![]()
Most torrent clients today have ability to detect clipboard for magnet links. However, after copied an URL link, user has to manually open the downloading app and then click ‘Open URL’ (or ‘Add Torrent Link’) option to let it paste the link automatically.
Instead of using web browser pop-up to choose app to open an URL, KDE desktop has a built-in feature ‘Klipper Actions‘ that detects clipboard contents and automatically pops-up a menu allows to open link with desired app.
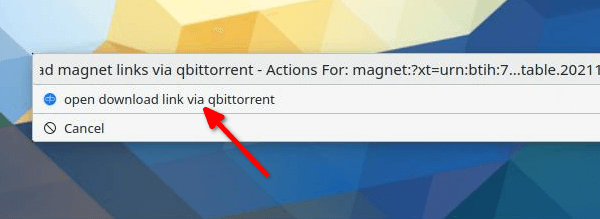
Picture 1: Click the pop-up option will automatically launch the app and open the link from clipboard
So just copy a magnet link. It opens the previous context menu (see the picture above) automatically, allows to click the menu option to launch your desired app and open the URL.
Setup the Klipper Actions for Magnet link in KDE:
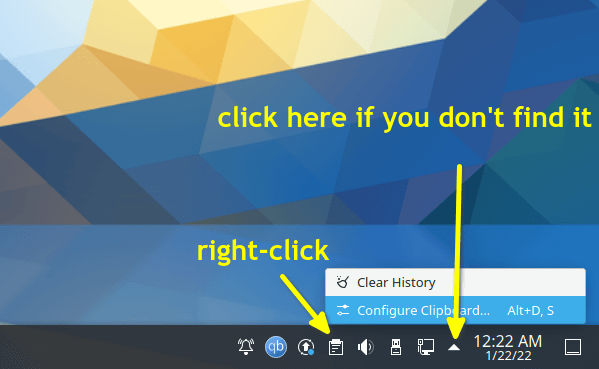
1.) Firstly, find out the ‘Clipboard’ indicator in system tray on panel (or click the ‘triangle‘ icon). Then right-click on the icon and choose ‘Configure Clipboard‘.
Open Klipper settings
2.) When the settings dialog opens, go to ‘Actions‘ in left pane and click on ‘Add Actions‘ button.

Add a Klipper action
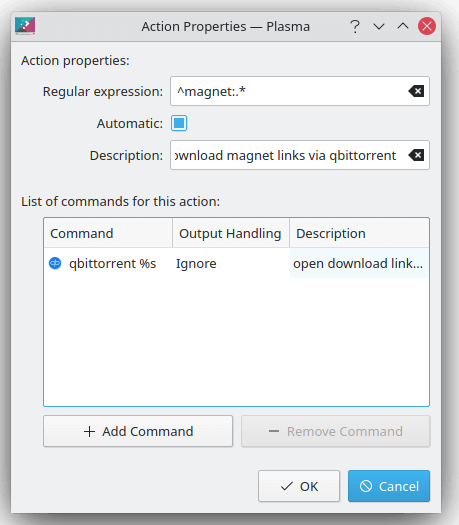
3.) In next dialog, do:
- input regular expression ^magnet:.*. It means any content started with ‘magnet:‘ (without quotes). See more about regular extension.
- Add description (optional).
- Click ‘Add Command’ and use
qbittorrent %sorktorrent %s. Use any torrent client as you prefer. - Type description for command (will display as text in pop-up menu).
4.) After adding an action, the settings dialog will look like the screenshot below. Here I added two actions to handle magnet link and url ends with torrent with qBittorrent client.
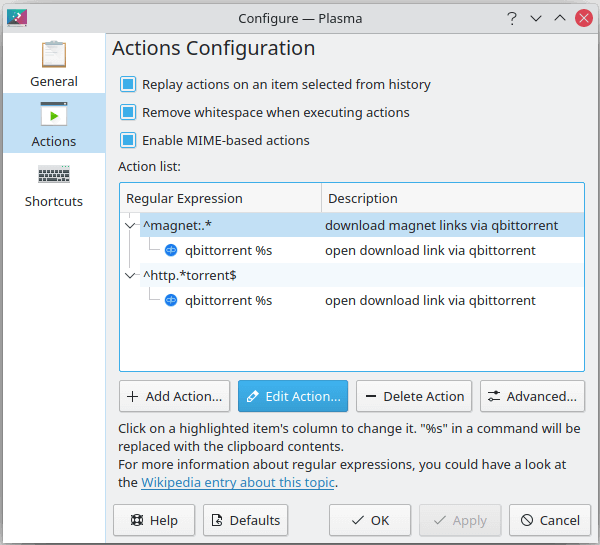
Actions for magnet links and url ends with .torrent
After clicking Apply (OK), copy a magnet link and the menu should pop-up automatically, allows to single click launching qBittorrent and open the download.
And, there are keyboard shortcuts: Ctrl+Alt+X to enable/disable Klipper actions, and Ctrl+Alt+R to trigger the menu (Picture 1) manually.