Mozilla Thunderbird email client released new major 91.0 version with many new features and improvements.
Thunderbird 91.0 now runs in multi-process (e10s) mode by default, which offers many advantages in responsiveness, stability, performance, and security.
For macOS users, the release adds native support for computers with Apple silicon CPUs. There are also Latvian language support, new user interface for adding attachments, etc.
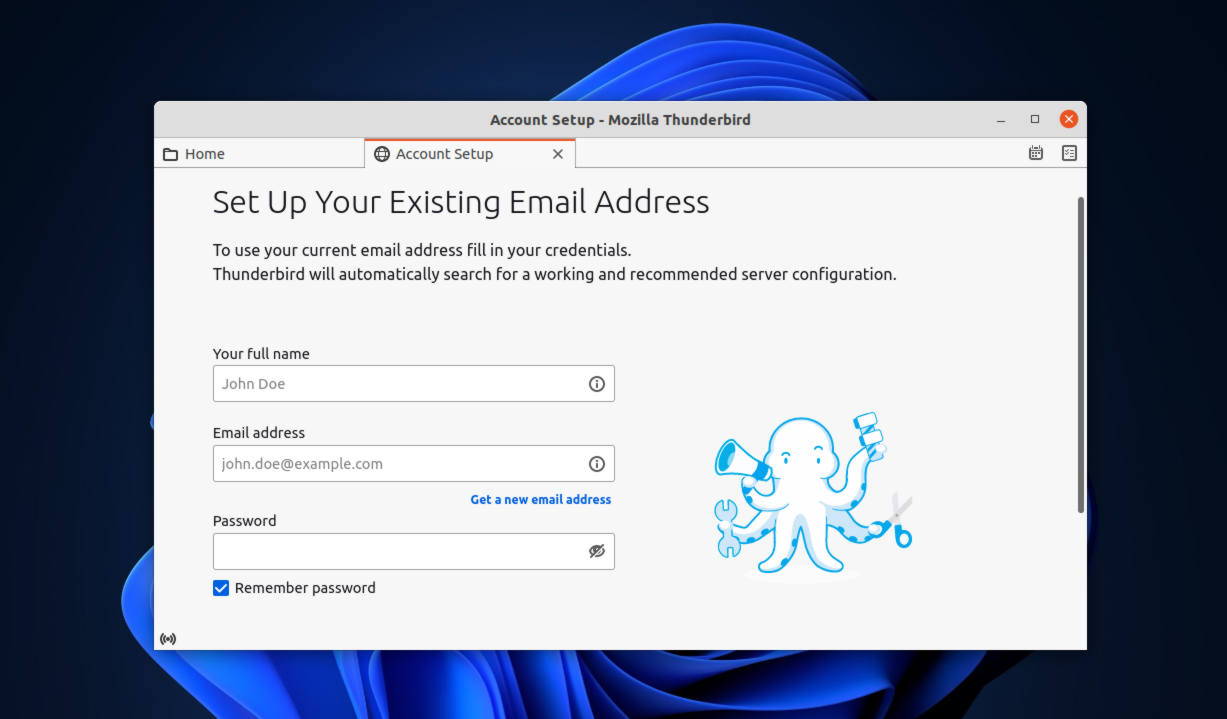
The ‘Account Setup’ has a new look and finally move to new tab instead of a floating dialog. It also adds ability to detect and set up CalDAV calendars and address book during setup.
The new version also brings improvements to Calendar, such as remote calendar auto-detection, ‘Edit’ option in event context menu, double-click to open .ics files, and import filter and sort items.
And a warning popup will appear when either trying to spend a reply to a likely non-existant email address such as “[email protected]”, or public recipients of a message exceeds threshold.
Other changes in Thunderbird 91.0 include:
- Beta-level support for Matrix servers chat.
- Enable redirect of messages.
- PDF.js viewer support.
- Allow showing empty CC/BCC rows in compose window
- Allow pinning folder views to the Folder Pane
- And much more!
How to Get Thunderbird 91.0 for Ubuntu:
As the release note said, the release only is available as a direct download, and not as an upgrade from Thunderbird version 78 or earlier.
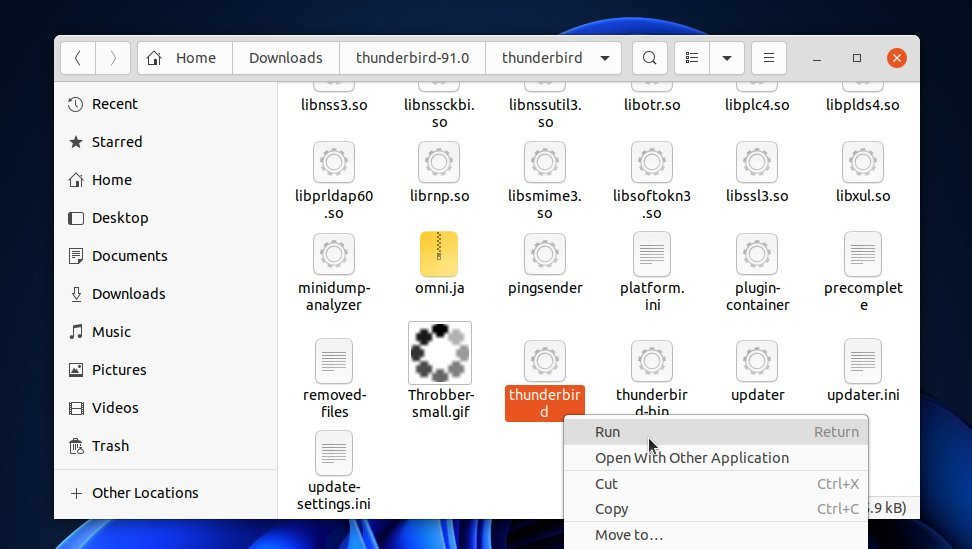
For Ubuntu Linux, it’s a tar.bz2 package. Once you get it, extract and right-click to run the executable to launch the client.
To create a shortcut icon for Thunderbird 91.0, you can open terminal (Ctrl+Alt+T) and run command to create & open a .desktop file:
gedit .local/share/applications/thunderbird91.desktop
Then paste following lines into the file. Replace “/PATH/TO/thunderbird“ with the executable file path, and finally save it.
If you don’t plan to move the source folder to another place for long time using, the file path should be: /home/USER_NAME/Downloads/thunderbird-91.0/thunderbird/thunderbird
[Desktop Entry]
Encoding=UTF-8
Name=Thunderbird 91.0
Comment=Send and receive mail with Thunderbird
Keywords=Email;E-mail;Newsgroup;Feed;RSS
Exec=/PATH/TO/thunderbird %u
Terminal=false
X-MultipleArgs=false
Type=Application
Icon=thunderbird
Categories=Application;Network;Email;
MimeType=x-scheme-handler/mailto;application/x-xpinstall;
StartupNotify=true
Actions=Compose;Contacts

[Desktop Action Compose]
Name=Compose New Message
Exec=/PATH/TO/thunderbird/thunderbird -compose
OnlyShowIn=Messaging Menu;Unity;

[Desktop Action Contacts]
Name=Contacts
Exec=/PATH/TO/thunderbird -addressbook
OnlyShowIn=Messaging Menu;Unity;