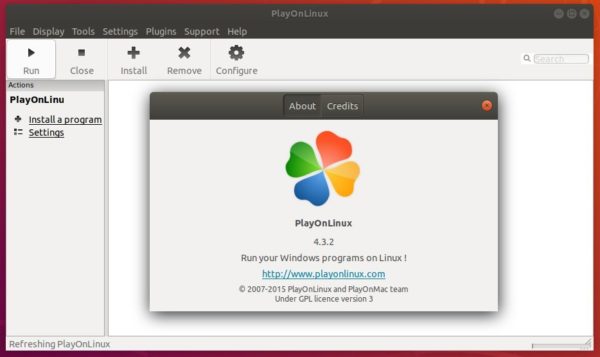
Archives For News

Free open-source software updates and Linux news

Stellarium, a free and open-source planetarium software, has reached the 0.15.2 release a few days ago with over 100 improvements and bug fixes.

Some new features in Stellarium 0.15.2:

  • an algorithm for DeltaT
  • orbit visualization data for asteroids
  • new option for the InfoString group
  • support for calculating extincted magnitudes of satellites
  • new type of Solar system objects: sednoids
  • read the announcement for more details.

How to Install Stellarium 0.15.2 in Ubuntu / Linux Mint:

The new release has been made into the official PPA, available for Ubuntu 16.04, Ubuntu 16.10, Ubuntu 17.04, Linux Mint 18.

1. Open terminal by pressing Ctrl+Alt+T or searching for “Terminal” from start menu. When it opens, run command to add the PPA:

sudo add-apt-repository ppa:stellarium/stellarium-releases

Type in your password (no visual feedback due to security reason) and hit Enter.

2. If you have an existing Stellarium installation, launch Software Updater (Update Manager) and upgrade the software after checking for updates.

Tip: It’s highly recommended to reset the settings when you will install the new version

Or just run commands in terminal to install / upgrade Stellarium:

sudo apt update

sudo apt install stellarium

Uninstall:

You can easily restore Stellarium to the stock version in your Ubuntu main repository by purging the PPA via command:

sudo apt install ppa-purge && sudo ppa-purge ppa:stellarium/stellarium-releases

The Sigil epub editor has reached the 0.9.8 release yesterday. Here’s how to install it in Ubuntu 16.04, Ubuntu 16.10, Linux Mint 18 via PPA.

Sigil 0.9.8 release highlights:

  • PyQt5 support for plugins.
  • New preferences menu to adjust the size of Sigil’s main icons to your liking.
  • An important fix for temp_folder issues on Windows
  • Add manifest properties to Book Browser tooltips and to All Files Reports Widget for epub3
  • Make Sigil’s UI and spellchecker language settings available to plugins
  • Various bug-fixes, read the announcement for details.

Sigil Adjust menu icons’ size

How to Install Sigil 0.9.8 in Ubuntu / Linux Mint:

Sigil does not offer official Linux binaries. Besides building from the source tarball, you may install Sigil 0.9.8 via my personal PPA.

1. Open terminal by pressing Ctrl+Alt+T or searching for “Terminal” from start menu. When it opens, run command to add the PPA:

sudo add-apt-repository ppa:ubuntuhandbook1/sigil

Type in your password (no visual feedback due to security reason) and hit Enter.

2. Then you can upgrade Sigil editor from an existing release via Software Updater:

Or install /upgrade Sigil via commands:

sudo apt update

sudo apt install sigil

In Addition, for Linux libxml2 bug see HERE. Sorry that I can’t build it with DBUILD_PATCHED_LIBXML2=1 option since it requires cloning source from github.com but Launchpad builders do not have internet access.

Kodi 17.1, the first bug-fix release for the v17 “Krypton”, has been released and made into PPA for Ubuntu 14.04, Ubuntu 16.04, Ubuntu 16.10, and Linux Mint 17 & 18.

According to the changelog, Kodi 17.1 brings a huge list of fixes and here are some of them:

  • Update Estuary and Estouchy with some bugfixes and improvements
  • Fix EDL skipping
  • Fix slow song smartplaylist
  • Several PVR fixes
  • Update Chorus webinterface
  • Fix addons not being marked broken when they are updated with broken flag
  • Add limiter on random songs which should prevent large memory usage on big libraries
  • Improve keyboard mapping during button mapping
  • Improve analog stick handling
  • Improve plugin performance when building the content list
  • Include RTMP inputstream add-on for Windows

Although the Kodi website does not announced the v17.1 release at the moment, you can now install or upgrade to Kodi 17.1 via following steps:

1. Open terminal by pressing Ctrl+Alt+T or searching for “Terminal” from Unity Dash / Start Menu. When it opens, run command to add Kodi PPA:

sudo add-apt-repository ppa:team-xbmc/ppa

Type in your password (no visual feedback due to security reason) and hit Enter.

2. Then upgrade Kodi Media Center from a previous release via Software Updater:

Or run the commands below one by one to install or upgrade Kodi:

sudo apt update

sudo apt install kodi

Once installed, you can either launch Kodi from app launcher or select log in Kodi session at login screen.

After more than one year of development, the Audacity audio editor has reached the 2.1.3 release. Here’s how to install it in Ubuntu 16.04, Ubuntu 16.10, and their derivatives.

Thanks to an upgrade of the PortAudio library, Audacity 2.1.3 now properly supports Windows 10. It also features:

  • Added support for Magic Mouse/Trackpad on mac OS.
  • New Distortion effect, Rhythm Track (was called Click Track) and Sample Data Import. Also effects are no longer grayed-out when in pause.
  • New scrub ruler and ‘pinned’ option so the waveform moves and the recording/playing head stays still.
  • New features in Timer Record.
  • On Mac, audacity.app is now added to /Applications/ directly rather than adding a folder there.
  • Over 60 bugs fixed, including five longstanding bugs.

How to Install Audacity 2.1.3 in Ubuntu via PPA:

The Audacity Team does not offer official builds of DEB packages. Besides building from source, you can install Audacity 2.1.3 from my PPA (unofficial). Ubuntu 14.04 is excluded due to requirement of GCC >= 4.9.

1. Open terminal by pressing Ctrl+Alt+T or searching for “Terminal” from Unity Dash. When it opens, run command to add the PPA:

sudo add-apt-repository ppa:ubuntuhandbook1/audacity

Type in your password (no visual feedback due to security reason) when it asks and hit Enter.

2. After that, upgrade Audacity via the Software Updater (Update Manager) utility:

Or you can run the commands below one by one to install or upgrade the audio editor:

sudo apt update

sudo apt install audacity

Uninstall:

For any reason, you can easily remove the PPA and downgrade Audacity to the stock version in Ubuntu via the ppa-purge tool:

sudo apt install ppa-purge && sudo ppa-purge ppa:ubuntuhandbook1/audacity

The Deluge BitTorrent client 1.3.14 was release one day ago. Users with previous release installed are highly recommended to upgrade to this release.

For WebUI, Deluge 1.3.14 contains a fix for CSRF vulnerability that has the real potential to compromise your machine. For Windows user, the package now includes libtorrent 1.0.11 which should fix crashing on startup.

  • Fixed ‘Too many files open’ errors.
  • Added support for python-geoip for use with libtorrent 1.1.
  • Fixed a single proxy entry being overwritten resulting in no proxy set.
  • Added tracker_status translation to UIs.
  • [GtkUI] Strip whitespace from infohash before checks.
  • Add missed feature autofill infohash entry from clipboard.
  • Backport bind interface option for server.
  • Security: Fixed WebUI CSRF Vulnerability.
  • [Console] Fix decode error comparing non-ascii (str) torrent name.
  • Fixes for splitting magnets from file.
  • Remove duplicate magnet extension when splitting.

How to Install Deluge 1.3.14 in Ubuntu / Linux Mint:

The new release has been made into the official PPA, available for Ubuntu 12.04, Ubuntu 14.04, Ubuntu 16.04, Ubuntu 16.10, Ubuntu 17.04, Linux Mint 13, 17, 18, and their derivatives.

1. To add the PPA, open terminal and run command:

sudo add-apt-repository ppa:deluge-team/ppa

Type in your password (no visual feedback) and hit Enter

2. Then upgrade Deluge using Software Updater (Update Manager):

Or install it for the first time via commands:

sudo apt-get update

sudo apt-get install deluge

How to Restore:

To restore deluge BitTorrent client to the stock version in your Ubuntu main repository, open terminal and run command to purge the PPA:

sudo apt-get install ppa-purge && sudo ppa-purge ppa:deluge-team/ppa

Skype 5.0 for Linux has been announced a few hours ago. It’s now in the beta stage.

What’s New in Skype 5.0 for Linux:

  • Calls to mobiles and landlines with Skype credit
  • one-to-one VIDEO CALLS support from Linux to Skype for Android, iOS, Windows, and Mac.
  • View shared screens from other Skype desktop clients
  • Unity launcher now shows the number of unread conversations
  • online contacts in contact list now include Away and Do Not Disturb statuses.

How to Install Skype 5.0 for Linux in Ubuntu / Linux Mint:

The new release can be installed from the Skype apt repository, simply open terminal from Unity Dash, App Launcher, or via Ctrl+Alt+T shortcut key and run following commands one by one:

1. Make sure you have ‘apt-transport-https’ installed by running command:

dpkg -s apt-transport-https > /dev/null || bash -c "sudo apt-get update; sudo apt-get install apt-transport-https -y" 

Type in your password (no visual feedback) when it prompts and hit Enter.

2. Download and install Skype GPG key via command:

curl https://repo.skype.com/data/SKYPE-GPG-KEY | sudo apt-key add -

3. Add Skype apt repository to your system via command:

echo "deb [arch=amd64] https://repo.skype.com/deb stable main" | sudo tee /etc/apt/sources.list.d/skype-stable.list

4. Finally, install Skype for Linux either via Synaptic Package Manager or by running following commands in terminal:

sudo apt update

sudo apt install skypeforlinux

How to Remove:

For any reason you can remove Skype for Linux either via Synaptic Package Manager or by running the command:

sudo apt remove skypeforlinux && sudo apt autoremove

And you can remove the Skype repository via Software & Updates -> Other Software.

Ubuntu 17.04 Beta 1 Released for Opt-in Flavors

Last updated: February 24, 2017

The next Ubuntu 17.04 Zesty Zapus has reached the beta 1 release earlier today. The beta 1 features images for Kubuntu, Lubuntu, Ubuntu Budgie, Ubuntu GNOME, Ubuntu Kylin, Ubuntu Studio, and Xubuntu.

This Zesty Zapus snapshot includes the v4.9 kernel and features:

  • Kubuntu 17.04 comes with Plasma 5.9, and KDE Applications 16.12.1
  • Ubuntu Budgie 17.04:
    • budgie-desktop stable release v10.2.9
    • Latest GNOME 3.24 applications (in beta) together with GTK+ 3.22 window manager
    • AppIndicator support is now default
    • Terminix is the default terminal
  • Ubuntu Gnome 17.04 includes GNOME 3.24 Beta, Flatpak 0.8, the Software app 3.22 which now supports Flatpak.

Download Ubuntu 17.04 images:

Xubuntu 17.04: http://cdimage.ubuntu.com/xubuntu/releases/zesty/

Ubuntu Studio 17.04: http://cdimage.ubuntu.com/ubuntustudio/releases/zesty/

Ubuntu Kylin 17.04: http://cdimage.ubuntu.com/ubuntukylin/releases/zesty/

Ubuntu Gnome 17.04: http://cdimage.ubuntu.com/ubuntu-gnome/releases/zesty/

Ubuntu Budgie 17.04: http://cdimage.ubuntu.com/ubuntu-budgie/releases/zesty/

Lubunu 17.04: http://cdimage.ubuntu.com/lubuntu/releases/zesty/

Kubuntu 17.04: http://cdimage.ubuntu.com/kubuntu/releases/zesty/

Read more:fridge.ubuntu.com

Blender 2.78b Releaesed! How to Install in Ubuntu

Last updated: February 11, 2017

Blender 2.78b, a 2.78a release-compatible update was announced yesterday with important speedups, especially in Cycles and for Dependency graph.

BLender 2.78b comes with Cycles Speedups that were announced last month. Most notable will be faster rendering of Motion blur with hair, which has a 5-10 time speedup – important for production rendering. Also there are various bug-fixes.

How to Install Blender 2.78b in Ubuntu:

Blender is now available as SNAP package, first install snapd via command sudo apt install snapd in terminal, then you’re able to search for and install blender-tpaw in Ubuntu Software.

For those who don’t like the SNAP version, Blender 2.78b is also available in Thomas Schiex’s PPA, supports for Ubuntu 14.04, Ubuntu 16.04, Ubuntu 16.10, and derivatives.

1. Open terminal (Ctrl+Alt+T) and run command to add the PPA:

sudo add-apt-repository ppa:thomas-schiex/blender

Type in your password (no visual feedback) when it prompts and hit enter.

2. Then you can upgrade Blender from an existing version via Software Updater (or Update Manager) after checking for updates.

Or install blender package either via Synaptic Package Manager or via commands:

sudo apt-get update

sudo apt-get install blender

Uninstall:

If you installed blender from PPA repository, run the following command in terminal to remove the PPA and downgrade Blender to the stock version available in Ubuntu main repositories.

sudo apt-get install ppa-purge && sudo ppa-purge ppa:thomas-schiex/blender

Kodi, formerly known as XBMC, finally reached the new stable 17.0 release. Here’s how to install it in Ubuntu via PPA.

Kodi 17.0, code-name “Krypton”, brings updated default UI, better organisation of settings, and many under-the-hood changes on Video Player, Music Library, PVR, audio on Android, and thousands of small bug-fixes and improvements to stability.

Kodi 17.0 features:

  • New default skins “Estuary” for TV, and “Estouchy” for touchscreen devices.
  • New default web interface
  • New inputstream add-ons with more protocols support.
  • hardware-accelerated DVD playback
  • Numerous improvements to Live TV and PVR functionality
  • Android implementation, and a wide variety of other changes.

How to Install Kodi 17 in Ubuntu / Linux Mint:

The Kodi Team announced that the official PPA will be updated soon with the new packages, available for Ubuntu 16.10, Ubuntu 16.04, Ubuntu 14.04, and Linux Mint 17 & 18.

At that time, you can follow the step below to install Kodi 17:

1. Open terminal from app launcher or via Ctrl+Alt+T shortcut key, when it opens, run command:

sudo add-apt-repository ppa:team-xbmc/ppa

Type in your password (no visual feedback) when it asks and hit Enter.

2. Then you can upgrade Kodi Media Center from an existing version, by launching Software Updater:

Or install it via following commands in terminal:

sudo apt update

sudo apt install kodi

Once installed, you can either launch Kodi from app launcher or log with Kodi session when you’re in login screen.

Uninstall:

To uninstall Kodi 17 and restore to the stock version in your Ubuntu repository, purge the PPA via ppa-purge tool via command:

sudo apt install ppa-purge && sudo ppa-purge ppa:team-xbmc/ppa

The LibreOffice office suite has reached the 5.3 stable series a few days ago. Now it’s available in both Ubuntu PPA and Snappy store.

LibreOffice 5.3 features:

  • The MUFFIN interfaces (Microsoft Ribbon UI)
  • First source release of LibreOffice Online, that offers basic collaborative editing of documents in a browser
  • Faster rendering performance
  • Many UI/UX improvements
  • New text layout engine
  • And much more, see the release note.

LibreOffice 5.3 ‘Ribbon’ UI

How to Install LibreOffice 5.3 in Ubuntu:

For Ubuntu 16.04 and higher, the latest LibreOffice is now available via snap package, simply run commands below in terminal (Ctrl+Alt+T):

sudo apt install snapd && sudo snap install libreoffice

You can also use Ubuntu Software to install the snap version of LibreOffice (need to install snapd).

To remove the Snap version of LibreOffice, either use Ubuntu Software App, or run command:

sudo snap remove libreoffice

Also, the official PPA is available with traditional packages for Ubuntu 14.04, Ubuntu 16.04, Ubuntu 16.10, Linux Mint 17 & 18:

1. To add the PPA, run following command in terminal:

sudo add-apt-repository ppa:libreoffice/ppa

2. Then upgrade LibreOffice using the Software Updater (or Update Manager) utility after checking for updates: