The first point release of Ubuntu 22.04 is finally out! Users of Ubuntu 20.04 will receive notification to upgrade to the new LTS.
For users who are still running Ubuntu 20.04, the new LTS features Linux Kernel 5.15, GNOME 42 desktop with built-in 3-finger gestures, new screenshot UI, horizontal workspace view, and RDP remote desktop sharing, and more.

Changes in the new point release:
As usual, this point release includes many updates, high-impact bug-fixes with a focus on maintaining stability and compatibility.
The installation screen has been updated with new logo and appearance. The Ubuntu Studio 22.04 does not install issue when secure boot enabled, has been fixed by manually blacklist DKMS modules.
Besides upgrading from Ubuntu 20.04, it even supports for upgrading from Ubuntu 20.10 and Ubuntu 21.04 directly. Simply open terminal and try via do-release-upgrade -d command. See this bug for more.
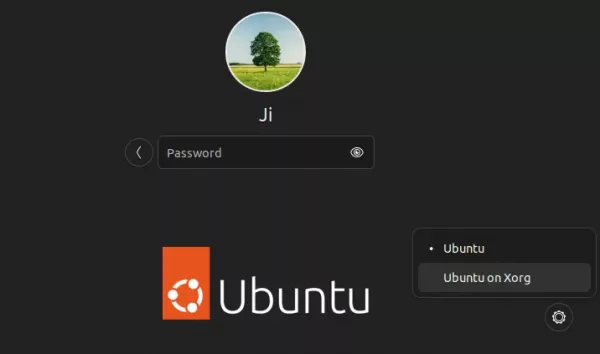
For NVIDIA users, Ubuntu 22.04.1 now defaults to Wayland session for hybrid systems with Nvidia graphics drivers. For non-hybrid systems with Nvidia drivers, the classic Xorg will be default. Though, user can manually switch between Wayland and Xorg via gear button in login screen.

Other changes include:
- new RISC-V platform support
- Add support for VisionFive, Nezha and LicheeRV boards
- Fix RDP Sharing on switch
- Fix connecting to windows server over RDP
- Add Intel DG2 support.
- Add Xilinx ZCU111 board support
- Add symlinks to enable StarFive boards AP6212 Wi-Fi module.
- Add mic mute key support for HP Elite x360 series
And personally, screen flickering issue seems to be fixed in my cheap HP laptop. See full changes since Ubuntu 22.04 to 22.04.1.
Download Ubuntu 22.04.1
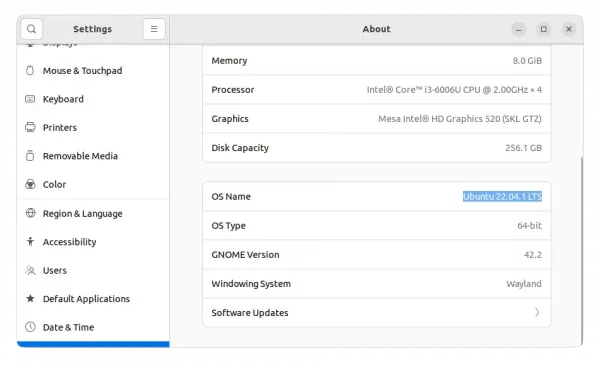
For those who are already running Ubuntu 22.04, just install regular updates via “Software Updater” will bring you to the new release. To verify, go to “About” page in settings.
To download the disc images, go to:
For Ubuntu 20.04 users, just wait for the upgrade prompt. Or try running update-manager -c command in terminal after installing all available package updates.