![]()
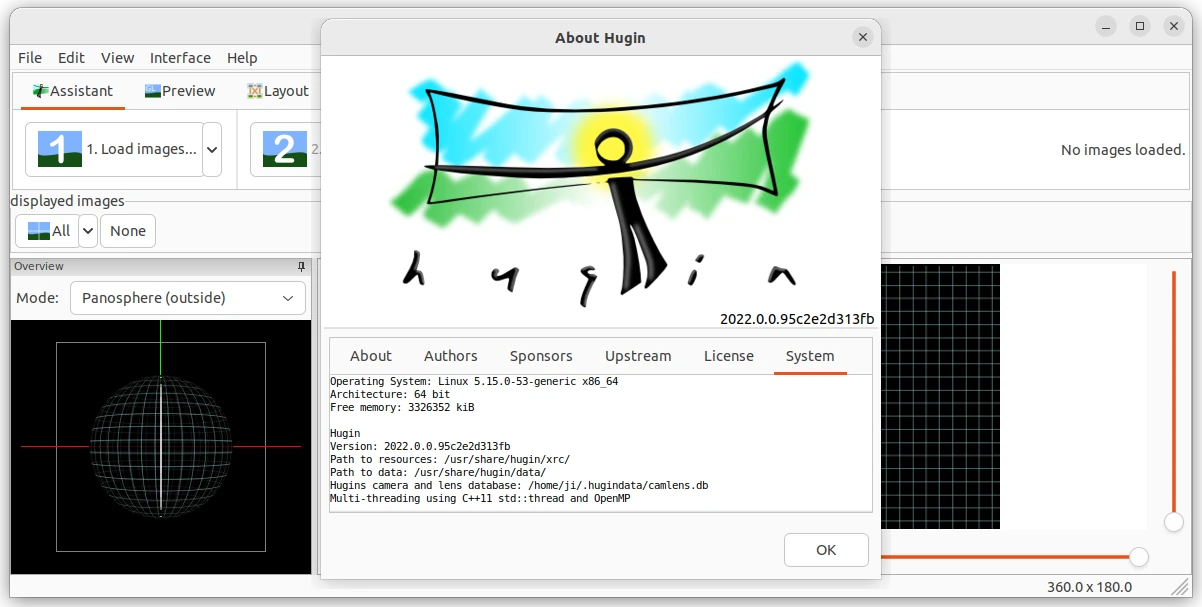
The Hugin panorama photo stitcher finally announced the 2022.0.0 release! Ubuntu PPA updated for Ubuntu 18.04, Ubuntu 20.04, Ubuntu 22.04 and Ubuntu 22.10.
One year per release! The 2022 release is finally here, though there’s not so many changes!
- Add simple edge fill option to fill black edges in panorama with homogenous color.
- Simplified the assistant page with only the necessary GUI controls to make it more clear for beginners and casual users.
- Several improvements to control points tab (e.g. magnifier displays now warped image for better judgement of wide angle/fisheye images).
- Improved handling of duplicate control points when running cpfind.
- Extended command line tools pto_mask (
--delete-mask) and pano_modify (allow specifying crop relative to canvas size).
There are as well some bug-fixes in the release, including fulla flatfield extremely dark, high DPI display support for Windows, and Hugin Calibrate Lens launch issue on Debian Testing Cinnamon.
How to install Hugin 2022.0.0 in Ubuntu:
For the source tarball as well as Windows msi packages, go the sourceforge download page.
For all current Ubuntu releases, including Ubuntu 18.04, Ubuntu 20.04, Ubuntu 22.04, Ubuntu 22.10, and their based systems, I’ve made the unofficial package into this PPA repository.
I also sync the packages into the apps PPA, use either one as you prefer.
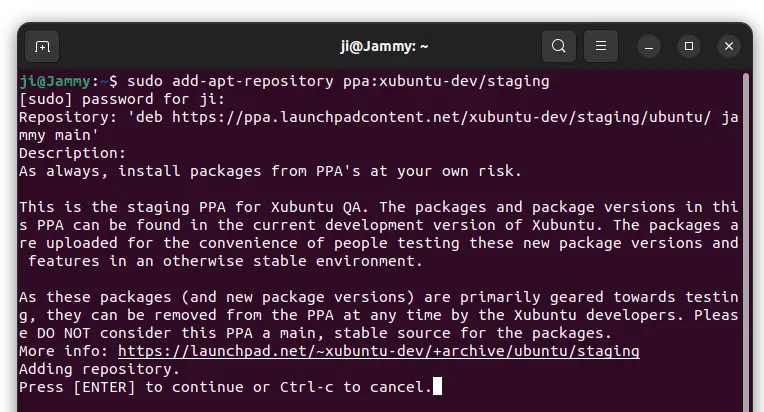
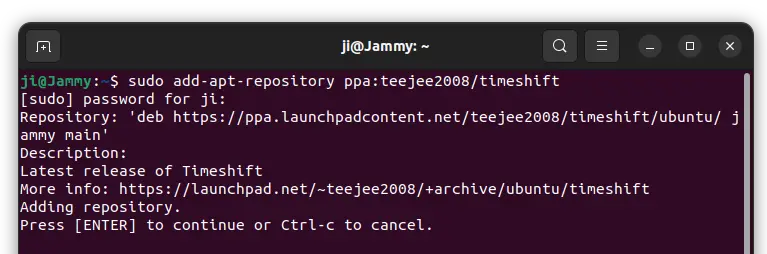
1. First, press Ctrl+Alt+T on keyboard to open terminal. When it opens, run command to add the PPA:
sudo add-apt-repository ppa:ubuntuhandbook1/hugin
Type user password (no asterisk feedback) when it asks and hit Enter to continue.

2. Update system package cache for Ubuntu 18.04 and Linux Mint, though it’s done automatically while adding PPA in Ubuntu 20.04+:
sudo apt update
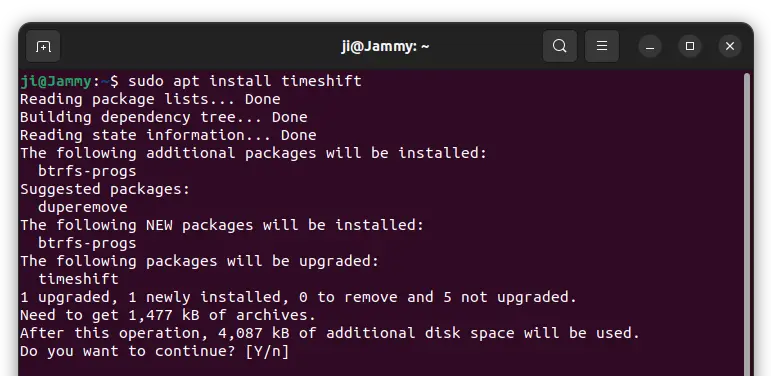
3. Finally, either run the command below in terminal to install the panorama photo stitcher:
sudo apt install hugin
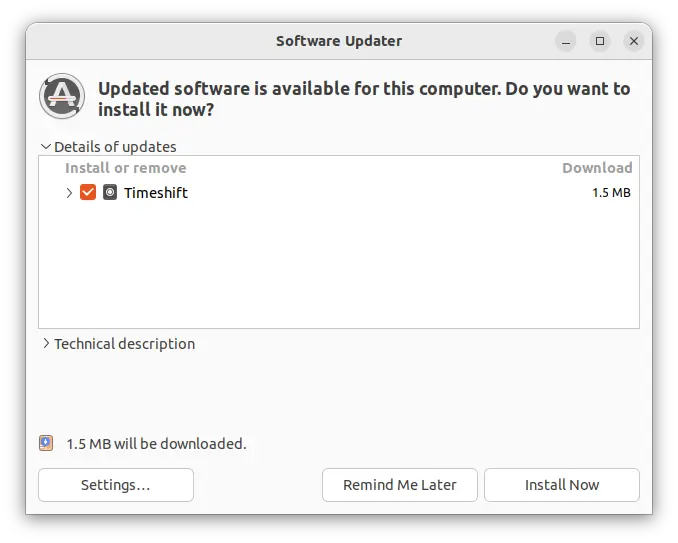
Or, upgrade the software (if an old version was installed) via Software Updater (Update Manager) app:

Uninstall hugin:
To remove the software package, simply run command:
sudo apt remove --autoremove hugin hugin-data
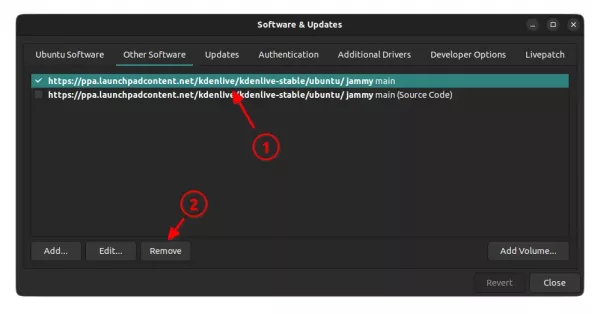
And, remove the PPA either by running command in terminal:
sudo add-apt-repository --remove ppa:ubuntuhandbook1/hugin
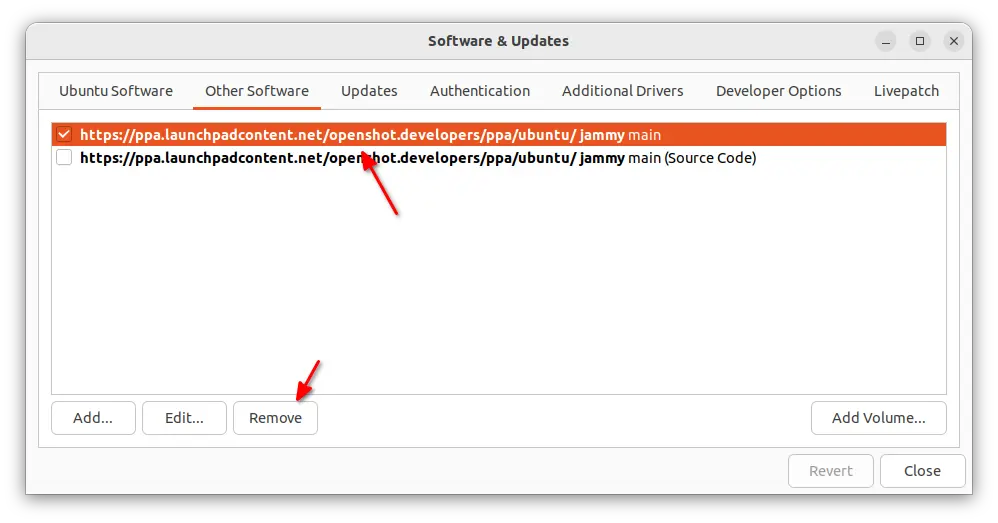
Or remove the source line from ‘Software & Updates‘ utility under Other Software tab.