I got a HP printer that is working good with my Ubuntu laptop. But, in new Ubuntu desktop PC, it does nothing when trying to print anything.
The printer is automatically detected and added in the settings page, and shown in the Document Viewer’s Print dialog. But, it does nothing when clicking ‘Print’ button. If you ran into similar issue, then this tutorial could help.
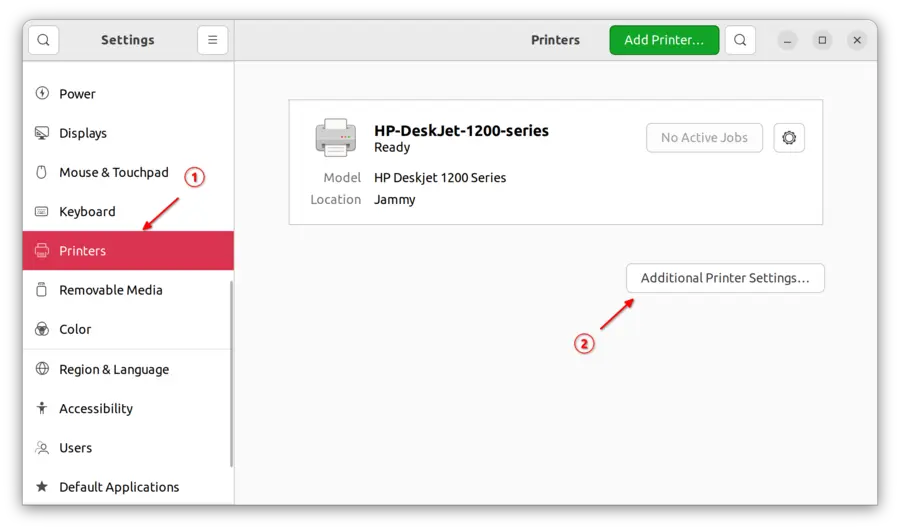
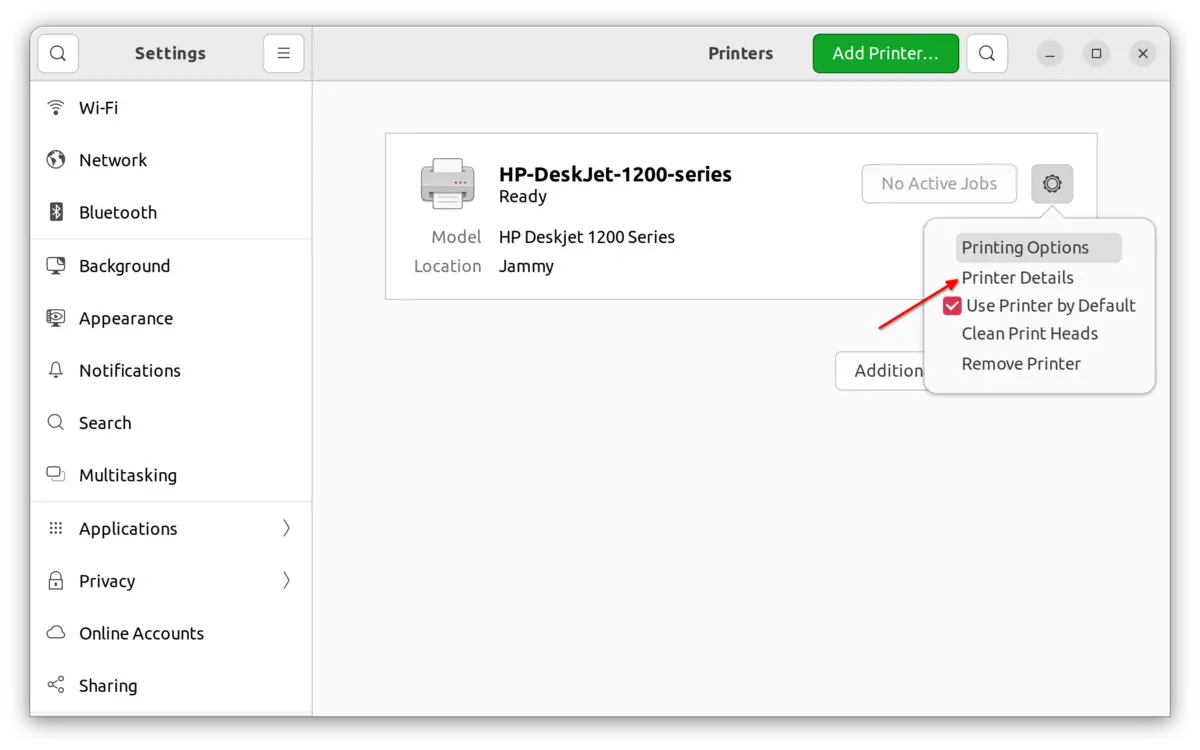
1. First, open “Settings” and navigate to “Printers” in the left. Then, click on “Additional Printer Settings …” button.
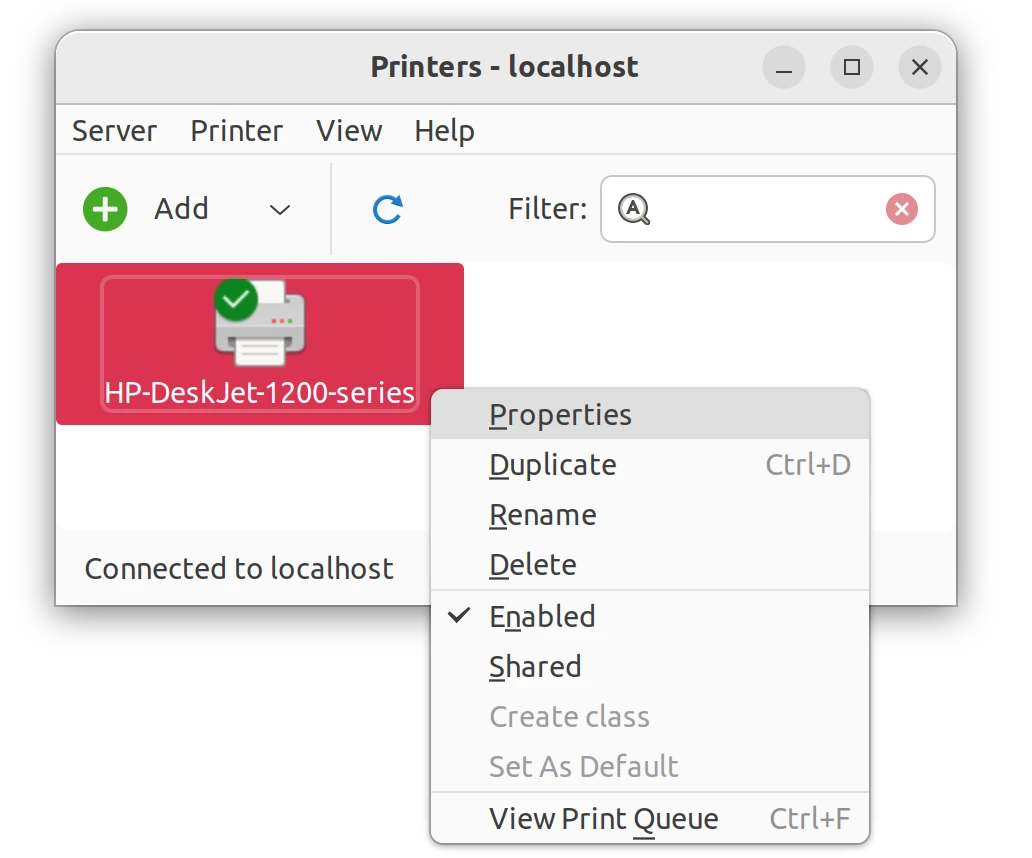
2. In the pop-up dialog, right-click on the printer device, and click “Properties”.
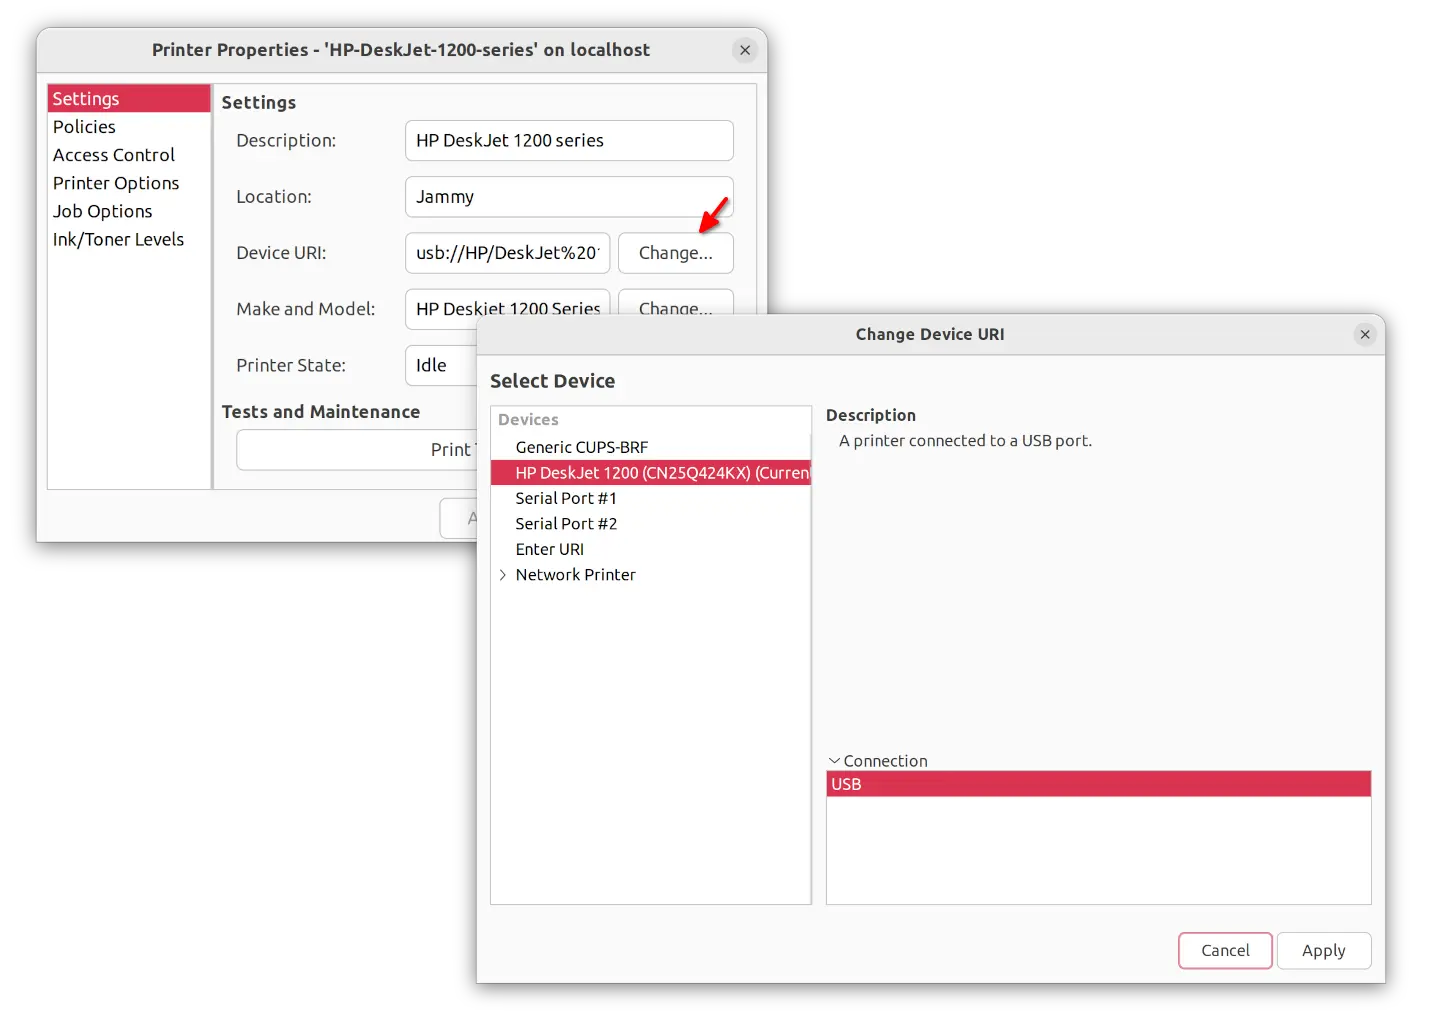
3. Next, click on “Change” button after ‘Device URI’ and make sure the correct device is selected in pop-up dialog.
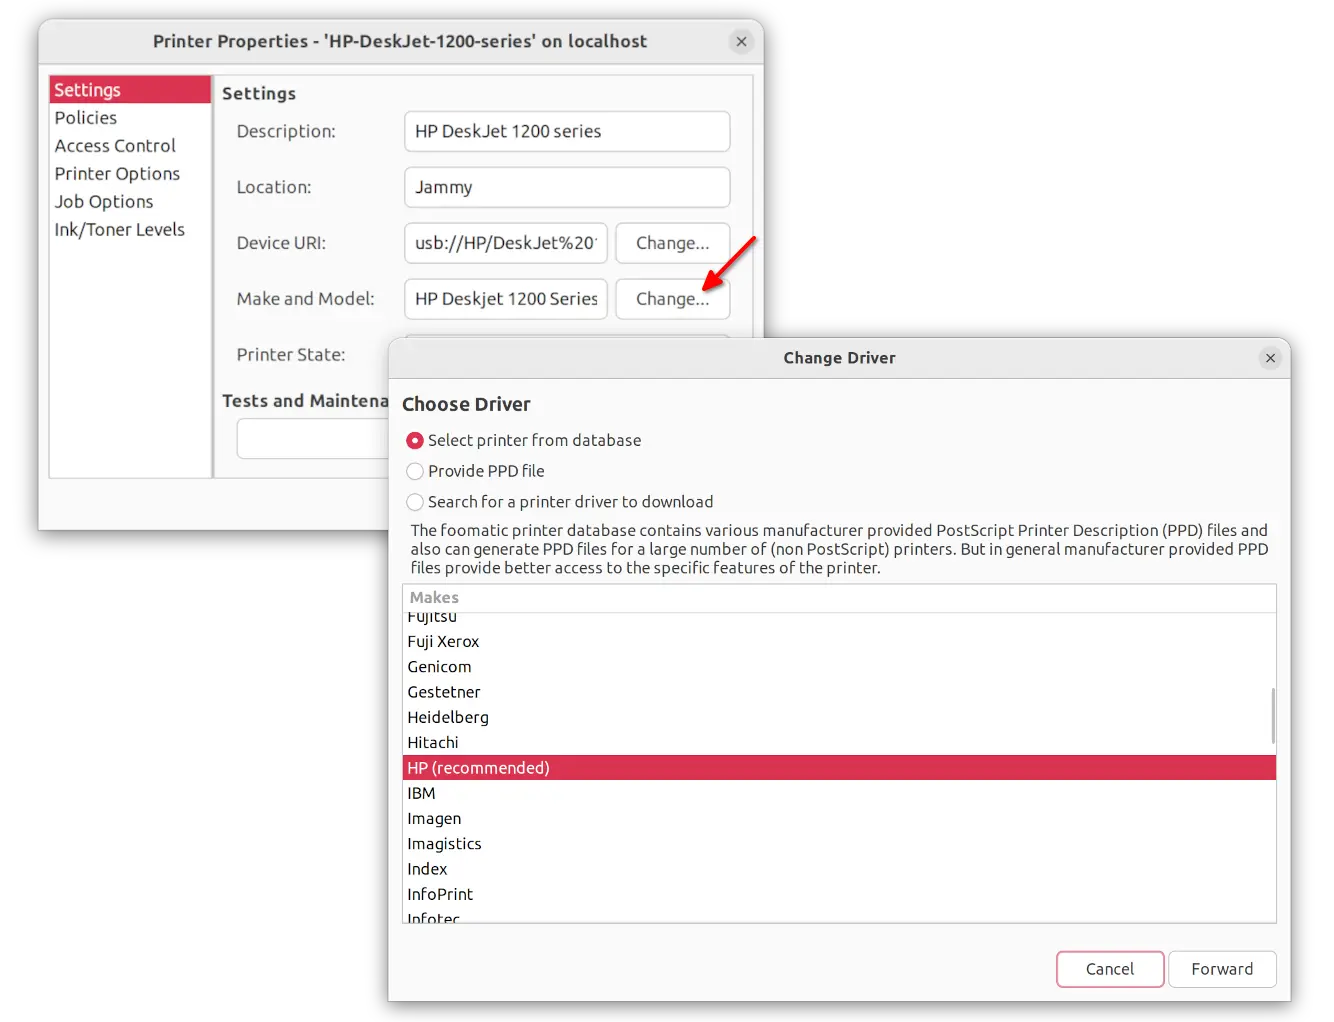
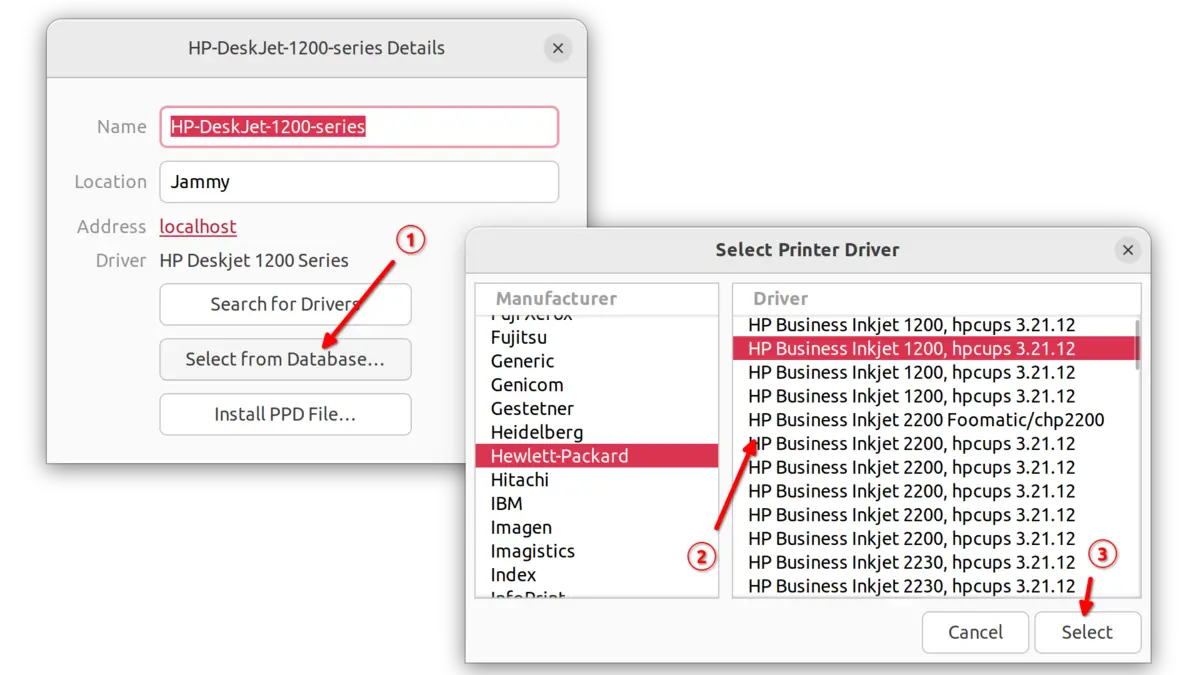
4. Also, click on “Change” button for the ‘Make and Module’. It should automatically search for and select the best driver for your device. If not, try ‘Search a printer driver to download’ option. Finally, click ‘Forward’ button and follow the wizard until done.
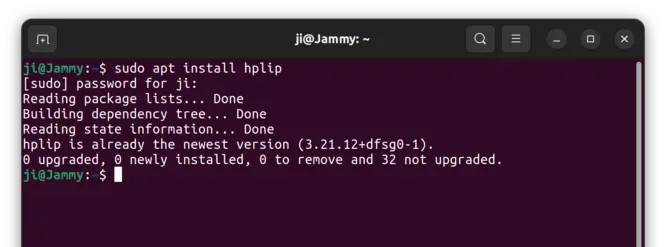
5. If your printer’s still not working after running previous steps. Press Ctrl+Alt+T on keyboard to open terminal, then run command to install the HPLIP driver:
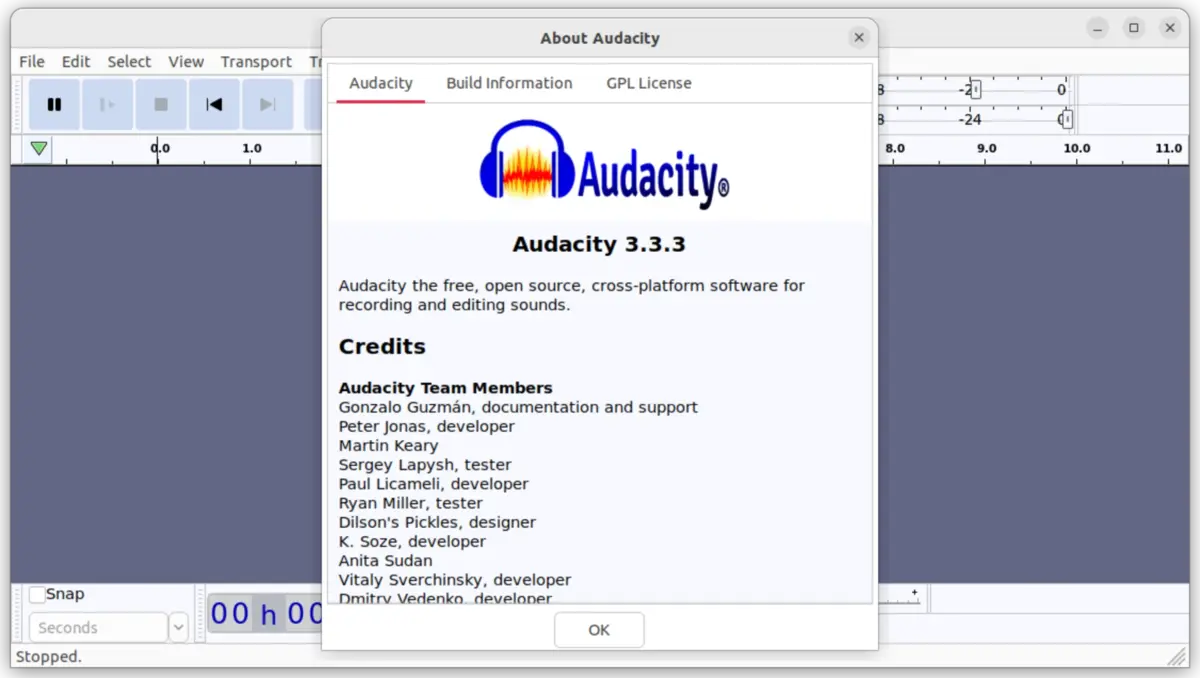
Audacity audio editor released version 3.3.3 a day ago.
The new release fixed the Filter Curve EQ and Graphic EQ scaling when resizing the dialog. Previously, resizing it only cause large blank area while leaving EQ unchanged.
The release also fixed audio.com upload flow. It added track title field which is required for upload, and audio.com link is opened immediately upon upload. However, anonymous uploads that was disabled in the last release is still NOT allowed.
How to Install Audacity 3.3.3 in Ubuntu Linux
Option 1: AppImage
Audacity offers official AppImage package available to download at the link below:
It’s a non-install package that runs in most Linux. Just right-click on it in file manager, go ‘Properties’ and add “Allow executing file as program” permission, finally, click Run it to open the audio editor.
Tip: Ubuntu 22.04 and higher, need to enable AppImage support first by running command below in terminal:
sudo apt install libfuse2
Option 2: Flatpak
Audacity is also available to install as Flatpak package. Ubuntu user can press Ctrl+Alt+T on keyboard to open terminal, and run the 2 commands below one by one to get it.
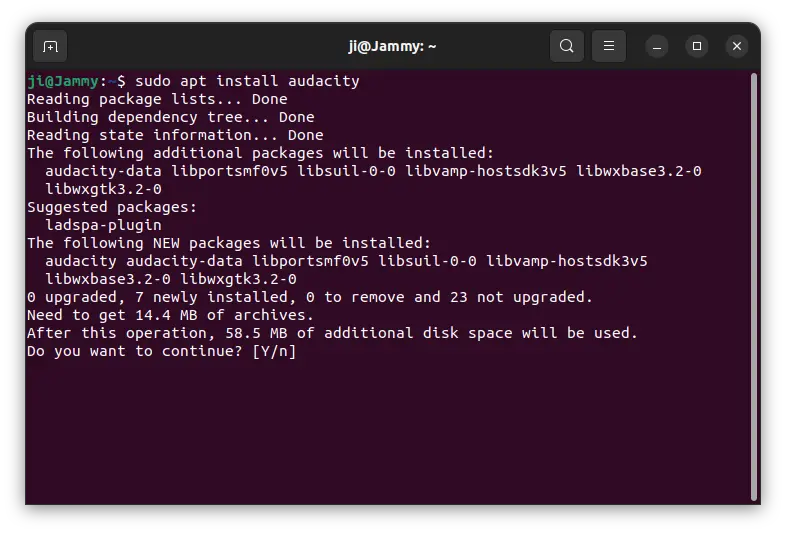
Flatpak takes so much disk space (2 GB+ in my case) for this single application, so here’s an unofficial PPA contains native .deb package for Ubuntu 22.04, Ubuntu 22.10, and Ubuntu 23.04. Support for Ubuntu 20.04 is still NOT available due to compile bug.
NOTE: the PPA follows the build rule from the Audacity package in Debian/Ubuntu repository, which disabled networking! Meaning there’s NO audio.com sharing!! If you do need this feature, please leave comment for request.
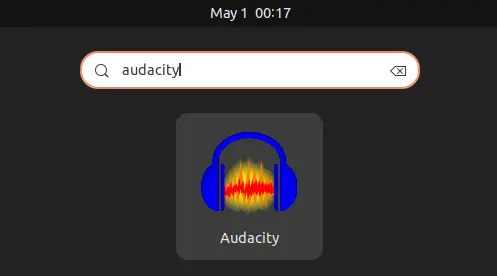
1. First, open terminal either by pressing Ctrl+Alt+T on keyboard, or by searching from start menu ‘Activities’ overview depends on your DE.
2. When terminal opens, paste the command below and hit run to add the PPA.
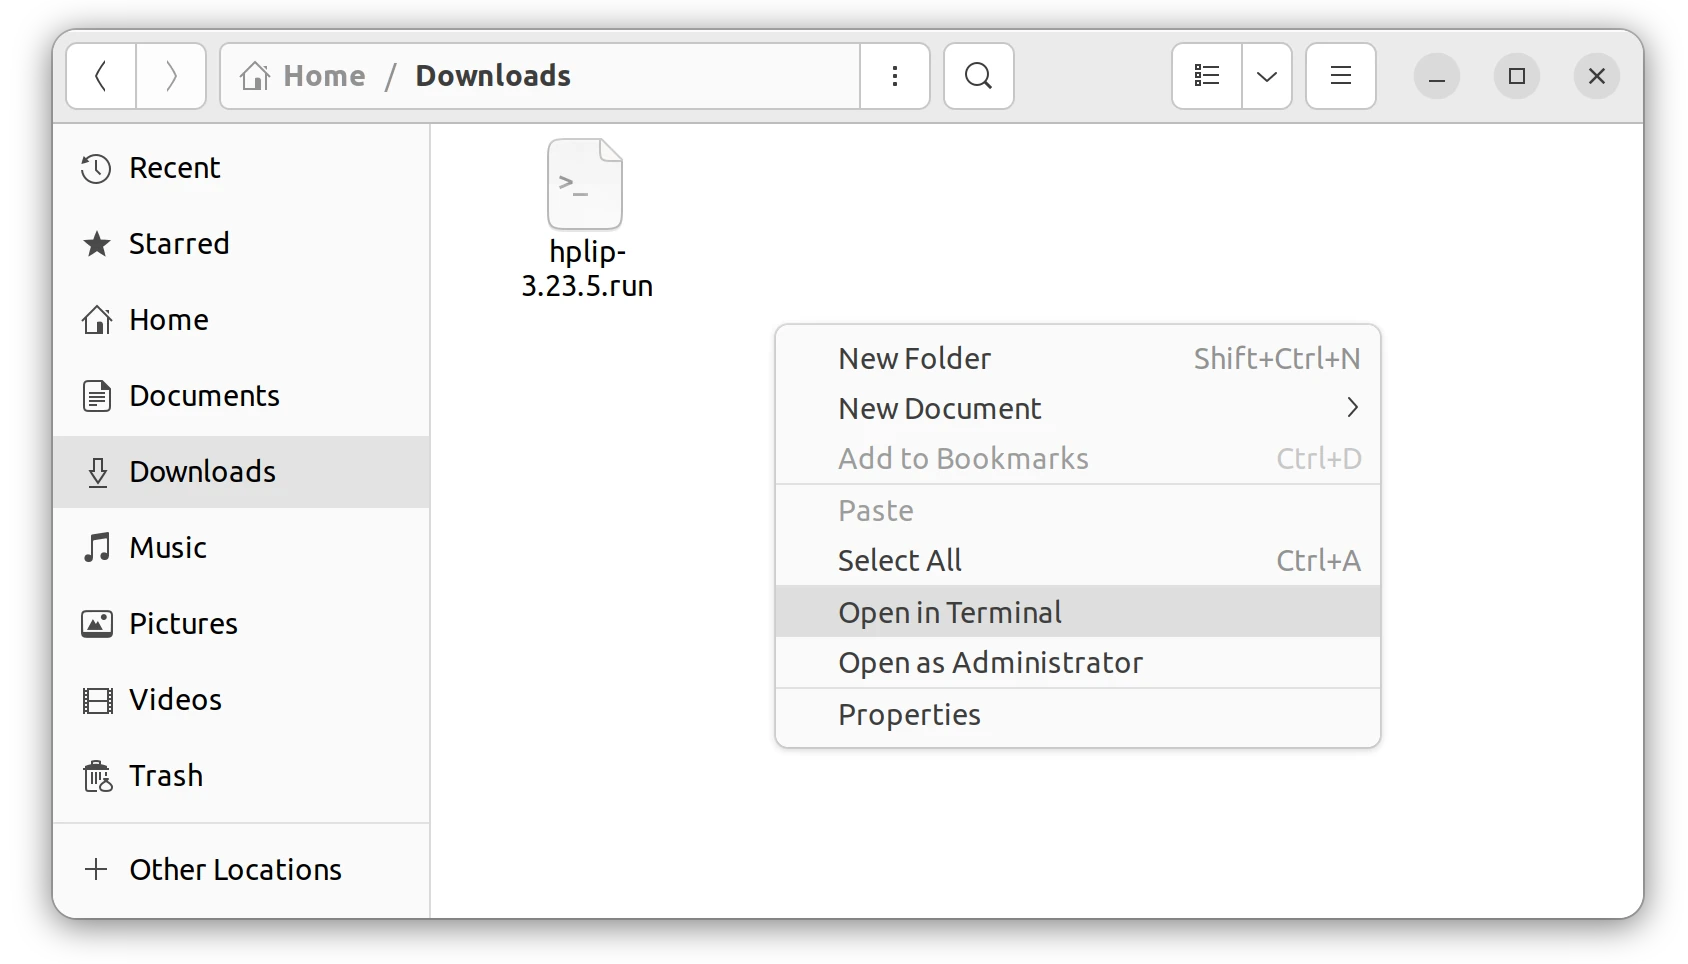
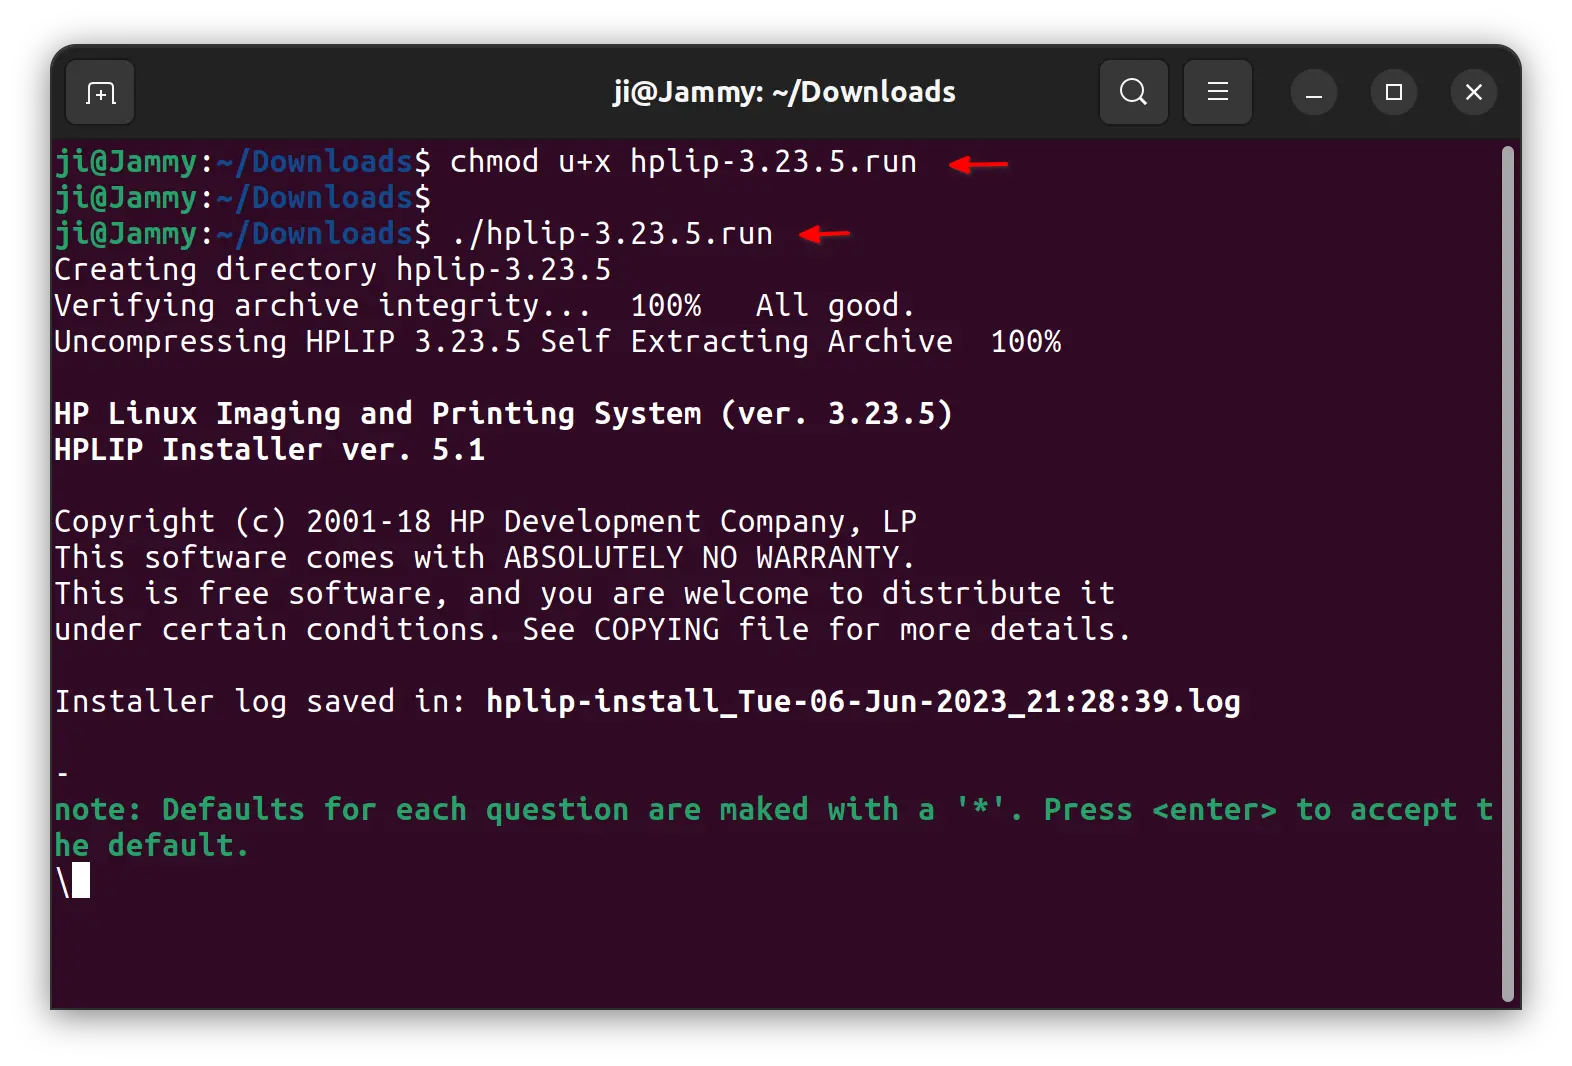
Once you downloaded the file, right-click on blank area in ‘Downloads’ folder and select “Open in Terminal”.
When terminal opens, run the commands below one by one:
Add executable permission for the file:
chmod u+x hplip-3.23.5.run
Run the file, follow the on-screen prompt and answer some questions:
./hplip-3.23.5.run
Until the command done without errors, you can plug or re-plug your HP printer for the new driver to work.
NOTE: The .run installer so far does not support Ubuntu 23.04! But, after running the previous commands, it generated the source folder in user ‘Downloads’ folder. Right-click on that folder and select ‘Open in Terminal’, then 23.04 user can run the commands below one by one to build from source:
The KeePass password manager now is at version 2.55. Here are the new features and PPA repository for all current Ubuntu releases.
KeePass 2.54 now uses the enforced configuration file for the triggers, global URL overrides, password generator profiles and a few more settings. See more about enforced configuration.
As well, there’s now new ‘Enforced Options’ dialog for storing certain options in the enforced configuration file. User can open it by going to menu 'Tools' -> 'Advanced Tools' -> 'Enforce Options'.
The ‘Print’ and ‘Export’ command in most report dialogs now requires the ‘Print’ application policy and ‘Export’ application policy flag, and the master key must be entered.
Hide passwords and other sensitive data by default in report dialogs.
Support hiding the value via asterisk in single line edit dialogs
Like on Windows, commands that require elevation now have a shield icon in Linux/macOS.
add ‘Move Selected Unused Text to Dialog Control’ command.
Redesign export confirm dialog.
Disable the clipboard workarounds by default in Linux, macOS, etc.
Various other improvements.
How to Install KeePass 2.55 (updated) in Ubuntu via PPA
Besides building from source code, I’ve uploaded the package into this unofficial PPA for Ubuntu 18.04, Ubuntu 20.04, Ubuntu 22.04, Ubuntu 23.10, Ubuntu 23.04 and their derivatives.
NOTE: Thanks to @AnonTester, there should be no longer “invalid data format” pop-up in every app launch. Because, I’ve made small script to sync the version number between KeePass.exe and KeePass.exe.config files during the building process.
1. First, press Ctrl+Alt+T on keyboard to open terminal. Then, run the command below to add the PPA:
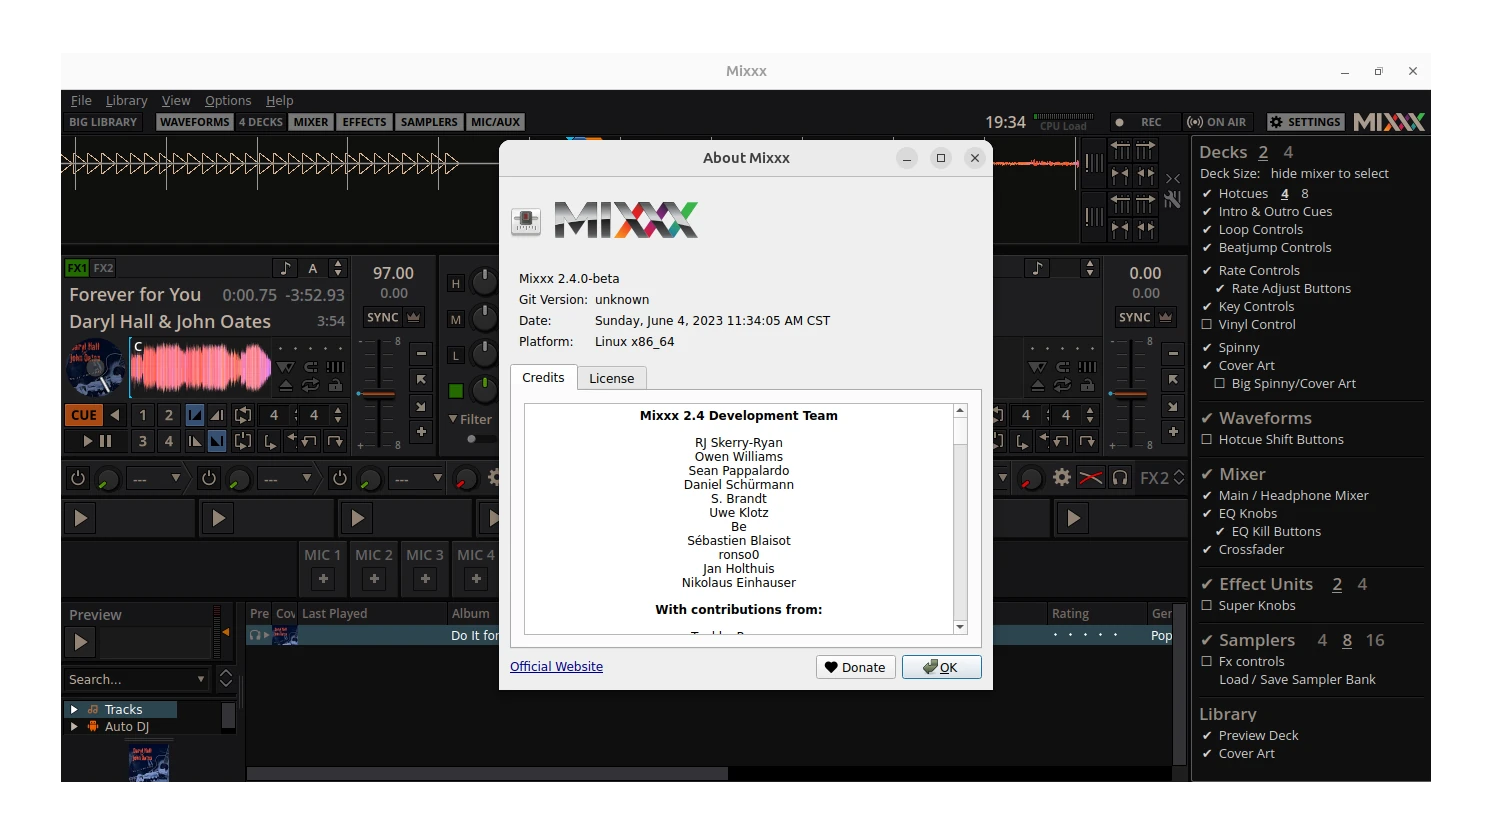
The free and open-source DJ mixing software, Mixxx, announced the beta version of the next major 2.4 release series a few days ago!
The new Mixxx 2.4 added support for saving loops as hotcues, and native Apple Silicon support for better performance on M1, M2, etc., devices.
The release also features explicit sync leader support, new controller mapping scripting engine (ES2016 support), new “all-shaders” scrolling waveforms for much better UI performance, new Quick Effect selector and effect chain buttons.
Other changes include:
background color for quick cover art preview
cover art fetcher to the Musicbrainz dialog
support exporting crates, playlists and the library to Engine Prime and Denon standalone controllers
Add support for m4v files
Add experimental QML user interface
Noise active effect, pitch shift effect, distortion effect.
Drop Ubuntu 18.04 support, add NixOS support.
And numerous other changes including search improvement, optimized database, history cleanup, and more and more. See this page for details.
How to Install Mixxx 2.4 Beta in Ubuntu:
Mixxx has an official Beta PPA contains the package for Ubuntu 20.04, Ubuntu 22.04, Ubuntu 23.04 and Ubuntu 23.10.
NOTE: At the moment of writing, the 2.4 Beta package in PPA is borken due to missing dependency. So, check the link above! And do the commands below when the PPA successfully updated.
1. First, press Ctrl+Alt+T on keyboard to open terminal. When it opens, run command to add the PPA:
sudo add-apt-repository ppa:mixxx/mixxxbetas
Type user password (no asterisk feedback) when it asks and hit Enter to continue.
2. Then, update system package cache for Linux Mint, etc:
sudo apt update
3. Finally, install Mixxx 2.4 beta package by running command:
sudo apt install mixxx
Before the maintainer fixed the PPA package, user can compile Mixxx 2.4 Beta from the source tarball.
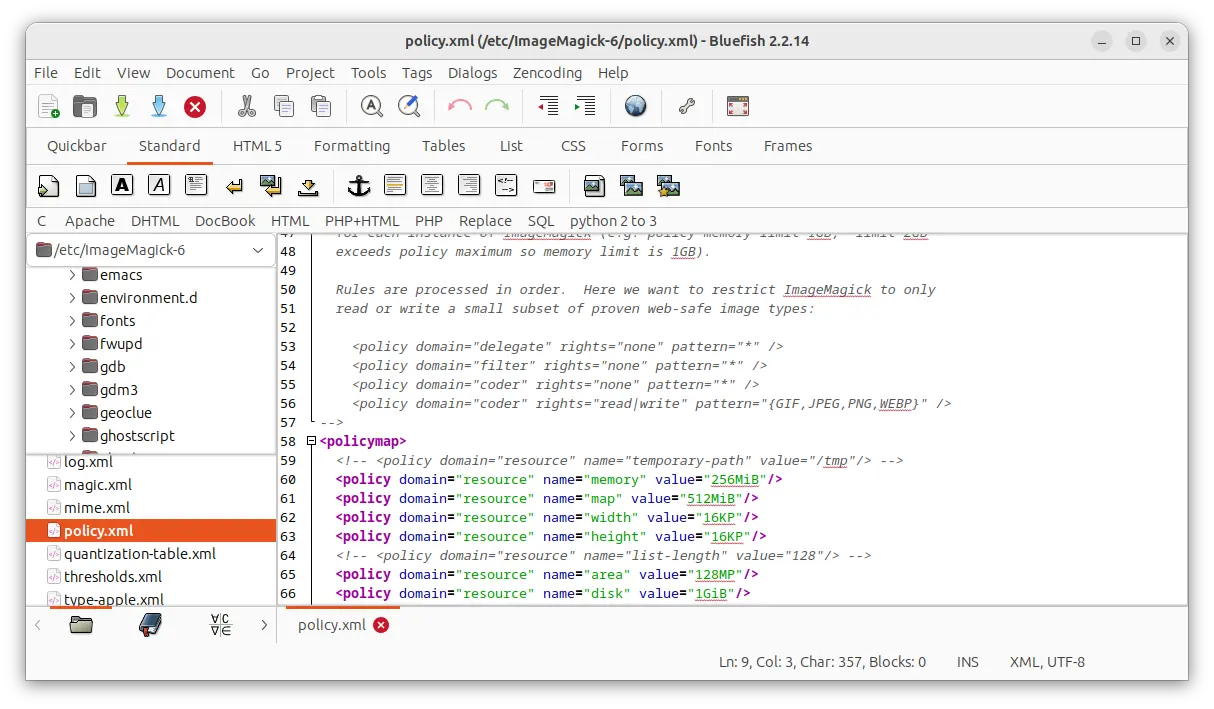
The Bluefish text editor just got a new bug-fix release today!
It’s Bluefish 2.2.14, that fixed crashes when deleting backup files on close, when closing some of the dialogs in flatpak app, and when the CSS language file was loaded on a 32-bit system.
Furthermore, the release fixed zencoding functionality with python3, added option to store the scope of the search dialog to the session or project which was removed in 2.2.12 release. Also, it improves the speed of the bookmarks code.
Bluefish 2.2.14
How to Install Bluefish in Ubuntu
Bluefish is available in Ubuntu repository, but always old. For the most recent releases, either use the official Flatpak package, third-party PPA, or build it from source by yourself.
Option 1: Flatpak package
Bluefish provides official package through Flatpak that works in most Linux but runs in sandbox.
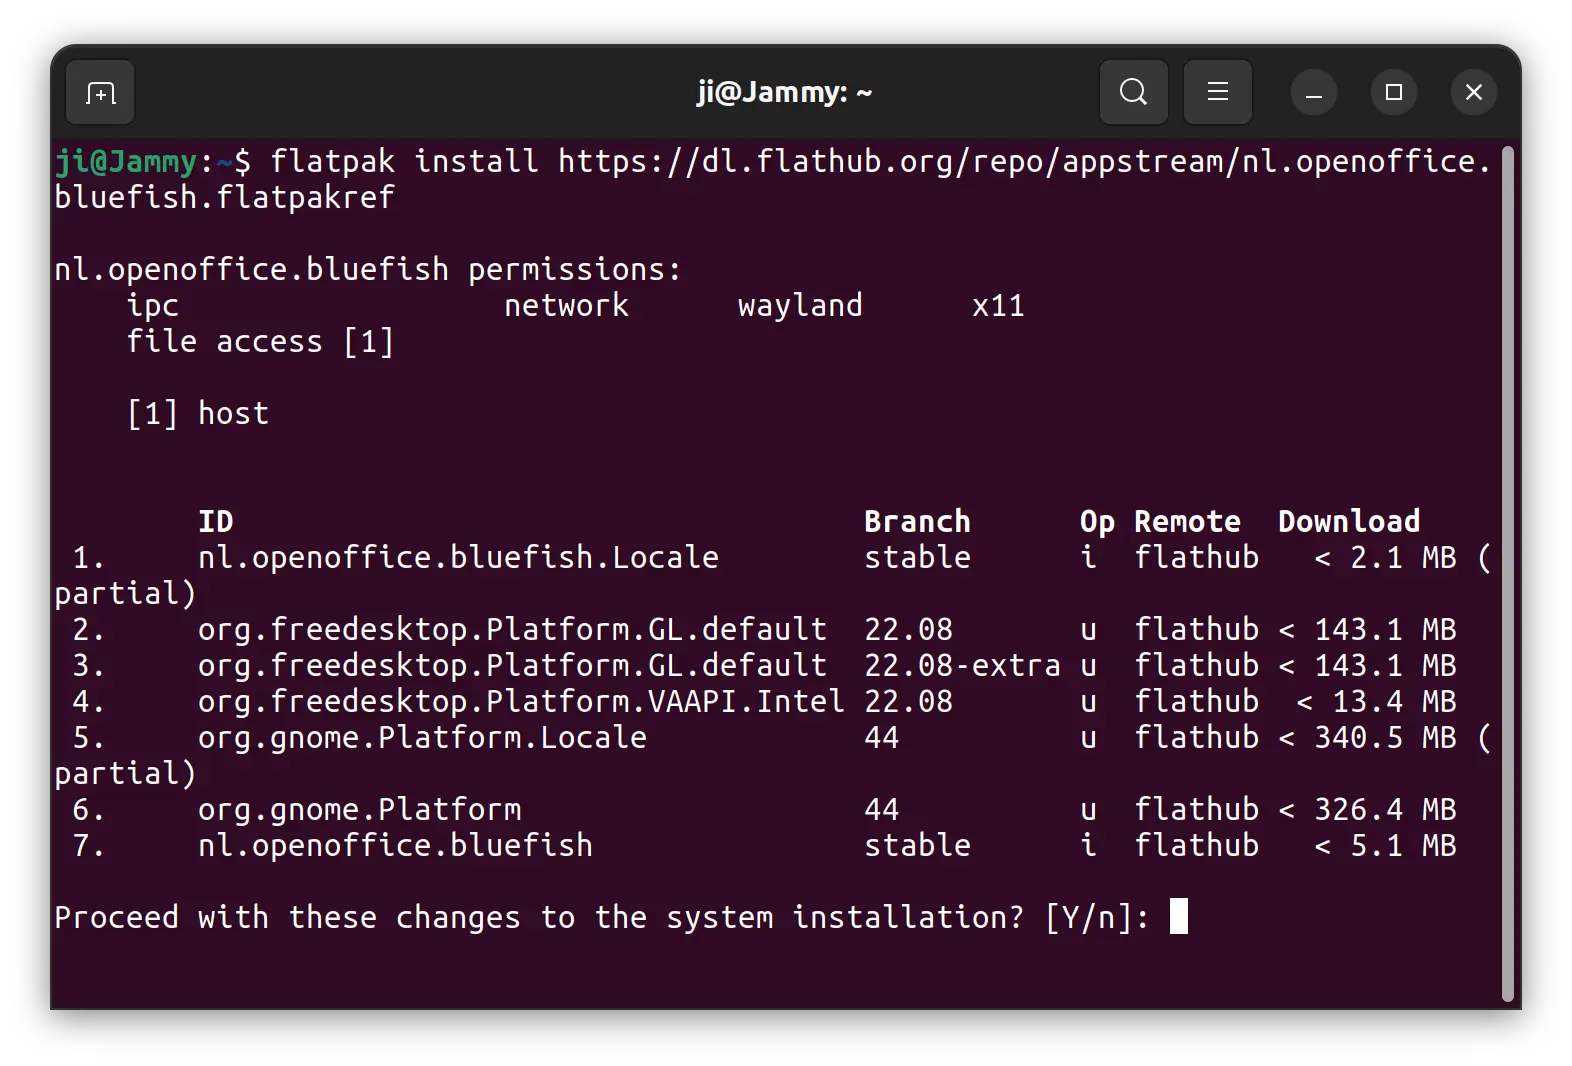
Ubuntu user can press Ctrl+Alt+T on keyboard to open terminal, and run the commands below one by one to install the package:
At the moment of writing, the Flatpak package is still v2.2.13. You can run flatpak update nl.openoffice.bluefish to update it when the new package is published.
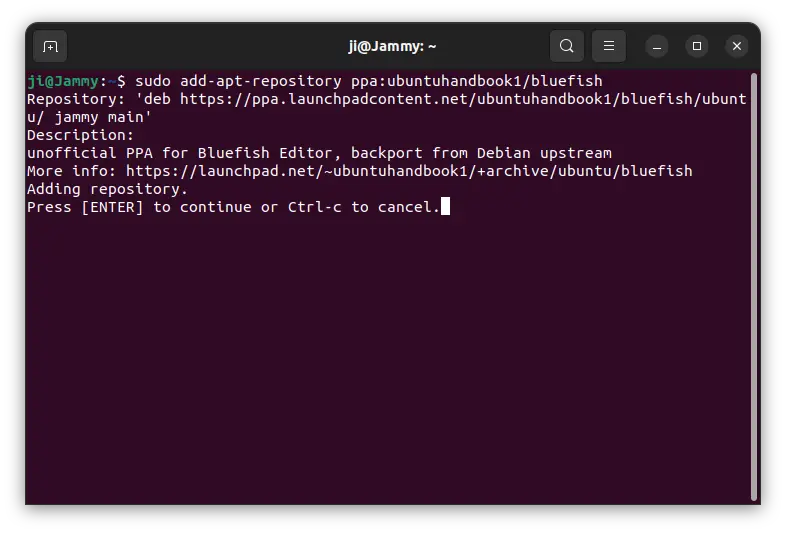
Option 2: Ubuntu PPA (unofficial)
As you can see in the screenshot above, the Flatpak package will install hundred MB of run-time libraries. So, this unofficial PPA is here for choice.
The PPA supports Ubuntu 18.04, Ubuntu 20.04, Ubuntu 22.04, Ubuntu 22.10, Ubuntu 23.04, and their based systems with both x86_64 and arm64/armhf CPU architecture types.
1. First, press Ctrl+Alt+T on keyboard to open terminal. When it opens, run command to add the PPA:
Type user password (no visual feedback) when it asks and hit Enter to continue.
2. For the old Ubuntu 18.04 and Linux Mint users, manually refresh the system package cache by running command:
sudo apt update
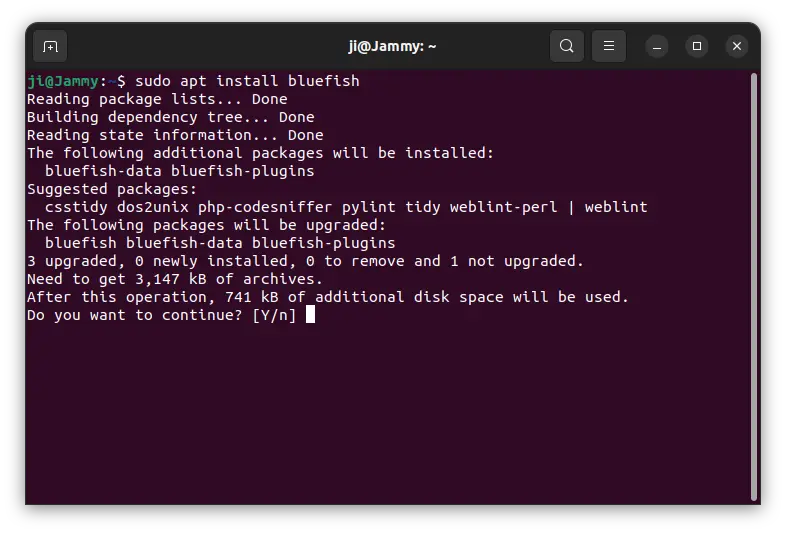
3. Finally, either run command to install the text editor:
sudo apt install bluefish
Or, open “Software Updater” and use the tool to upgrade the previous Bluefish package to the latest.
Option 3: Build Bluefish text editor from source
For those who can’t wait, it’s not hard to compile the package from source tarball. And, following steps are tested and work in my case in Ubuntu 23.04.
1. First, open terminal (Ctrl+Alt+T) and run command to install the dependency libraries:
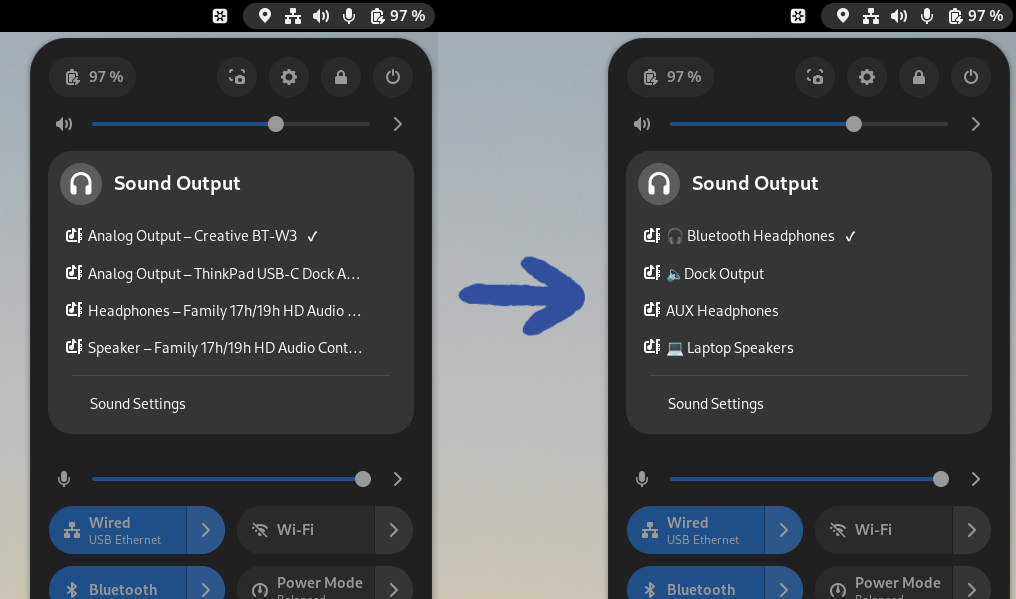
For Ubuntu 24.04, Ubuntu 23.10, Fedora 38 and other Linux with GNOME 44 ~ 46, there’s now an extension allows to change display name of audio output devices from the top-right aggregation menu (aka Quick Settings).
By default, the speakers and headphones in the sound output sub-menu is a bit too explicit, that are not very clear to understand. To make the menu easy to read, you may rename them to just “headphones”, “built-in speaker”, or whatever that you want.
1. To install the extension, first open Ubuntu Software, search and install “Extension Manager”:
Install Extension Manager in Ubuntu 22.04+
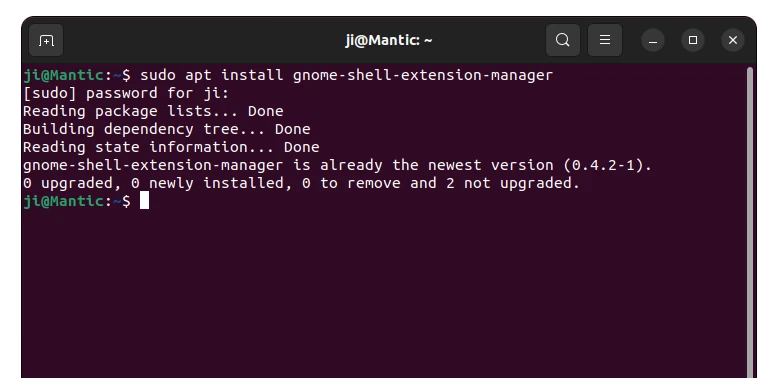
For Ubuntu 23.10/24.04, press Ctrl+Alt+T on keyboard to open terminal and run the command below instead to install it:
sudo apt install gnome-shell-extension-manager
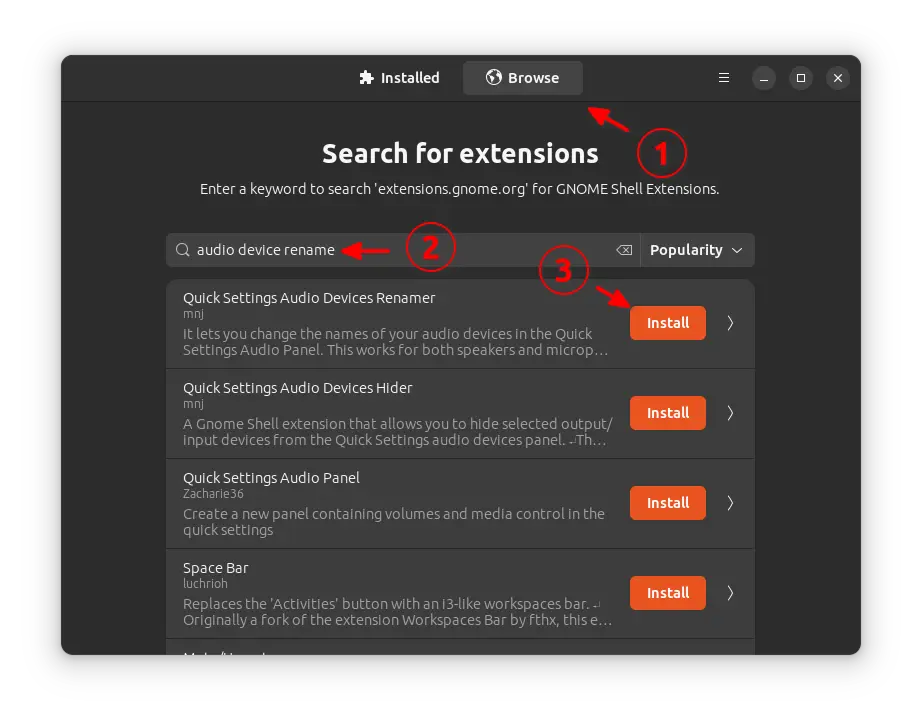
2. Then launch “Extension Manager”, navigate to ‘Browse’ tab, finally search and install the “Quick Settings Audio Devices Renamer” extension.
For Fedora and other Linux, go to this web page and use ON/OFF switch to install the extension.
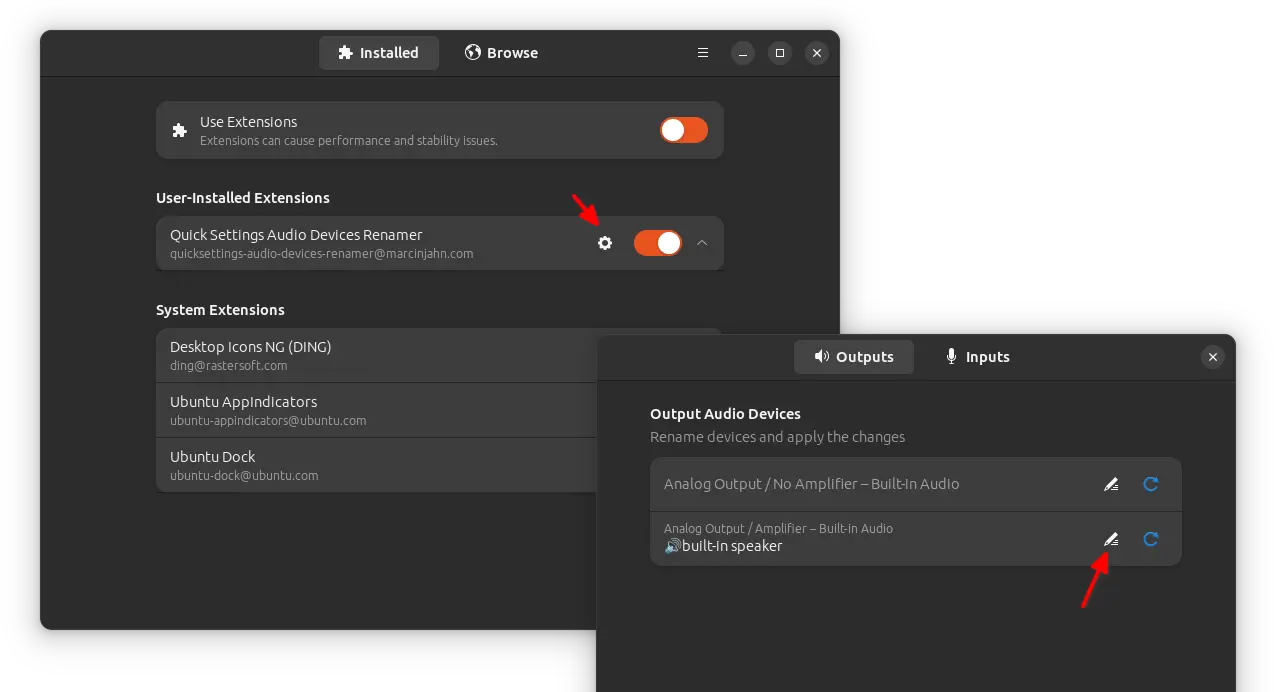
3. Once installed the extension, switch back “Installed” tab in Extension Manager (or open GNOME Extensions app). Then, click open the settings for that extension, finally click on the ‘pencil’ icon to edit the name of corresponding output device.
You can even insert emojis in the name, either by using a emoji picker or copy from “Gnome Characters” app.
Want to let “Open in Terminal” context (right-click) menu option work for another terminal emulator? Here’s an extension to do the similar job for Nautilus.
When right-clicking on either a folder or blank area in file manager, there’s an “Open in Terminal” menu option to launch system default terminal with that folder as working directory.
The option in Ubuntu so far is provided by the built-in gnome-terminal package. Meaning no way to use the option for another terminal emulator. However, there’s an extension can add similar option to open terminal from in-side folder.
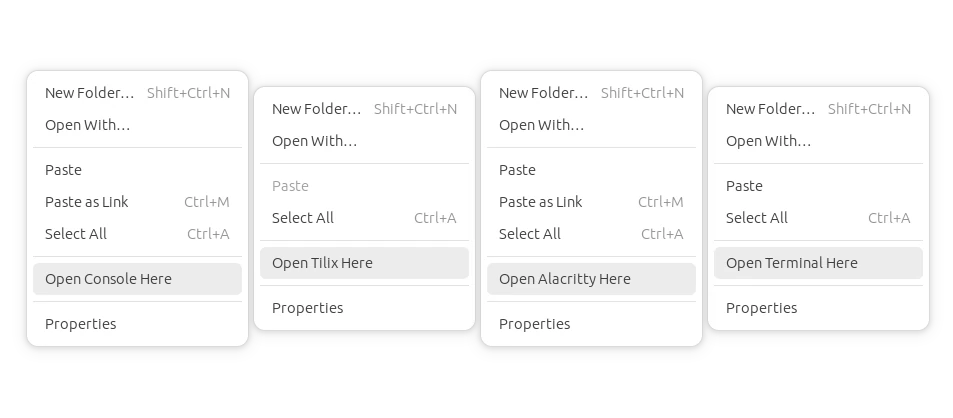
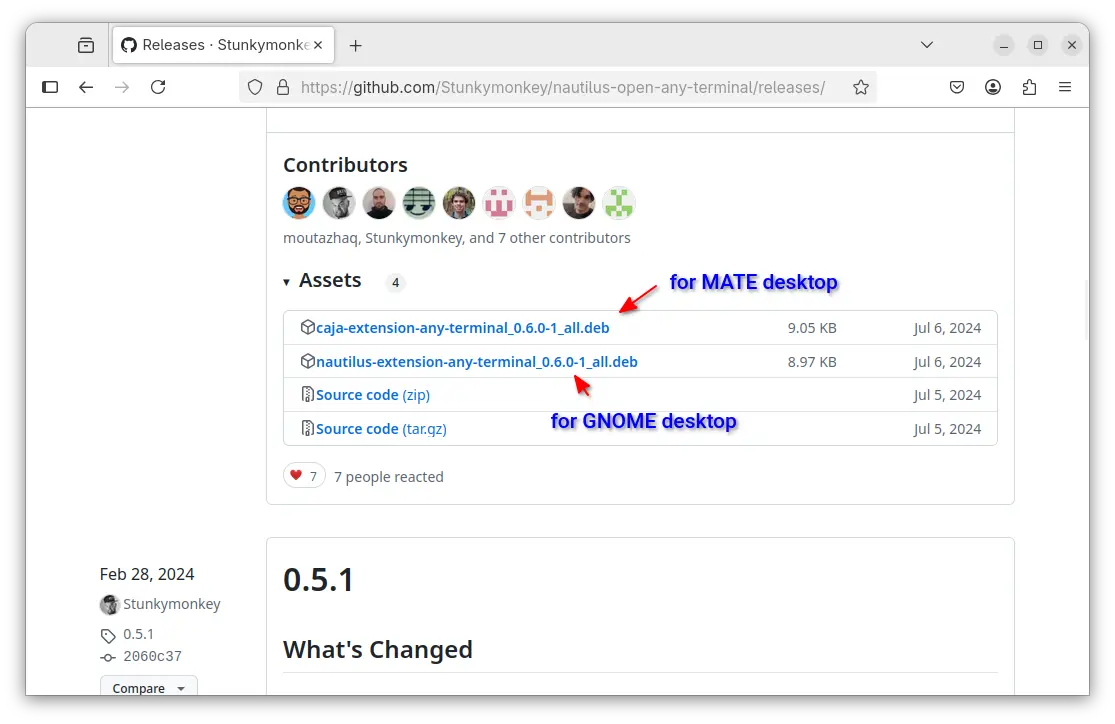
And not only for Gnome Terminal, the extension supports many other terminal emulators:
Then, select download either “nautilus extension” for default GNOME desktop or “caja extension” for MATE desktop. Finally, double-click to open it with either AppCenter or Software Install depends on your Ubuntu edition, then click install.
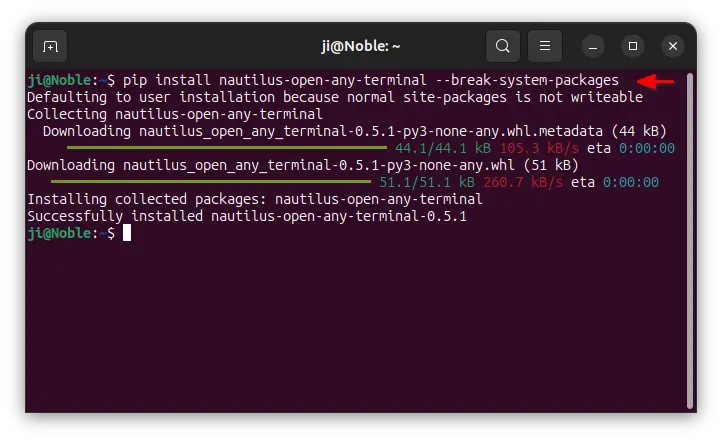
Option 2: Use Python package
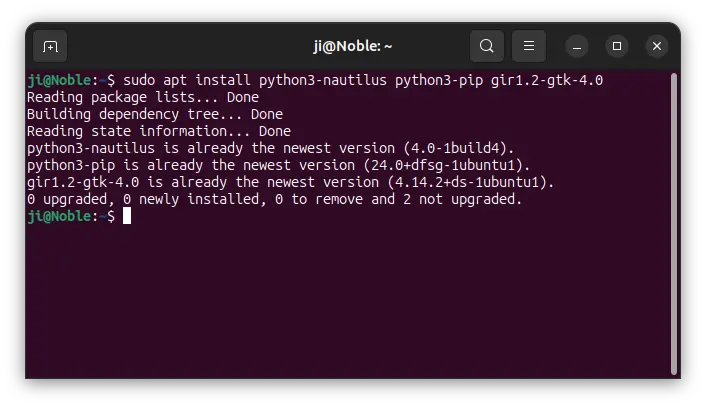
1. First, press Ctrl+Alt+T on keyboard to open terminal. Then run command to install git and python3-nautilus package:
After installed the extension, apply it by running command to quit Nautilus:
nautilus -q
Then, open “Dconf Editor” (install it from Ubuntu Software or App Center) and navigate to ‘com/github/stunkymonkey/nautilus-open-any-terminal‘. Finally, set the value of ‘terminal’ to tell which terminal emulator to use.
You can of course choose another terminal emulator by running command (replace kgx with yours terminal app):
gsettings set com.github.stunkymonkey.nautilus-open-any-terminal terminal "kgx"
Tip: You may also remove the built-in ‘Open in Terminal’ option by running command:
sudo apt remove nautilus-extension-gnome-terminal
Uninstall
To get rid of the context menu option, simply open terminal (Ctrl+Alt+T) and run command to uninstall the python package:
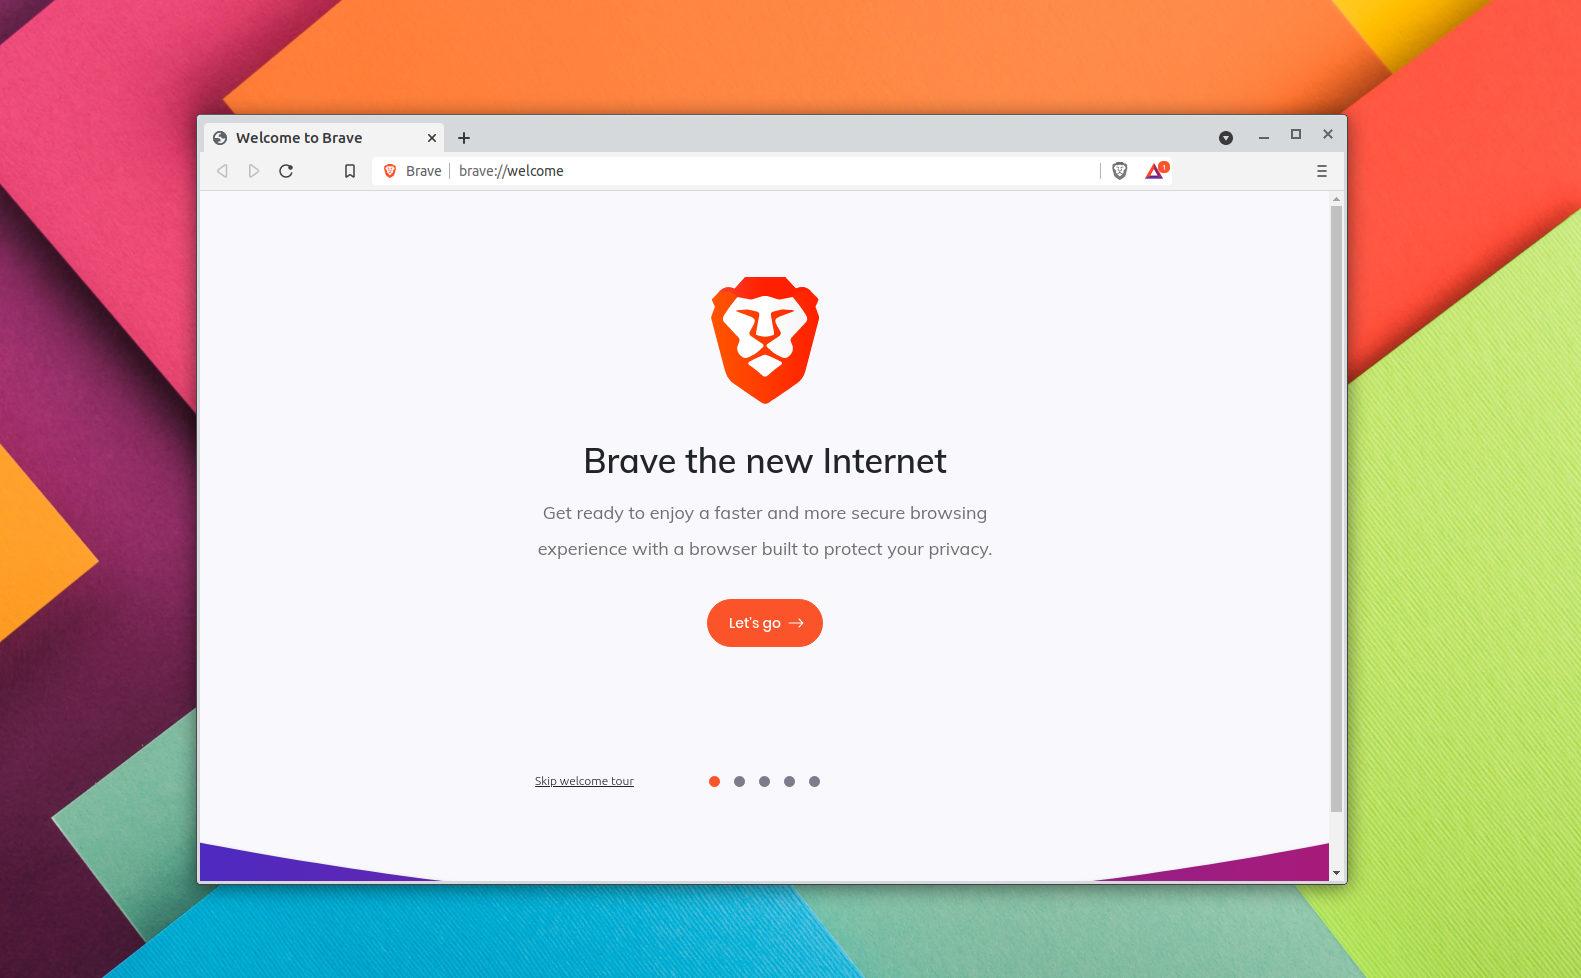
This simple tutorial shows how to install brave browser via the new apt source policy in Ubuntu 24.04 & 22.04.
Due to security issue, Debian changed its policy for adding apt sources. Ubuntu is changing the rules too. Since Ubuntu 22.04, it uses more secure key files with digital signature for system repositories and PPAs.
Since Ubuntu 23.10, it now uses deb822 .sources file instead of the previous .list file for third-party repositories. And, the new source files include ‘Signed-by’ section to specify the key file.
Step 1: Install curl command line download tool
First, press Ctrl+Alt+T on keyboard to open terminal. When it opens, run command to install curl and apt-transport-https package:
sudo apt install apt-transport-https curl
Type user password (no asterisk feedback) when it asks.
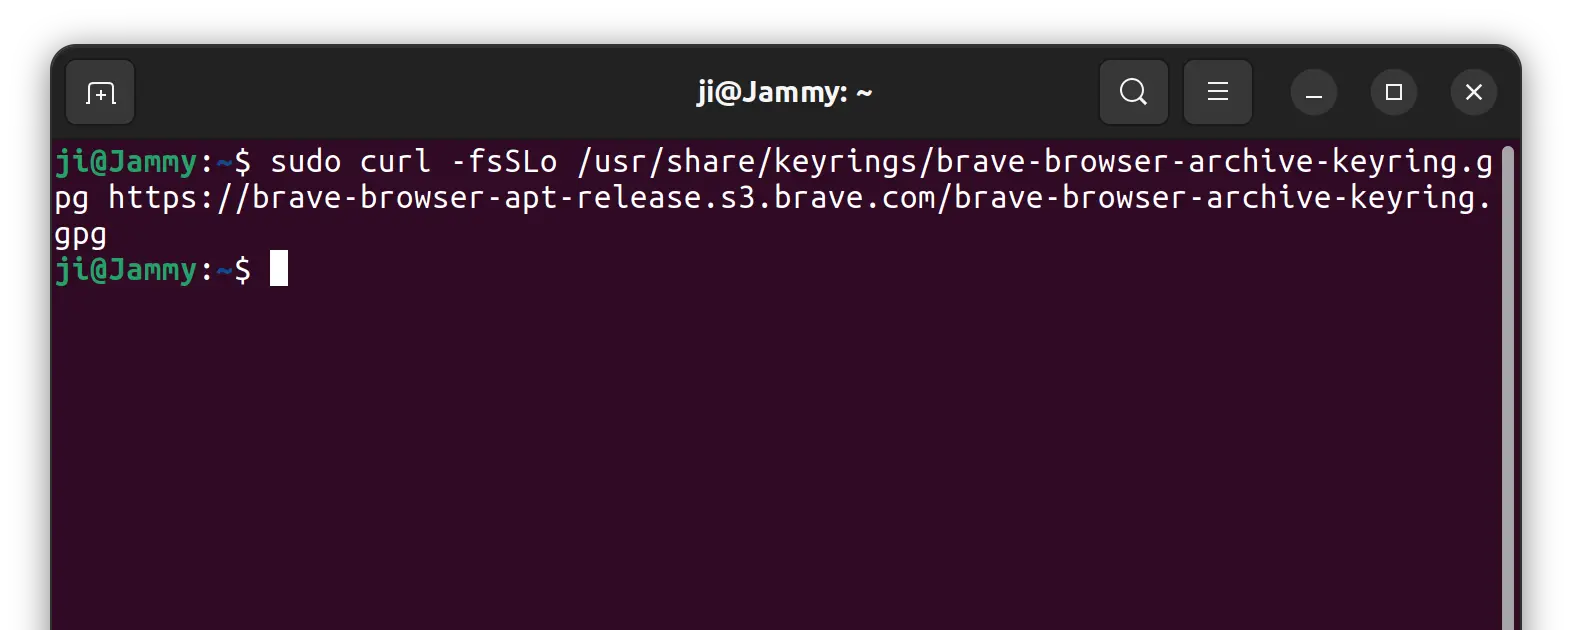
Step 2: Download & Install the key
Then, run curl command to download the key file and save it into /usr/share/keyrings folder.
This can be done by running the single command below in terminal:
Replace gedit with gnome-text-editor for Ubuntu 24.04.
2. Then in the pop-up text editor window, paste following lines:
Types: deb
URIs: https://brave-browser-apt-release.s3.brave.com/
Suites: stable
Components: main
Architectures: amd64
Signed-By: /usr/share/keyrings/brave-browser-archive-keyring.gpg
As you see, the new source file is easy to read, but a bit hard to write for beginners. See this thread for more about it.
Step 4: Update cache & install Brave Browser
After saving the file in last step, you can now run commands below to refresh the system package cache:
sudo apt update
And, finally install the web browser via command:
sudo apt install brave-browser
You don’t have to run the command every time when a new release is out. Just launch “Software Updater”, newer release of the browser package will be available there along with system package updates.
Uninstall Brave:
To remove brave browser package, open terminal (Ctrl+Alt+T) and run command:
sudo apt remove --autoremove brave-browser
And remove the apt source repository by running command:
For developers who want to prepare their project for the latest Python releases, here’s how to install Python 3.12 in all current Ubuntu releases.
Python 3.12 finally goes stable. It features more flexible f-string parsing, Per-Interpreter GIL, new type annotation syntax for generic classes, support for the Linux perf profiler, and many performance improvements, but removed the distutils package and wstr from Unicode. See more about Python 3.12.
How to Install Python 3.12
Python is easy to install in Ubuntu by either using the popular Deadsnakes PPA or building from the source. Choose either one that you prefer.
Option 1: Install Python 3.12 from PPA
For Ubuntu 22.04, Ubuntu 20.04, and their derivatives such as Linux Mint 21, the Deadsnakes PPA has made the packages for all supported CPU architecture types: amd64, arm64/armhf, ppc64el, and s390x.
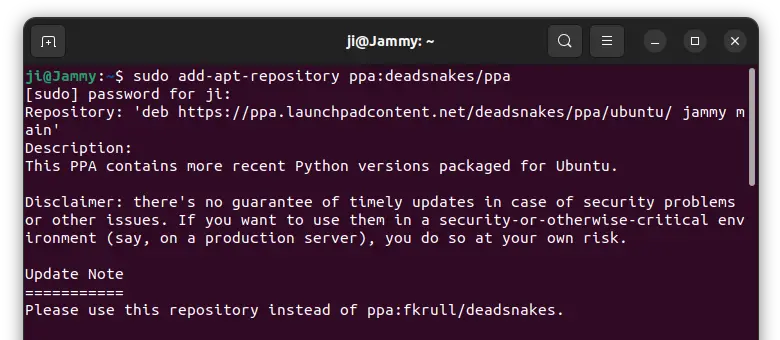
1. First, press Ctrl+Alt+T on keyboard to open terminal. Then paste the command below and hit run to add PPA:
sudo add-apt-repository ppa:deadsnakes/ppa
Type user password (no asterisk feedback) when it asks and hit Enter to continue.
2. Ubuntu 20.04+ automatically refresh package cache while adding PPA. However, Linux Mint user may need to do this job manually by running command:
sudo apt update
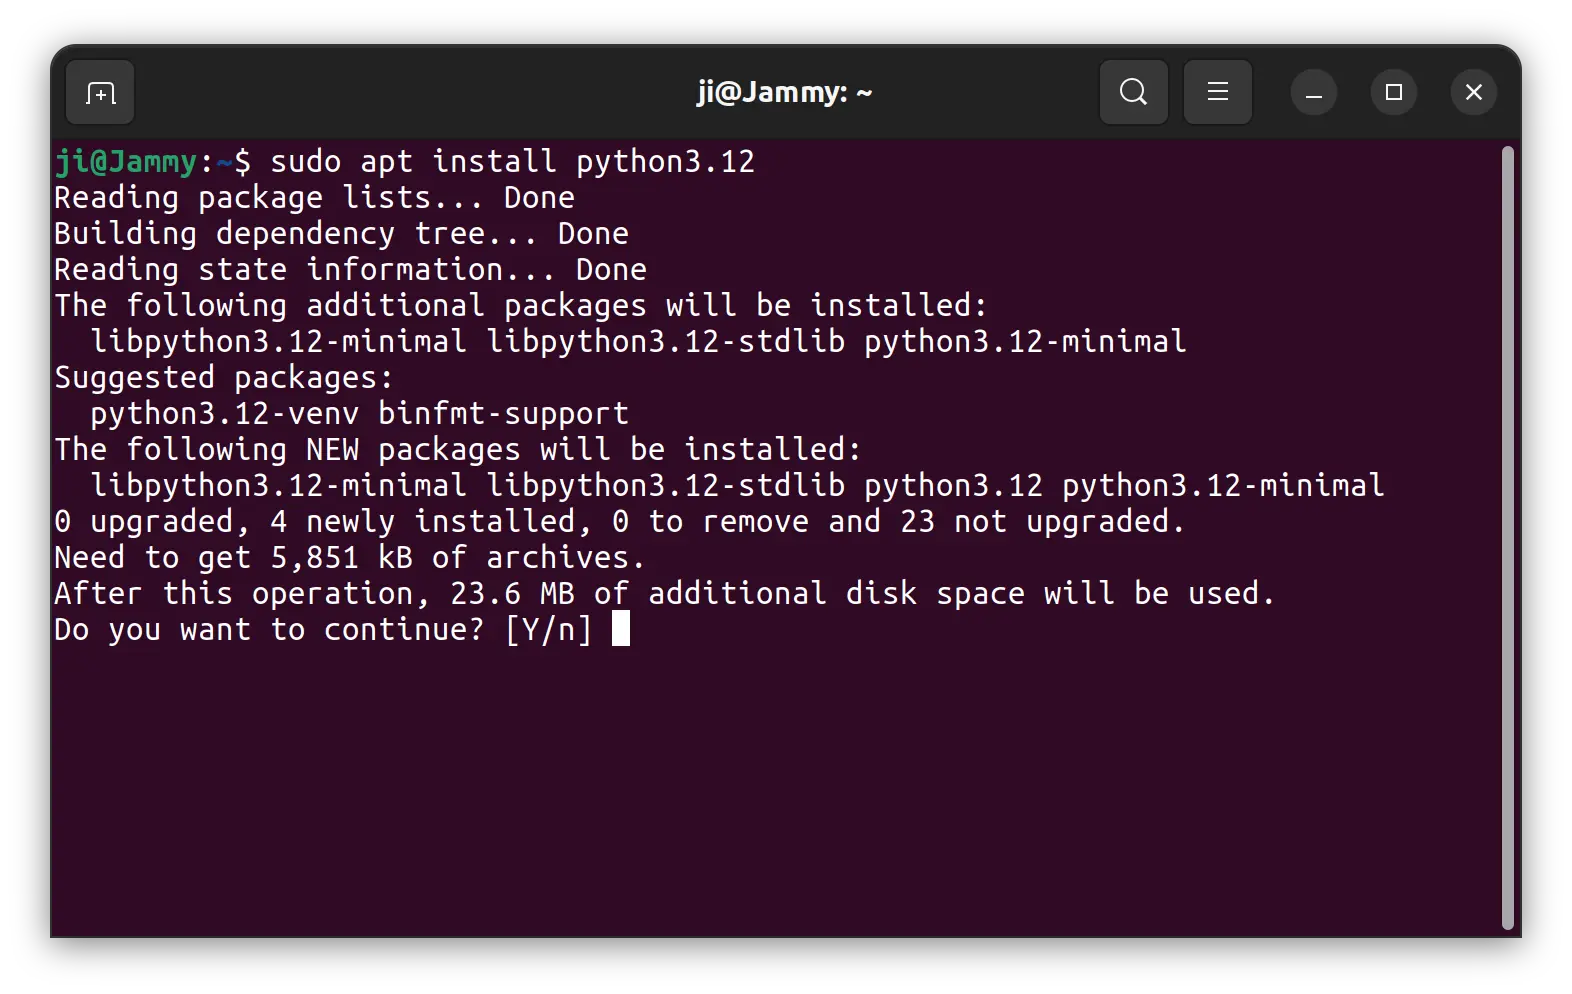
3. Finally, run command to install Python 3.12:
sudo apt install python3.12
Option 2: Compile and install Python 3.12 from source
Don’t trust third-party repositories or you’re running Ubuntu 23.04 or Ubuntu 18.04? It’s easy to build Python from the source tarball.
1. First download the source tarball from its ftp download page:
Finally, run command to set default for /usr/bin/python executable if more then one available:
sudo update-alternatives --config python
Use pip installer for Python 3.12
Due to PEP 668, pip install does no longer work like before. The recommended way to use pip is create a virtual environment first, though there are few workarounds.
First run command to install the pyvenv binary:
sudo apt-get install python3.12-venv
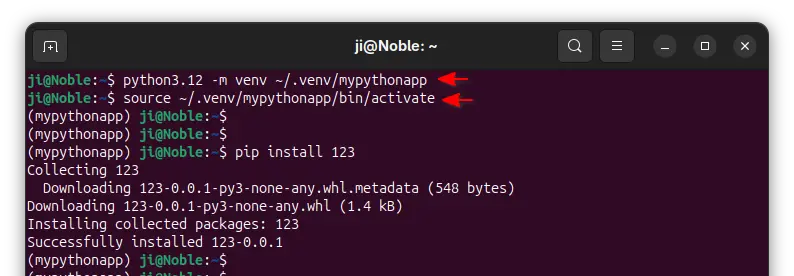
Then, create a virtual environment by running command:
python3.12 -m venv ~/.venv/mypythonapp
This command will create a .venv hidden folder in your user home folder then create a virtual environment called mypythonapp (replace the name as you want).
Next, use the source command to get into that virtual environment:
source ~/.venv/mypythonapp/bin/activate
Finally, run pip command to install a python package.
Tips: Without running source command every time, you may optionally add that virtual environment into PATH, so it can be run in anywhere in terminal.
To do so, either run command below, which works for the terminal window only, or paste it into the end of .profile file (press Ctrl+H in user home to view it) and log-out and back in.
export PATH=$HOME/.venv/mypythonapp/bin:$PATH
Uninstall Python 3.12:
If you installed Python 3.12 using the PPA repository, simply open terminal and run command to remove it: