RustDesk, the free open-source alternative to TeamViewer and AnyDesk, released new 1.4.5 version today.
The new version of this Rust written remote desktop software introduced new relative mouse mode, which is useful for first-person shooting and 3D applications, e.g., AutoCAD.
RustDesk, the free open-source remote desktop application, release new 1.4.4 version few days ago.
The new release of this Teamviewer or AnyDesk alternative app introduced edge scrolling support, when your app window is smaller than the remote screen size.
Previously, it scrolls automatically when you move cursor around the screen. While, the “Scrollbar” mode is available for choice when you want to manually move the bottom or right scrollbar to move around.
RustDesk, the popular free open-source remote desktop software, released version 1.4.3 few days ago.
RustDesk is yet another remote desktop solution written in Rust, which works in Linux, Windows, macOS, Android, iOS, and web browser. It features peer-to-peer encrypted connection and self-hosting server support.
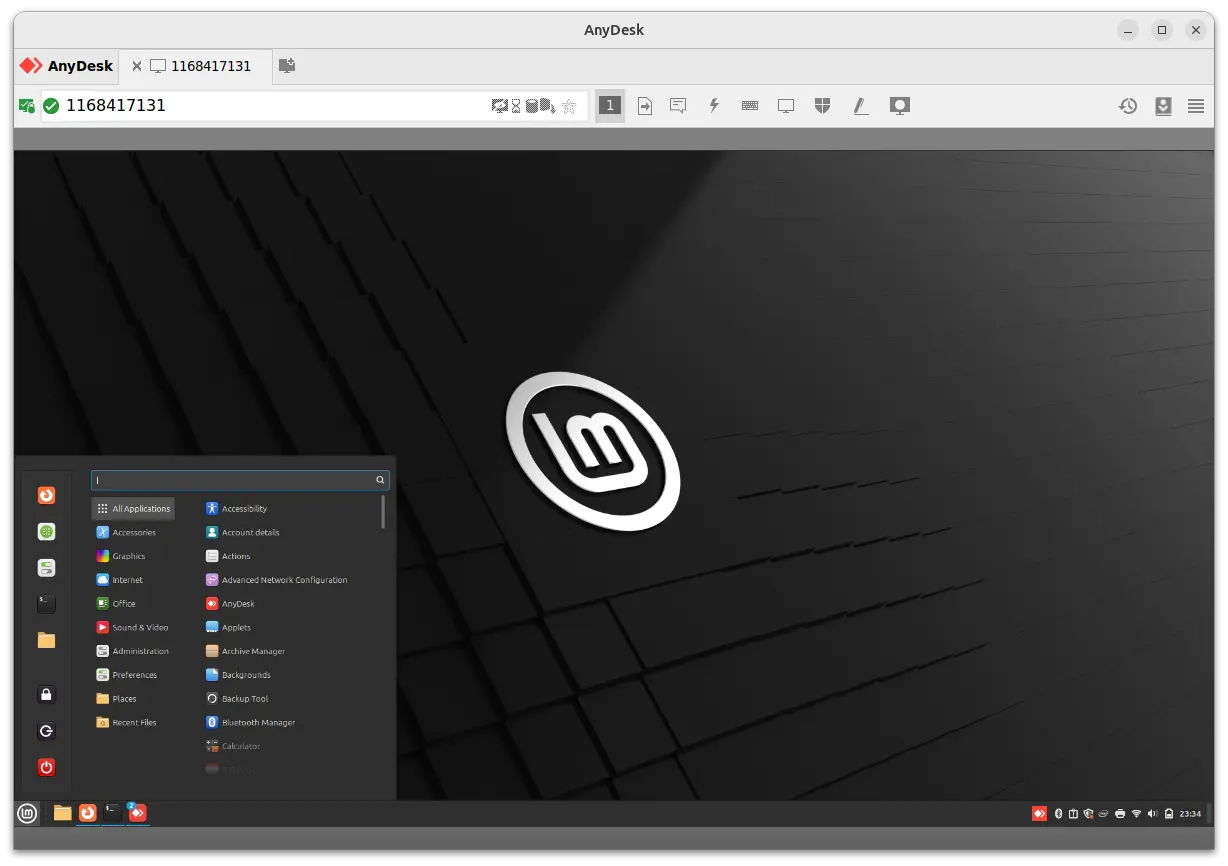
This tutorial shows how to install and configure AnyDesk for remote desktop access in Ubuntu 24.04 and Ubuntu 25.10.
AnyDesk is a popular remote desktop application works in Linux, Windows, macOS, Android, and iOS. It features full remote access, file manager and file transfer, chat, VPN, wake-on-lan, and more.
For Debian, Ubuntu, and Linux Mint based systems, AnyDesk is available to install through either way below:
native .deb package, and apt repository to keep it up-to-date.
Flatpak package – runs in sandbox, maintained by open-source community.
Both so far supports only amd64 (Intel/AMD) CPU architecture types.
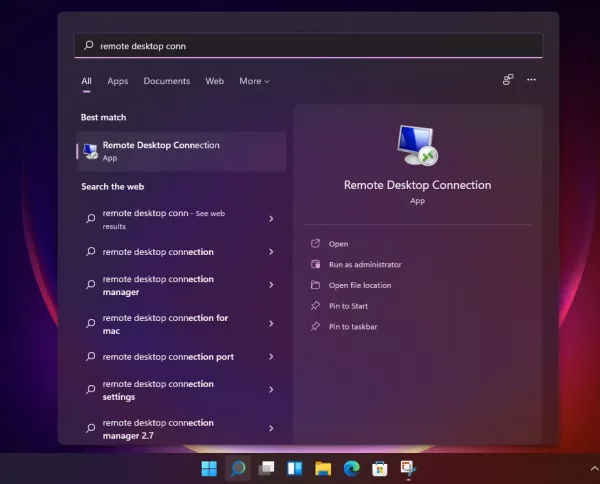
This simple tutorial shows how to enable RDP remote desktop for extended screen in Ubuntu 22.04, Ubuntu 24.04, and Ubuntu 25.04 with default GNOME desktop.
Since Ubuntu 22.04, the default GNOME desktop has built-in RDP support. The function has feature to share screen in ‘extend’ mode.
In this mode, Ubuntu won’t mirror the primary display, but create virtual extended screens for remote access.
Each remote connection is limited to its own virtual screen. You can drag and drop any app windows to that screen, allowing remote users to see and/or manipulate, while keeping sensitive data un-accessible in primary screen.
Or, you can use remote client PC/laptop’s monitor wirelessly to setup multiple screens for the Ubuntu machine. Though, operating in the virtual external monitors will be a bit laggy.
As you may know, GNOME 42 adopted Microsoft RDP protocol for its built-in remote desktop feature. Ubuntu 22.04 Beta previously excluded it because of the bug due to mixed Gnome-control-center and Gnome-remote-desktop versions.
In recent updates, this feature is finally back. Users may now easily remote access to Ubuntu 22.04 desktop with the more secure and MS Windows friendly protocol.
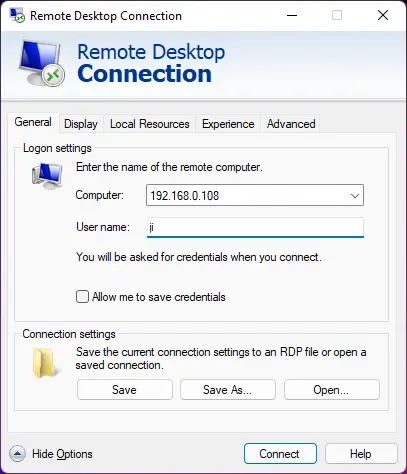
Remote Ubuntu 22.04 desktop from Windows 11
Enable Remote Desktop in Ubuntu 22.04
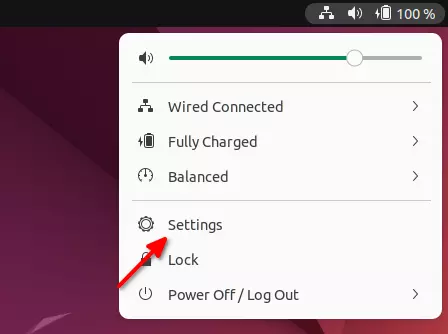
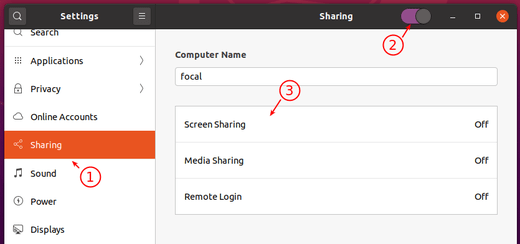
1. Firstly, open system settings (Gnome Control Center) from the system tray menu.
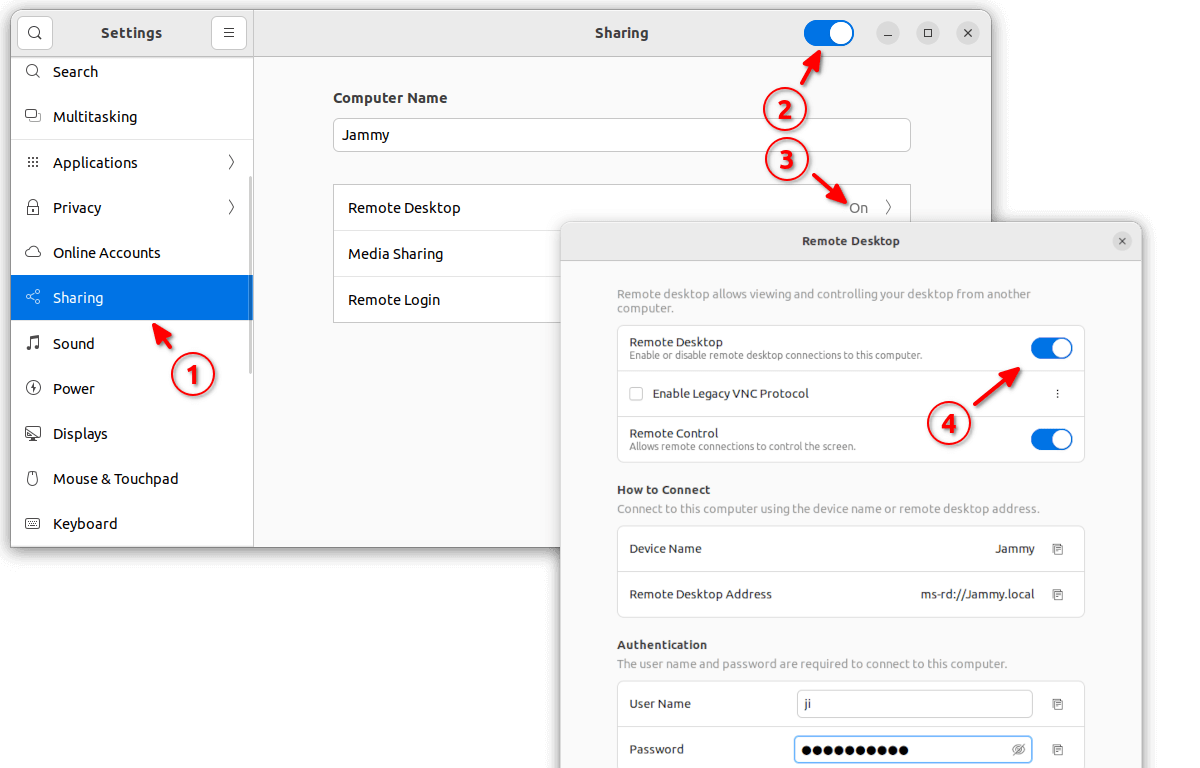
2. Then navigate to ‘Sharing’ from left, and turn on the toggle icon on right-corner of app header. You can finally click “Remote Desktop” to enable the function and configure user, password, etc.
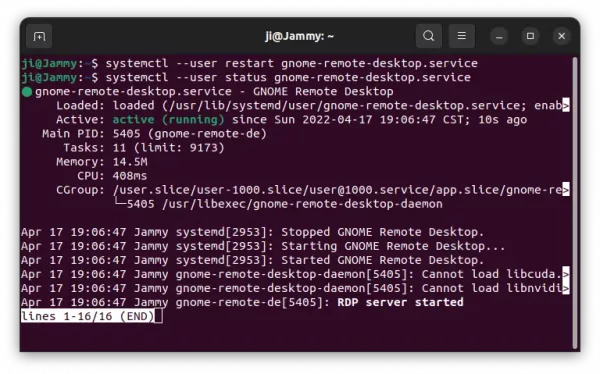
In my case, the first connection does not work until I re-start the remote-desktop service by running command (press Ctrl+Alt+T to open terminal):
Want to access your Ubuntu desktop remotely from a Windows 11 computer? It’s easy to do the job with built-in screen sharing function.
Ubuntu uses Vino as default VNC server to share your existing desktop. With it, users can access Ubuntu remotely either in or out of local network via a VNC client.
Enable Vino VNC in Ubuntu:
1. Firstly, click on ‘Activities’ in top bar, search for and open terminal from system app launcher. When it opens, run commands:
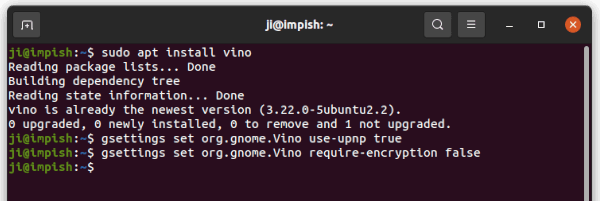
Make sure Vino is installed by running command:
sudo apt install vino
To allow computer outside of local network to access, enable upnp is your router support it:
gsettings set org.gnome.Vino use-upnp true
Vino requires encryption by default. However, VNC clients from Windows computer does not support the encryption type. So you may disable the feature via command:
gsettings set org.gnome.Vino require-encryption false
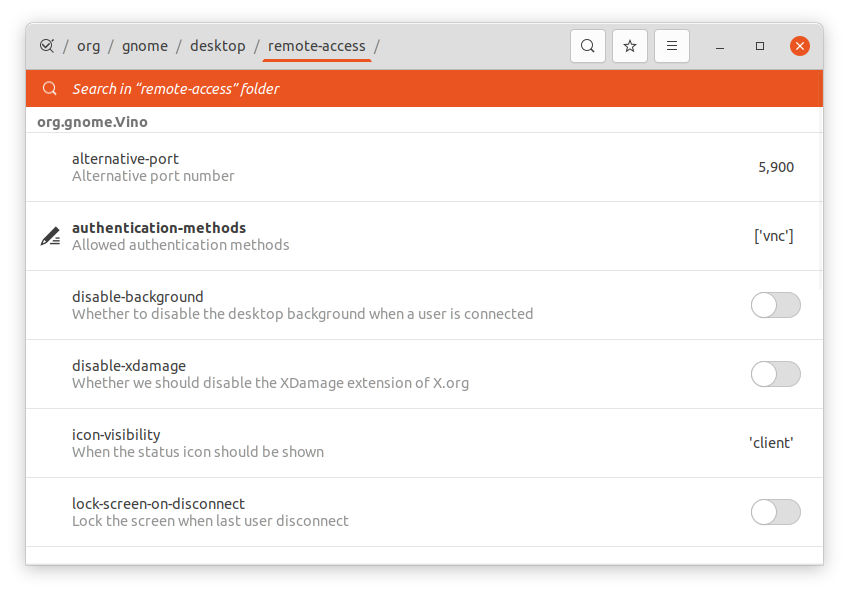
There are more settings, e.g., change listening port, disable background, lock on disconnect. And you can control them via Dconf Editor (install from Ubuntu Software), by going to ‘org -> gnome -> desktop -> remote access’.
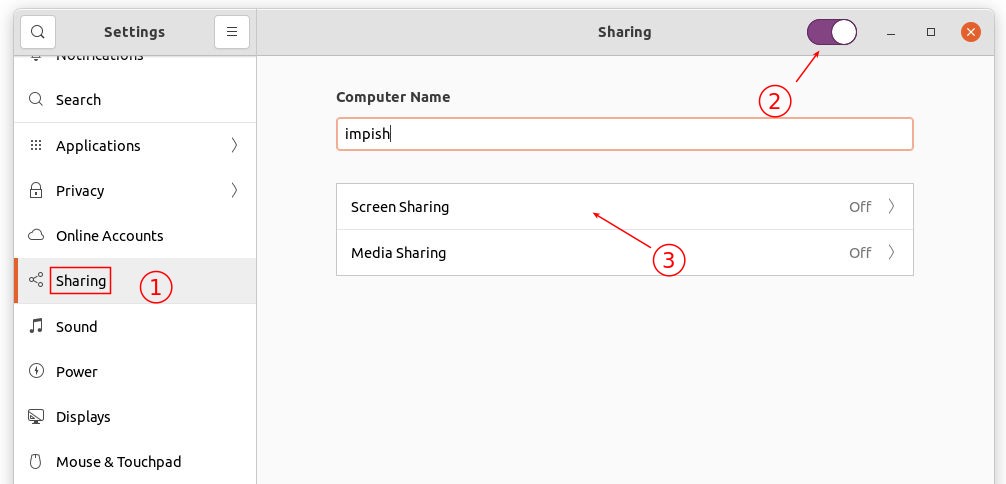
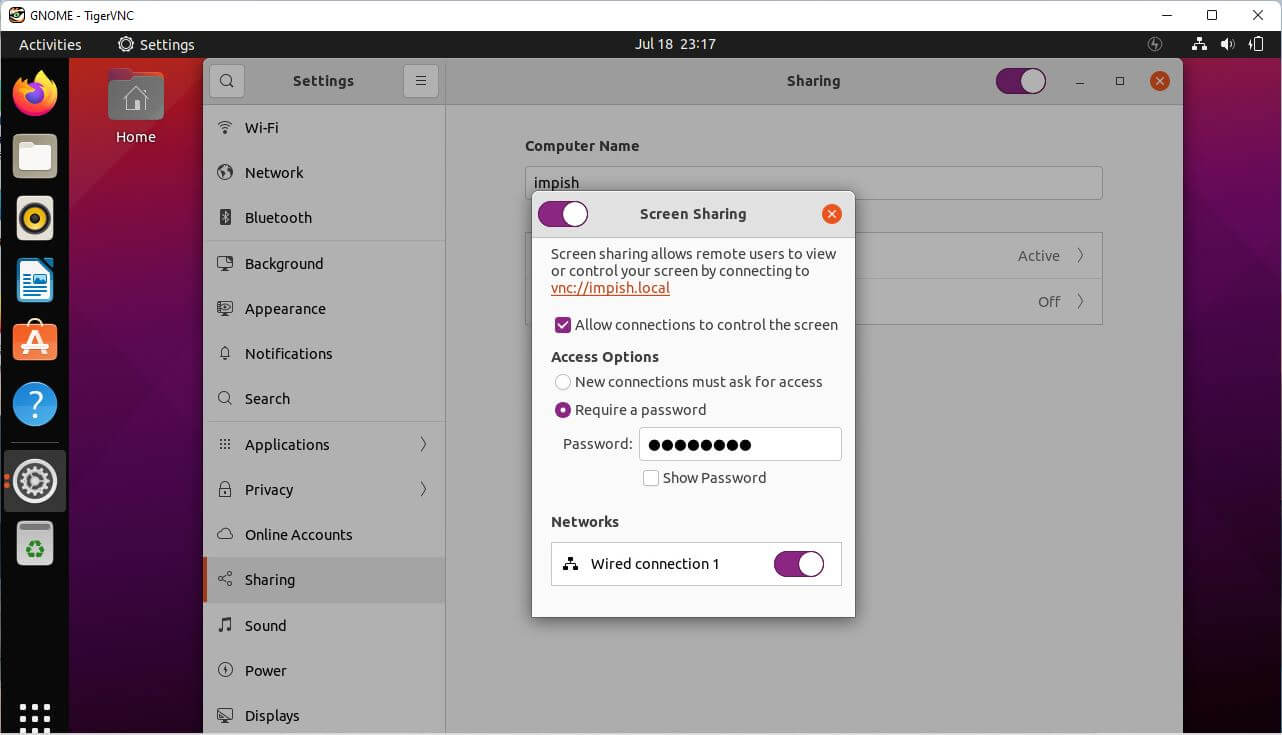
2. Secondly, open System Settings and go to Sharing in the left pane. Toggle on the slider icon on header, and then click ‘Screen Sharing’ to go to its settings page.
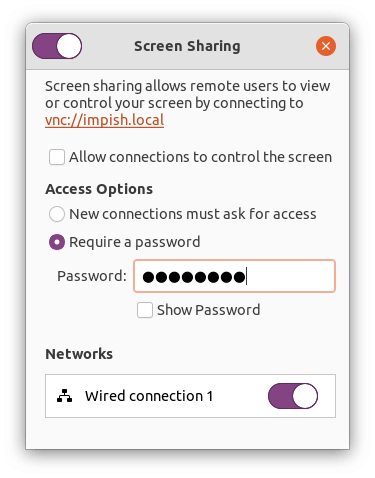
3. Finally, turn on ‘Screen Sharing’ function, and do:
Allow remote control by enabling “Allow connections to control the screen”
Set ‘New connections must ask for access’ if you’re sitting at Ubuntu computer.
Or set a hard-to-guess password for choice.
If you have both wired / wireless network connected, choose one to share with.
Remove Access Ubuntu from Windows 11:
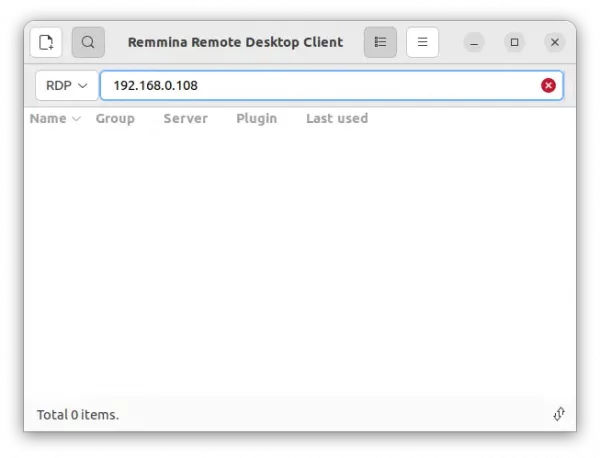
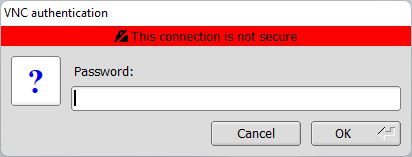
Windows uses need a VNC client to get access remote computers. And I use TigerVNC which is available to download at the link below:
This quick tutorial shows how to enable remote desktop service in Ubuntu 20.04, so that you can access to Ubuntu desktop remotely via VNC viewer.
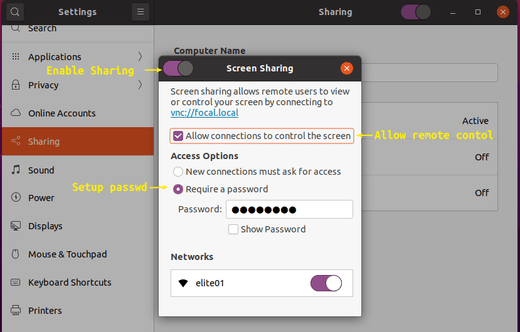
1.) Open System Settings utility, navigate to Sharing in the left pane, toggle on Sharing in the top-right, and finally click on “Screen Sharing”.
2.) In the pop-up dialog, turn on “Screen Sharing” and select:
Enable remote control by tick “Allow connections to control screen”.
Setup a password or select ask for access on each connection.
3.) As a workaround of TightVNC connection error: “No security types supported. Server sent security types, but we do not support any of them“.
NOTE: Instead of running following commands, you may use Dconf Editor and navigate to org/gnome/desktop/remote-access.
Run command in terminal (press Ctrl+Alt+T to open terminal):
gsettings set org.gnome.Vino require-encryption false
You may also run command to allow people not in local network to access using UPnP (if your router supports it):
gsettings set org.gnome.Vino use-upnp true
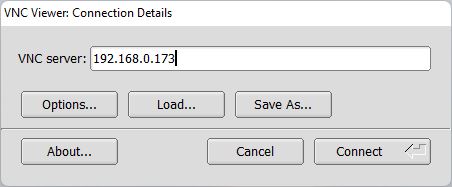
Finally, connect to this Ubuntu desktop remotely using either Computer name (as picture in step 1.) shows) or IP address via a VNC viewer / client and enjoy!