![]()

Sniffnet, the popular free open-source network traffic monitoring software, released new 1.5.0 version few days ago.
The new version of this lightweight Rust-based packet analyzer introduced per app or program based network traffic monitoring.
News, Tutorials, Howtos for Ubuntu Linux
![]()
Sniffnet, the popular free open-source network traffic monitoring software, released new 1.5.0 version few days ago.
The new version of this lightweight Rust-based packet analyzer introduced per app or program based network traffic monitoring.
![]()
In Ubuntu 26.04 (Beta so far), OpenVPN connection does not work out-of-the-box due to a bug in AppArmor. Here’s a quick workaround to fix the issue.
For security reason, Ubuntu by default uses AppArmor (Application Armor), a Linux Kernel security mode, to restrict programs’ capabilities for file access, networking and permissions.
![]()
Got multiple computers/laptops but only one mouse & keyboard? Without buying a KVM switch, here’s a software can do the job sharing them between your computers.
It’s Input Leap a free open-source application forked from Barrier, allowing to use single mouse and keyboard to control multiple computers in same local network.
![]()
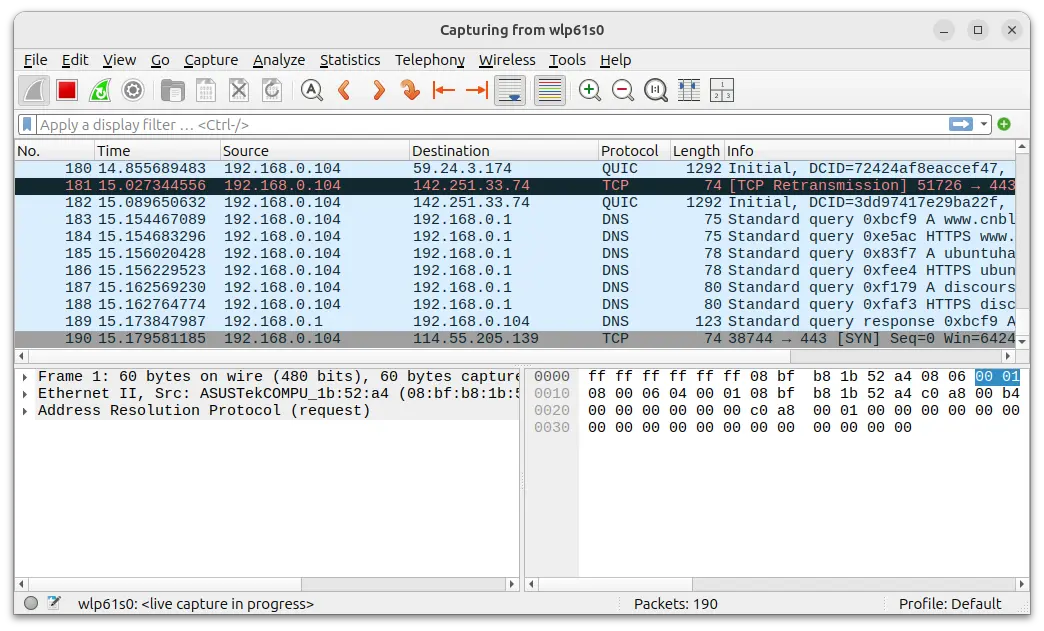
This is a step by step beginner’s guide shows how to install and setup the latest Wireshark network protocol analyzer software (v4.4.8 updated) in Ubuntu 24.04, Ubuntu 22.04, Ubuntu 20.04, and Linux Mint 22/21.
Wireshark is a popular free open-source software to capture and display real-time details of network traffic. It’s available in Ubuntu system repository, but old.
![]()
![]()
This is a step by step guide shows how to enable Wake-on-LAN feature in Ubuntu, so you can wake it up from suspend, hibernation, or shutdown state remotely using another computer or mobile phone.
Wake on LAN, WoL in short, is a protocol allows computer to be turned on or waked up from sleep using network message. It’s based on AMD’s Magic Packet Technology, and also known as wake on WAN, remote wake-up, power on by LAN, and resume by LAN.
WoL uses wired network on target computer for the communication. Though, there’s also Wake on Wireless LAN (WoWLAN) allowing to wake up wirelessly.
![]()
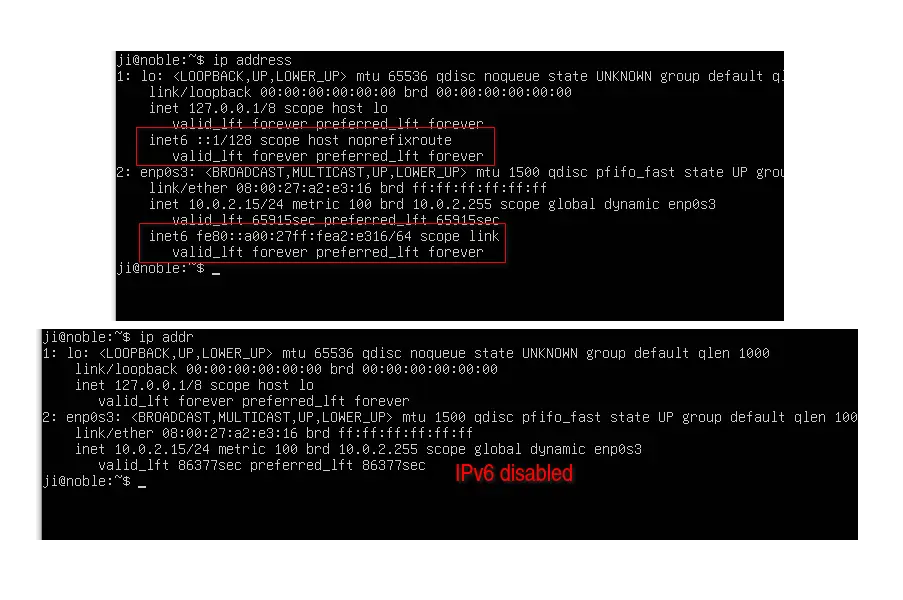
This is a step by step beginner’s guide shows how to disable IPv6 in Ubuntu 24.04 LTS with or without system restart.
IPv6 is the future of internet protocols. But for some reasons, such as compatibility with certain networks, testing purpose, or security concerns, or just because don’t use that thing, users may want to disable IPv6 in their machines.
Disabling IPv6 is generally safe. There may be small performance loss on some websites and services that are optimized for IPv6, though you can re-enable it at any time as you want.
![]()
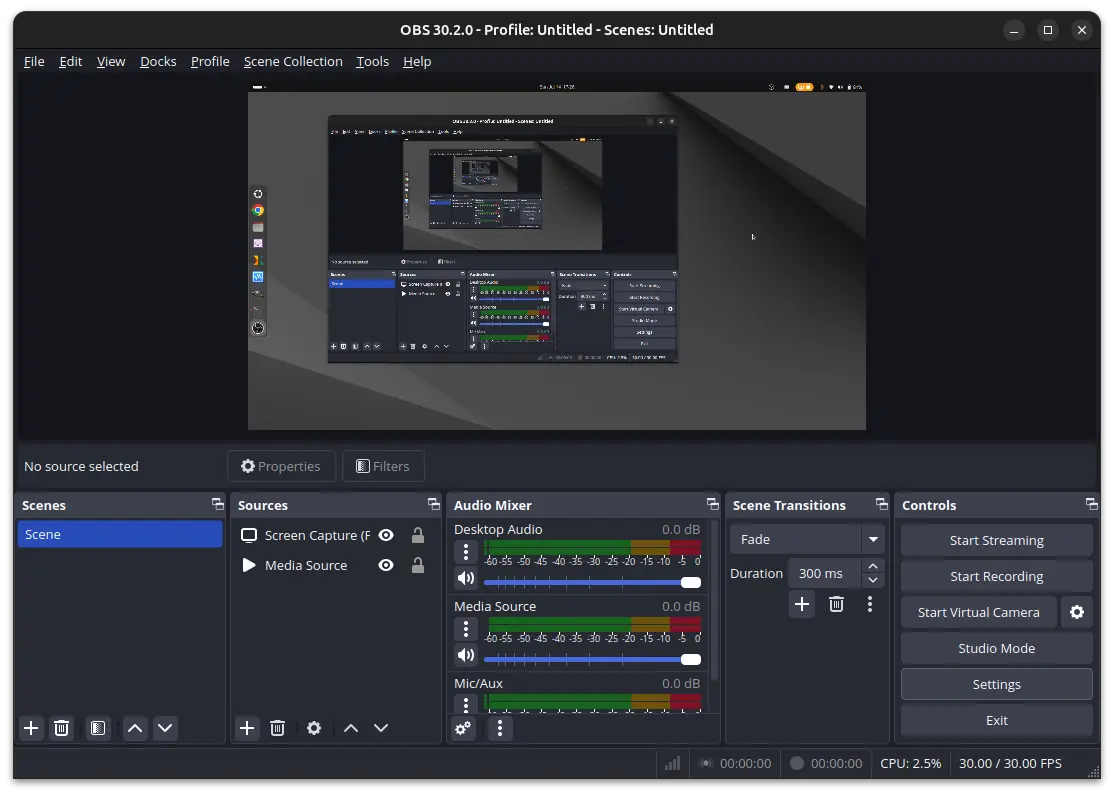
OBS Studio, the popular free open-source live streaming software, announced new major 30.2.0 release a day ago.
The new release has some improvements for Linux support. They include native NVENC encoder interface for NVIDIA GPU hardware accelerated encoding, and NVENC AV1 support. And, Linux shared texture support to the NVENC encoder, QuickSync encoder, as well as VA-API encoder.
OBS Studio 30.2.0 also added multi-track video streaming support, aka Enhanced Broadcasting on Twitch.
To improve the experience for viewers with poor network conditions or those watching on older devices, the streaming service usually creates multiple video qualities of original high-quality source content.
Now, OBS Studio itself can produce multiple video qualities, though, it so far supports only Windows and requires NVIDIA GTX 900, GTX 10, or RTX 20 series GPU or newer or an AMD RX 6000 series GPU or newer. And, it will collect info, such as OBS version and audio/video settings, CPU, GPU, Memory, and OS info and set to the streaming service.
![]()
This simple tutorial shows how to easily turn your Ubuntu or Debian into home media server, so that you can listen to the music, watch photos and videos that are stored in Linux PC remotely using your mobile phones and/or smart TVs.
GNOME, the default desktop in Ubuntu and Fedora Workstation, has built-in option to enable this feature. It uses Rygel home media solution as backend.
It automatically transcode media to a format compatible with the client device. And, client machines that supports DLNA/UPnP, such as Sony PlayStation, Microsoft Xbox, smart TV, Android, iOS, can access them through the local network.
Continue Reading…
![]()
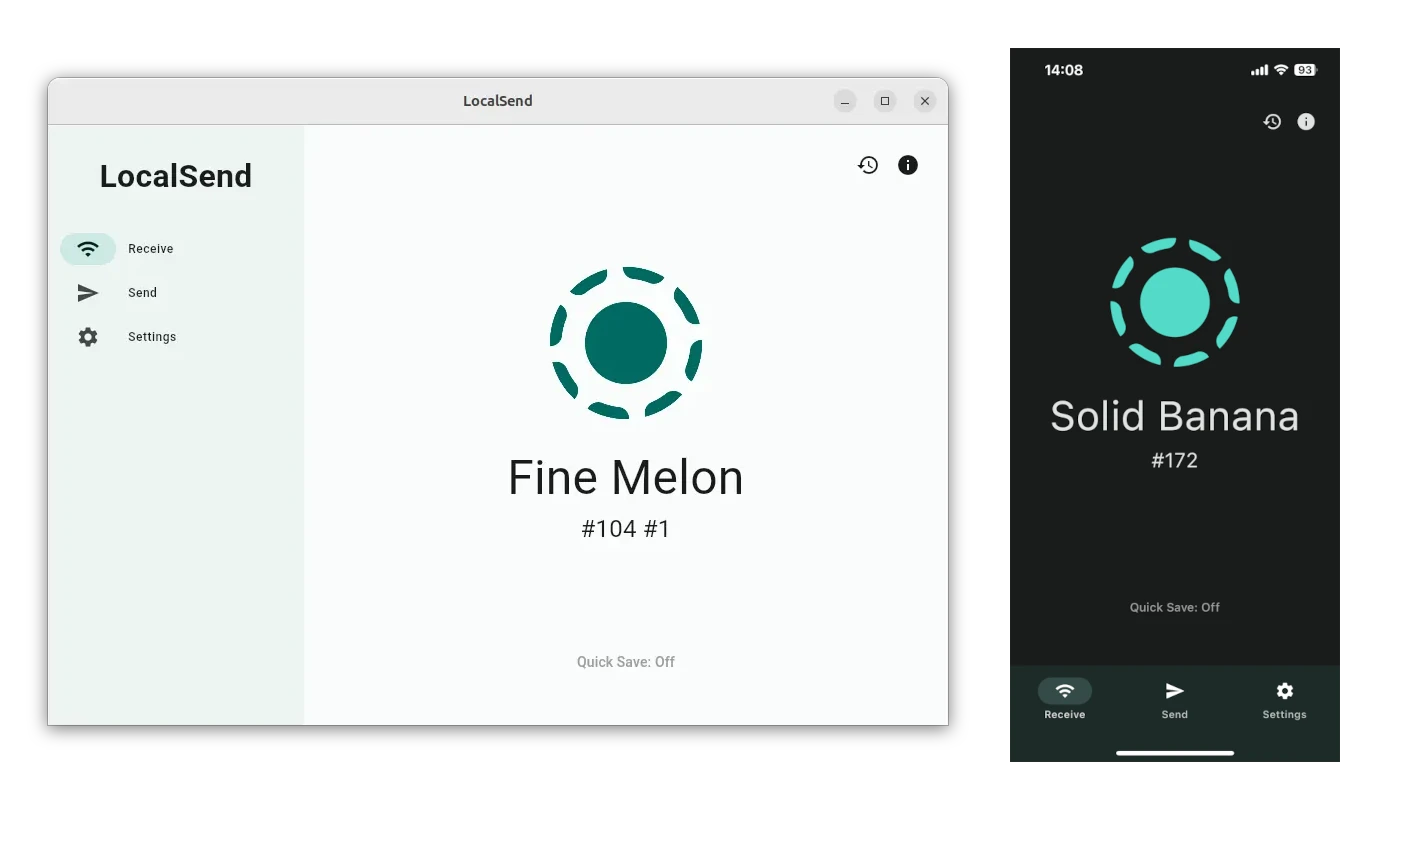
Looking for an app to transfer files and send messages over local network? LocalSend is good choice that works for most devices.
LocalSend is a free and open source application which promotes itself as alternative to Apple’s AirDrop. It’s a cross-platform app that allows to securely send files and messages over local network without an internet connection.
It works in Linux, Windows, macOS, Android, iOS, and Fire OS. Meaning you can use the file transfer app in most PC and mobile devices. And, the app doesn’t require an internet connection or external servers. It uses REST API for secure communication. All data is sent securely over HTTPS, and the TLS/SSL certificate is generated on the fly on each device.