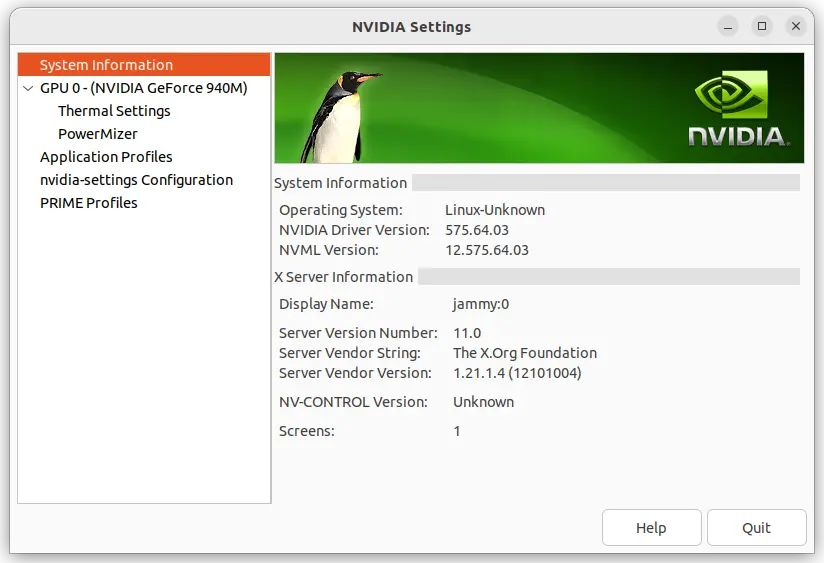
Archives For November 30, 1999

NVIDIA announced the first stable release for 550 series Linux driver this Friday. It’s NVIDIA Driver 550.54.14 released as latest production branch version.

The release brings better support for Wayland, the more security touchscreen and HiDPI friendly display server, that’s already default in Ubuntu, Fedora, and other Linux with recent GNOME Desktop. They include:

  • NVIDIA VDPAU driver for hardware video acceleration can run in XWayland.
  • Support GNOME ‘Night Light’ and KDE ‘Night Color’ features on Wayland.
  • Support for PRIME render offload to Vulkan Wayland WSI.
  • Add support for virtual reality displays, such as the SteamVR platform, on Wayland compositors support DRM leasing.
  • Fix Source 2 engine games hang on Wayland session.
  • Fix that Wayland apps sometimes run at extreme low frame rate on Maxwell, Volta, and Pascal series GPUs.
  • Fix VRR (Variable Refresh Rate) not working with Wayland.

Continue Reading…

For Ubuntu machine with NVIDIA graphics card, here’s how to implement hardware acceleration for video playback in Firefox web browser.

Firefox so far only supports VA-API for GPU decoding to offload CPU and save power. Both Intel and AMD GPUs support VA-API. However, NVIDIA so far supports the api only through the open-source Nouveau driver.

If you have only NVIDIA GPU running with proprietary driver, then hardware video acceleration does not work out-of-the-box for Firefox.

For choice, there are libvdpau-va-gl1 driver (h.264 only) or libva-vdpau-driver, but both seems no longer updated. The best choice so far is the free open-source nvidia vaapi driver.
Continue Reading…

NVIDIA announced 545.29.02 graphics driver for Linux yesterday, as a new release series for its New Feature Branch Version.

For Ubuntu 22.04 + and Fedora Workstation with default GNOME on Wayland, as well as KDE on Wayland, the new driver adds support for the CTM, DEGAMMA_LUT, and GAMMA_LUT DRM-KMS CRTC properties, which, finally make the ‘Night Light’ and ‘Night Color’ feature work for NVIDIA users.

Night Light finally works on Wayland with NVIDIA driver

For desktop GPUs, the release adds initial experimental support for runtime D3 (RTD3) power saving mode. When all the PCI functions are idle, and all required conditions are satisfied, your GPU will go to the lowest power state resulting into maximum power savings.

The new driver also added experimental support for framebuffer consoles. On kernels with implement features, nvidia-drm will install a framebuffer console when loaded with both modeset=1 and fbdev=1 kernel parameters. Though, when an nvidia-drm framebuffer console is enabled, unloading nvidia-drm will cause the screen to turn off.

Other changes in NVIDIA 545.29.02 include:

  • Experimental HDMI 10 bits per component support
  • Support for virtual reality displays
  • CERTIFIED-quality support for GeForce and Workstation GPUs to open kernelmodules.
  • Support for PRIME render offload to Vulkan Wayland WSI
  • Support for HDR signaling
  • Add support to NVIDIA VDPAU driver for running in Xwayland
  • Support EGL_ANDROID_native_fence_sync EGL extension.
  • Support VK_EXTERNAL_SEMAPHORE_HANDLE_TYPE_SYNC_FD_BIT
  • Support VK_EXTERNAL_FENCE_HANDLE_TYPE_SYNC_FD_BIT

For more about the new driver, see the official release note.

How to Install NVIDIA 545 Driver

Ubuntu will build the new driver series and publish through official system repositories. So, just wait! It will be available in “Additional Drivers” utility when it’s ready.

For those who can’t wait, the “Graphics Drivers” team PPA has made the driver package for Ubuntu 20.04, Ubuntu 22.04, and higher.

Simply, press Ctrl+Alt+T on keyboard to open terminal. Then, run command to add the PPA:

sudo add-apt-repository ppa:graphics-drivers/ppa

Finally, launch the ‘Additional Drivers’ utility for installing the new driver.

NVIDIA 520, the latest feature release of NVIDIA driver for Linux, is available to install in all current Ubuntu LTS releases.

So far, it’s NVIDIA 520.56.06 released few weeks ago with following new features:

  • Implement over-the-air (OTA )updates in the Proton and Wine NVIDIA NGX build, though needs to set “PROTON_ENABLE_NGX_UPDATER” to 1 to enable it.
  • Following extensions no longer depend on nvidia-uvm.ko at runtime:
    • VK_KHR_acceleration_structure
    • VK_KHR_deferred_host_operations
    • VK_KHR_ray_query
    • VK_KHR_ray_tracing_pipeline
    • VK_NV_cuda_kernel_launch
    • VK_NV_ray_tracing
    • VK_NV_ray_tracing_motion_blur
    • VK_NVX_binary_import
    • VK_NVX_image_view_handle
  • Fixed blank screens and hangs when starting an X server on RTX 30 series GPUs boot with HDMI.
  • Fixed a bug where Marvel’s Spider-Man Remastered would sometimes crash with Xid 13 errors on Turing and later

How to Install NVIDIA 520 in Ubuntu

NOTE: Though it’s tested and works good in my case, it might still breaks your system (usually boot into blank screen) due to various reasons (e.g., upstream bug or corrupt installation)! So don’t do it in production machine!

The driver package is available now for Ubuntu 18.04, Ubuntu 20.04, and Ubuntu 22.04. For Ubuntu 22.10 user, it’s so far in pre-released repository, though should be published soon in next few days.

1. First, it’s HIGHLY recommended to update system by launching ‘Software Updater‘ and install all available updates! And, restart your system if it asks.

2. Second, search for and open ‘Additional Drivers‘ from Activities overview screen.

3. When it opens, choose “nvidia-driver-520” from the list, and click ‘Apply Changes’ button to install the driver.

In case you don’t see the 520 driver in the list, navigate to the first ‘Ubuntu Software’ tab, and make sure the 4 repositories (main, universe, restricted, multiverse) are enabled. Finally, close and Reload, and re-open the utility.

After installation, the ‘Additional Drivers‘ utility should prompt to restart your computer to apply change.

Verify

After restarting computer, open ‘Settings‘ and navigate to ‘About‘ page to verify if your NVIDIA graphics card is in use.

And, search for and open ‘NVIDIA Settings‘ utility to for driver version, GPU switching, and other settings.

Due to bug, you can’t switch to Intel (Power Saving Mode) with the tool, you can however install an extension to do the job via system status menu option.

Install ‘Prime indicator’ for switching GPU

For Ubuntu 22.04, search for and install ‘Extension Manager‘ from Ubuntu Software app. Then, use the tool to search and install ‘Prime Inidcator’.

For Ubuntu 20.04 and Ubuntu 18.04, first open terminal (Ctrl+Alt+T) and run command to install the agent package:

sudo apt install chrome-gnome-shell

Then visit the extension web page and use the ON/OFF switch to install it:

In case you don’t see the ON/OFF switch, follow the link in that page to install browser extension and refresh.

After installing the extension, go to top-right system status menu to switch between Intel, NVIDIA, and hybrid mode.

IMPORTANT: The Extension will automatically log out once your select another GPU mode and confirm with password!!! Save your works before doing change.

This simple tutorial shows how to install the NVIDIA proprietary driver in Ubuntu 22.04 and switch between dedicated and integrated GPU.

Since Ubuntu provides the proprietary driver packages via its restricted repositories, user may install NVIDIA driver as easy as a few clicks.

Install NVIDIA Driver

1.) Firstly, click on top-left corner ‘Activities‘, and then search for and open ‘Softwre & Updates’ utility.

When the tool opens, make sure the “Proprietary drives for devices (restricted)” is enabled.

Make sure ‘restricted’ repository enabled

2.) Next, navigate to ‘Additional Drivers‘ tab. There it should list all available graphics drivers.

If it shows nothing, press Ctrl+Alt+T to open terminal and run command sudo apt update to refresh package cache. Then re-launch the ‘Software & Updates’ utility.

Choose one of the drivers from the list and click on ‘Apply Changes‘ to install it. There will be a little bar indicates the installing process. When done, restart your computer!

Switch between NVIDIA and Intel Graphics:

After restart, your machine will be on performance mode with the dedicated GPU. To switch GPU mode, search for and open ‘NVIDIA X Server Settings‘.

When the app opens, navigate to ‘PRIME Profiles‘. Then you’ll see three options available in the right:

  • NVIDIA (Performance Mode) – use dedicated NVIDIA GPU to render Ubuntu desktop.
  • NVIDIA On-Demand – use integrated graphics to render desktop, but possible to offload specific apps via dedicated GPU.
  • Intel (Power Saving Mode) – use integrated graphics to render Ubuntu desktop.

In my case, the “Intel (Power Saving Mode)” is somehow grayed out. As a workaround, choose Intel graphics card by running sudo prime-select intel in terminal.

Changing GPU mode however needs log out and back in to apply changes.

Run certain apps via NVIDIA GPU while rendering desktop via integrated graphics

By setting GPU mode to “NVIDIA On-Demand”, you may run certain apps via NVIDIA GPU, while others handled by the integrated GPU.

1.) For CUDA apps, you need to run command in terminal (Ctrl+Alt+T) to install the nvidia-cuda-toolkit package.

sudo apt install nvidia-cuda-toolkit

Then there’ll be application-specific menu to tell it which device to use.

2.) For other apps, just use the following environment variables.

__NV_PRIME_RENDER_OFFLOAD=1
__GLX_VENDOR_LIBRARY_NAME=nvidia

You can do this by launching apps from command line. For example, launch SuperTuxkart (a kart racing game) via command:

__NV_PRIME_RENDER_OFFLOAD=1 __GLX_VENDOR_LIBRARY_NAME=nvidia supertuxkart

Or, edit the application’s .desktop file which is usually under “/user/share/applications” directory. And, change the line of ‘Exec’ to:

Exec=env __NV_PRIME_RENDER_OFFLOAD=1 __GLX_VENDOR_LIBRARY_NAME=nvidia supertuxkart

Add System Menu option to Switch CPU

To make it easy to switch between your GPUs, there’s a Gnome Extension available to add options into system tray menu.

1.) To get the menu option, you need to first install the open-source EnvyControl tool. Press Ctrl+Alt+T on keyboard to open terminal, and run the command below one by one:

  • Use git command to grab the source:
    git clone https://github.com/geminis3/envycontrol.git
  • Navigate to the source folder, and install it for global use via pip package manager:
    cd envycontrol && sudo pip3 install .

If the pip3 command does not exist, run sudo apt install python3-pip command to install it.

As the project page mentioned, users have to run the following 2 commands one by one to prevent Ubuntu’s own gpu-manager from interfering:

sudo prime-select on-demand
sudo systemctl disable gpu-manager.service

2.) Next, run command to make sure you have the agent packages installed for installing Gnome Extensions:

sudo apt install chrome-gnome-shell gnome-shell-extension-prefs

3.) Finally, go to the extension page and turn on the slider icon to install it:

NOTE 1: The pre-installed Firefox does not support this stuff so far! Use another browser, or install back Firefox as classic deb package.

NOTE 2: If you don’t see the on/off switch in that page, click the ‘click here to install browser extension‘ to install extension for your web browser and refresh the page.

The menu option should appear immediately after successfully installed the extension. If not, press Windows (Super) key on keyboard or click “Activities” on top panel, and then search for and open the “Gnome Extensions” app to manage your extension.

NVIDIA graphics driver for Linux released version 465.27 a day ago with new Laptop GPUs support and a few bug-fixes.

In NVIDIA 465.27, following new GPUs are supported:

  • T600 Laptop GPU
  • T1200 Laptop GPU
  • RTX A5000 Laptop GPU
  • RTX A4000 Laptop GPU
  • RTX A3000 Laptop GPU
  • RTX A2000 Laptop GPU

There are also some fixes in the release including:

  • Fixed a bug that could prevent a system from resuming from suspend when DisplayPort activity occurred while the system was suspended.
  • Fixed a regression that prevented eglQueryDevicesEXT from correctly enumerating GPUs on systems with multiple GPUs where access to the GPU device files was restricted for some GPUs.
  • Fixed a regression that could cause system hangs when changing display resolution on SLI Mosaic configurations.
  • Fixed a bug that could result in blank displays when driving multiple displays at the same resolution using active DisplayPort dongles.

How to Install NVIDIA 465.27 in Ubuntu:

Ubuntu now builds the latest NVIDIA drivers and pushes them via its own security & updates repositories.

Just wait! It’ll be available in next few days. At that time, launch Additional Drivers utility and you’ll see the driver available to install.

If you can’t wait, go to NVIDIA website and download the .run installer package (not recommended for beginners):

NVIDIA for Linux driver 450.66 was released today as the latest long lived branch version.

NVIDIA 450.66 fixed triple buffering support of Vulkan X11 swapchains when applications are syncing to vblank.

It also added following GPUs support:

  • EIZO Quadro MED-XN31LP
  • EIZO Quadro MED-XN50LP
  • EIZO Quadro MED-XN51LP
  • EIZO Quadro MED-XN70
  • EIZO Quadro MED-XN71
  • EIZO Quadro MED-XN72
  • EIZO Quadro MED-XN90
  • EIZO Quadro MED-XN91
  • EIZO Quadro MED-XN92
  • Matrox D-Series D1450
  • Matrox D-Series D1480

How to Get Nvidia 450.66 in Ubuntu:

The “Graphics Drivers” team PPA is a reliable source that contains most recent Nvidia packages for Ubuntu. Check the PPA link before getting started as it’s not updated to 450.66 at the moment of writing.

1. To add the PPA, open terminal (Ctrl+Alt+T) and run command:

sudo add-apt-repository ppa:graphics-drivers/ppa

Type user password for sudo prompt (no asterisk feedback) and hit Enter to continue.

2. Then launch Additional Drivers utility, choose Nvidia 450 and apply changes.

Sorry I can’t see these drivers as I don’t have a discrete graphics card in my laptop :(

(Optional) To remove the PPA repository, either go to Software & Updates > Other Software, or run command:

sudo add-apt-repository --remove ppa:graphics-drivers/ppa

For Ubuntu 18.04 users plagued by screen tearing issue while using NVIDIA proprietary drivers, this quick tutorial may help you via enable PRIME Synchronization on Optimus.

Screen tearing usually happens on Ubuntu Linux laptop that uses Prime to switch between NVIDIA and Intel drivers.

1. Open terminal (either via Ctrl+Alt+T or by searching for ‘terminal’ from software launcher) and run command to create a new config file:

sudo gedit /etc/modprobe.d/nvidia-drm-nomodeset.conf

Type your password (no asterisks feedback) when it prompts and hit Enter.

2. When the file opens after running the previous command, add following line and save the file.

options nvidia-drm modeset=1

3. Finally update intramfs and reboot your machine.

sudo update-initramfs -u

To check if previous changes work after reboot, run command:

sudo cat /sys/module/nvidia_drm/parameters/modeset

It should output ‘Y’.

In addition, to get much SMOOTHER Nvidia window dragging experience, you can also do:

1. Set maximum performance in Nvidia X Server Settings -> PowerMizer.

2. If you have MORE than enough RAM, set swap tendency to a MUCH lower value by running command to edit sysctl.conf:

sudo gedit /etc/sysctl.conf

and add following 2 lines when the file opens:

via: ubuntuforums

Nvidia announced the 352.30 release of its Linux driver yesterday with GeForce 910M support and various important fixes.

Release highlights of Nvidia 352.30:

  • Fixed a bug that caused poor video post-processing performance in VDPAU when operating on a large number of video streams simultaneously.
  • Fixed a bug that could cause an Xid error when terminating a video playback application using the overlay presentation queue in VDPAU.
  • Updated nvidia-installer to avoid recursing too deeply into kernel source trees under /usr/lib/modules, mirroring an existing restriction on recursion under /lib/modules.
  • Fixed a rare deadlock condition when running applications that use OpenGL in multiple threads on a Quadro GPU.
  • Fixed a kernel memory leak that occurred when looping hardware – accelerated video decoding with VDPAU on Maxwell-based GPUs.
  • Fixed a bug that caused the X server to crash if a RandR 1.4 output provided by a Sink Output provider was selected as the primary output on X.Org xserver 1.17 and higher.
  • Fixed a bug that caused waiting on X Sync Fence objects in OpenGL to hang indefinitely in some cases.
  • Fixed a bug that prevented OpenGL from properly recovering from hardware errors or sync object waits that had timed out.

Install Nvidia 352.30 from PPA:

For Ubuntu 15.10, Ubuntu 15.04, Ubuntu 14.04 and derivatives (e.g., Linux Mint 17.x, and Elementary OS Freya), the new driver can be easily installed from an PPA repository:

1. To add the PPA, open terminal from the Dash/Launcher/Ctrl+Alt+T. When it opens, run command:

sudo add-apt-repository ppa:graphics-drivers/ppa

2. After adding the PPA, install nvidia-352 package via Synaptic Package Manager or upgrade from previous release through Software Updater. Or run below commands one by one in terminal:

sudo apt-get update

sudo apt-get install nvidia-352 nvidia-352-uvm nvidia-settings

For the official binaries, go to www.nvidia.com/object/unix.html

Nvidia Graphics Driver for Linux has just released version 340.58 with new GPUs support and a few bug fixes.

The latest long lived branch release Nvidia 340.58 was released this Wednesday with below changes:

  • Added support for the following GPUs:
    • GeForce GT820M
    • GeForce GTX 760A
    • GeForce GTX 850A
    • GeForce 810A
    • GeForce 820A
    • GeForce 840A
  • Fixed a bug that could cause VT-switching to fail following a suspend, resume, and driver reload sequence.
  • Fixed a bug that caused incorrect colors to be displayed on X screens running at depth 8 on some GPUs.
  • Fixed a bug that prevented GPUs from being correctly recognized in MetaMode strings when identified by UUID.
  • Implemented support for disabling indirect GLX context creation using the -iglx option available on X.Org server release 1.16 and newer.  Note that future X.Org server releases may make the -iglx option the default. To re-enable support for indirect GLX on such servers, use the +iglx option.
  • Added the “AllowIndirectGLXProtocol” X config option. This option can be used to disallow use of GLX protocol. See “Appendix B. X Config Options” in the README for more details.

How to Install / Upgrade to Nvidia 340.58:

The Xorg-Edgers PPA provides the binary packages of the driver for Ubuntu 14.10, and Ubuntu 14.04.

Press Ctrl+Alt+T on keyboard to open terminal. When it opens, run the commands below one by one:

sudo add-apt-repository -y ppa:xorg-edgers/ppa

sudo apt-get update

sudo apt-get install nvidia-340

Above commands will add the PPA and install the new driver. After that, restart your computer to take effect.

If for some reason, the new driver does not work properly. Open terminal or log into command console (Ctrl+Alt+F2), run below commands to install ppa-purge and purge the PPA:

sudo apt-get install ppa-purge

sudo ppa-purge ppa:xorg-edgers/ppa

Above commands should remove Nvidia Driver 340.58 and revert your graphics driver to original.