
![]()
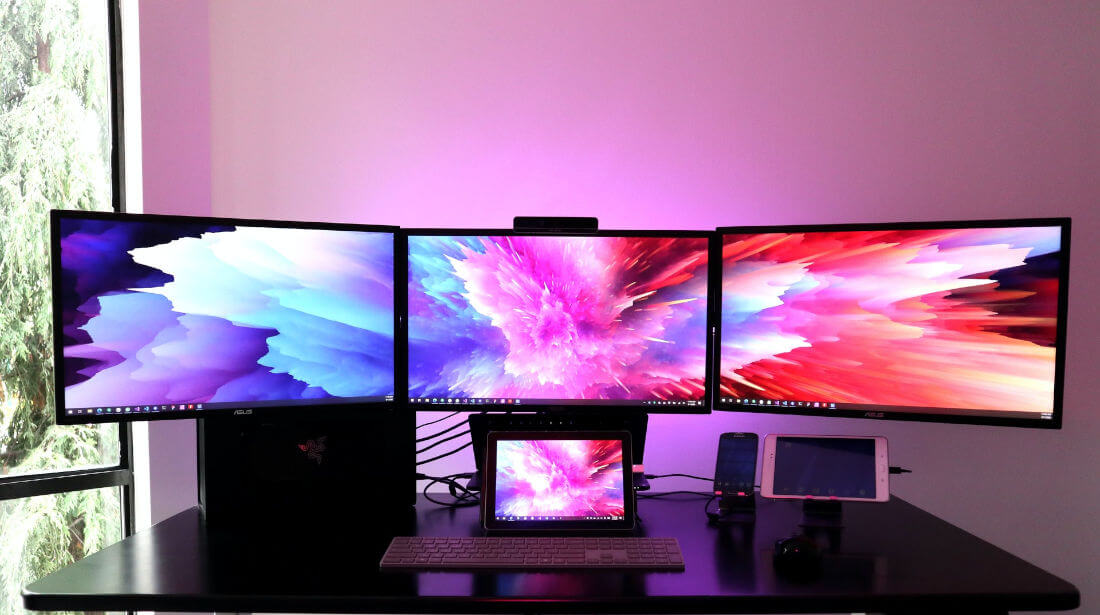
Working with multiple computers at your desk? To make it clean, you can use single mouse and keyboard to control all the machines via Barrier.
Barrier is a free and open-source solution forked from Synergy. It makes it easy to share mouse & keyboard, over local network, between machines running Windows, Linux, Mac OS, FreeBSD. Either wired, wireless, or laptop’s built-in keyboard and touchpad can be shared with the software.
NOTE: This tutorial is tested in following machines:
- Two Windows 10 machines, both wired network – working so far so good!
- Ubuntu 22.04 (server, wireless network), and Windows PC (wired network) – sometimes works, sometimes NOT
1. How to Install Barrier
Barrier is a popular software that most Linux Distros have it in the main repositories. So you can install it in Linux either via system package manager or Distro’s own command line installer (e.g., apt install, dnf install, and pacman -S)
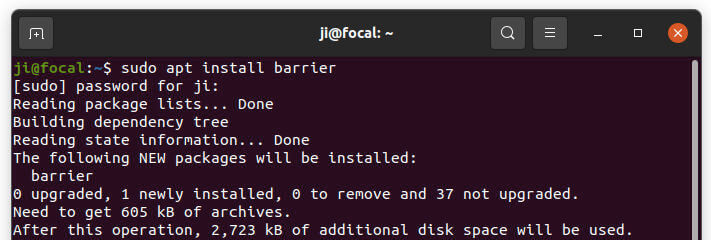
For Ubuntu 20.04/22.04 & higher, Linux Mint 20/21, and current Debian releases, open terminal and run command to install it:
sudo apt install barrier
Since Ubuntu 20.04 has version 2.3.2, you can alternatively install most recent version using the Flatpak or Snap package.
For Windows and Mac OS, the latest packages are available to download at the link below:
2. Setup Barrier server and client.
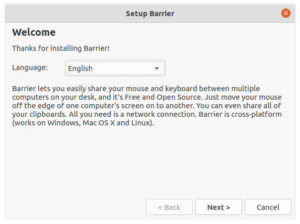
After installed Barrier in all the machines, launch it, choose your language and then select either Server or Client.

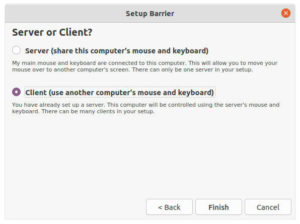
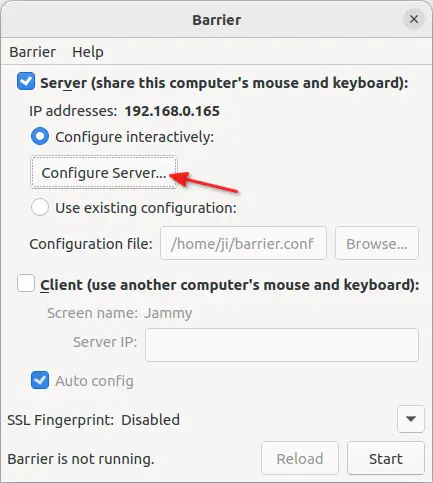
Select “Server” on the machine that connected with the mouse and keyboard. And all others set to “Client”.
Setup the server.
On the server computer, click on “Configure Server…” button.
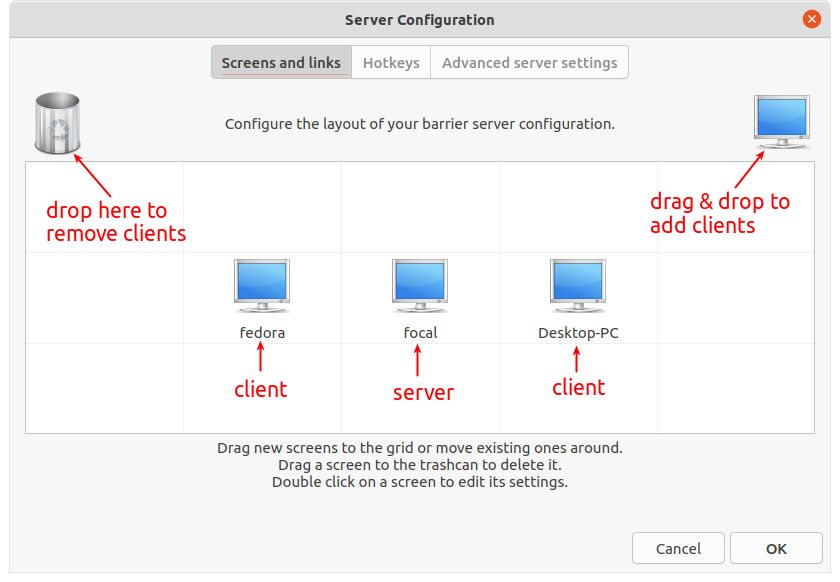
In the screen configuration page, you have to drag and drop small “computer” icon into the grid to add clients.
- The center one is the current server screen.
- Drag & drop ‘computer’ icon to create client screens.
- Double-click to rename client screen name (according to the name show in Barrier app in client machines).
- Move client screens around the server (left, right, top, bottom) as you prefer.
In the case (as picture shows), when I move the mouse cursor to the left screen edge in server, the mouse & keyboard will take control of “fedora” machine. In “fedora”, move to the right screen edge will go back to server machine.
As well, move the cursor to the right edge in server will go to “Desktop-PC”.
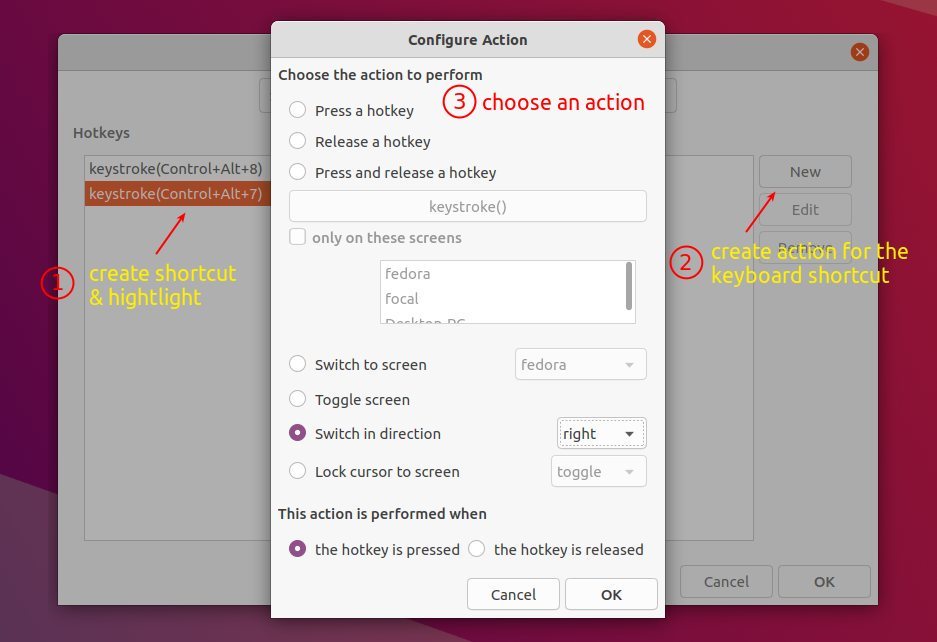
In the “Hotkeys” tab, you can configure keyboard shortcut to switch screens.
- First click ‘New’ and create a shortcut key.
- Second highlight the key you created.
- Click ‘New’ in right to specify an action to perform.
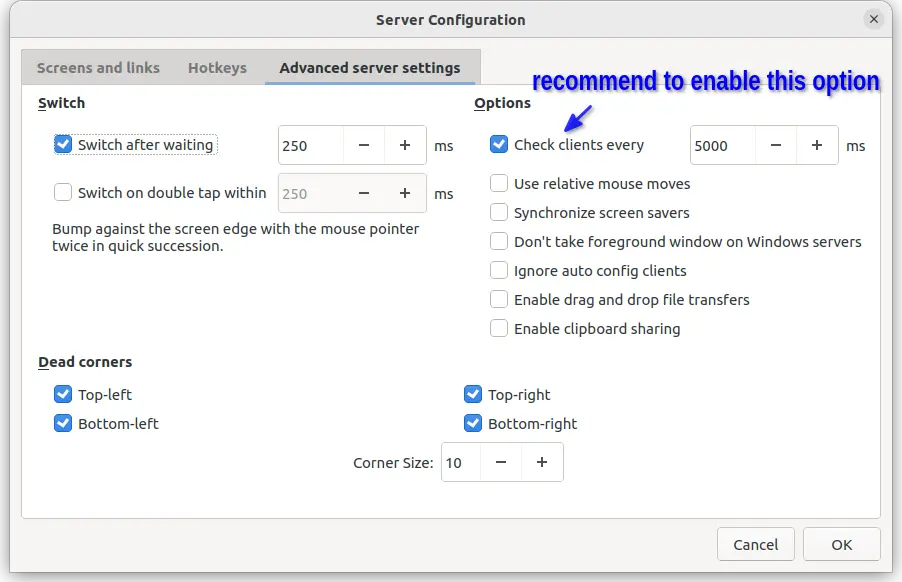
And you can get optional settings in the ‘Advanced server settings’ page. They include:
- switch time delay.
- dead corners.
- transfer and share files between machines.
Setup the client.
It’s easy to configure the clients since it supports ‘auto config’. Just click start, it will automatically connect to the server if available, and prompt you to trust the fingerprint if SSL enabled.
By disabling ‘Auto config’, you can type server IP manually. And a dialog will pop-up indicates you connected successfully.

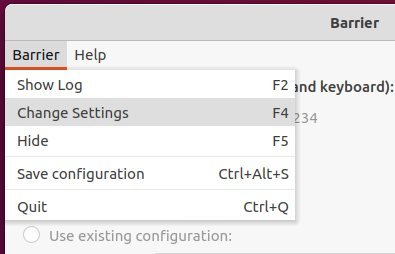
For connecting issues, check the log from menu. As well, you can change the listening port, toggle SSL via settings menu.
NOTE: for better working, try disable “Enable SSL” in both server and clients machines.
3. Start Sharing
After setup both server and clients, click ‘Start’ button in both machines. Then, try moving mouse cursor to screen edge to switch machine, or use the keyboard shortcut you set.


