Archives For Ubuntu 13.10

This quick tutorial is going to show you how to install Subsonic music streamer 4.8 in Ubuntu 13.10 Saucy Salamander & Linux Mint 16 Petra via getdeb repository.

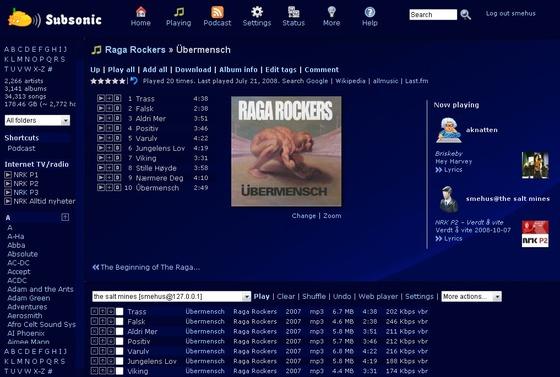
As you may know, Subsonic is a free, web-based media streamer, providing ubiquitous access to your music. Use it to share your music with friends, or to listen to your own music while at work. You can stream to multiple players simultaneously, for instance to one player in your kitchen and another in your living room.

Subsonic is designed to handle very large music collections (hundreds of gigabytes). Although optimized for MP3 streaming, it works for any audio or video format that can stream over HTTP, for instance AAC and OGG. By using transcoder plug-ins, Subsonic supports on-the-fly conversion and streaming of virtually any audio format, including WMA, FLAC, APE, Musepack, WavPack and Shorten.
subsonic ubuntu 13.10

Install Subsonic:

1. Press Ctrl+Alt+T on your keyboard to open terminal. When it opens, run 2 commands to add getdeb repository:

wget http://archive.getdeb.net/install_deb/getdeb-repository_0.1-1~getdeb1_all.deb

sudo dpkg -i getdeb-repository_0.1-1~getdeb1_all.deb

For Linux Mint, there’s an option under ‘Software & Sources -> Additional repositories’ allows to easily enable / disable this repository.

2. Use synaptic package manager to install Subsonic. Or run commands below instead:

sudo apt-get update; sudo apt-get install -y subsonic

How to install Songbird in Ubuntu 13.10 Saucy

Published: October 13, 2013 — Last updated: April 4, 2019

songbird ubuntu 13.10

This quick tutorial is going to show beginners how to install songbird music player in Ubuntu 13.10 Saucy Salamander & Linux Mint 16 Petra.

Songbird for Linux has discontinued, but the v2.0 is still available in GetDeb repository for Ubuntu 13.10 Saucy and its derivatives.

To get started installing this web player, first click the link below to download the DEB:

Download GetDeb package

Then double-click to install the package via pop-up Ubuntu Software Center. It’ll add the get repository to your system.

For Linux Mint 16, there’s an option in ‘Software & Sources -> Additional repositories’ to enable the repository.

After added the repository, use synaptic package manager to install Songbird. Or run below commands in terminal (Ctrl+Alt+T):

sudo apt-get update; sudo apt-get install songbird

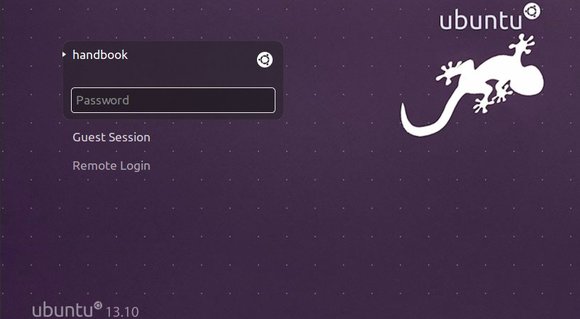
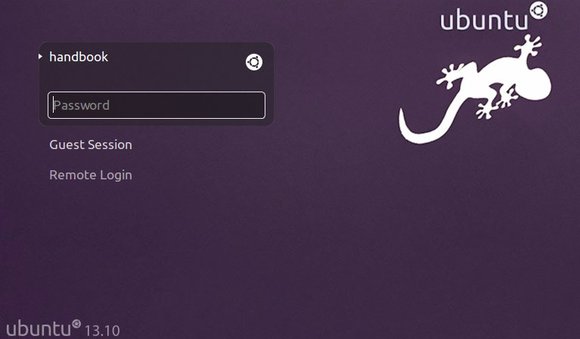
There’re lots of white dots on default LightDM login screen, which is quite annoying. This quick tip shows you how to remove them in Ubuntu 13.10 Saucy.

See the screenshot before and after:

login screen with white dots

login screen with white dots

login screen without white dots

login screen without white dots

To get started:

Press Ctrl+Alt+T on your keyboard to open terminal. When it opens, run:

1. Run command to allow user lightdm to create a connection to the X server:

sudo xhost +SI:localuser:lightdm

2. Then switch to user lightdm in the terminal window.

sudo su lightdm -s /bin/bash

3. Finally set draw grid (white dots) feature to false:

gsettings set com.canonical.unity-greeter draw-grid false

That’s it.

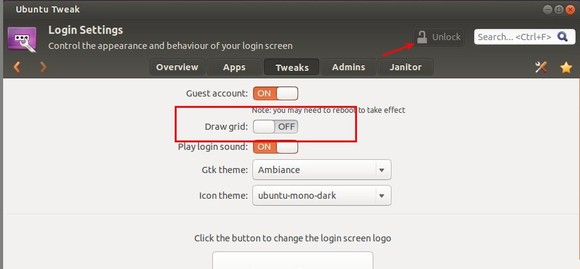
If you’re not comfortable with command console. You can use Ubuntu-Tweak, it has an option to turn off this feature under Tweaks -> Login Settings -> unlock -> turn off draw grid.

ubuntu-tweak-remove-white-dots

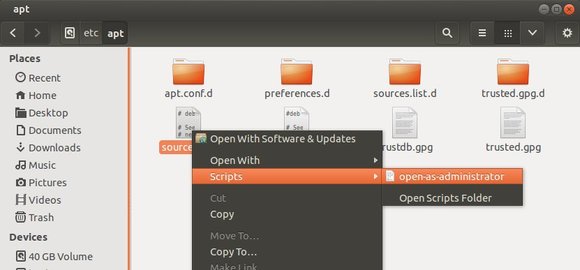
This quick tip is going to show beginners how to add ‘open as administrator’ or ‘open as root’ into Nautilus context menu in Ubuntu 13.10 Saucy.

With this feature enabled, you can quickly open files and folders in Nautilus with root (super user) privilege. This also works on Linux Mint 16 Petra if you’re using Nautilus 3.8.x.

Open as Administrator ubuntu 13.10

To get started:

1. Open Ubuntu Software Center, search for and install gksu. It allows graphical programs to ask a user’s password to run program as root / administrator.

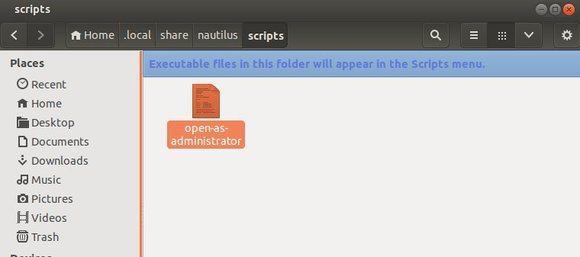
2. Open Nautilus file browser, press Ctrl+H to view hidden files & folders. Navigate to USER Home -> .local -> share -> nautilus -> scripts.

Create an empty document under this directory named ‘open-as-administrator’

create open as administrator

3. Open this file with Gedit, copy and paste following codes into the file and save.

#!/bin/bash
#
# this code will determine exactly the path and the type of object,
# then it will decide use gedit or nautilus to open it by ROOT permission
#
# Determine the path
if [ -e -n $1 ]; then
obj="$NAUTILUS_SCRIPT_SELECTED_FILE_PATHS"
else
base="`echo $NAUTILUS_SCRIPT_CURRENT_URI | cut -d'/' -f3- | sed 's/%20/ /g'`"
obj="$base/${1##*/}"
fi
# Determine the type and run as ROOT
if [ -f "$obj" ]; then
gksu gedit "$obj"
elif [ -d "$obj" ]; then
gksu nautilus "$obj"
fi

exit 0

4. Right-click on this file, go to Properties -> Permissions tab. Check the box which says ‘Allow executing file as program’.

Log out and back in, or restart Nautilus by nautilus -q command. Done.

cinelerra ubuntu 13.10

This tutorial is going to show beginners how to install Cinelerra-CV Video Editor in Ubuntu 13.10 Saucy or Linux Mint 16 Petra.

Cinelerra-CV is the community version of Cinelerra which adds new enhancements to the official source code. So far, the latest is version 2.2 and it’s available in PPA for Ubuntu 13.10 Saucy, Ubuntu 13.04 Raring, Ubuntu 12.10 Quantal, Ubuntu 12.04 Precise, Ubuntu 10.04 Lucid and their derivatives.

Install Cinelerra via PPA:

To get started, hit Ctrl+Alt+T on your keyboard to open terinal. When it opens, run command to add the PPA:

sudo add-apt-repository ppa:cinelerra-ppa/ppa

Then update package lists on your system:

sudo apt-get update

Finally install the package:

sudo apt-get install cinelerra-cv

If you’d like to install the official version of cinelerra, download the Debs from this page.

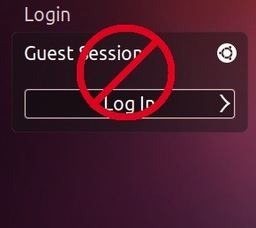
disable guest ubuntu 13.10

This quick tip is going to show beginners how to disable the Guest session from Ubuntu 13.10 Saucy LightDM Login Screen.

Guest Session comes default in Ubuntu Unity, which anyone can log into from the login screen without password. You can easily remove it by the steps below:

1.) Press Ctrl+Alt+T on your keyboard to open terminal. When it opens, copy and paste below code and hit Enter.

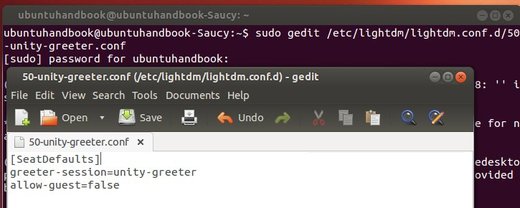
sudo gedit /etc/lightdm/lightdm.conf.d/50-unity-greeter.conf

2.) It opens the config file. All you need to do is add below line into the file and click save.

allow-guest=false

remove guest ubuntu 13.10

The changes will take effect when you restart your computer. Enjoy!

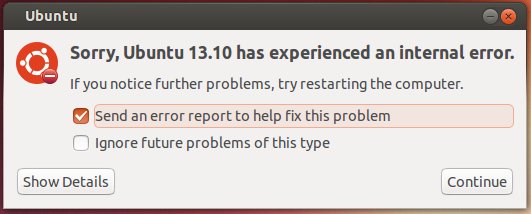
Ubuntu error reporting

If something goes wrong in Ubuntu Unity, you usually get the error dialog which says ‘Sorry, Ubuntu 13.10 has experienced an internet error’

This helps Ubuntu gather information about issues and create a fix for them. If it annoys you, this tutorial will show you how to easily turn it off.

Ubuntu Error Reporting

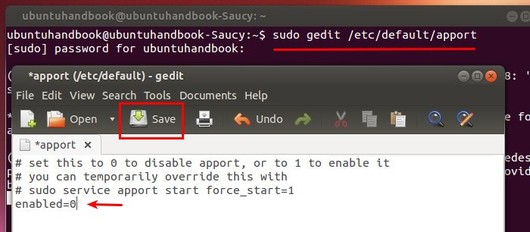
To get started, press Ctrl+Alt+T on your keyboard to open terminal. When it opens, run command to edit the config file:

sudo gedit /etc/default/apport

Change the value to 0 to disable (1 to enable) this feature.

disable error reporting

That’s it. Enjoy!

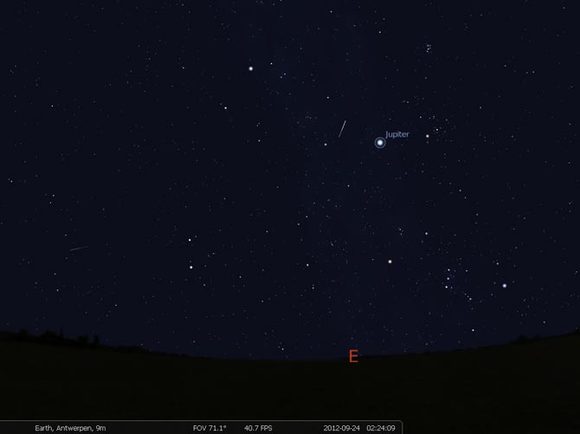
stellarium planetarium

This tutorial is going to show you how to install Stellarium in Ubuntu 13.10 Saucy Salamander via PPA.

Stellarium is a free open source planetarium for your computer. It shows a realistic sky in 3D, just like what you see with the naked eye, binoculars or a telescope.

stellarium ubuntu

Features:

sky

  • default catalogue of over 600,000 stars
  • extra catalogues with more than 210 million stars
  • asterisms and illustrations of the constellations
  • constellations for 15 different cultures
  • images of nebulae (full Messier catalogue)
  • realistic Milky Way
  • very realistic atmosphere, sunrise and sunset
  • the planets and their satellites

interface

  • a powerful zoom
  • time control
  • multilingual interface
  • fisheye projection for planetarium domes
  • spheric mirror projection for your own low-cost dome
  • all new graphical interface and extensive keyboard control
  • telescope control

visualisation

  • equatorial and azimuthal grids
  • star twinkling
  • shooting stars
  • eclipse simulation
  • supernovae simulation
  • skinnable landscapes, now with spheric panorama projection

customizability

  • plugin system adding artifical satellites, ocular simulation, telescope configuration and more
  • ability to add new solar system objects from online resources
  • add your own deep sky objects, landscapes, constellation images, scripts…

The latest release 0.12.4 fixed:

  • crash Stellarium 0.12.3 (Ocular)
  • Render nighttime landscapes without lighting

To install Stellarium in Ubuntu, press Ctrl+Alt+T on your keyboard. When it opens, run below commands one by one:

sudo add-apt-repository ppa:stellarium/stellarium-releases

sudo apt-get update

sudo apt-get install stellarium

This quick tip is going to show beginners how to enable workspaces and add ‘show desktop’ shortcut icon on Unity Launcher in Ubuntu 13.10 Saucy.

Ubuntu 13.10 Saucy Salamander final is to be released on October 17th. Now it’s in beta 2.

By default, the Unity session only provide one working desktop. You can easily enable multi workspaces by following steps:

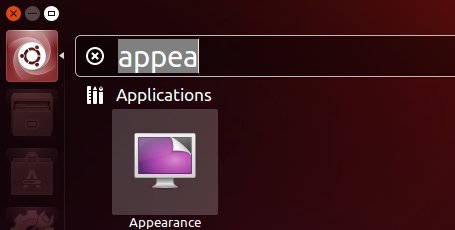
1.) Go to Unity Dash. Search for and open Appearance utility.

ubuntu appearance

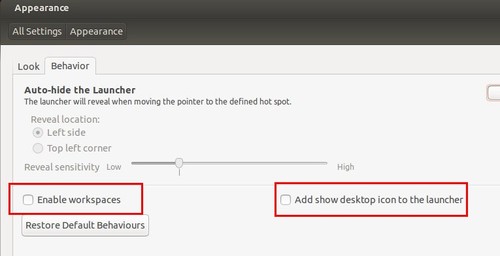
2.) When it opens, navigate to Behavior tab. Check the box which says “Enable Workspaces”, then you’ll get a shortcut icon on Unity Launcher which provides the ability to show and switch between workspaces.

enable workspaces unity

As well as that, check the box “Add show desktop icon to the launcher”.

How to Upgrade to Ubuntu 13.10 Saucy from Ubuntu 13.04 Raring

Published: September 28, 2013 — Last updated: October 8, 2013

ubuntu 13.10 saucy salamander

Ubuntu 13.10 Saucy Salamander Final is to be released on October 17th. Now it’s in beta stage.

This tutorial is going to show you how to upgrade your Ubuntu 13.04 Raring Ringtail to Ubuntu 13.10.

Before getting started:

Before you getting started any upgrade process, you need to do:

1.) Backup your important files, documents, bookmarks.

2.) If you’ve installed proprietary drivers manually directly from the manufacturers website then the recommendation is to remove these drivers first and revert to the open-source drivers before upgrading.

3.) Purge third-party PPAs via ppa-purge. Press Ctrl+Alt+T on your keyboard to open terminal. When it opens, run command to install ppa-purge:

sudo apt-get install ppa-purge

Then remove any ppa as well as downgrade installed packages. For example, purge ubuntu-x-swat ppa:

sudo ppa-purge ubuntu-x-swat/x-updates

You can use Y PPA Manager to add/remove/purge your PPAs on Ubuntu.

Upgrade to Ubuntu 13.10:

To get started upgrading process:

1.) Update system:

sudo apt-get update; sudo apt-get dist-upgrade

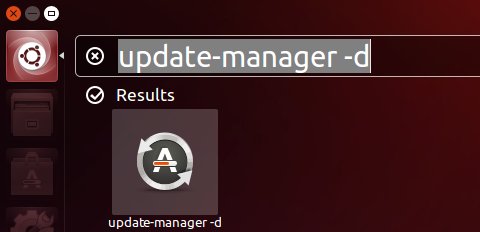
2.) Press Alt+F2 key combination on your keyboard, type in update-manager -d and open it.

update manager

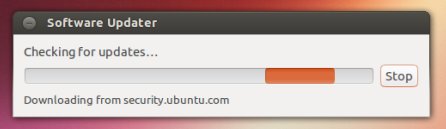
3.) The software-updater is checking for updates and then downloading repository information.

dow

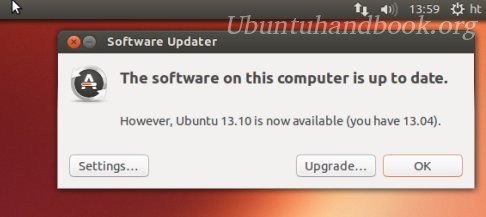
4.) Once done, you’ll see below window where it says “However, Ubuntu 13.10 is now available (you have 13.04)”. Click on Upgrade button and the instructions afterwards.

Upgrade to Ubuntu 13.10