Archives For November 30, 1999

Want to add icons in Ubuntu context menus, window menus and buttons? Well, it’s very easy because Ubuntu by default provides an option to enable / disable them.

All you need to do is follow the steps below. Works on Ubuntu 12.04, Ubuntu 12.10, Ubuntu 13.04, Ubuntu 13.10, Ubuntu 14.04 Unity Desktop.

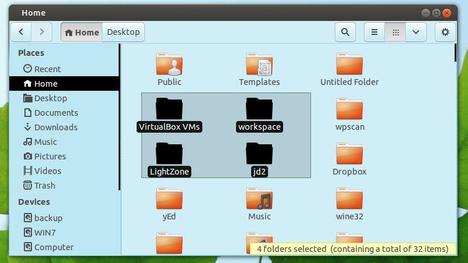
First take a look at result:

Ubuntu menu and button have icons

Ubuntu menu and button have icons

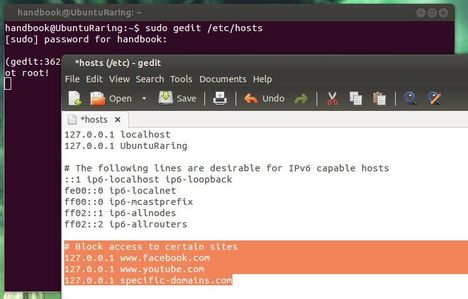
Method 1: If you’re familiar with Linux commands, press Ctrl+Alt+T to open terminal and run commands below:

To enable menu have icons, run:

gsettings set org.gnome.desktop.interface menus-have-icons true

To enable button have icons, run:

gsettings set org.gnome.desktop.interface buttons-have-icons true

Replace the value true with false in previous commands to disable them again if you want.

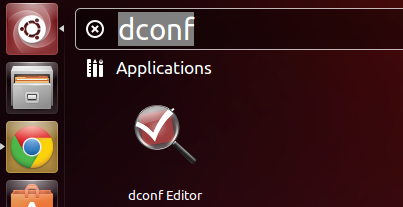
Method 2: Need a graphical interface? Well, search for and install dconf editor or dconf-tools in Ubuntu Software Center.

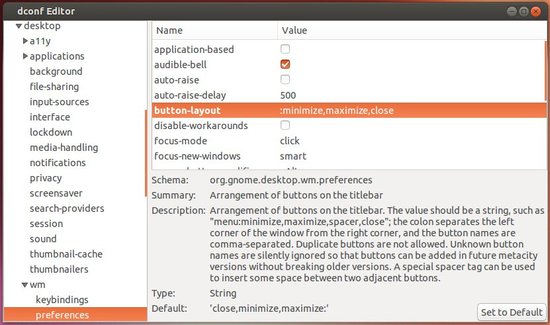
Then open it from Unity Dash, navigate to org/gnome/desktop/interface. Check on the boxes after button-have-icons and menu-have-icons in right and that’s it.

enable menu have icons via dconf editor

This quick tutorial is going to show you how to display or re-hide ‘hidden’ startup applications in Ubuntu 13.10 Saucy Salamander.

There’s a built-in utility in Ubuntu, which allows to add, remove, and edit additional startup applications. By default the system auto-start services are hidden, here’s how to show it in the box.

Before:

no apps in startup applications utility in ubuntu 13.10

After:

show hidden apps in startup applications

To get started, press Ctrl+Alt+T on your keyboard to open terminal. When it opens, run command below:

sudo sed -i 's/NoDisplay=true/NoDisplay=false/g' /etc/xdg/autostart/*.desktop

Then re-open the utility and you’ll see all ‘hidden’ apps.

If you just want to change some settings and then hide them again, run this command in terminal:

sudo sed -i 's/NoDisplay=false/NoDisplay=true/g' /etc/xdg/autostart/*.desktop

That’s it. Enjoy!

This simple tutorial shows you how to change the hostname (also known as computer name) in Ubuntu 21.10 Impish Idri.

The computer name is a unique identifier given to each computer. It’s not a big deal for small home networks or single use home computers. It matters however in larger organizations where you need to be able to identify servers. The name is a single word with no spaces, it has only letters, numbers or a hyphen with up to 253 characters.

The default name was set during installing the Ubuntu system. You can however change it at anytime as you want. And here’s the universal way to do the trick in either Ubuntu desktop or server editions.

Tutorial Objectives:

  • Change Computer Name / Hostname in Ubuntu 21.10
  • Enjoy!

Change computer name until reboot:

To get started, first either connect to your Ubuntu server or open terminal by pressing Ctrl+Alt+T on keyboard or searching from the overview screen. When it opens, run command:

sudo hostname NEW_NAME

Replace ‘NEW_NAME’ in command with your desired computer name. And it will take place until reboot.

NOTE: the new name takes effect immediately but not visible until you start a new terminal window.

Change computer name permanently:

In most Linux distributions, you can edit the “/etc/hostname” configuration file to set new computer name.

1.) To do so, open terminal from start menu or connect to the command console of remote server, then run command:

sudo nano /etc/hostname

This command will edit the config file via nano, the universal command line text editor. You may replace it with your favorite text editor, such as gedit for GNOME desktop.

When the file opens, delete the old name and type a new one. And press Ctrl+X, then type y, and hit Enter to save changes!

2.) It’s important to edit /etc/hosts file to map the new name to 127.0.1.1 and/or the permanent IP address if any.

sudo nano /etc/hosts

NOTE: you have to set same name in both /etc/hosts and /etc/hostname to avoid networking issues. And save file by pressing Ctrl+X, type y, and hit Enter.

Finally reboot to apply change and enjoy!

There’re lots of white dots on default LightDM login screen, which is quite annoying. This quick tip shows you how to remove them in Ubuntu 13.10 Saucy.

See the screenshot before and after:

login screen with white dots

login screen without white dots

To get started:

Press Ctrl+Alt+T on your keyboard to open terminal. When it opens, run:

1. Run command to allow user lightdm to create a connection to the X server:

sudo xhost +SI:localuser:lightdm

2. Then switch to user lightdm in the terminal window.

sudo su lightdm -s /bin/bash

3. Finally set draw grid (white dots) feature to false:

gsettings set com.canonical.unity-greeter draw-grid false

That’s it.

If you’re not comfortable with command console. You can use Ubuntu-Tweak, it has an option to turn off this feature under Tweaks -> Login Settings -> unlock -> turn off draw grid.

This tutorial is going to show you how to enable hardware acceleration on Intel graphics cards using VDPAU driver.

VDPAU is an open-source library and API allows to video programs to offload portions of the video decoding process and video post-processing to the GPU video-hardware. If VDPAU available, CPU usage can be significantly lower.

Applications that uses VDPAU:

  • Avidemux as of version 2.6
  • Boxee
  • GStreamer
  • MPlayer
  • MythTV
  • XBMC Media Center
  • XBMC Live
  • Xine
  • MLT
  • Adobe Flash 10.2 Stage Video and later versions (32-bit only presently)
  • VLC media player 2.1

VDPAU is not available on Intel graphics cards. Fortunately, there’s an open-source project called libvdpau-va-gl, which is a VDPAU driver that uses OpenGL under the hood to accelerate drawing and scaling, and VA-API (if available) to accelerate video decoding. You can use it on some Intel chips.

Install libvdpau-va-gl via PPA on Ubuntu

Press Ctrl+Alt+T on your keyboard to open terminal. When it opens, run below commands one by one (Supports Ubuntu 13.10, 13.04, 12.10, 12.04).

sudo add-apt-repository ppa:nilarimogard/webupd8
sudo apt-get update
sudo apt-get install libvdpau-va-gl1

To install the VAAPI drivers for Intel HD Graphics:

sudo apt-get install i965-va-driver

To launch an application with the driver, for example, launch firefox:

VDPAU_DRIVER=va_gl firefox

To force Adobe Flash to use the hardware acceleration:

sudo mkdir -p /etc/adobe
echo "EnableLinuxHWVideoDecode=1" | sudo tee /etc/adobe/mms.cfg
echo "OverrideGPUValidation=1" | sudo tee -a /etc/adobe/mms.cfg

To enable the driver for system-wide (not recommended):

sudo sed -i "s/^# \[/\[/g" /etc/X11/Xsession.d/20vdpau-va-gl
sudo sed -i "s/^# export/ export/g" /etc/X11/Xsession.d/20vdpau-va-gl

via: libvdpau-va-gl on Github | webupd8

This quick tip is going to show beginners how to enable workspaces and add ‘show desktop’ shortcut icon on Unity Launcher in Ubuntu 13.10 Saucy.

Ubuntu 13.10 Saucy Salamander final is to be released on October 17th. Now it’s in beta 2.

By default, the Unity session only provide one working desktop. You can easily enable multi workspaces by following steps:

1.) Go to Unity Dash. Search for and open Appearance utility.

2.) When it opens, navigate to Behavior tab. Check the box which says “Enable Workspaces”, then you’ll get a shortcut icon on Unity Launcher which provides the ability to show and switch between workspaces.

As well as that, check the box “Add show desktop icon to the launcher”.

How to move window buttons to right in Ubuntu 13.10

Last updated: September 27, 2013

Ubuntu 13.10 Saucy Salamander is going to be released on October 17th. I’ve installed the final beta on my laptop. If you’re not comfortable with Ubuntu’s default window title buttons (minimize, maximize, close) location, you can easily move them to right via following steps.

1.) Go to Unity Dash, search for and open Dconf Editor. If not exist, install it from Ubuntu Software Center.

2.) When it opens, navigate to org -> gnome -> desktop -> wm -> preferences.

3.) Change the value of button-layout to:

:minimize,maximize,close

That’s it. Enjoy!

This simple tutorial will show you how to disable the mouse-over tooltip messages in Ubuntu 13.04 Raring and Ubuntu 13.10 Saucy using CCSM.

It’s easy to do it using the CompizConfig Settings Manager by setting totally transparent tooltips. So that you can see them. NOTE: This method won’t work for the tooltips for Unity Launcher.

To get started, install CCSM in Ubuntu Software Center. You don’t have to do something special, just search for and install CompizConfig Settings Manager. Then you can open it from Unity Dash.

Open CCSM, click on ‘Opacity, Brightness and Saturation’ to go to its configuration page. Then enable this plugin, click new to add a rule, type in Tooltip and set the value to 0 and finally close it.

That’s it. To restore, just remove the rule in the plugin’s configuration page. Enjoy!

This simple tutorial shows you how to change the Nautilus file browser and other apps’ background & selected color if you’re boring with the default colors in Ubuntu 13.04 Raring.

It can be easily done in Nautilus 3.4.x and 3.6.x via Dconf Editor. So this tutorial will also work for Ubuntu 12.10 Quantal and Ubuntu 12.04 Precise.

In the screenshots below, I changed the background color to sky blue and selected color to black.

To do it, open Dconf Editor from Unity Dash. Navigate to org/gnome/desktop/interface, add or change the value of gtk-color-scheme. So that you can change the background color, tooltips color, text color, etc.

bg_color:#C4E5F6;selected_bg_color:#000000;base_color:#888888;tooltip_fg_color:#ffffff;tooltip_bg_color:#ffffff;text_color:#000000

To restore, just remove what you added. Enjoy!

Want to block access to certain websites from your machine running Ubuntu or Linux Mint? It’s easy to do it by editing the host file.

With the hosts file, you can tell Ubuntu to redirect the specific websites to 127.0.0.1. So that the web browser returns below error:

To do so, edit the /etc/hosts with your favorite editor. Press Ctrl+Alt+T on your keyboard to open terminal. When it opens, run below command to edit the hosts via gedit:

sudo gedit /etc/hosts

Add below lines to the end of the file. Exclude the “http://” and change the domain names.

# block access to certain sites
127.0.0.1 www.websites1.com
127.0.0.1 www.websites2.com
127.0.0.1 websites3.com
127.0.0.1 morewebsites.com

Save the file and re-launch your web browser. Done.