Ubuntu 22.04 Jammy Jellyfish now is in final beta stage! Here’s how you can upgrade to the new LTS from Ubuntu 20.04!
NOTE: the steps below now will upgrade to Ubuntu 22.04 Beta at the moment. Though, the beta will be upgraded to the final stable release automatically in next month by running regular updates.
What’s New in Ubuntu 22.04:
The new Ubuntu 22.04 LTS features Linux Kernel 5.15 and GNOME 42 desktop. It’s a long term support release with 5 years support. The Final Beta was announced with changes including:
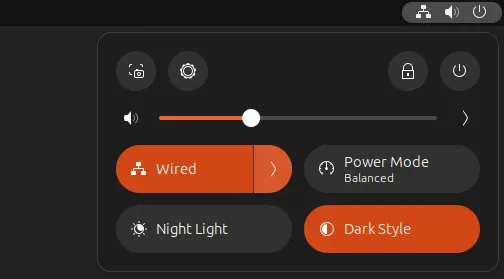
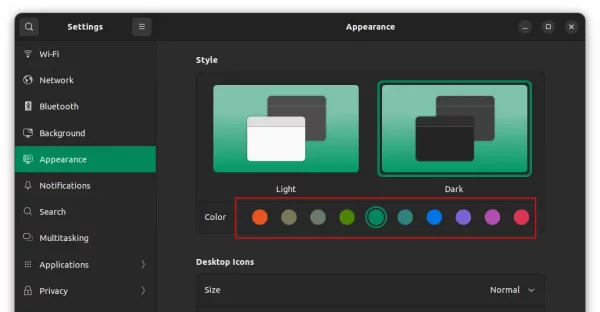
- Full dark/light mode via appearance settings.
- 10 accent colors.
- New screenshot UI (press Print-Screen to start it).
- Switch Firefox to Mozilla’s Snap package.
- Defaults to Wayland compare to Ubuntu 20.04.
- LibreOffice 7.3, Thunderbird 91.
- Python 3.10, Ruby 3.0, Mesa 22, PulseAudio 16, CUPS 2.4, PostgreSQL 14.2
- See release note for more.
Preparation:
Before getting started, there are some things need to do first! They are important to prevent upgrade failure.
1.) Backup! Backup! Backup! The upgrade process may fail due to different reasons. So, it’s important to back your data, bookmarks, etc.
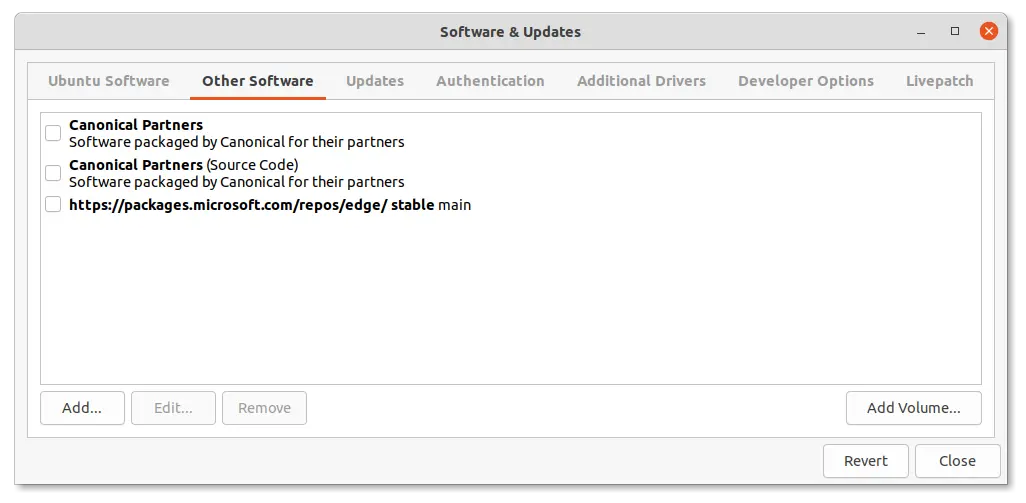
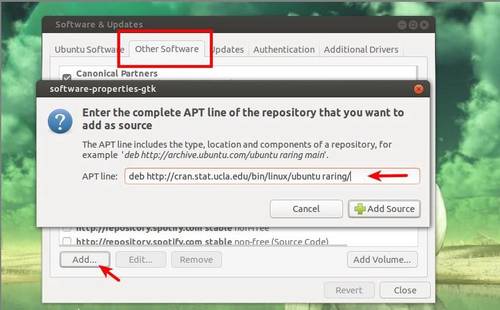
2.) Disable third-party PPAs. This can be done by launching ‘Software & Updates’ utility and navigate to ‘Other Software’ tab.
If possible, I’d recommend to purge PPAs which also downgrade these third-party software packages. Especially for ffmpeg, mesa, etc.
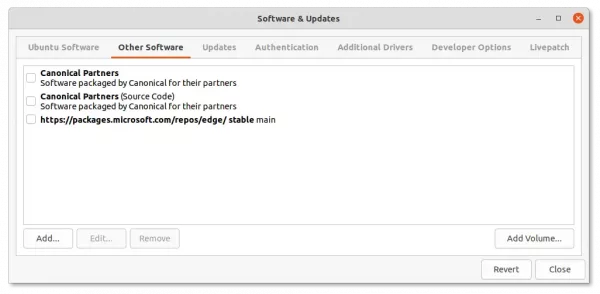
Disable or remove 3 party PPAs
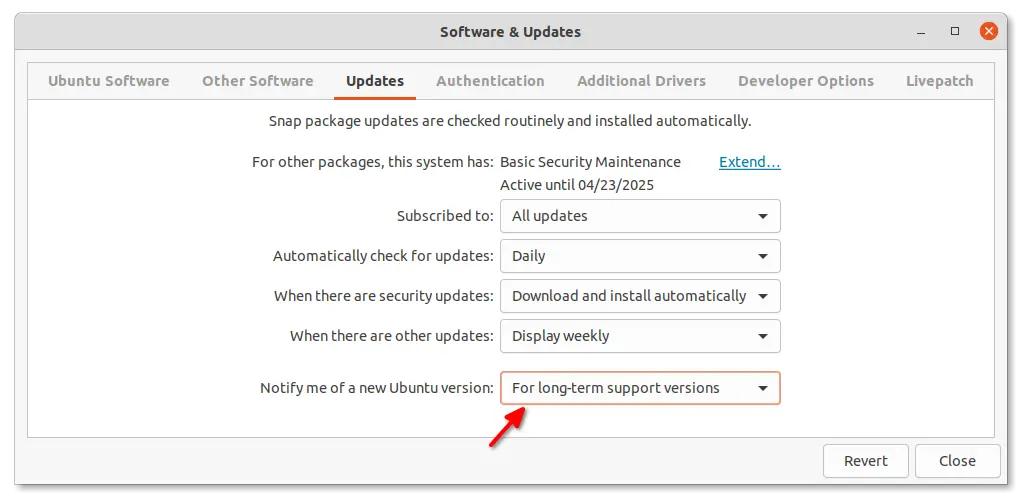
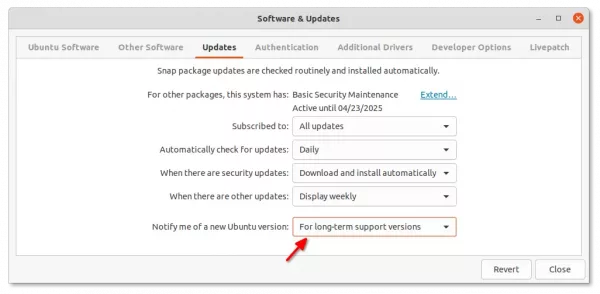
3.) Also in ‘Software & Updates’ tool, navigate to ‘Updates’ tab. There choose ‘Notify me of a new Ubuntu version: For long term support versions‘.
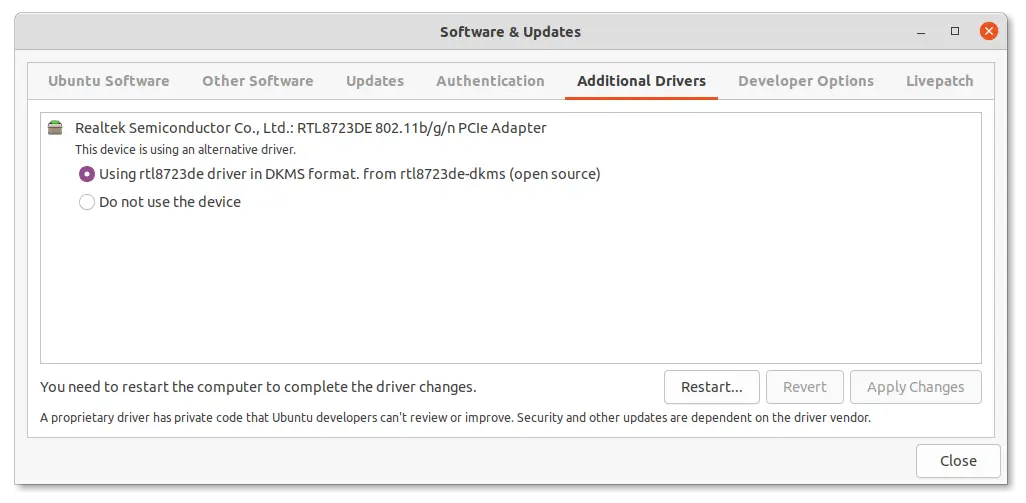
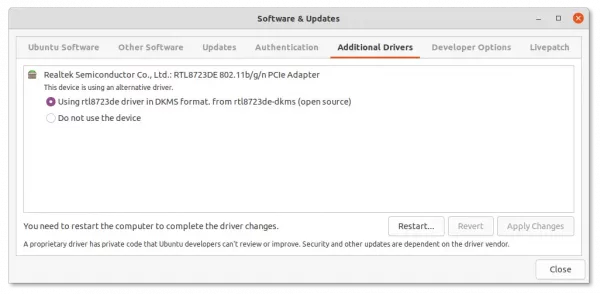
4.) Remove proprietary drivers from ‘Additional Drivers’ tab, and use an open-source driver instead. You may skip this step if your PC does not have a dedicated GPU.
5.) Remove other Desktop Environments! If you have other desktops (e.g., KDE, XFCE, Cinnamon), it’s better to remove them, so to speed up the upgrade process.
6.) Disable User Extensions. Disable user installed Gnome Extensions via Gnome Tweaks tool!
Upgrade to Ubuntu 22.04:
NOTE: The upgrade process may fail! If you can’t afford to have a broken system, please do a clean install instead of upgrading it!
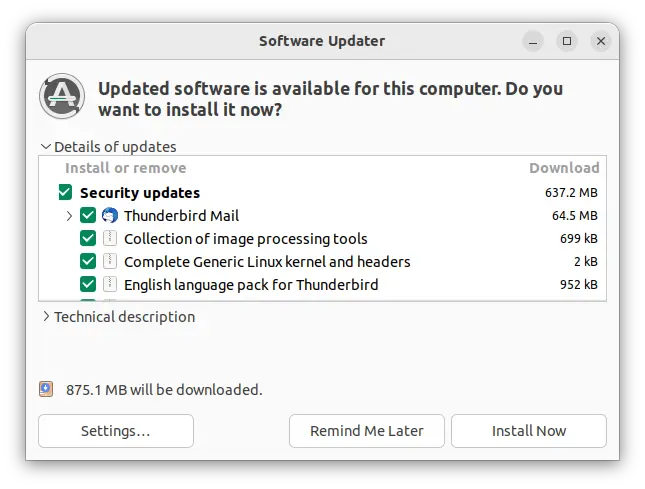
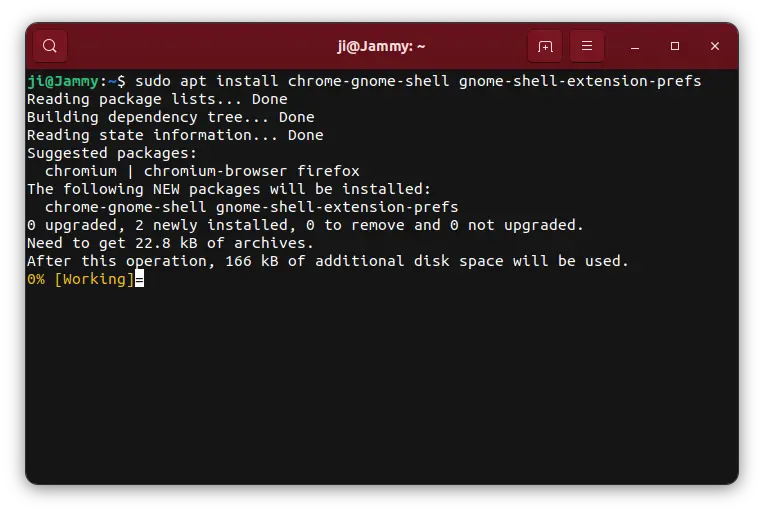
1.) Firstly, press Ctrl+Alt+T on keyboard to open terminal. When it opens, run the command below to install all available system updates:
sudo apt update && sudo apt full-upgrade
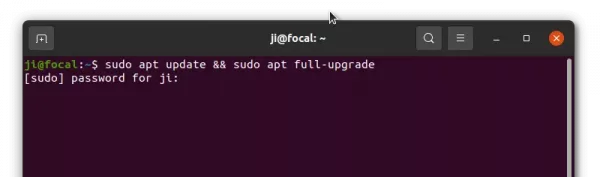
install all available system updates
And, restart your computer if you have not run system updates for a long time.
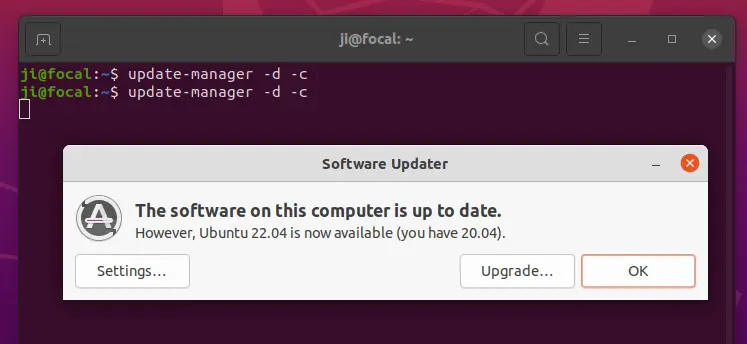
2.) Next, in terminal run the command below to run update manager to check distribution update:
update-manager -d -c
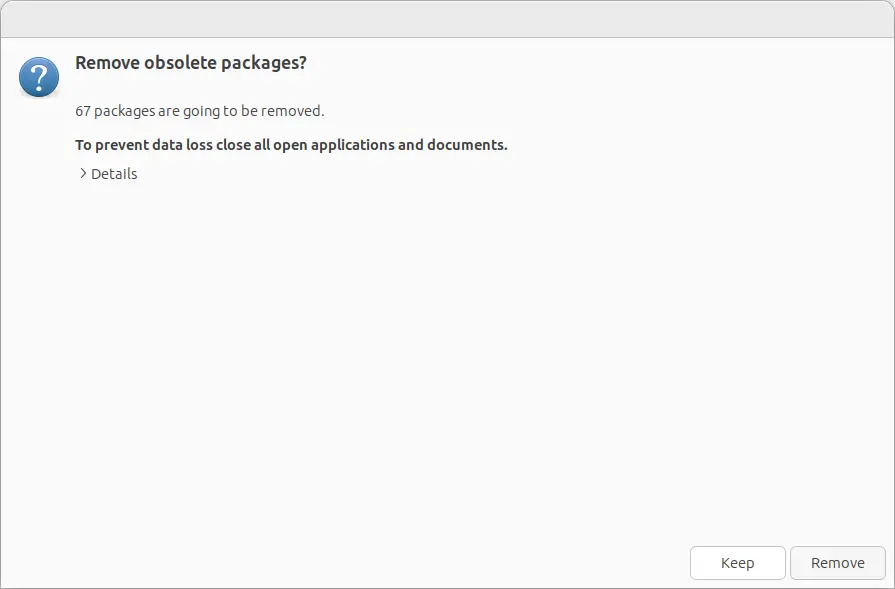
If there are still available updates or removals, click on ‘Install Now’ and re-run the command.
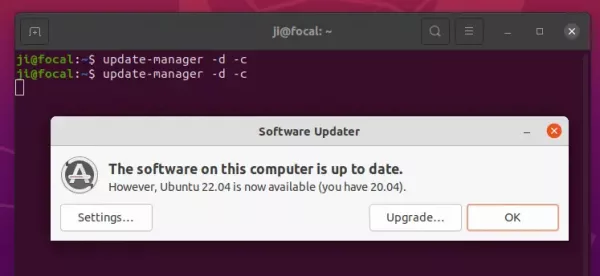
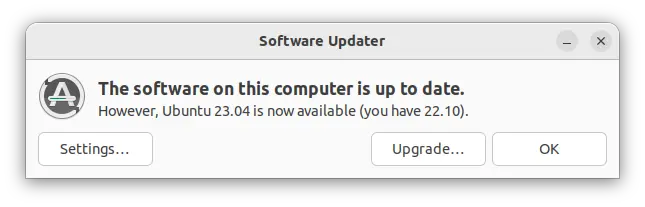
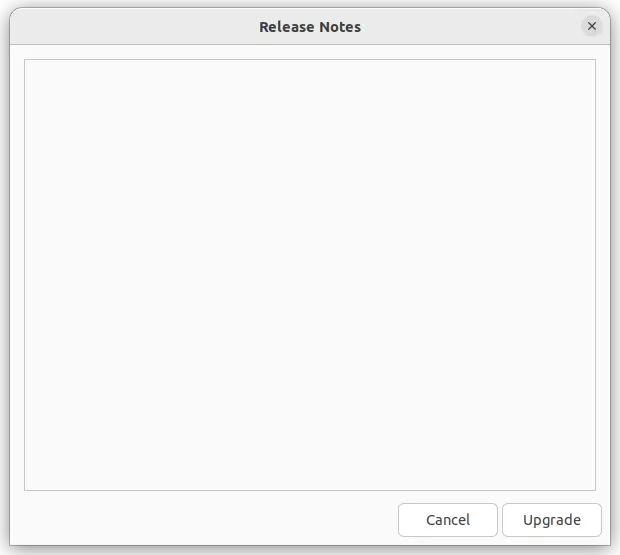
3.) Once you see the prompt for Ubuntu 22.04. Click on “Upgrade” button, and confirm in the next ‘Release Notes’ dialog.

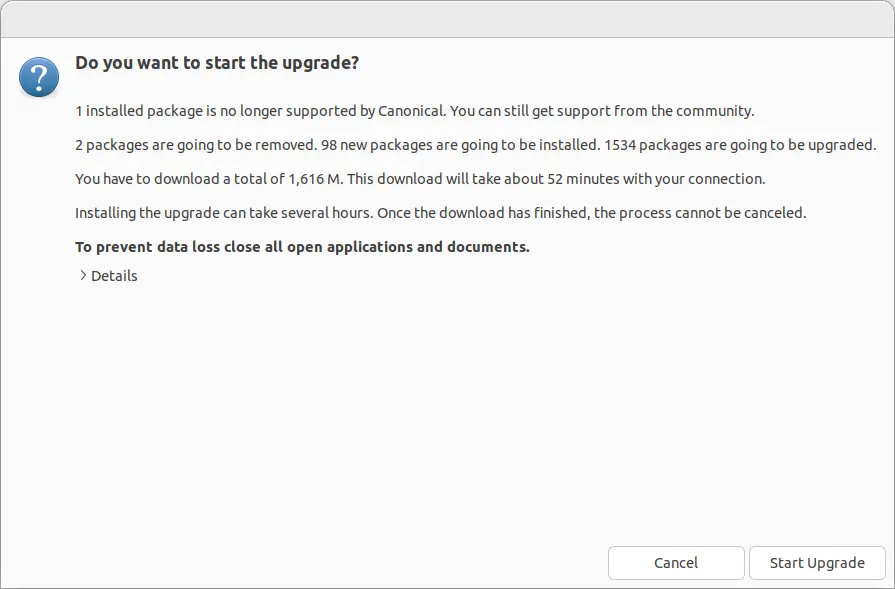
4.) It will pop-up another dialog asks to confirm via ‘Start Upgrade’ button. Once you click on it, the ‘Distribution Upgrade’ wizard will pop-up indicates the upgrading process.
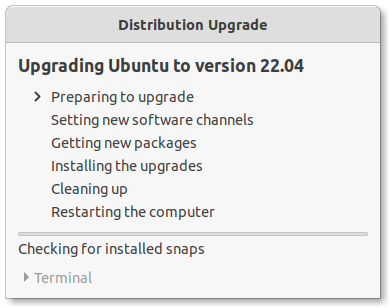
5.) Don’t go far away from your computer!! There will be a few more confirm dialogs, so you have to keep an eye on the screen.
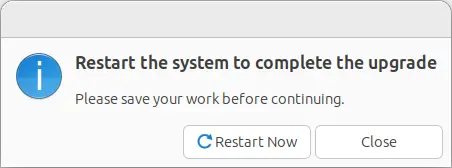
If everything goes well, there will be a dialog asks to “Restart” to complete the upgrade.
Sadly, I went out when it was ‘Getting new packages‘. And the upgrade process failed at blank screen when I was back! So there’s no screenshot for this step.
Troubleshoot:
There may be various reasons that the upgrade failed. Here are the issues in my case.
As mentioned, the upgrade failed in my case and the laptop run into blank screen. And, I did following steps that successfully finish the upgrade.
1.) Force reboot and login. Press Ctrl+Alt+F2 (F3 ~ F6) and type username, then password to log into tty console if GDM (login screen) does not start. Or, select boot “Advanced -> recover mode -> drop root shell prompt” from boot-loader if Ubuntu refused to boot!
2.) Once logged in, try running command to configure unfinished packages:
sudo dpkg --configure -a
3.) And, try to fix broken dependencies via command:
sudo apt -f install
In my case, some third-party packages (e.g., libfilezilla12 from xtradeb PPA, and libreoffice-common from LibreOffice Fresh PPA) break the dependencies! And, the command failed with something look like:
trying to overwrite ‘…’, which is also in package libfilezilla12 0.27.1~extradeb1
Errors were encountered while processing:
…
E: Sub-process /usr/bin/dpkg returned an error code(1)
To fix the issue, just remove the package via command (replace package name ‘libfilezilla12’ accordingly):
sudo dpkg -P libfilezilla12
Then re-run the sudo apt -f install until it’s done successfully without error!
4.) Install all available system updates via command:
sudo apt full-upgrade
If everything goes well, clean up via command:
sudo apt remove --autoremove
And finally restart computer via reboot command.
5.) Some packages are however missing in my case after restart. They were fixed by manually installing the packages via the commands below.