This tutorial shows how to install the most recent VokoscreenNG screen recording app in all current Ubuntu releases, including Ubuntu 20.04, Ubuntu 22.04, Ubuntu 24.04.
VokoscreenNG is a free and open-source application for recording your desktop, window, or an area in Linux and Windows desktop. It can record sound from multiple sources, and record from built-in webcam or camera. For Linux, the app works on both Wayland (however with limited features) and classic Xorg sessions. Continue Reading…
Kooha, the small free open-source screen recording app, release new 2.3.0 version a few days ago.
Kooha is one of the first apps support Wayland, the default display server in recent Ubuntu and Fedora workstation releases. Since GNOME’s built-in screenshot/screencast tool does not support recording audio, it is a good alternative to record full screen or rectangular area with microphone and desktop audio support. And, it can record your desktop screen into WebM, MP4, GIF, and Matroska formats.
In last 2.2.x release series, Kooha added new area selection UI for better Wayland support. In the new 2.3.0 release, the area selection window now is resizable, so you can have a bigger view when selecting recording area. And, previous selected area is now remembered to make it easy to redo recording last area.
Still looking for an alternative screen recording application for GNOME Desktop? Try this one!
GNOME, the default desktop environment of Ubuntu and Fedora Workstation, lacks good screen recorder after switching to Wayland.
Kooha is a good choice that support recording voice and multiple monitors, which works in both Xorg and Wayland.
In this tutorial I’m going to introduce EasyScreenCast. It’s a free and open-source application for GNOME desktop only.
EasyScreenCast simplifies the use of the video recording function integrated in gnome shell, allows quickly to change the various settings of the desktop recording.
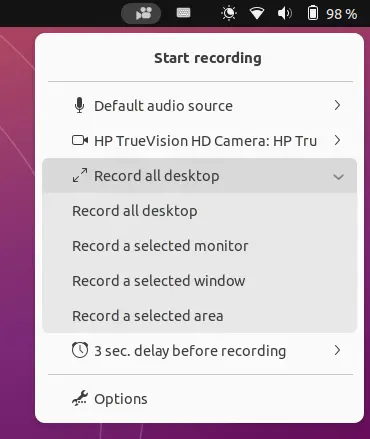
It starts as an indicator applet in the top-right system tray area, by clicking on it will show you the menu to:
Start / Stop recording.
Choose audio source.
Enable webcam recording at the same time.
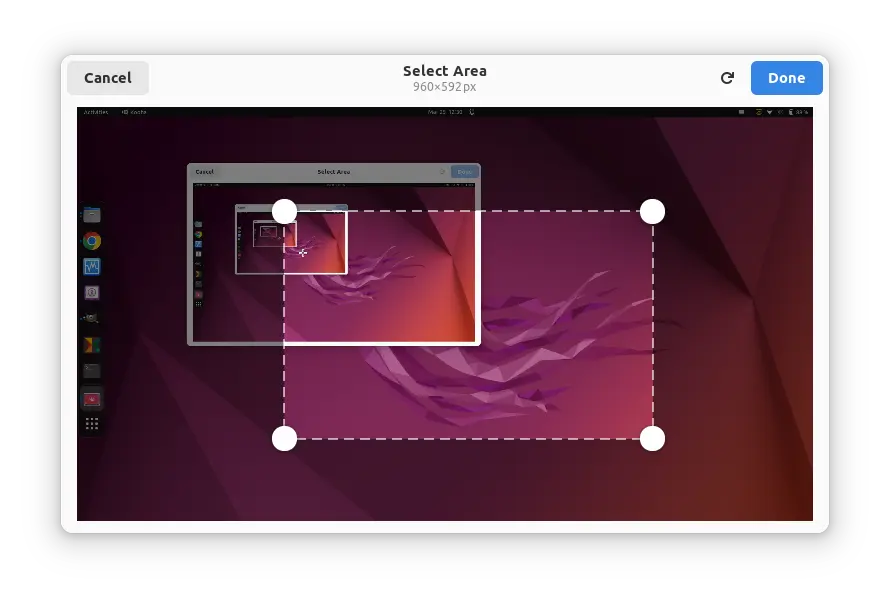
Select recording area.
Set time delay.
As you can see in the screenshot above, it supports recording full-screen (all desktop), a selected app window.
To record a selected area, just click down and drag to create an rectangle area on screen after clicked ‘Start Recording’. It has option to show a border around the area while recording, though NOT enabled by default.
For multiple monitors, choose “Record a selected monitor” option. Click “start recording” and make some mouse clicks on your desired monitor screen to start.
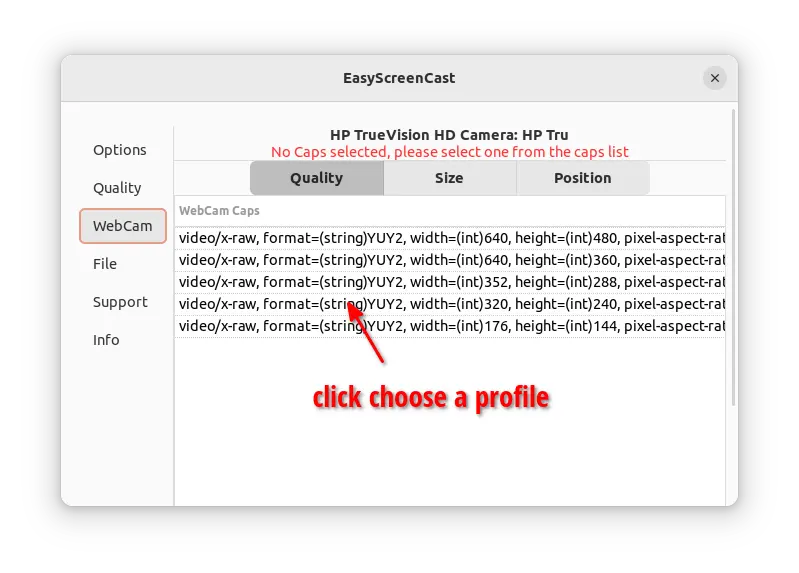
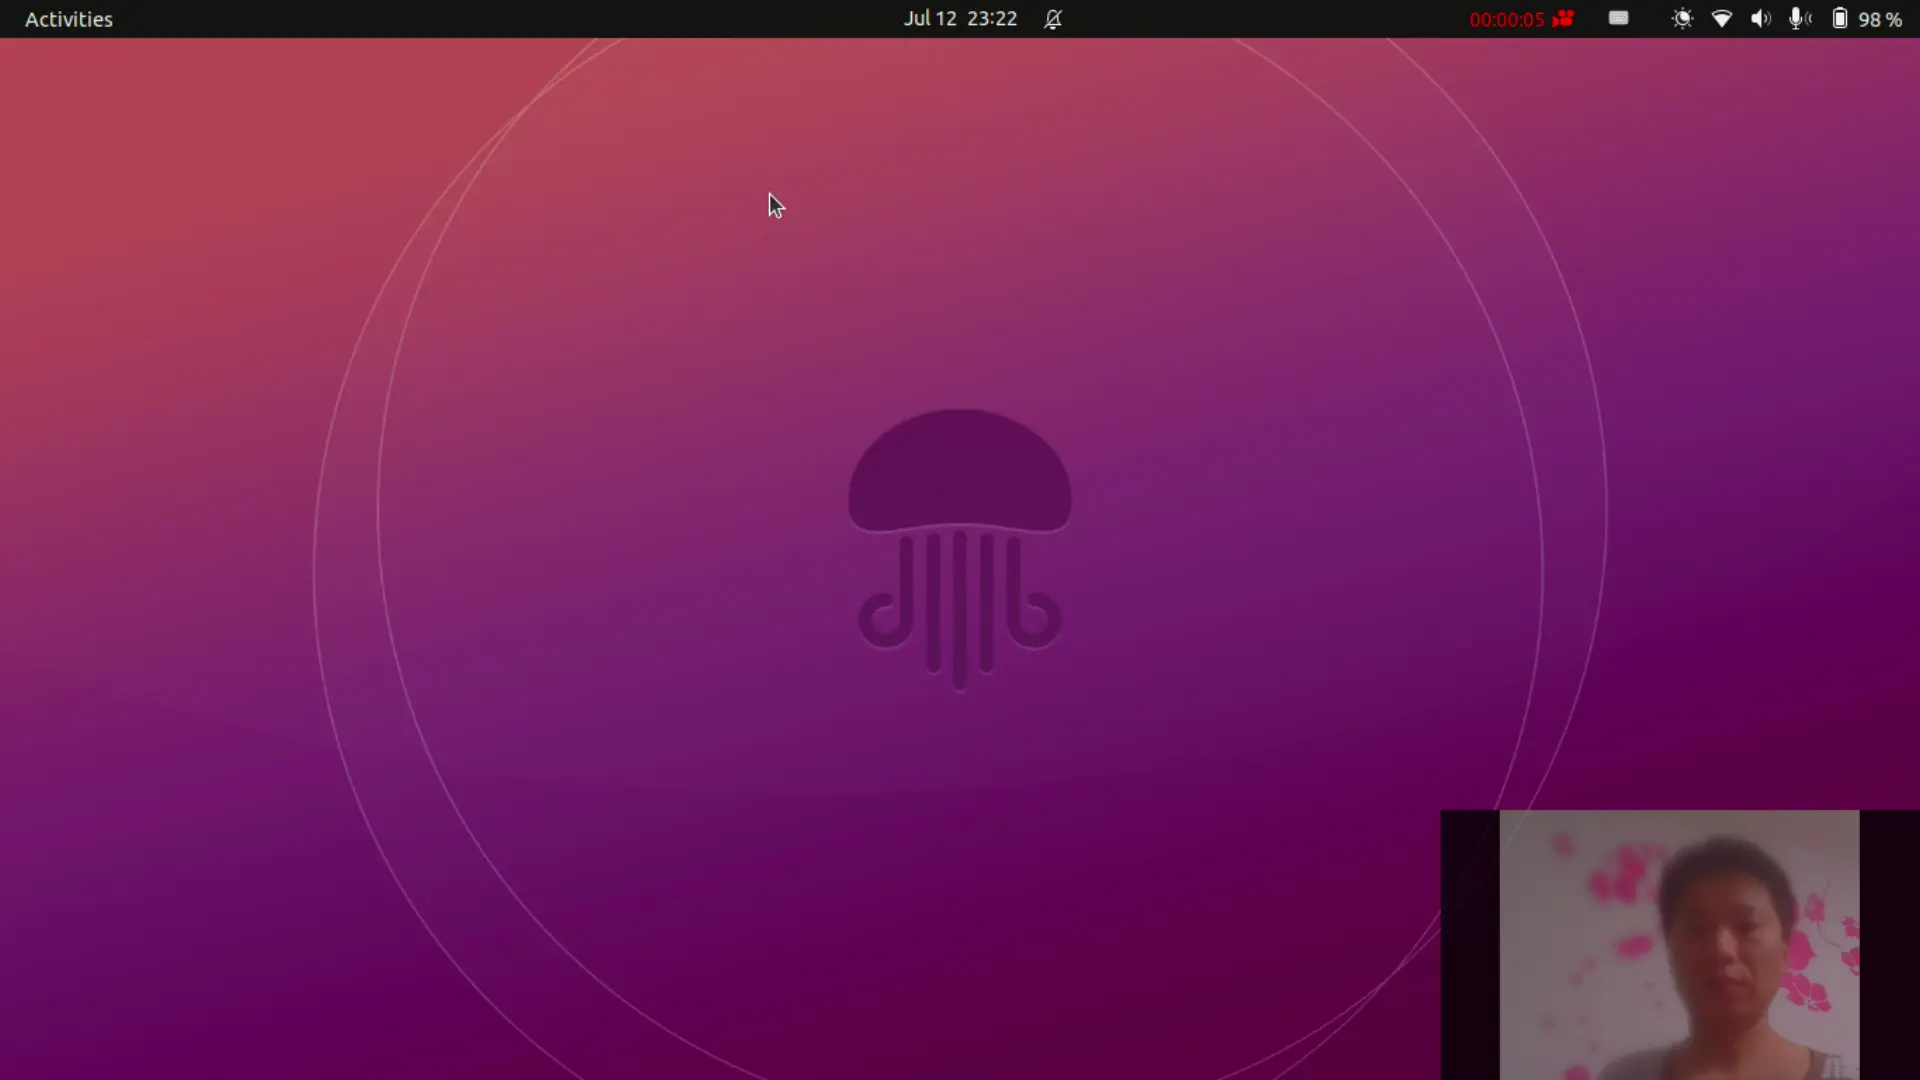
By enabling webcam recording, it can also record your face and your desktop screen at the same time! Just choose your webcam from the indicator menu, then setup the quality, size, and position in “Options” dialog.
After recording, you video will have a small screen with yourself in bottom right corner. Just like the screenshot below shows.
Other things EasyScreenCast can do include:
Keyboard shortcut.
Run command before and/or after recording.
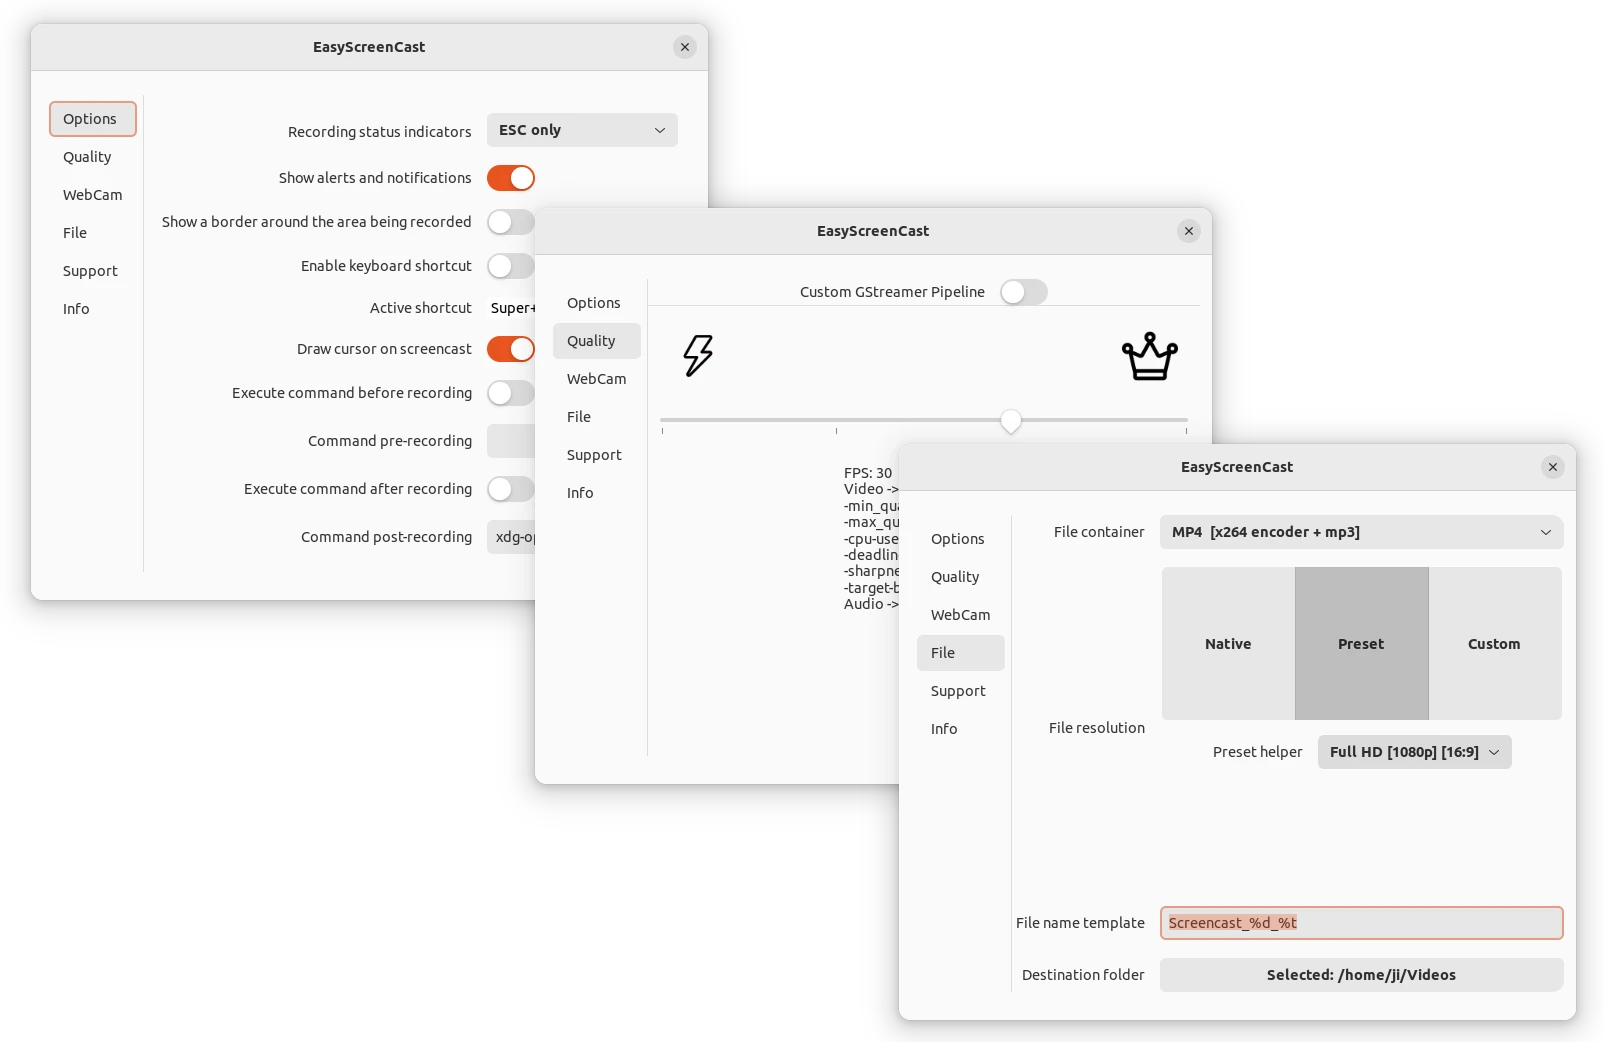
Configure the video quality.
Record to WebM, MP4, MKV, OGG, with presets or custom resolution.
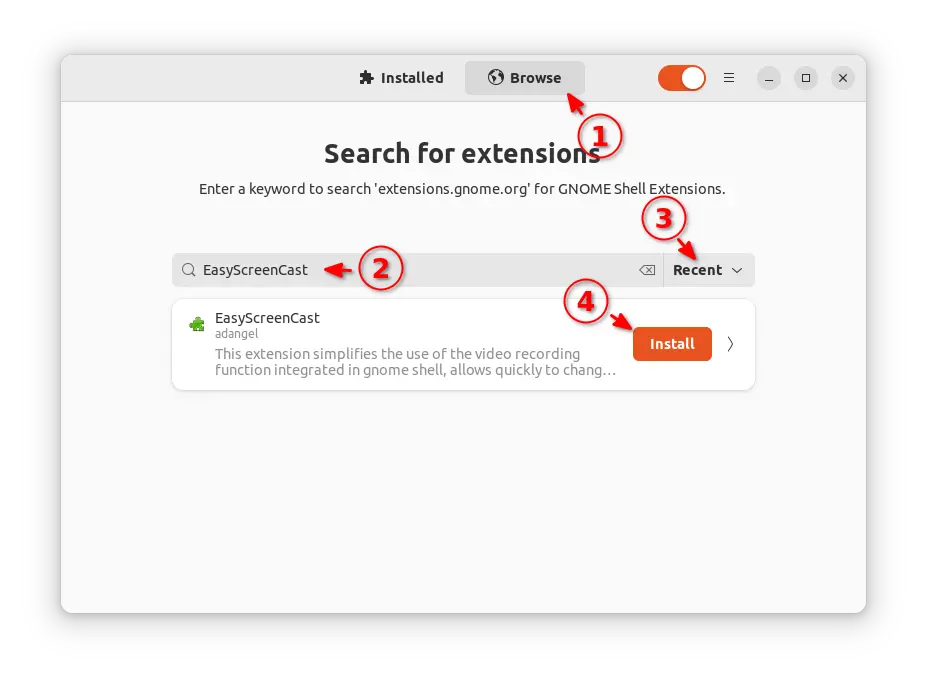
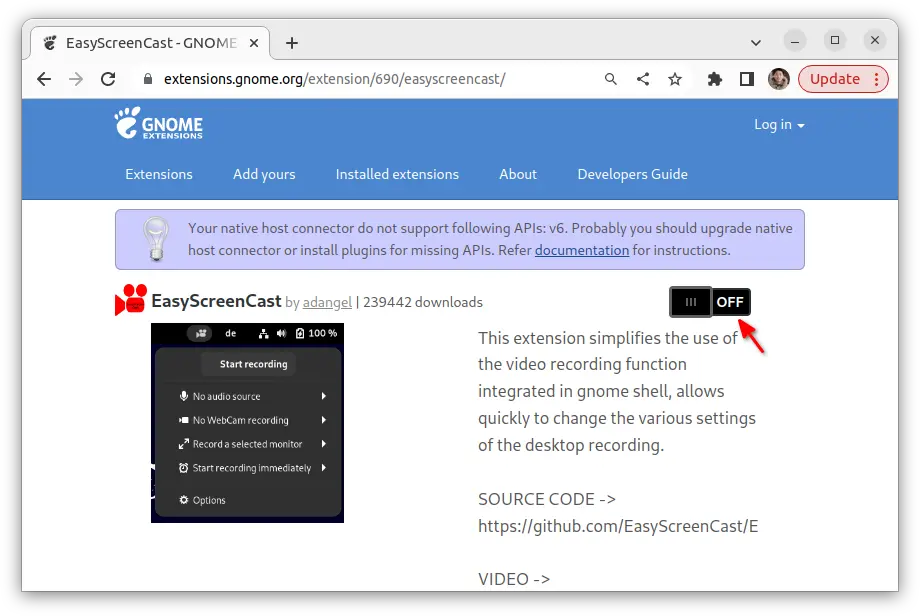
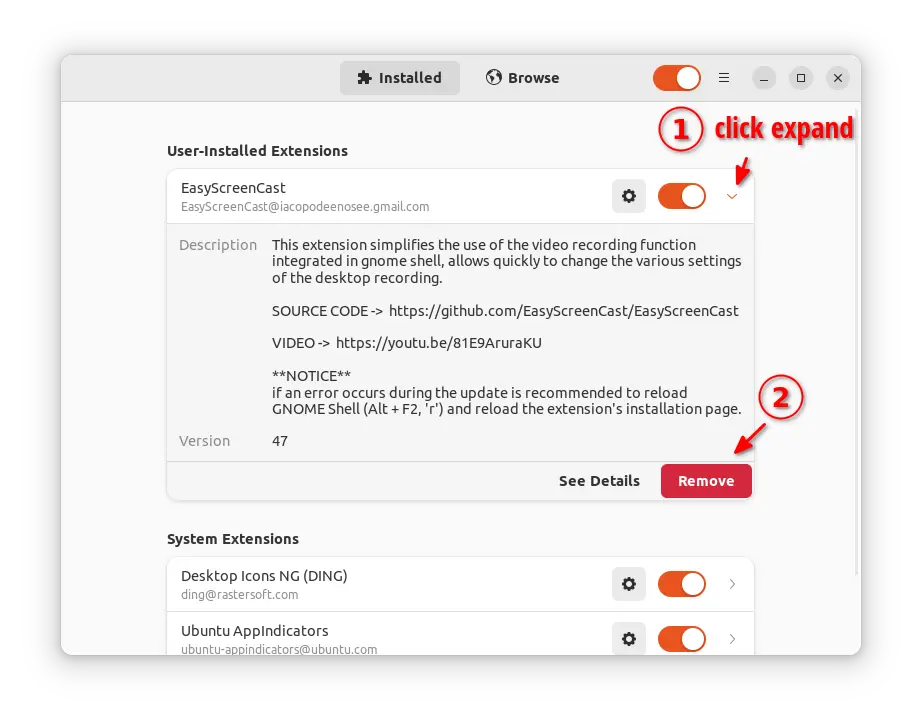
How to Install EasyScreenCast in Ubuntu & Other Linux
EasyScreenCast is available to install as GNOME Shell extensions. So far, it support GNOME version from 38 to 46.
Meaning, you can install it in Ubuntu 22.04, Ubuntu 24.04, current Fedora 38+, RHEL/Rocky Linux/Alma Linux 9, and Debian 12, Arch, etc with GNOME.
1. First, it requires few gstreamer plugins packages for webcam and encoding support. Ubuntu user can simply press Ctrl+Alt+T to open terminal and run command to install it: