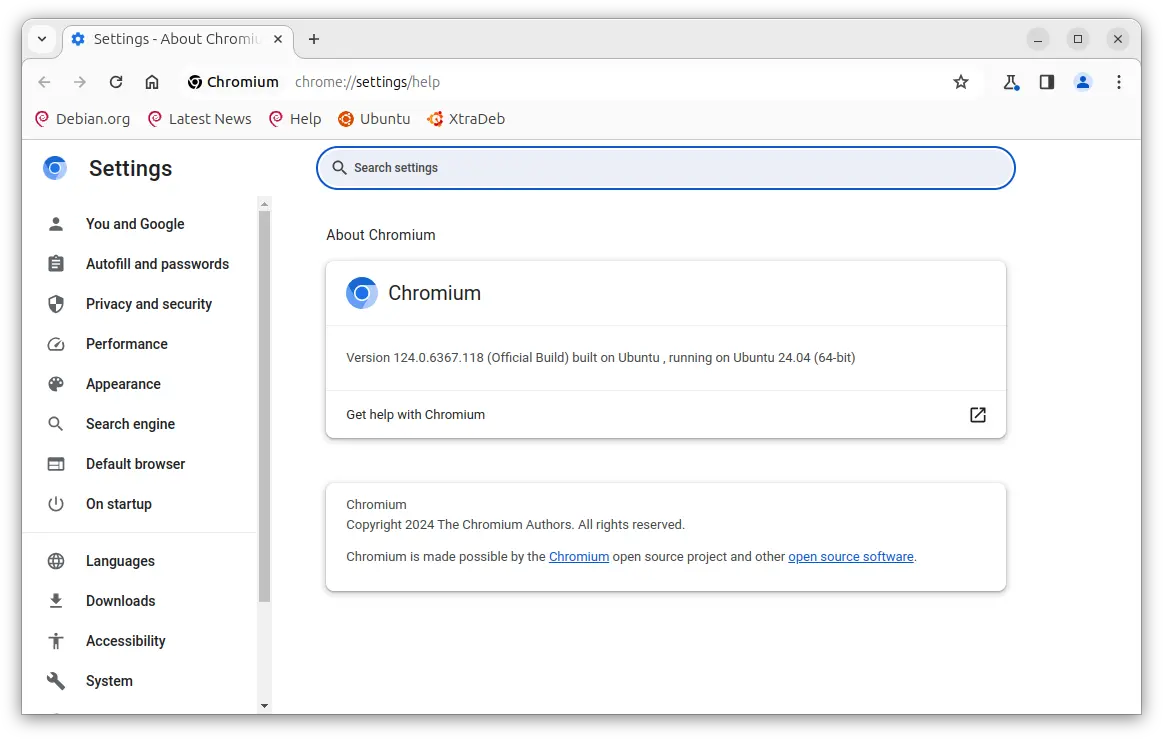
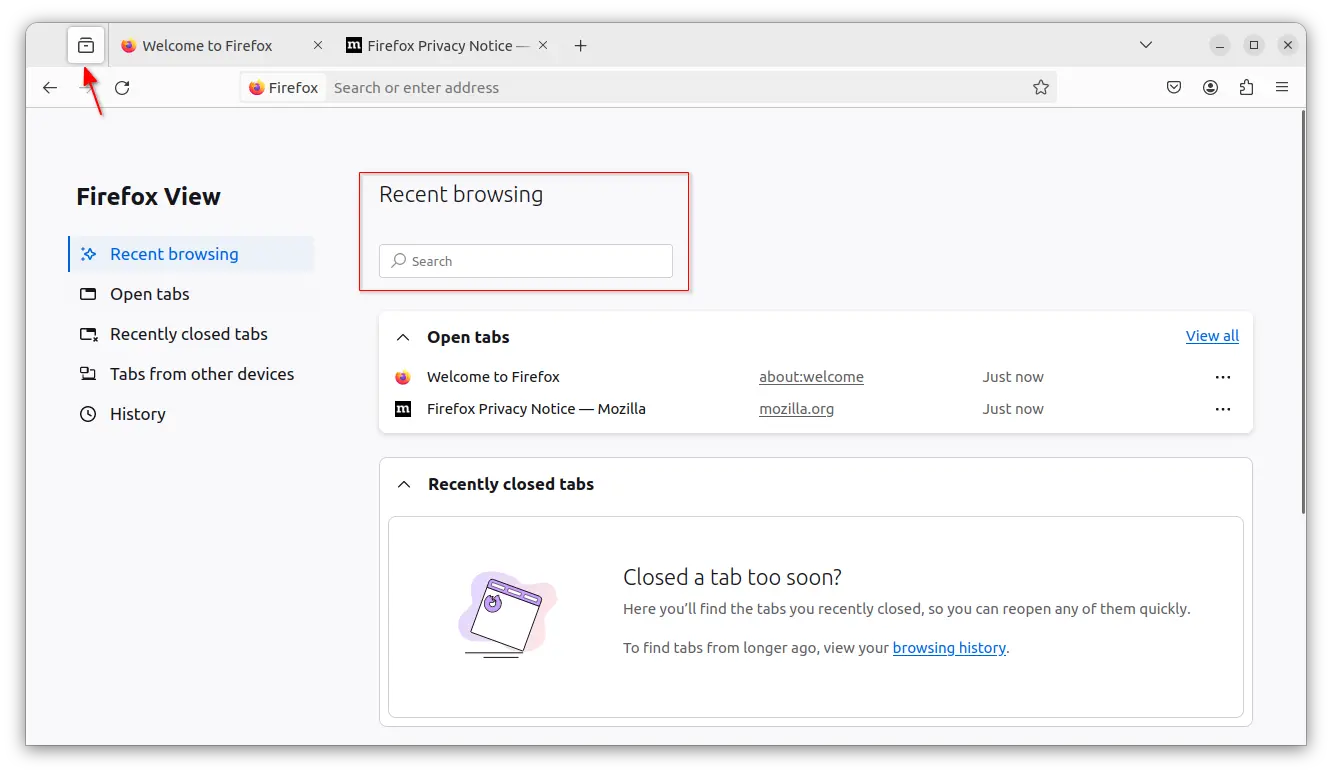
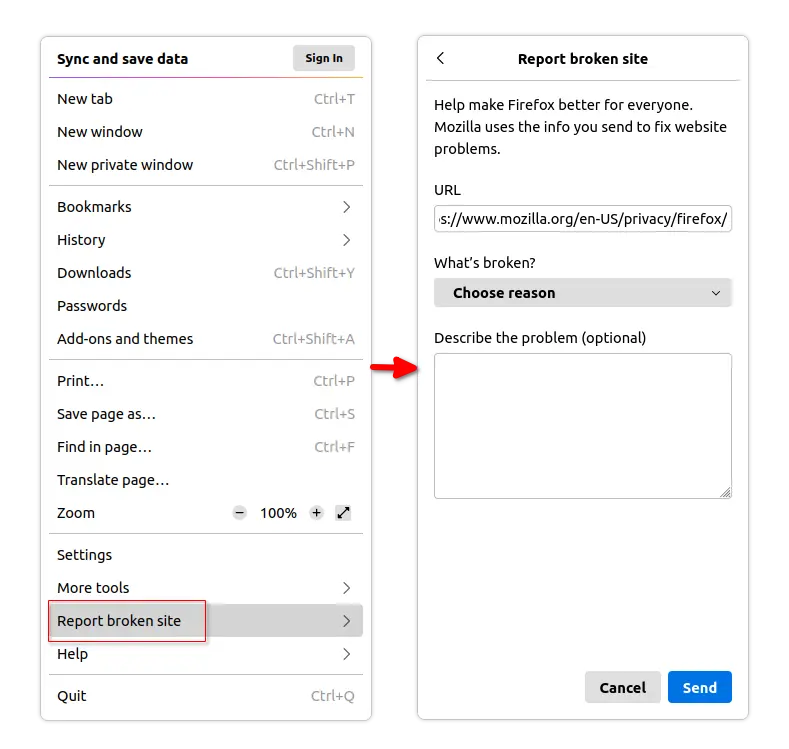
Archives For November 30, 1999


Firefox web browser announced the new monthly 121.0 release this Tuesday!

For Linux, the release finally default to Wayland session when available, meaning for Ubuntu 22.04 and higher (exclude Snap), Fedora Workstation, and other Linux with recent GNOME Desktop.

With Wayland, it has better support for touchscreen & touchpad.

User can use 2-finger swipe left/right to navigate forward and backward, and 2-finger pinch gesture to zoom in/out. It as well has per-monitor DPI settings, better graphics performance, and more.

Sadly, this feature does NOT enabled for Firefox Snap in my case for Ubuntu. User can choose to either install Firefox as .deb package, or manually enable Wayland support for the Snap pacakge.

Besides Wayland for Linux, Firefox 121.0 also adds Voice Control commands support on macOS systems, and prompts Windows users to install the Microsoft AV1 Video Extension to enable hardware decoding support.

Other features in Firefox 121.0 include:

  • Option to force links to always be underlined
  • New PDF viewer floating button to simplify deleting drawings, text, and images.
  • Option to disable the debugger; keyword on the current page.
  • Support :has() selector, the hanging and each-line keywords, balance keyword, lazy loading iframes.
  • tail call elimination support in WebAssembly language
  • Various security fixes.

How to Get Firefox 121.0

Most Linux that pre-installs Firefox, will build the latest package soon and publish into system repositories.

For Ubuntu, the snap package has been updated to v121.0. It should update to the new release automatically.

If NOT, press Ctrl+Alt+T on keyboard to open terminal, and run command to do the update manually.

snap refresh firefox

For the portable Linux tarball, as well as the official release note, go to the link below:

This simple tutorial shows how to install Firefox Beta, Firefox Developer Edition, or Firefox Nightly in Debian, Ubuntu, Linux Mint, using the new official repository.

Mozilla announced new official apt repository for Debian and Ubuntu users few months ago, which contains the .deb package for Firefox Nightly build.

Now, the repository also contains packages for Firefox Beta and Firefox Developer Edition! And, here’s step by step guide shows how to use it to install the latest packages in your system.

NOTE 1: Ubuntu also has an official PPA contains Firefox Beta package. Though, it’s maintained by members from Ubuntu Team.
NOTE 2: This tutorial is tested and works in Debian 12, Ubuntu 20.04, Ubuntu 22.04, and Ubuntu 23.10.

Step 1: Install the Repository Key

To add the new repository, you need to first download & install the key, so your system will trust the packages from it.

First, open terminal either from start menu or by pressing Ctrl+Alt+T on keyboard.

When terminal opens, run command to make sure ‘/etc/apt/keyrings’ exist for storing the keys.

sudo mkdir -p /etc/apt/keyrings

Then, download & install the key by running the single command below in terminal:

wget -q https://packages.mozilla.org/apt/repo-signing-key.gpg -O- | sudo tee /etc/apt/keyrings/packages.mozilla.org.asc > /dev/null

If ‘wget’ command not found, run sudo apt install wget to install it.

After that, you can verify the new key file by listing the content of that directory: ls /etc/apt/keyrings.

Step 2: Add Mozilla’s Official Repository

Also in a terminal window, run the single command below will create a config file and write the source repository.

echo "deb [signed-by=/etc/apt/keyrings/packages.mozilla.org.asc] https://packages.mozilla.org/apt mozilla main" | sudo tee /etc/apt/sources.list.d/mozilla.list > /dev/null

When done, you may verify by running cat /etc/apt/sources.list.d/mozilla.list to print the source file content.

Step 3: Install Firefox Stable, Beta, Dev, or Nightly

After adding the apt repository and key, run the command below to refresh system package cache:

sudo apt update

Finally, install Firefox Beta by running command:

sudo apt install firefox-beta

The repository also contains Firefox Stable, Development, and Nightly versions! Replace firebox-beta in last command with firefox, firefox-devedition, or firefox-nightly according which version you want to install. For STABLE version,  you however NEED to set higher PPA priority.

Non-English user may also install the language package by running command:

sudo apt install firefox-beta-l10n-xx

Replace xx with the shortcode for your language. Also, replace beta for dev or nightly version accordingly.

Step 4: (Optional) Change the App Name to Differ from Firefox Stable

The new Firefox Beta uses same logo to Firefox Stable, and it also displayed as “Firefox” in start menu.

If you have more than one edition of Firefox packages in system, then you may have to differ them from each other by changing the name.

To do so, first launch terminal (Ctrl+Alt+T) and run command to copy the .desktop config file from system to local directory:

sudo cp /usr/share/applications/firefox-beta.desktop ~/.local/share/applications/

Then, change the app name to “Firefox Beta” by running command:

desktop-file-edit --set-name="Firefox Beta" ~/.local/share/applications/firefox-beta.desktop

The change should apply automatically in few seconds. If not, run sudo update-desktop-database to update the database manually.

If you also want to differ the icon, use --set-icon='/path/to/new/icon' in last command.


This is a step by step beginner’s guide shows how to install LibreWolf web browser in Ubuntu and its based systems.

LibreWolf is a free and open-source web browser fork from Firefox. The browser focuses on privacy and security, and has uBlocker ad blocker out-of-the-box.

The browser website has an official guide for installing in on Debian and Ubuntu based systems. This tutorial is just a re-write with screenshots and more explanations.

NOTE: This tutorial only works on x86_64 system for modern Intel/AMD CPU architecture types.

Step 1: Install the Key

Adding 3rd party repository in Debian/Ubuntu system needs to first install the key, so your system will trust the packages from that repository.

First, press Ctrl+Alt+T on keyboard to open terminal. When it opens, run command:

wget -qO- https://deb.librewolf.net/keyring.gpg | sudo gpg --dearmor -o /etc/apt/keyrings/librewolf.gpg

This command will download the key file via wget command line tool, dearmor it so the key will be un-readable, finally save it to /etc/apt/keyrings directory.

You may verify the key by running cat /etc/apt/keyrings/librewolf.gpg. And, it should output unreadable text, like the screenshot below shows you.

Step 2: Add LibreWolf Repository

LibreWolf repository so far supports Debian 11/12, Ubuntu 20.04 & 22.04, Linux Mint 20.3, 21.1, 21.2, and all their based systems. It also works in Ubuntu 23.04/23.10 by using the package for 22.04.

1. Get your system code-name

First, run command in terminal (Ctrl+Alt+T) to get the code-name of your system:

lsb_release -sc

The code-name MUST be one of una, bookworm, vanessa, focal, jammy, bullseye, vera, or uma. If NOT, then run command:

cat /etc/os-release

This command will output which version of Ubuntu (and its code-name) is based on.

2. Add LibreWolf repository

Once you got the code-name, run the command below in terminal to create & edit source file:

sudo gedit /etc/apt/sources.list.d/librewolf.sources

Replace gedit in command with gnome-text-editor for Ubuntu 24.04, xed for Cinnamon, pluma for MATE, mousepad for XFCE, or nano command line text editor that works in most desktop environment.

When the file opens, paste the line below and save it:

Types: deb
URIs: https://deb.librewolf.net
Suites: jammy
Components: main
Architectures: amd64
Signed-By: /etc/apt/keyrings/librewolf.gpg

Here you need to replace jammy with the code-name you got in last step. For Ubuntu 24.04 (Noble) and 23.10 (Mantic), just use jammy which is working good in my case.

Finally save the file. For nano text editor, press Ctrl+S to save, then Ctrl+X to exit.

Step 3: Install LibreWolf web browser

After adding the repository and key, run the command below in terminal to refresh your system package cache:

sudo apt update

Finally, install the browser via command:

sudo apt install librewolf

Once successfully installed the package, search for and launch it from start/application menu or ‘Activities’ overview depends on your desktop environment.

And, when a newer version of the browser package is released, just use Software Updater (Update Manager) to update it:

future version of LibreWolf available in Update Manager

Set LibreWolf as default web browser

For the default GNOME Desktop, open Settings (Gnome Control Center), then navigate to Default Applications in left pane. Finally, select “LibreWolf” from the drop-down box for Web.

For GNOME 46 (Ubuntu 24.04), Default Applications has been moved to “Apps” settings page.

Other desktops may have their own option to do the job. If you don’t know where to find the option, try editing the config file that works in most desktop environments. To do so:

  • First, open file manager and press Ctrl+H to show all hidden files and folders.
  • Navigate to .config sub-folder and click edit mimeapps.list file.
  • Finally, set librewolf.desktop for text/html, x-scheme-handler/http, x-scheme-handler/https and save file.

How to Remove LibreWolf Web Browser

To remove the web browser, also open terminal (Ctrl+Alt+T) and run command:

sudo apt remove librewolf --autoremove

Also remove the Key file as well as source repository by running commands in terminal one by one:

sudo rm /etc/apt/sources.list.d/librewolf.sources
sudo rm /etc/apt/keyrings/librewolf.gpg

And, refresh system package cache after making changes to package sources.

That’s all. Enjoy!

This simple tutorial shows how to install the Waterfox web browser from its official tarball & create app shortcut in Ubuntu Linux.

Waterfox is a free open-source fork of Firefox, claims to be ethical and user-centric, emphasizing performance and privacy.

The browser provides official Linux package through the portable tarball package, though a community maintained Flatpak package is also available to run it in sandbox.

Step 1: Download Waterfox Tarball

To download the package, simply go to its website via the link button below and click the “Download” button:

Once you got the package, just extract it, and run the executable file (waterfox or waterfox-bin) in the new generated folder, will launch the web browser.

Extract, and Launch Waterfox web browser

Step 2: Create App Shortcut for Waterfox

If you want to make the app icon visible in the ‘Activities’ overview search result (or application/start menu depends on your desktop environment), then follow the steps below to create app shortcut for it.

1. Move the source folder

Before creating app shortcut, it’s better to move the ‘waterfox’ folder for long time use.

For current user only, you may put the folder to anywhere in your user home. I usually create a custom folder in user home (e.g., bin, apps) or put portable apps into .local (it’s hidden, press Ctrl+H to view/hide).

In the screenshot below, I moved the waterfox folder into the custom “MyApps”  folder:

For global, it’s good choice to move the folder to “/opt“, so all users in the system can launch the web browser.

In the case, right-click on blank area of the folder that contains “waterfox” sub-folder, and click “Open in Terminal”. In pop-up terminal, run command to move or copy it to opt:

sudo cp -R waterfox /opt

2. Create App Shortcut

In most Linux, the app shortcuts are handled by .desktop files located in either /usr/share/applications or .local/share/applications.

First, search for and launch your system text editor from overview or application menu depends on your DE:

When it opens with an empty document, paste following lines:

[Desktop Entry]
Version=1.0
Name=Waterfox Web Browser
Comment=Browse the World Wide Web
GenericName=Web Browser
Keywords=Internet;WWW;Browser;Web;Explorer
Exec=/home/ji/MyApps/waterfox/waterfox %u
Terminal=false
X-MultipleArgs=false
Type=Application
Icon=/home/ji/MyApps/waterfox/browser/chrome/icons/default/default128.png
Categories=GNOME;GTK;Network;WebBrowser;
MimeType=text/html;text/xml;application/xhtml+xml;application/xml;application/rss+xml;application/rdf+xml;image/gif;image/jpeg;image/png;x-scheme-handler/http;x-scheme-handler/https;x-scheme-handler/ftp;x-scheme-handler/chrome;video/webm;application/x-xpinstall;
StartupNotify=true
Actions=new-window;new-private-window;

[Desktop Action new-window]
Name=Open a New Window
Exec=/home/ji/MyApps/waterfox/waterfox -new-window

[Desktop Action new-private-window]
Name=Open a New Private Window
Exec=/home/ji/MyApps/waterfox/waterfox -private-window

Depends on where you moved the ‘waterfox’ folder, change the value of “Exec” and “Icon” accordingly! Meaning replace /home/ji/MyApps to yours.

When done pasting file content and changing Exec/Icon path, press Shift+Ctrl+S to open the “Save as” dialog. Then, do:

  • press Ctrl+H to show hidden folders in the pop-up dialog.
  • navigate to home -> .local -> share -> applications. Create ‘applications’ if it does not exist.
  • type waterfox.desktop as the file name.
  • finally click Save button.

If you did the previous steps correctly, it should now show ‘waterfox’ icon in the start/application menu or ‘Activities’ overview depends on your desktop environment.

Uninstall Waterfox

To uninstall the web browser installed via the previous steps, first remove the ‘waterfox’ folder depends on where you saved it. Then, remove the waterfox.desktop file from .local/share/applications.

Can’t wait to try out the new Thunderbird 115, but hate Snap and Flatpak packages? Here’s how to install it from Ubuntu PPA!

Thunderbird 115 is a new major release series with refined look and feel. It now uses GNOME CSD style header bar instead of the old title-bar. Which has a more compact header bar, that looks better in Ubuntu, Fedora, and other Linux with GNOME.

As well, it provides menu options to change the header-bar height to meet your need.

Besides the headerbar, menu, tool-bar, etc, are also redesigned to look better in today’s Linux desktop. As well, it takes use the new logo announced few months ago. See more about Thunderbird 115.

How to Install Thunderbird 115 via PPA

Ubuntu is most likely to build the new Thunderbird 115 package into system repository! Check this page for Ubuntu’s official package status.

Before that, user can easily search for and install Thunderbird Snap package from Ubuntu Software. Or, install the Flatpak package in Flathub repository. However, both are running in sandbox and support 64-bit X86 CPU architecture type only.

If you hate sandboxed applications, and/or running Ubuntu on ARM devices (e.g., Apple M1/M2, Raspberry Pi) or IBM POWER platform, then, there are Ubuntu PPAs for choice.

1. Add Ubuntu PPA

The Mozilla Team PPA has already built the packages for Ubuntu 20.04, Ubuntu 22.04, Ubuntu 23.04, and Ubuntu 23.10

First, press Ctrl+Alt+T on keyboard to open terminal. When it opens, run command to add the PPA:

sudo add-apt-repository ppa:mozillateam/ppa

Type user password (no asterisk feedback) when it asks and hit Enter to continue

2. Install/Update Thunderbird

After adding the PPA, simply launch “Software Updater” and wait for checking for updates. Until done, install the updates to install Thunderbird 115.

Or, just run command in terminal to install/update the package:

sudo apt install thunderbird

Linux Mint user need to run sudo apt update first to refresh package cache.

After installation, search for and launch the email client from ‘Activities’ overview or start menu depends on your desktop environment.

Uninstall Thunderbird.

If you have problem with the new release package, or Ubuntu updated the package in its official repository, then you can purge the Ubuntu PPA to switch back the stock version of Thunderbird package.

To do so, just open terminal (Ctrl+Alt+T) and run command:

sudo apt install ppa-purge && sudo ppa-purge ppa:mozillateam/ppa

If the command above failed, you may manually remove the PPA by running command:

sudo add-apt-repository --remove ppa:mozillateam/ppa

Then, remove the Thunderbird package installed from that PPA:

sudo apt remove --autoremove thunderbird

This simple tutorial shows how to install brave browser via the new apt source policy in Ubuntu 24.04 & 22.04.

Due to security issue, Debian changed its policy for adding apt sources. Ubuntu is changing the rules too. Since Ubuntu 22.04, it uses more secure key files with digital signature for system repositories and PPAs.

Since Ubuntu 23.10,  it now uses deb822 .sources file instead of the previous .list file for third-party repositories. And, the new source files include ‘Signed-by’ section to specify the key file.

Step 1: Install curl command line download tool

First, press Ctrl+Alt+T on keyboard to open terminal. When it opens, run command to install curl and apt-transport-https package:

sudo apt install apt-transport-https curl

Type user password (no asterisk feedback) when it asks.

Step 2: Download & Install the key

Then, run curl command to download the key file and save it into /usr/share/keyrings folder.

This can be done by running the single command below in terminal:

sudo curl -fsSLo /usr/share/keyrings/brave-browser-archive-keyring.gpg https://brave-browser-apt-release.s3.brave.com/brave-browser-archive-keyring.gpg

Step 3: Add the brave apt source repository

The previous .list file with or without ‘Signed-By’ is still working! But here I’m going to show the new .sources file.

1. First, run command to create a .sources file under ‘/etc/apt/sources.list.d’:

sudo gedit /etc/apt/sources.list.d/brave-browser-release.sources

Replace gedit with gnome-text-editor for Ubuntu 24.04.

2. Then in the pop-up text editor window, paste following lines:

Types: deb
URIs: https://brave-browser-apt-release.s3.brave.com/
Suites: stable
Components: main
Architectures: amd64
Signed-By: /usr/share/keyrings/brave-browser-archive-keyring.gpg

As you see, the new source file is easy to read, but a bit hard to write for beginners. See this thread for more about it.

Step 4: Update cache & install Brave Browser

After saving the file in last step, you can now run commands below to refresh the system package cache:

sudo apt update

And, finally install the web browser via command:

sudo apt install brave-browser

You don’t have to run the command every time when a new release is out. Just launch “Software Updater”, newer release of the browser package will be available there along with system package updates.

Uninstall Brave:

To remove brave browser package, open terminal (Ctrl+Alt+T) and run command:

sudo apt remove --autoremove brave-browser

And remove the apt source repository by running command:

sudo rm /etc/apt/sources.list.d/brave-browser-release.list

Also remove the key file via command:

sudo rm /usr/share/keyrings/brave-browser-archive-keyring.gpg

Finally, run sudo apt update to refresh system package index.

PHP finally released 8.2.0 release after 7 release candidates. Here are the new features and how to install guide for all current Ubuntu LTS.

PHP 8.2.0 allows to mark a class as readonly, which will add the readonly modifier to every declared property, and prevent the creation of dynamic properties. Moreover, using the AllowDynamicProperties attribute on readonly class will trigger a compile-time error.

Other release highlights in PHP 8.2.0 include:

  • Disjunctive Normal Form (DNF) Types
  • New stand-alone types: null, false, and true
  • New “Random” extension
  • Constants in traits
  • Deprecate dynamic properties

There are as well numerous bug-fixes and other changes in the release. See the changelog for details.

How to Install Php 8.2 in Ubuntu:

Not recommended for beginners. Only install PHP 8.2 for web developing purpose or there’s specific feature or bug-fix you need in this release.

The popular Ondřej Surý’s PPA has built the package for all current Ubuntu LTS: Ubuntu 18.04, Ubuntu 20.04 and Ubuntu 22.04.

1. First, open terminal or connect to your Ubuntu server and run command to add the PPA:

LC_ALL=C.UTF-8 sudo add-apt-repository ppa:ondrej/php

Run sudo apt install software-properties-common in case the command does not exist. And, type user password (no asterisk feedback) when it asks and hit Enter to continue.

2. Then, install Php packages accordingly. For example, install apache2 module and mysql module via command:

sudo apt install php8.2 libapache2-mod-php8.2 php8.2-mysql

Or install the FPM-CGI binary for use with Nginx:

sudo apt install php8.2 php8.2-fpm php8.2-mysql

For Ubuntu 18.04, run sudo apt update first to refresh package cache.

After installed it, remember to configure your http server (apache 2 or nginx) for the new PHP package, and configure php8.2 via files under ‘/etc/php/8.2/’.

Uninstall Php 8.2

To remove the package, simply run command:

sudo apt remove --autoremove php8.2 libapache2-mod-php8.2 php8.2-*

And remove the Ubuntu PPA via command:

sudo add-apt-repository --remove ppa:ondrej/php

Remember Midori? The lightweight web browser that was default in Elementary OS and Bodhi Linux revived!

Midori was a popular lightweight web browser used the WebKitGTK rendering engine and GTK UI toolkit. The development of the project was however discontinued more than 3 years ago. And, Ubuntu even removed it from system repository since Ubuntu 22.04 LTS.

According to the Wikipedia, the Midori project has been merged with the Astian Foundation in 2019. And, Astian announced a week ago that Midori browser is still alive!

It’s now Chromium based web browser that using Electron and React with both desktop edition for Linux, macOS, and Windows, and mobile edition for Android.

The browser still aims to be lightweight, fast and free. It’s still an open-source app, with the source code host in gitlab project page. (update: the project page does no longer exist! If you know where Astian hosts the source code, please leave comment below.)

Midori web browser next generation

The new Midori browser so far features:

  • New logo.
  • Adblock integration, block ads out-of-the-box.
  • Incognito mode support.
  • Chromium based, without Google services and low resources usage
  • Fast and highly customizable UI.
  • Partial Chrome extensions support.
  • To use its own open-source AstianGO search engine. Though, it so far uses DuckDuckGo as default. While Google, Bing, and Ecosia available for choice.

How to Install New Midori web browser in Ubuntu & other Linux

Astian offers official Midori packages for Linux through AppImage and .deb package.

Option 1: AppImage

AppImage is a portable package format without installation required. Just select download it from its website:

Then, right-click on AppImage in file manager. Open ‘Properties’ dialog and grant ‘execute as program’ permission. Finally, click run the package to launch the web browser.

Option 2: Deb package

It also provides official .deb packages for modern 64-bit computers, available to download via the link button below:

NOTE: The Debian (.deb) package seems broken at the moment of writing. It won’t install in my case in Ubuntu 22.04, Debian 11 either via double-clicking or using apt install command. So please try AppImage until Astian fixed the issue.

A new monthly release of Firefox web browser to be released soon! Users of Mozilla team PPA should already received the updates.

Though it’s not officially announced at the moment of writing, user can however check what’s new in the release via the Github Releases page.

And, here are the changes in Firefox 107 according to it:

  • Improved the performance of the instance when Microsoft’s IME and Defender retrieve the URL of a focused document in Windows 11 version 22H2.
  • Power profiling visualizing performance data recorded from web browsers is now also supported on Linux and Mac with Intel CPUs, in addition to Windows 11 and Apple Silicon.
  • A couple of helpful improvements in Firefox DevTools making it easier to debug WebExtensions:
    • New webext argument to automatically open DevTools.
    • Simple to inspect popup windows (implemented by WebExtension) using DevTools.
    • Reload button in the DevTools toolbox to see the changes you made in source code.
  • Various bug fixes and new policies implemented.

How to Install Firefox 107 in Ubuntu:

The best way to install the new Firefox release package is just wait! Wait until Ubuntu developer team build the package and publish into official system repository. So, just keep your system up-to-date, you’ll get Firefox 107 in next few days!

For Ubuntu 22.04 and Ubuntu 22.10 users who prefer the classic .deb package, the 107 release is already available in the Mozillateam PPA. Simply open terminal by pressing Ctrl+Alt+T on keyboard, and run commands below one by one:

NOTE: This PPA now supports all current Ubuntu releases, meaning Ubuntu 16.04, Ubuntu 18.04 and Ubuntu 20.04 are also supported.

  • 1. Add the Mozillateam PPA by running command:
    sudo add-apt-repository ppa:mozillateam/ppa
  • 2. Check updates for old Ubuntu releases:
    sudo apt update
  • 3. Finally, install Firefox from the PPA via command:
    sudo apt install -t "o=LP-PPA-mozillateam" firefox

IMPORTANT: to avoid Ubuntu 22.04+ to override the PPA package with system built-in Snap package, you have to create a config file under ‘/etc/apt/preferences.d’, and write following rules (See this guide for details):

# Prefer Firefox package from Mozillateam PPA

Package: firefox*
Pin: release o=LP-PPA-mozillateam
Pin-Priority: 501

Mozilla Firefox got a new monthly update recently, with minor new features, performance improvements and some bug-fixes.

According to the release note, Firefox 104 adds one more video site, Disney+, for displaying subtitles in the pop-out videos (Picture-in-Picture).

Disneyplus.com in Firefox dark

When the browser is minimized or occluded, and for background tabs, the UI will now be throttled for better performance and battery usage. And, paste unformatted shortcut now works again in plain text contexts, such as input and text area.

Other changes in Firefox 104 include:

  • Support scroll-snap-stop and re-snapping properties for developers.
  • The Firefox profiler web app can analyze power usage of a website (Windows 11 and macOS only).
  • Highlight color preserved correctly in the mail composer of Yahoo Mail and Outlook.
  • Various security fixes and new policies

How to get Firefox 104:

For Ubuntu 18.04 and Ubuntu 20.04, Firefox 104 has already made into official repositories, simply launch Software Updater and install the updates to get it.

For Ubuntu 22.04 with pre-installed Firefox as Snap, you should now have v104. To verify, go to hamburger menu -> Help -> About Firefox.

For Ubuntu 22.04 users hate snap package, as well as old Ubuntu 16.04, the Mozilla Team PPA maintains the latest packages. See this step by step how to install guide.