



This is a step by step beginner’s guide shows how to install the latest version of Nginx web server (either mainline or stable) in Ubuntu 26.04, Ubuntu 24.04, or Ubuntu 22.04 Desktop or Server.
Nginx is a popular free and open-source web server, that can be also used as reverse proxy, load balancer, mail proxy and HTTP cache.
For a just working version, user can run command sudo apt install nginx-full to install it from Ubuntu system repository, which however is always old. For the latest version, you can get it from Nginx’s official repository.
Mainline vs Stable
There are 2 Nginx release series for choice. They are Mainline with latest features, and Stable which is bit old in version number. Choose either one before getting started.
Mainline – Includes the latest features and bug fixes and is always up to date. It is reliable, but it may include some experimental modules, and it may also have some number of new bugs. Stable – Doesn’t include all of the latest features, but has critical bug fixes that are always backported to the mainline version.
Option 1: Install Nginx from its official repository
Nginx provides an official repository contains the most recent packages for all current Ubuntu releases, so far including Ubuntu 22.04, Ubuntu 24.04, and Ubuntu 26.04. It’s official repository but contains less modules, and supports amd64 (AMD/Intel), arm64 (e.g., Raspberry Pi and Snapdragon X), and devices.s390x (IBM Z, LinuxONE)
1. First, open terminal (Ctrl+Alt+T) or connect to your Ubuntu Server, then run command to install required tools:
sudo apt install wget coreutils
2. Then, download & install the key file:
- First create
/etc/apt/keyringsin case it does not exist, for storing 3rd-party keys:sudo mkdir -p /etc/apt/keyrings
- Then, use
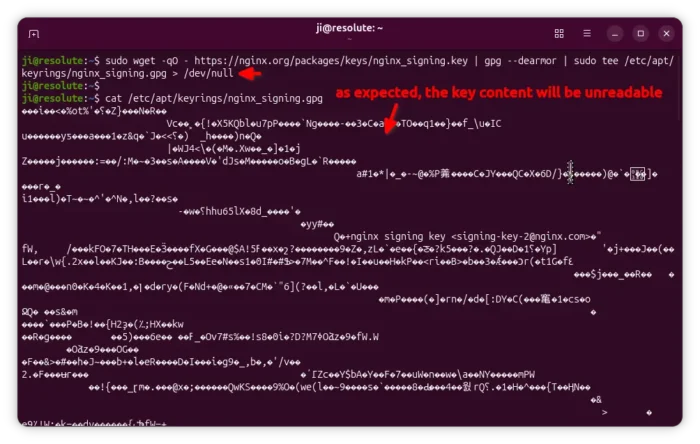
wgetcommand to download the key, dearmor it, and finally save to the/etc/apt/keyringsdirectory:sudo wget -qO - https://nginx.org/packages/keys/nginx_signing.key | gpg --dearmor | sudo tee /etc/apt/keyrings/nginx_signing.gpg > /dev/null
3. Next, run command to create & edit source file:
sudo nano /etc/apt/sources.list.d/nginx.sources
When the file opens in terminal, paste following lines (for 26.04):
Types: deb
URIs: https://nginx.org/packages/ubuntu/
Suites: resolute
Components: nginx
Architectures: amd64
Signed-By: /etc/apt/keyrings/nginx_signing.key
NOTE:
- For Mainline version, use
https://nginx.org/packages/mainline/ubuntu/instead for URIs. - For other Ubuntu edition, replace
resolutewithnoblefor 24.04, orjammyfor 22.04. - For ARM devices, replace
amd64witharm64.
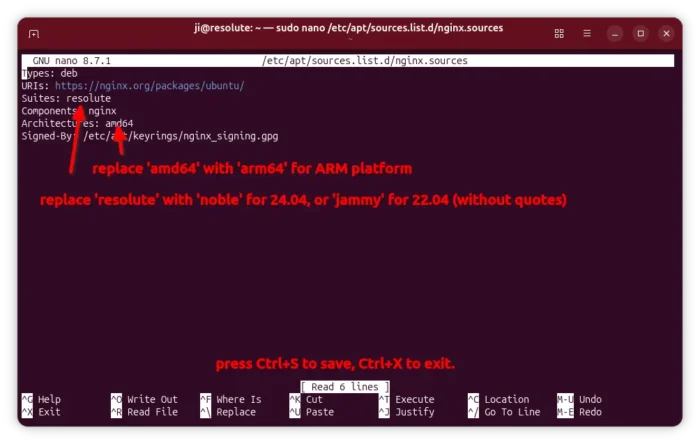
Finally, press ctrl+s to save file, then ctrl+x to exit.
4. After setting up the key & sources files, run command to refresh system package cache:
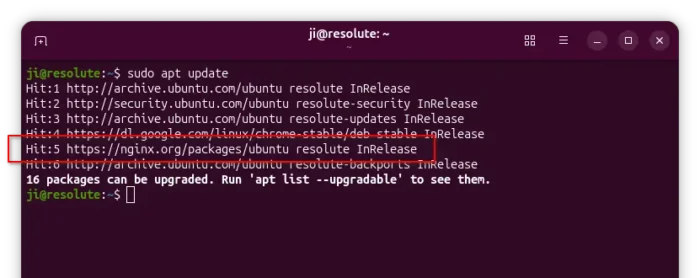
sudo apt update
In the output, there should be a line saying “Get/Hit:x https://nginx.org/packages/ubuntu code-name InRelease”.
5. Finally, install Nginx as well as modules via command:
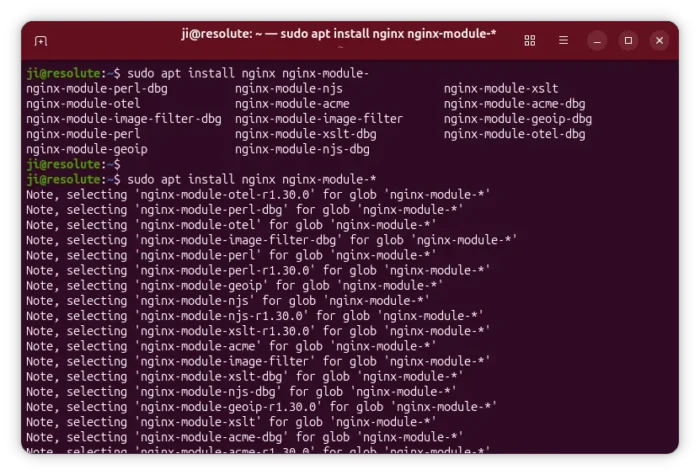
sudo apt install nginx nginx-module-*
As you see in the screenshot, there’s only 7 modules available. Instead of using nginx-module-* for installing all the modules, you may replace it with certain package name that you want to install.
NOTE: Installing Nginx from official repository will remove the packages (if installed) installed from Ubuntu system repository. While installing process, it may ask whether to override the original configuration file. Answer N (default) will keep the old one.
Configure Nginx
After installing the web server, you may run command to verify the version:
nginx -v
To configure it, run command to edit the config file:
sudo nano /etc/nginx/nginx.conf
When the file opens in command console, you can edit the user, group, enabled modules, and other basic settings. See the official Docs for details. NOTE: The Nginx packages were build with different user & group and --prefix.
Ubuntu and PPA packages usewww-datafor nginx user & group, and/usr/share/nginxfor prefix directory.- The official repository package use
nginxfor user & group, and/etc/nginxfor prefix.
For using Nginx along with other software, such as PHP-FPM, you have to set the user (www-data or nginx) accordingly in www.conf file.
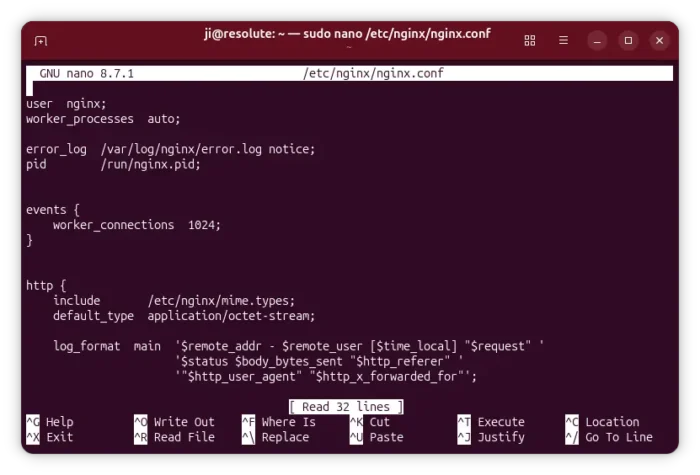
Nginx config file
Start, Restart, Troubleshot Nginx
After installing Nginx, it should start automatically. To verify its status, run command:
systemctl status nginx
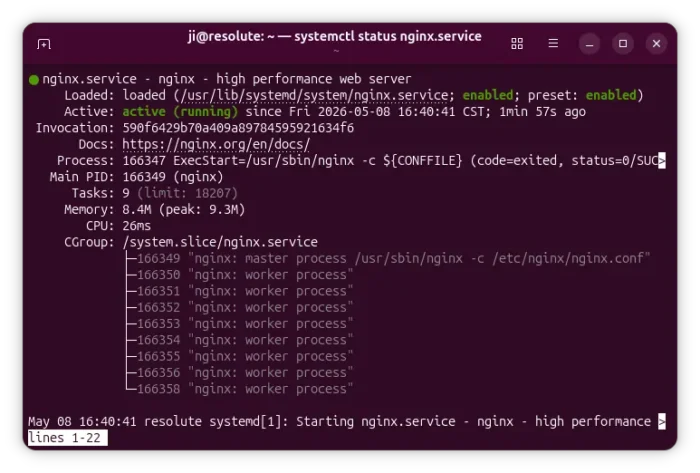
If it’s NOT active (running), try enable and start it via command:
systemctl enable nginx
systemctl start nginx
After making changes to Nginx config files, it’s better to run the command below to TELL if everything works:
nginx -t
Then, restart the service by running command:
systemctl restart nginx
Nginx by default enabled error log, available via /var/log/nginx/error.log. If you didn’t disable the feature in config file, then, run command to print errors if any:
cat /var/log/nginx/error.log |more
Option 2: Install Nginx from Ubuntu PPA (DISCONTINUED)
NOTE: THIS METHOD DOES NO LONGER WORK AS THE MAINTAINER REMOVED THE PPA. Please choose Option 1 Instead!
Ondřej Surý, a member from Debian developer team, maintains very popular PPAs contain the latest mainline and stable versions of Nginx for Ubuntu 24.04, Ubuntu 22.04, and Ubuntu 20.04. The PPAs are unofficial, but include most modules and can upgrade seamlessly from the stock version in Ubuntu repository. And, it so far supports amd64 (AMD/Intel), arm64/armhf (e.g., Raspberry Pi), and ppc64el (IBM POWER platform) devices. 1. First, press Ctrl+Alt+T to open terminal, or connect to remote Ubuntu Server.
- Then, run command to make sure you have the tool to manage software repositories:
sudo apt install software-properties-common
- To add the Nginx Stable PPA, run command:
sudo add-apt-repository ppa:ondrej/nginx
- Or, add the Nginx Mainline PPA instead via command:
sudo add-apt-repository ppa:ondrej/nginx-mainline
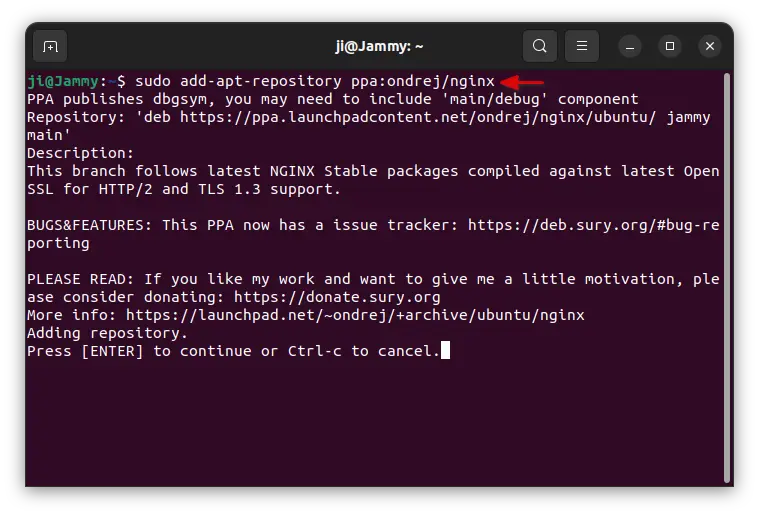 2. Ubuntu should automatically refresh package cache after adding PPA. Just in case, you may run the command below to do it manually:
sudo apt update
3. Finally, run command to install (or upgrade from system version) nginx as well as some common used modules:
sudo apt install nginx-full
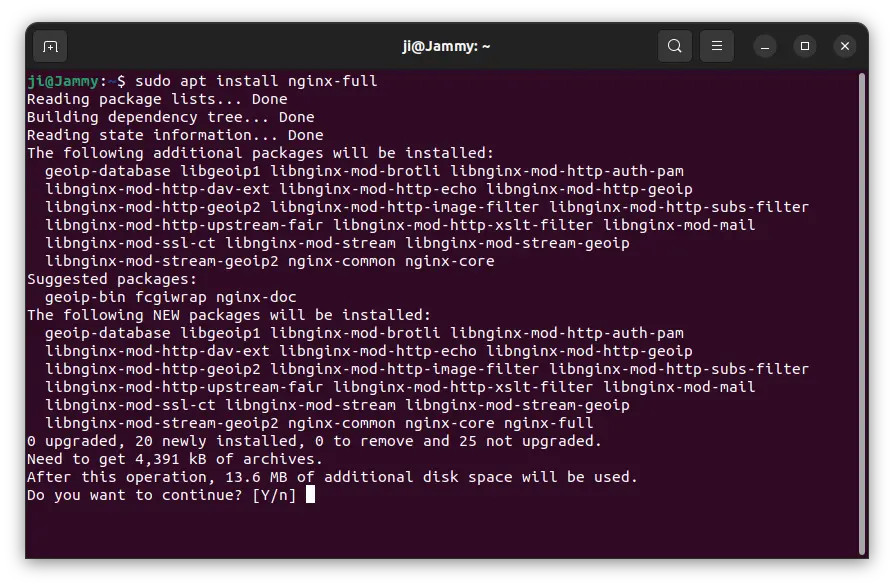 The command will left some other modules un-installed, you may type the command below then hit Tab key to list all available modules:
sudo apt install libnginx-mod-
Then type sudo apt install plus your desired module package name to install it. 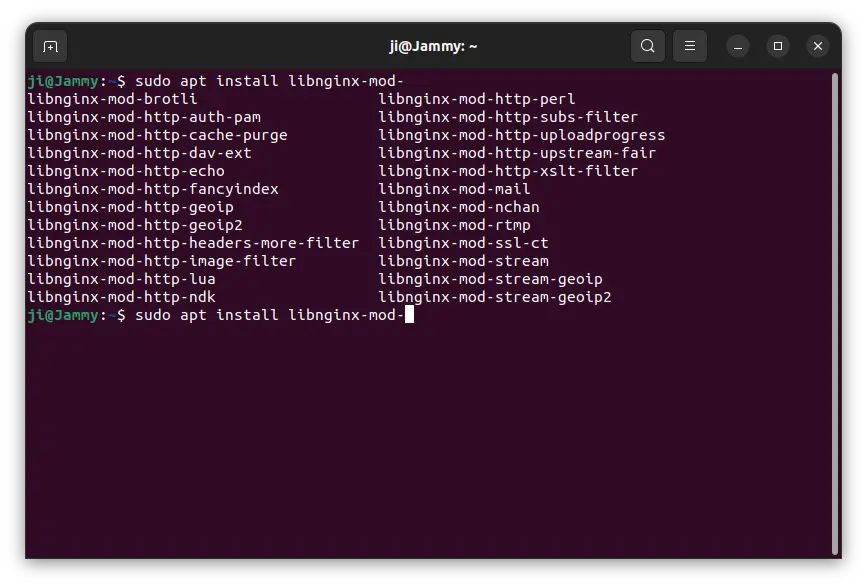 For choice, you may also install the
 nginx-extras (will replace nginx-full) that includes additional modules, such as http_flv_module, http_mp4_module, and some dynamic modules created by both Nginx and third-party developers.
Uninstall Nginx
If you want to remove Nginx from your machine or server, run command to disable the service first:
systemctl disable --now nginx
Then remove the nginx packages:
sudo apt remove --autoremove nginx nginx-module-*
And, remove the official repository by deleting the sources and key files:
sudo rm /etc/apt/keyrings/nginx_signing.gpg /etc/apt/sources.list.d/nginx.sources
Finally, run sudo apt update to refresh system package cache.
















Thanks. Useful. Blessings
There is a typo:
system status nginx
should be
systemctl status nginx