GNOME introduced new core camera app in the release of version 45, which however not adopted as default in Ubuntu 23.10 or Fedora 39.
If you want to try it out, then here’s how to do the trick in Ubuntu 24.04 and/or Ubuntu 23.10, and workaround “No Camera Found” issue.
The new camera app, aka Gnome Snapshot, is written in GTK4 + Libadwaita. Compare to Cheese, it looks more modern and native in current Ubuntu and Fedora Workstation.
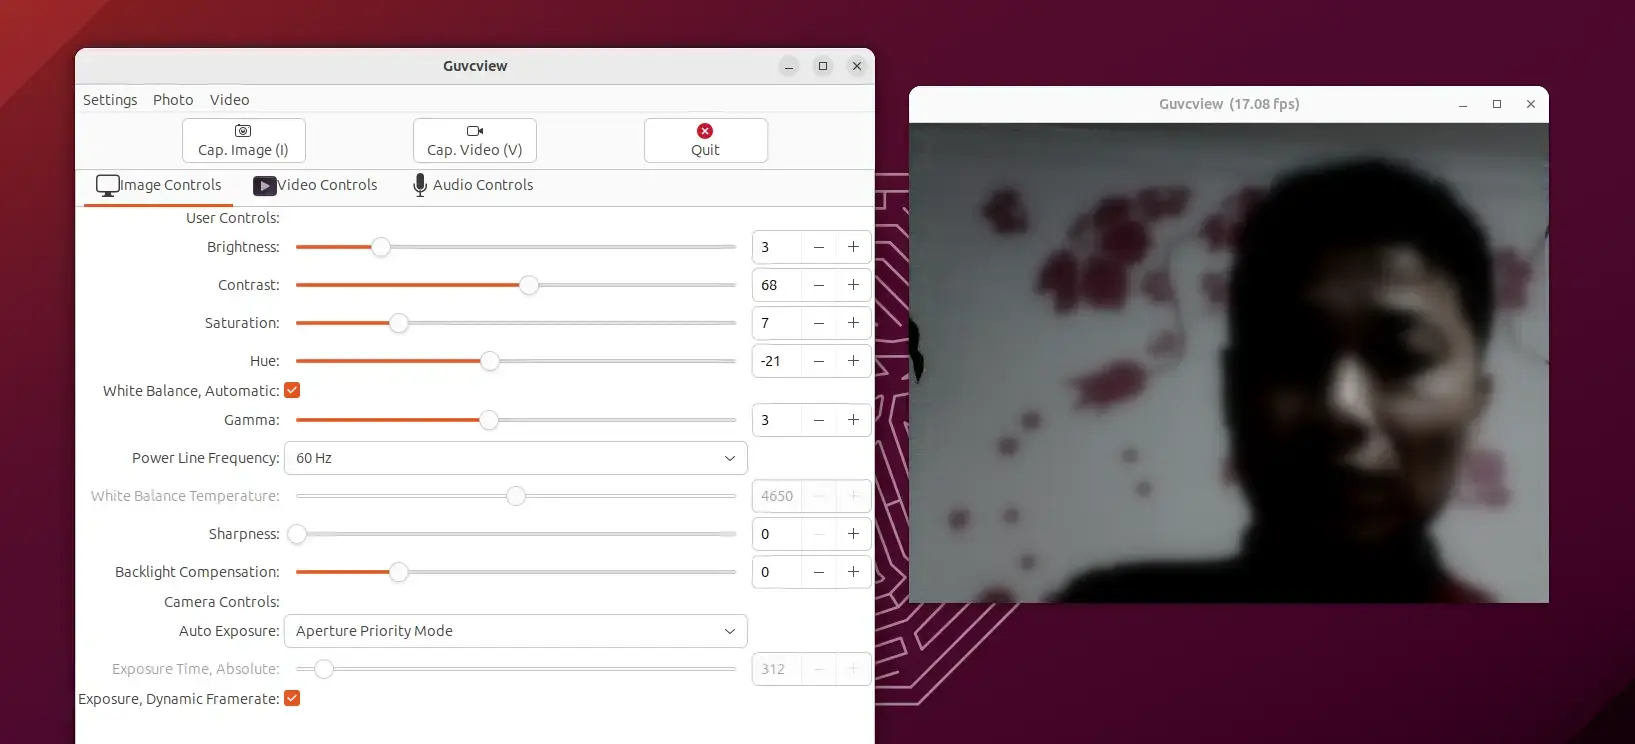
Guvcview, the free open-source tool for capturing image/video and dynamically controlling UVC camera and webcam devices, released version 2.1.0.
It’s a GTK3 and Qt5 application that provides both graphical interface and command line options to control your webcam or camera.
With it, you can change the brightness, contrast, saturation, hue, white balance (gamma), sharpness, backlight compensation, etc settings for your webcam.
Besides the dynamic control of UVC (USB Video Class) camera/webcam, it also allows to capture video with control of frame rate, filters such as mirror, invert, pieces, blur, etc. Also, capture audio with sample rate, latency, and filters including echo, reverb, fuzz, wahwah, and ducky.
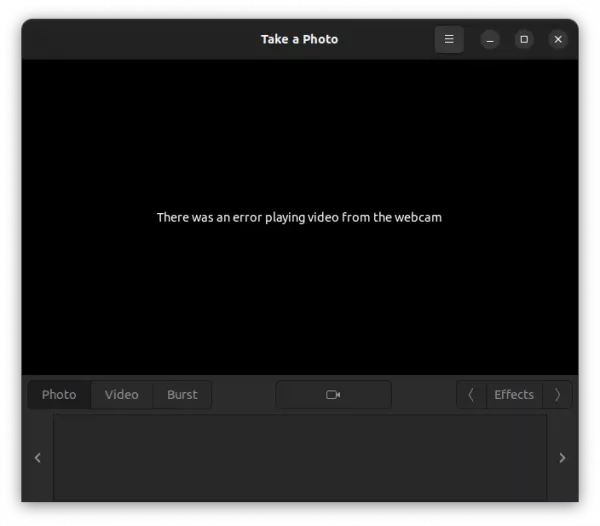
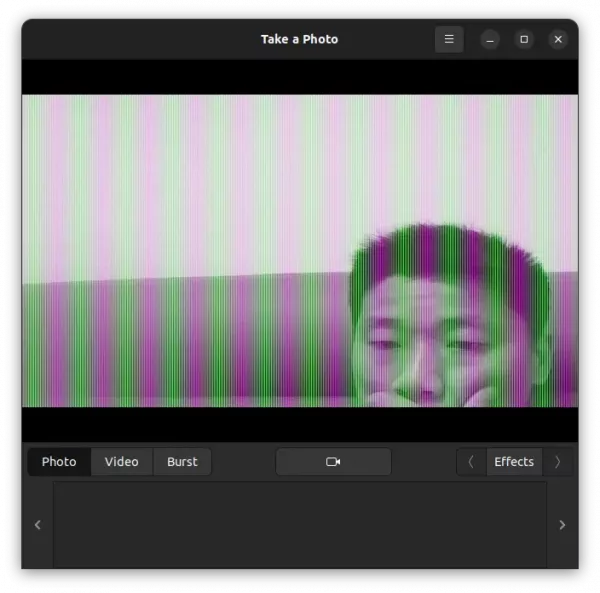
Cheese, the default app for taking photos or recording via webcam, is not working properly in my case in Ubuntu 22.04.
By launching the app, webcam light turns on and persists only for a few seconds. Then it displays a blank screen with following text:
“There was an error playing video from the webcam”
According to the Ubuntu bug report and the upstream one, it seems to have something to do with the patch for MJPEG output support that causes issue on low end PC (I guess).
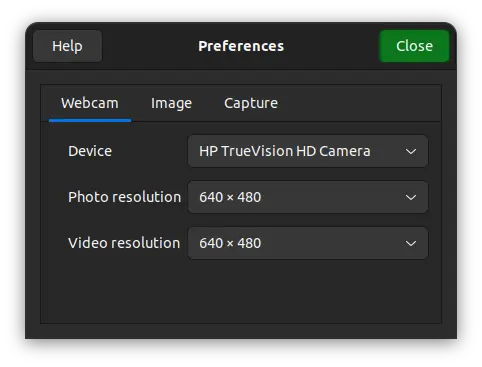
And, here are a few workarounds that works in my laptop with HP TrueVision HD Camera.
Workaround 1: Change output resolution
Firstly, launch Cheese and open “Preference” dialog from the hamburger menu. When it opens, change the resolution from 1280×720 to 640×480. Then close the app.
Next, launch Cheese again. It display a blank screen but camera light keeps on in my case. Continue decreasing the resolution until it works again. Then switch back a higher photo/video resolution.
However, the highest 1280×720 resolution produces a corrupted display just as the bug reported. While 640×480 works great in my case.
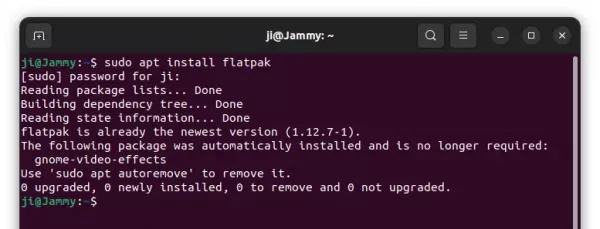
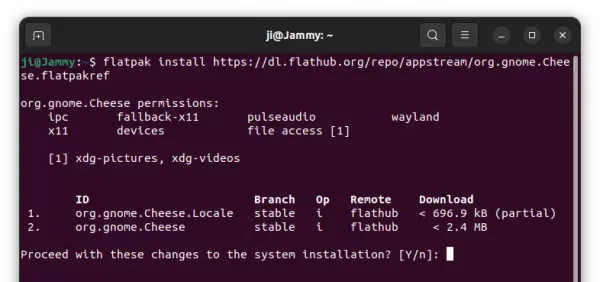
Workaround 2: Install Cheese 3.38 via Flatpak
The previous v3.38 does not has the issue. It’s available to install via the universal Flatpak package.
1. Firstly, press Ctrl+Alt+T on keyboard to open terminal. When it opens, run command to install the daemon:
There’ll be a few hundreds more MB run-time libraries to install for the first time.
Finally, run the command below to launch the Flatpak to see if it works:
flatpak run org.gnome.Cheese
3. (Optional) Remove the pre-installed Cheese package.
The make the app icon in search result to launch Cheese as Flatpak instead of the pre-installed package. You may remove the original package via command:
sudo apt remove cheese
And a system restart is required if you’re first time installing an app as Flatpak.
How to Restore
To remove the Flatpak package, use command:
flatpak uninstall --delete-data org.gnome.Cheese
And install back the original Cheese package using command:
sudo apt install cheese
Workaround 3: PPA with Cheese package (patched)
As @matthew.ruffell mentioned in the bug report, revert the commit will make it work again. This could be a workaround until the upstream fixed the issue. However, in my build the 1280×720 resolution just disappeared…
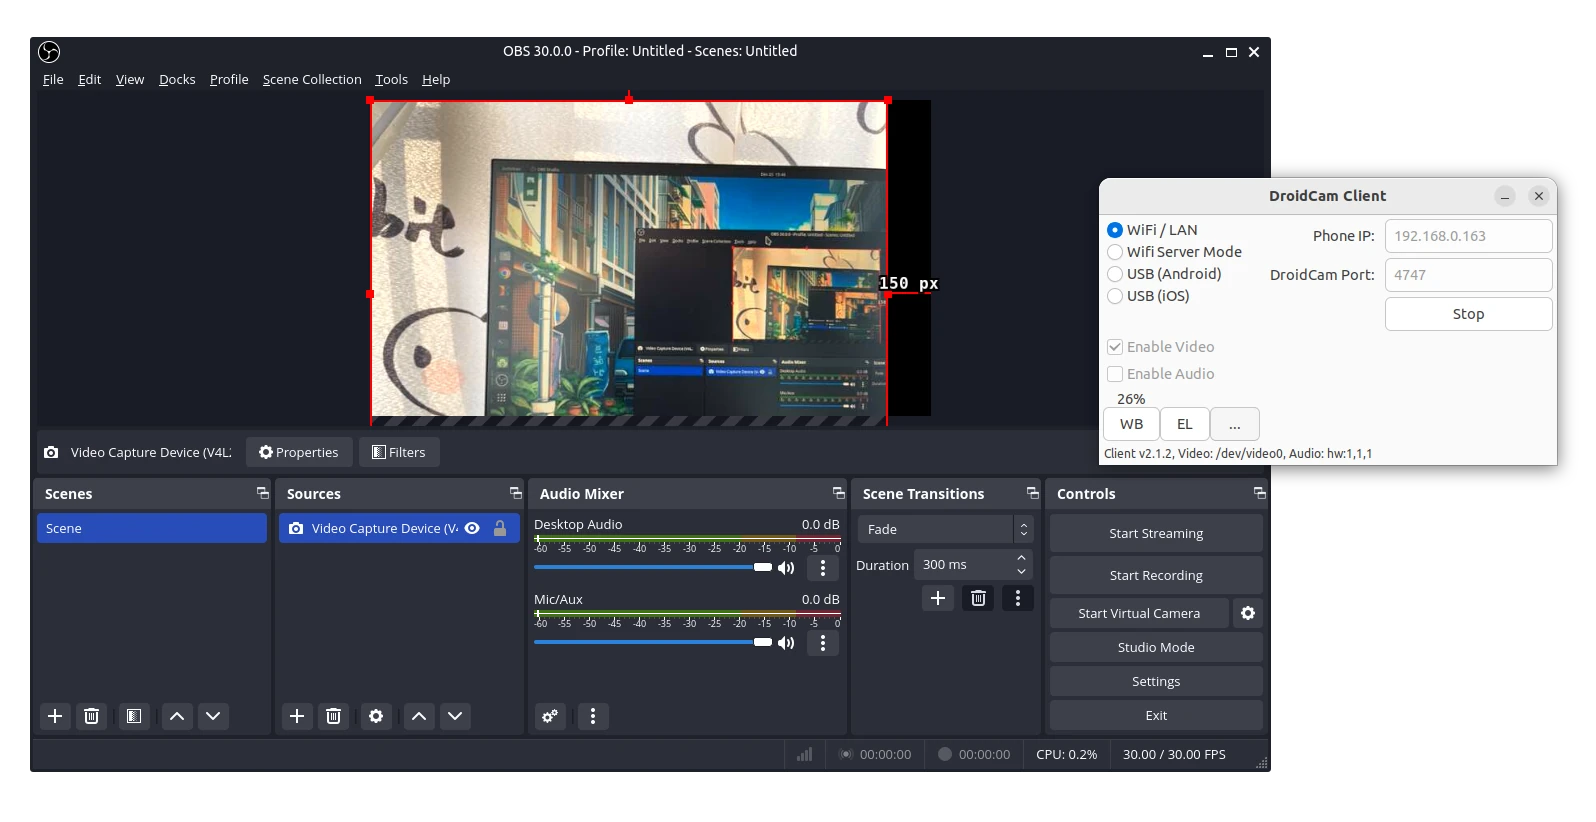
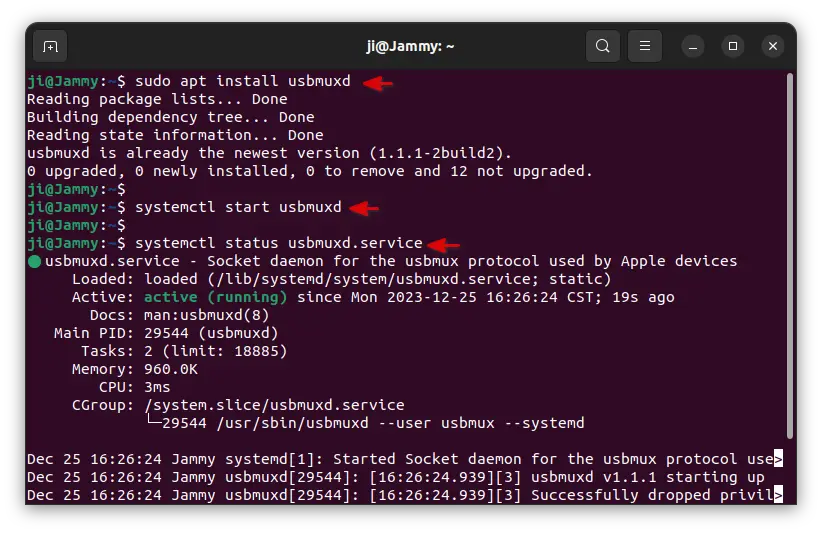
Don’t have a built-in webcam in your Ubuntu PC? You can use your Android or iPhone as wireless or USB webcam.
By installing a free open-source ‘DroidCam‘ app in both your phone and Linux Desktop, then you can use the Android/iOS phone just like built-in webcam, through either wireless network or USB cable.
It also works with OBS/XSplit/etc for streaming to Twitch or YouTube. You can also use DroidCam as an IP webcam (or Surveillance Camera) via a Internet browser virtually on all networks. Use it as a simple pet cam, spy cam, or a security camera.
Features:
Chat using “DroidCam Webcam” on your computer, including Sound and Picture.
Connect over WiFi or USB cable.
Use other apps with DroidCam in background (Android).
Surveillance/IP webcam MJPEG access
my iPhone camera screen in OBS Studio
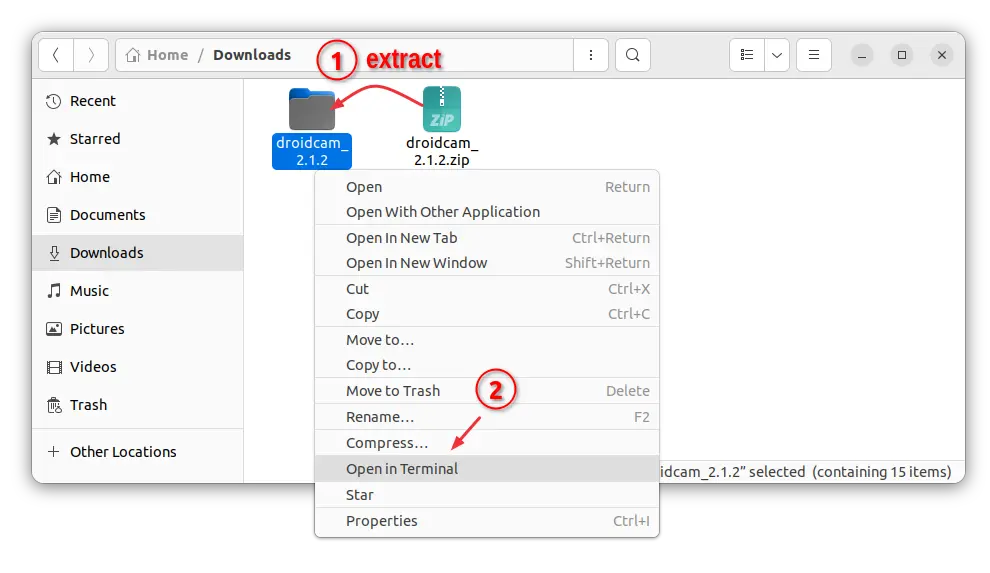
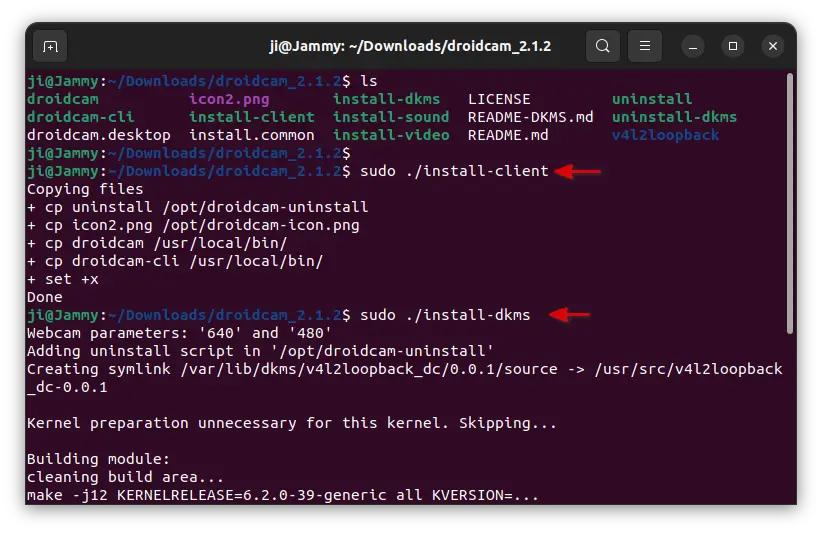
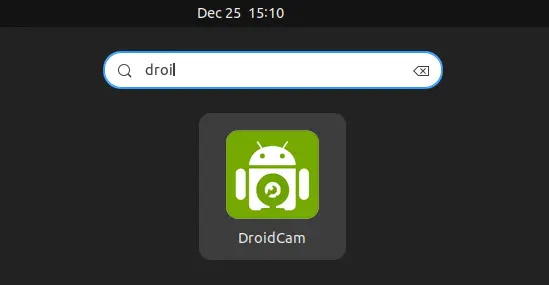
Step 1: Install DroidCam in Ubuntu:
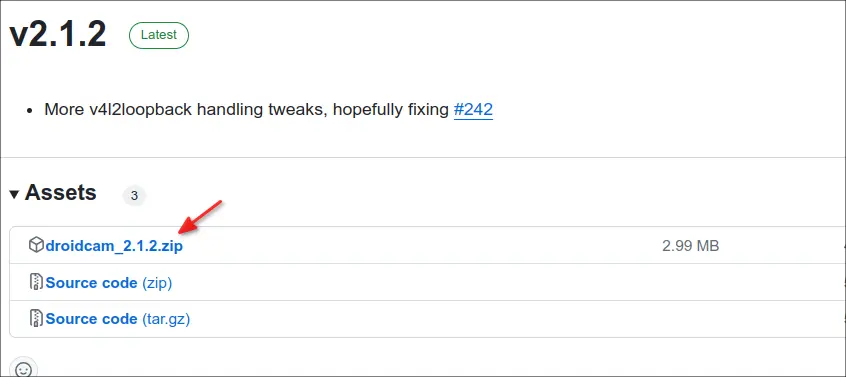
To install the app in Ubuntu & other Linux, first go to the Github release page to download the latest package:
Finally, either connect both phone and Ubuntu PC into same local network, or connect through USB.
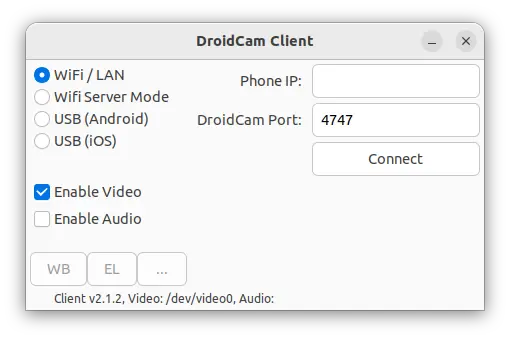
Open the app in both devices, and select either WiFi or USB in Ubuntu client app, try phone IP address if required and click “Connect”.
Once successfully connected, open up a V4L2 compatible program (e.g., VLC player, Skype, OBS Studio) and you should see DroidCam listed as a video device.
In addition, as you see in last screen, the app has a few buttons to configure white-balance, exposure-locked, zoom in/out, flip/mirror, and toggle LED flash, etc.
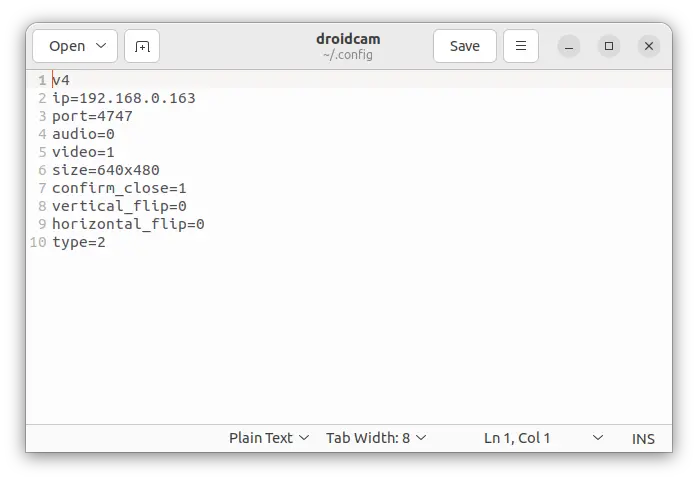
As well as screen resolution, user can edit the .config/droidcam (press Ctrl+H to view in Files) file for the configurations.
Uninstall:
To remove DroidCam client in Ubuntu, simply open terminal (Ctrl+Alt+T) and run command to run uninstall script: