The free open-source text and source code editor, Atom, is reaching the end of life!
Github, who is behind the editor, announced on June 8:
Today, we’re announcing that we are sunsetting Atom and will archive all projects under the organization on December 15, 2022.
Atom is cross-platform code editor developed by Github, the code hosting platform itself. It’s promoted as a “hackable text editor for the 21st Century”, as it is fully customizable in HTML, CSS, and JavaScript.
The end-of-life announcement explained that Atom has no significant feature development for the past several years. The community involvement has declined significantly. So, they decided to sunset the project.
You know, Atom is a direct competitor to Microsoft’s Visual Studio (VS) Code. And, Microsoft acquired Github on June 4, 2018. That could be the real reason (IMO) though it takes 4 years 😄.
Anyhow, there are 6 months until the developer team archive the atom/atom repository. It’s time for those still using Atom to migrate to an alternative solution.
The free open-source 3D creation software Blender 3.2.0 was released! Finally, it adds support for AMD GPU rendering for Linux!
Blender 3.2.0 introduced a new type of Cycles render pass that contains only the lighting from a subset of light sources. It’s ‘Light Groups’ which can be used to modify the color and/or intensity of light sources in the compositor without re-rendering.
Cycles now supports selective rendering of caustics in shadows of refractive objects. Paint is now available in Sculpt mode. New paint brush comes with a bunch of new settings like tip shape, wet mixing, flow and density.
And there are many other changes including:
Using the voxel remesher all color attributes will be preserved.
Masking, auto-masking and face sets are fully supported with color attribute painting.
Duplicate Elements Node that can duplicate points, edges, faces, instances, and curves
Asset collections (no longer experimental)
Curve pen tool to quickly add, delete, and tweak control points
New Envelope modifier.
Manage video sequencer channels by giving channels a name, as well as mute and lock options
Webp image import/export support.
OpenColorIO color space aliases support
And much more.
How to Install Blender 3.2.0 in Ubuntu
It’s quite easy to install Blender in Ubuntu, since the official Snap package is available in Ubuntu Software. You just need to keep an eye on the source info in the header bar, and make sure it’s from Snap Store.
Don’t like the sandbox applications? Blender website also provides 64-bit Linux tarball for downloading:
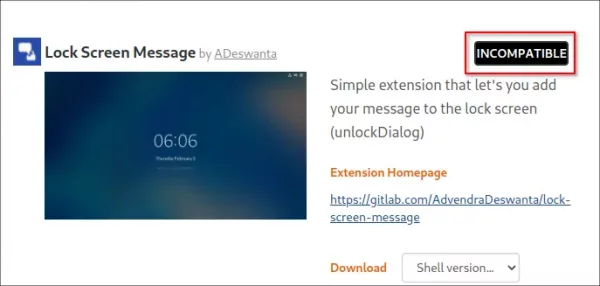
Your favorite GNOME extension is marked as “INCOMPATIBLE“? It might still work!
There are so many extensions to help improve Ubuntu, Fedora, or other Linux’s GNOME desktop experience. Some of them may be outdated for your GNOME version. So, you see “incompatible” instead of on/off switch when try installing via a web browser.
Sometimes, the extension is still compatible, but the Gnome version is not declared. You may try out and see if it works by disabling version validation, before bothering the extension developer.
NOTE: Disable version validation ONLY makes incompatible Gnome extensions install-able. Extensions may refuse to work!
Single command to disable version validation:
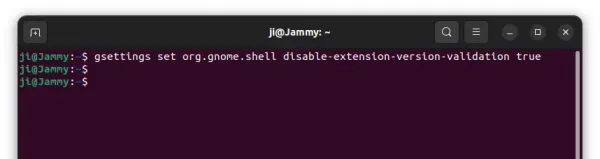
For those familiar with Linux commands, open terminal by searching from ‘Activities’ overview screen.
Then, run the single command to will disable version validation when trying to install Gnome extensions:
gsettings set org.gnome.shell disable-extension-version-validation true
Not only for Ubuntu and Fedora, it should also work for all Linux with GNOME desktop.
Disable version validation vid Dconf Editor:
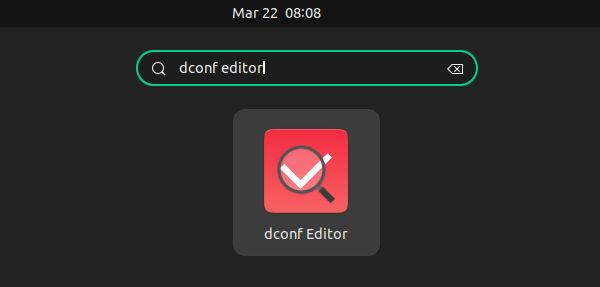
For graphical configuration tool, you may first install Dconf Editor from Ubuntu Software (Gnome Software).
Then, click top-left ‘Activities’, search for and launch the tool.
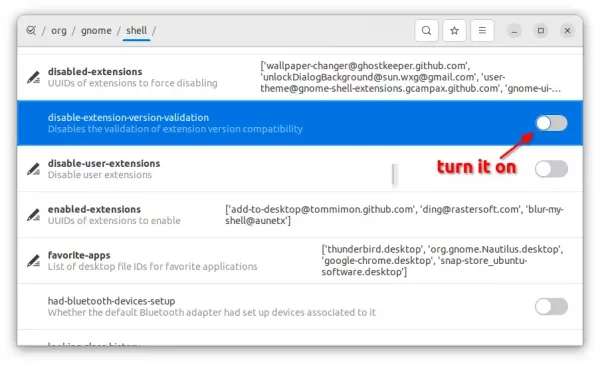
Finally, navigate to “org/gnome/shell” in the configuration tool, and turn on the slider icon for “disable-extension-version-validation”.
Install incompatible extension via Extension Manager:
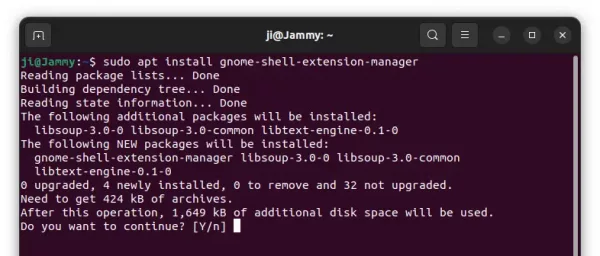
Since Ubuntu 22.04, user may simply press Ctrl+Alt+T on keyboard to open terminal. Then run command to install extension manager tool:
sudo apt install gnome-shell-extension-manager
Or, search for and install “Extension Manager” in Ubuntu Software (or Gnome Software).
Then, search for and launch the tool from ‘Activities’ overview.
Finally, navigate to ‘Browse’ tab to search for and install GNOME extensions. Though incompatible extensions are marked as “Unsupported”, user can still click on the button and confirm in pop-up dialog to install it anyway.
Ubuntu 22.04 misses coturn TURN and STUN server package in its system repository. Here’s how to install it via PPA.
Coturn is a free open source implementation of TURN and STUN Server, which can be used as either a VoIP media traffic NAT traversal server and gateway, or general-purpose network traffic TURN server and gateway.
The software package is available in all current Ubuntu releases, exclude Ubuntu 22.04! The reason that the new LTS exclude the package might be a compile issue due to OpenSSL 3.0 does no longer has FIPS 140 mode.
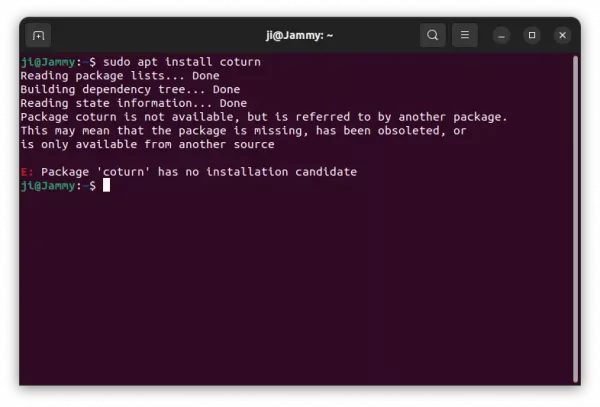
When you try installing the package in terminal, it will output that “E: Package ‘coturn’ has no installation candidate“.
Coturn is NOT available in Ubuntu 22.04 repository
Ubuntu 22.10 development branch has added a patch to fix build the package against OpenSSL 3.0, and here’s an unofficial backport for Ubuntu 22.04 via PPA repository.
NOTE: I’m NOT sure if it’s the real reason that Ubuntu 22.04 exclude the package in its repository. Use the PPA package in your own risk!
1. Add the PPA
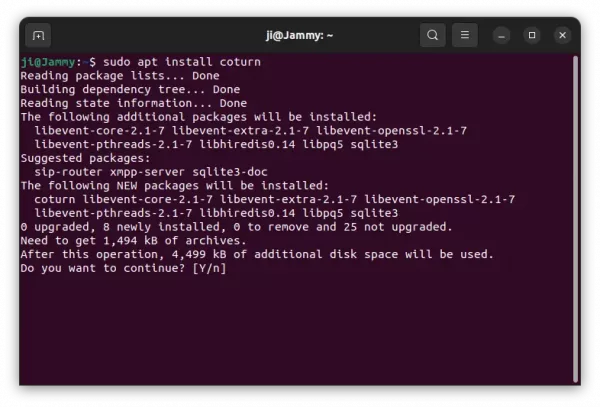
The PPA provides the coturn packages for amd64, arm64/armhf, ppc64el, and s390x CPU architectures for Ubuntu 22.04 and its based systems.
To get started, press Ctrl+Alt+T on keyboard to open terminal. When it opens, run the command below to add the PPA:
Still working on Ubuntu 21.10? It’s time to upgrade to Ubuntu 22.04 LTS, because it will reach end of life in next month.
Ubuntu 21.10, code-name “Impish Indri”, was released on October 14, 2021 as a short-term release with 9-month support.
Support of this Ubuntu edition will end soon. At that time, there’s no longer package updates and security fixes. Also, Ubuntu PPAs, software developers, as well as other software sources will (or has already) stop updating for 21.10.
To keep safe and get updated software packages, you may either upgrade to Ubuntu 22.04 or do a fresh install of Ubuntu 20.04. Both are long term support releases with 5-year support from their release date. Ubuntu 22.04 is recommended, though it still has various compatibility issues with old applications.
Download / Upgrade to Ubuntu 22.04
If you would like to do a fresh install of Ubuntu 22.04, download the iso image from the official website:
And, here’s a step by step guide that could help you to install Ubuntu 22.04 from an USB stick.
To upgrade from Ubuntu 21.10 to Ubuntu 22.04 LTS, you may either follow the official documentation with basic info. Or, follow this step by step upgrade guide which’s written for Ubuntu 20.04 but also works for 21.10 and will upgrade directly to the final release of Ubuntu 22.04.
Want to zoom in or zoom out your screen content? It’s easy to do the job via the system built-in magnifier tool.
If you just want to magnify your web pages, press Ctrl and + key combination on keyboard can do the trick in the most web browsers. For others, Ubuntu has a built-in screen magnifier.
It’s definitely the GNOME feature that also works in Fedora Workstation, and other Linux with the desktop environment. Which, can be useful when recording video tutorials.
Enable/Configure Screen Magnifier
It’s easy to enable the feature in Ubuntu 22.04 since “Settings” (aka Gnome control center) now includes the toggle option.
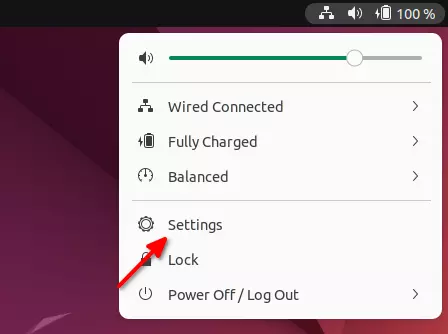
1. First, open “settings” via the top-right corner system menu.
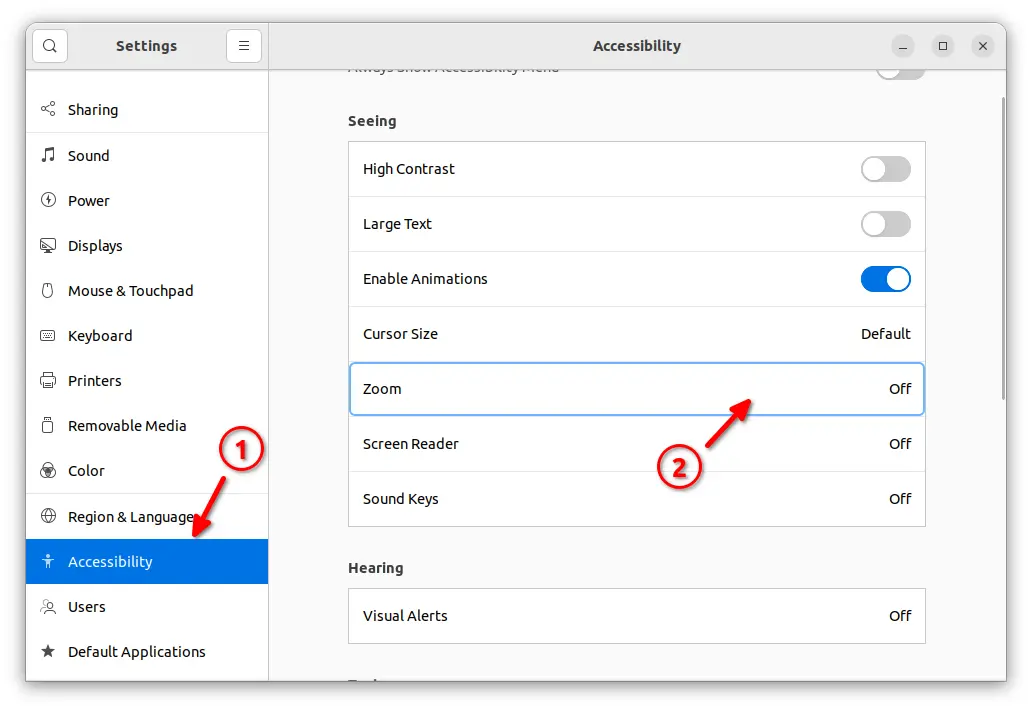
2. When it opens, go to Accessibility from the left, then click on “Zoom” option in right to open the configuration page.
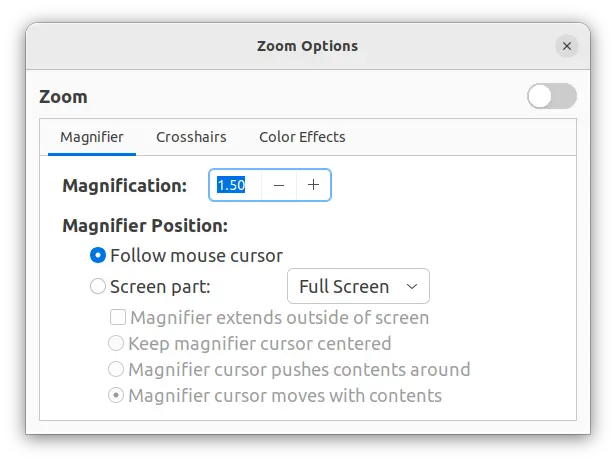
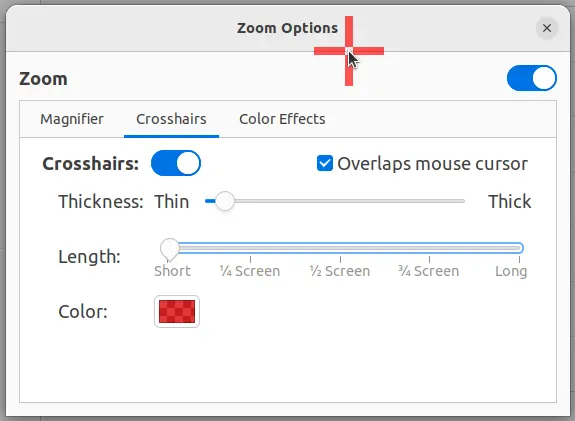
3. In next pop-up dialog, turn on/off the slider icon to enable or disable magnifier. The magnification factor defaults to 1.00 which means no magnification. You may set the value from 0.1 to 32 to either decrease or increase screen size.
There are options to set magnifier position to either follow mouse center or keep centered. Crosshairs in custom color is available to make mouse pointer easy to follow. And, you may adjust the screen brightness, contrast, and color when magnifier enabled.
Keyboard shortcut to Enable/Disable Magnifier
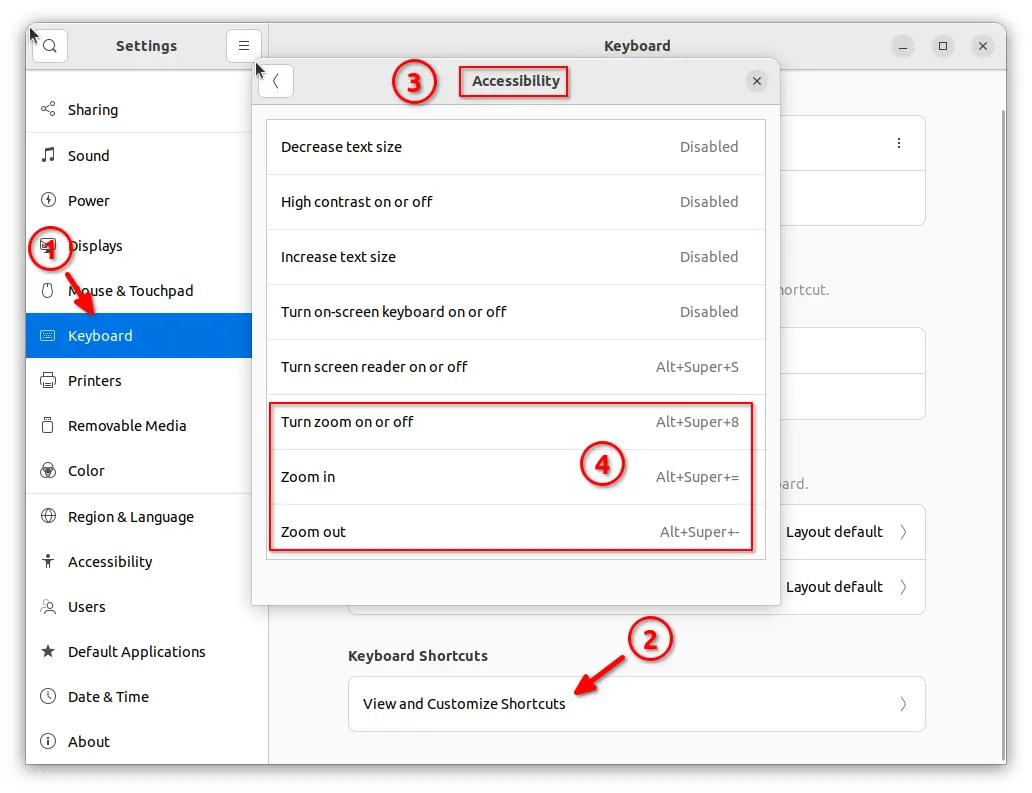
Besides using Gnome control center or Accessibility indicator (the human body icon in system tray), there’s a global keyboard shortcut Super (Windows key) + Alt + 8 to turn on/off the function quickly.
The shortcut key is quite useful. You may change it to any other key combination by going to “Settings -> Keyboard -> View and Customize Shortcuts -> Accessibility”.
As you can see, there are 2 more shortcuts Super + Alt + = and Super + Alt + -. Using them will set “Magnification factor” to 1.00 automatically. So, Super + Alt + 8 will only turn on/off the function but NO magnification, you can then press the 2 shortcut keys at any time to zoom in/out.
Change Magnifier shortcut key via Linux command:
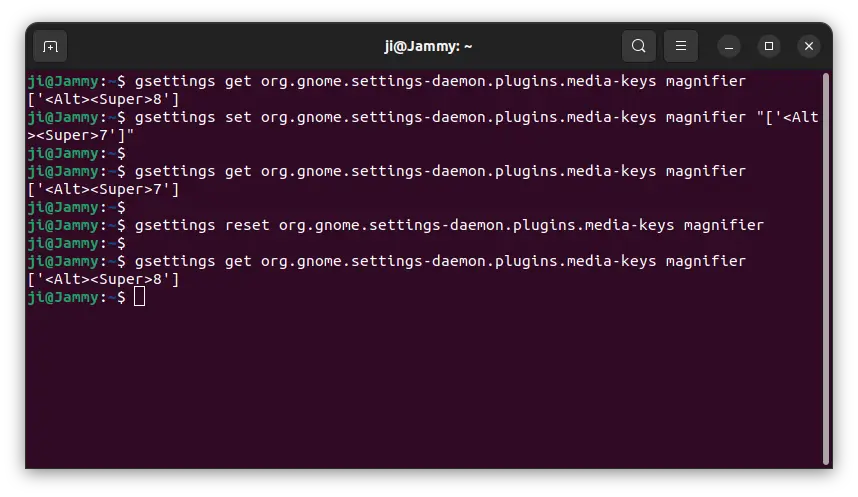
For those familiar with Linux command, it’s possible to change the shortcut key (to Alt+Super+7 for example) using command:
gsettings set org.gnome.settings-daemon.plugins.media-keys magnifier "['<Alt><Super>7']"
And, reset the key if you want by running command:
Since Ubuntu 22.04, you’ll find that the MPV media player does NOT have window border and title-bar out-of-the-box.
That’s quite annoying! You can no longer drag resizing the app window. And, title bar buttons (minimize, maximize, and close) only appear when you hover over the window during video playback.
MPV no window border and title bar
Why:
It’s NOT feature but a bug! Someone has reported the issue almost 9 years ago. Though, it’s still not been fixed due to GNOME Wayland protocol.
You know, MPV is a command line media player. It does not use the GUI toolkit for window borders, but the server-side protocol. However, GNOME developers do deliberately do not support the xdg-decoration protocol for server-side decorations in Wayland (via this FAQ).
Ubuntu 22.04 finally switched Wayland as the default session. So, the problem occurs.
Workaround 1: Switch back Xorg Session
Besides MPV, still many applications have compatibility issues with GNOME Wayland. Even the Night Light feature does not work in Ubuntu 22.04 with this session.
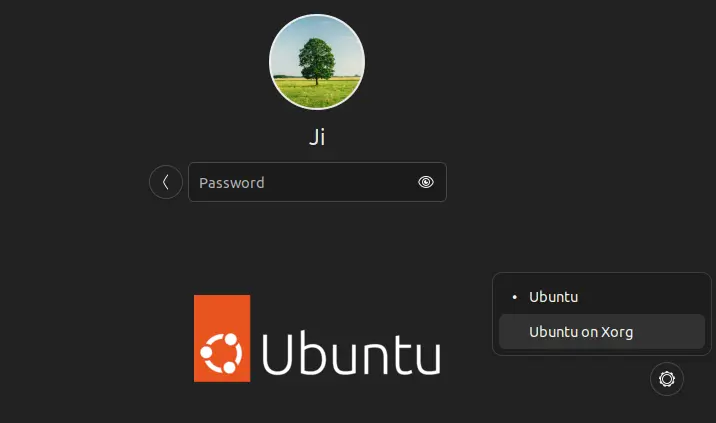
As a workaround, user may switch back to the classic Xorg session. To do so, simply log out, click your username in login screen, then select “Ubuntu on Xorg” via the bottom right gear button menu, and finally type password to log in.
To verify your current session either run echo $XDG_SESSION_TYPE command in terminal or check in “Settings -> About -> Windowing system”.
Workaround 2: Run MPV via X11 backend
For those prefer GNOME Wayland session, it’s possible to run MPV media player via X11 backend without switch session.
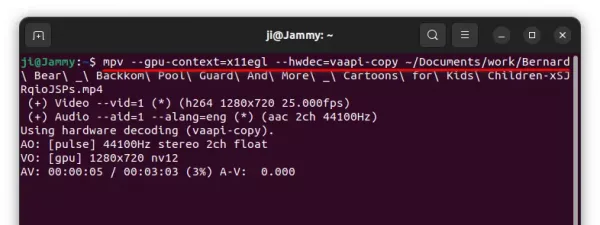
1.) To start video playback from command line, use command:
Here --gpu-context=x11egl tells to use x11 backend for video playback. And, --hwdec=vaapi-copy is required to enable GPU hardware acceleration in this case.
Thanks to S. Likhitrattanapisal, you may try --hwdec=vaapi flag to enable hwacc. Though it may not work, it depends on your hardware.
2.) To enable this for global use, you may add the flags into MPV configuration file.
Press Ctrl+Alt+T on keyboard to open terminal. When terminal opens, make a copy of configuration file first via command:
sudo cp /etc/mpv/mpv.conf /etc/mpv/mpv.conf.bak
Then, edit the file via command:
sudo xdg-open /etc/mpv/mpv.conf
When file opens, add the following new line:
gpu-context=x11egl
After saving the changes, start playing your movie via MPV. The window border as well as title-bar should be back!
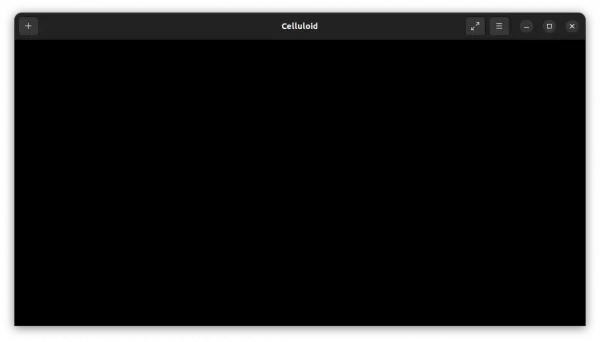
Workaround 3: Use GUI front-end
There are a few media players that use MPV as backend. As far as I know, there are SMPlayer and Celluloid (formerly GNOME MPV), both of which are available to install via Ubuntu Software (or App Center).
Mozilla Firefox 101 was released today with minor new features and security fixes.
If you do video conferencing regularly with Firefox web browser, you may now use as many microphones as you want, at the same time. It allows to switch your microphones at any time, if your conferencing service provider enables this flexibility.
For non-configured MIME file types, Firefox 101 allows to assign a custom action upon download completion.
Allow sites to detect if user has requested web content present with a higher (or lower) contrast.
New inspector panel option ‘Click and drag to edit size values’.
WebDriver BiDi protocal.
Add support for large, small, dynamic viewport units and logical ones (*vi and *vb).
Various security fixes.
How to Get Firefox 101:
Ubuntu keeps updating the Firefox packages through its security & updates repository. Simply keep your system up-to-date, you’ll get this Firefox release soon in next few days.
For Ubuntu 22.04 user prefer .deb package, as well as the old Ubuntu 16.04, keep an eye on the MozillaTeam PPA.
Need on-screen virtual keyboard? Here’s how to enable and use the function in Ubuntu 22.04 LTS.
The default GNOME desktop environment has built-in on-screen keyboard for use in case you don’t have a physical keyboard. It’s easy to enable this feature by doing following steps one by one:
Enable on-screen keyboard:
1. Firstly, open settings (gnome-control-center) via the top-right corner system menu option.
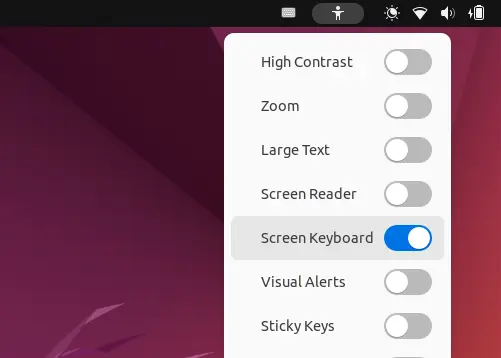
2. When it opens, navigate to “Accessibility” in the left. In right, screen down and turn on the option for “Screen Keyboard”.
A new human body icon should appear in top-bar, indicates that “Screen Keyboard” has enabled. There are as well toggle options for ‘High Contrast’, ‘Large Text’, ‘Sticky keys’, and more.
Improve OSK Usability:
On-screen keyboard by default only arise in few cases, such as when you focus the search box in ‘Activities’ overview.
However, it does not show you the virtual keyboard in most cases, include typing in text editor or inserting number in a input box.
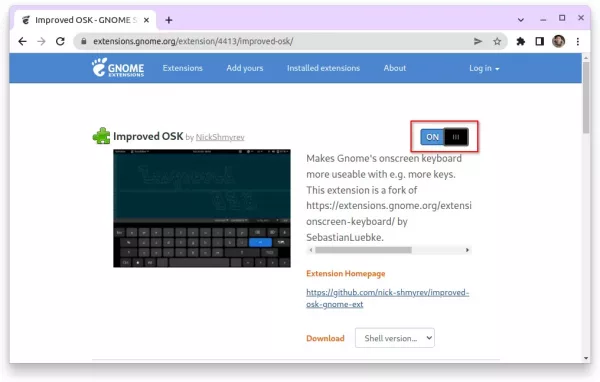
So the “Improved OSK” extension is present to improve the function by adding a small indicator applet on top-bar. By clicking on it, you may open up the on-screen keyboard at anytime and any input area your cursor focused.
Install “Improved OSK” extension
Method 1: Install extension via browser
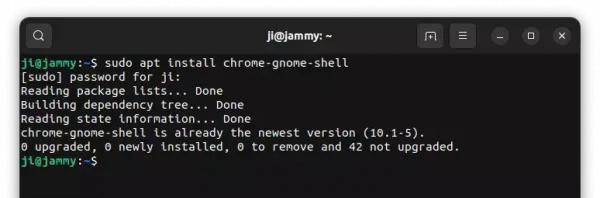
Firstly, press Ctrl+Alt+T on keyboard to open terminal. When it opens, run the command below to install the agent:
sudo apt install chrome-gnome-shell
Next, turn on the slider icon in the link page below to install the extension:
NOTE: The pre-installed Firefox is a Snap package that does not work for this stuff. Use another browser or try method 2.
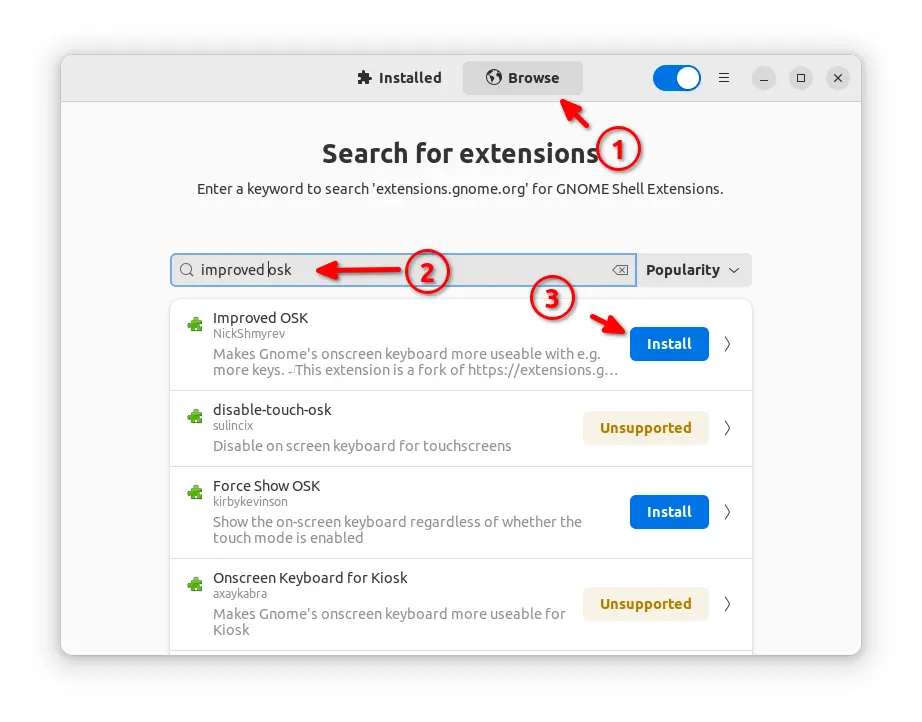
Method 2: Use extension manager
Since Ubuntu 22.04, there’s an “Extension Manager” app available in system repository to install and manage Gnome extensions.
1. First press Ctrl+Alt+T on keyboard to open terminal. Then, run command to install the app:
sudo apt install gnome-shell-extension-manager
2. Next, press Windows (Super) key on keyboard, then search for and open the “Extension Manager”
3. Finally, search for and install “Improved OSK” extension using the app under ‘Browse’ tab.
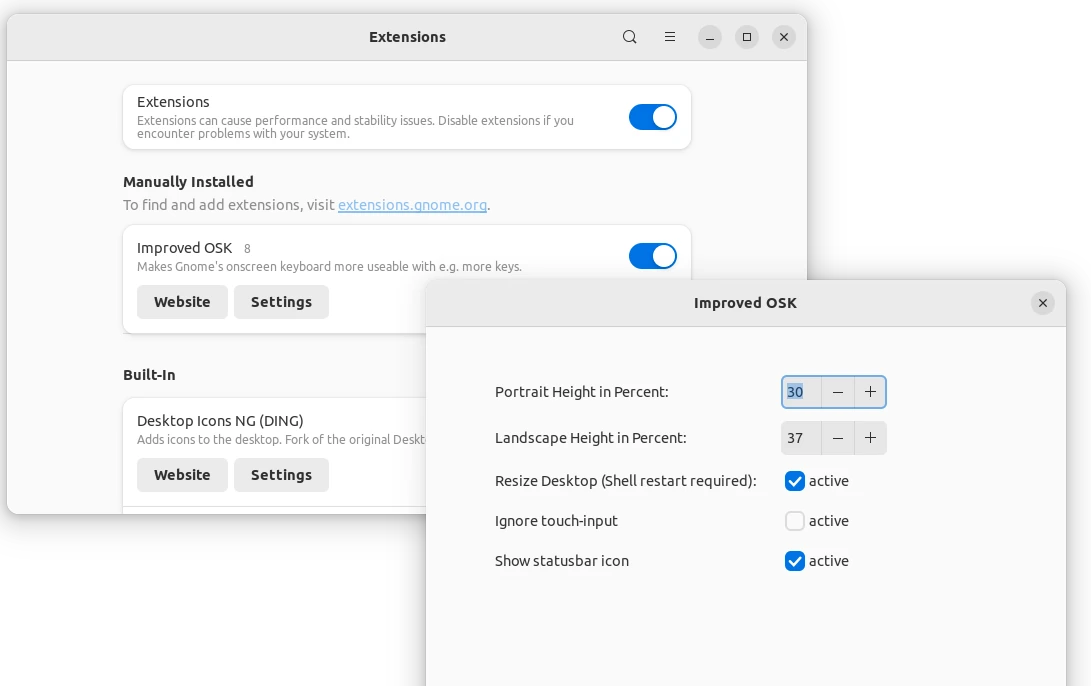
After installed the extension, open its settings page either via “Gnome Extensions” or “Extension Manager” (both available in Ubuntu Software/Gnome Software).
In the preference, you may increase or decrease the keyboard size, ignore touch input, and toggle display the indicator applet.
Got some photo images in .webp file format? Here’s how to open them with system default image viewer (and other GTK apps), and generate image thumbnail in File manager in Ubuntu 22.04 & Ubuntu 20.04
Webp is an image file format developed by Google. It supports both lossy and lossless compression, as well as animation and alpha transparency. The file format has smaller size while keeping good image quality.
You may view the WebP images in Linux via many applications, such as Firefox, Chrome and gThumb. But, that’s not enough! Files (aka nautilus file manager) does not show image thumbnail for webp, and image annotation tools may not open and save images in that file format.
So, this open-source library is present to deal with WebP support for GTK applications.
WebP thumbnail & default image viewer support
How to Install the Library:
The library has been made into some Linux’s own repository, including Arch, Fedora, and Manjaro. For Ubuntu user, you may either build it yourself or use this unofficial Ubuntu PPA.
UPDATE 1: Ubuntu 22.04 now includes the library in system repository. Just run apt install command in step 3 to install it.
UPDATE 2: The PPA mentioned above uses auto-build feature and the 20.04 build is broken so far. So, I made another Ubuntu PPA for choice.
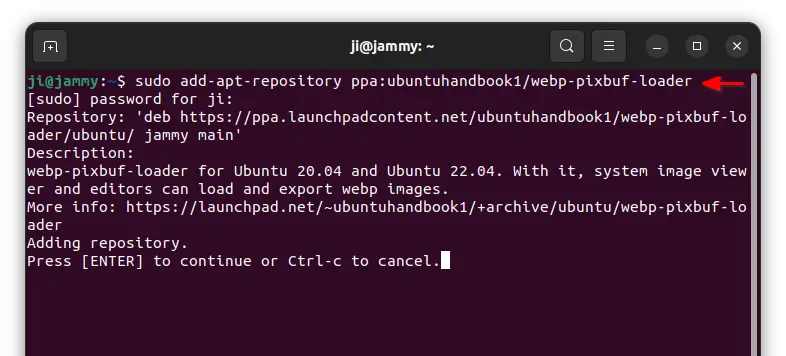
1. Firstly, press Ctrl+Alt+T on keyboard to open terminal. When it opens, run the command below to add the PPA:
Type user password (no asterisk feedback) when it asks and hit Enter to continue.
2. Linux Mint user needs to run command to update package cache, after adding PPA, which is done automatically in Ubuntu:
sudo apt update
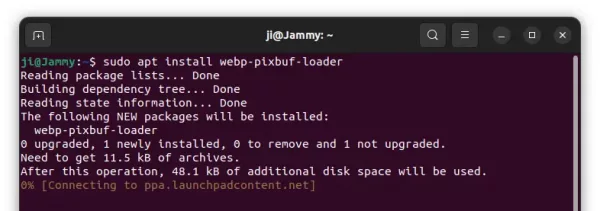
3. Then, run the command to install the library:
sudo apt install webp-pixbuf-loader
In case the command above does not work for you, run sudo apt update first to update cache.
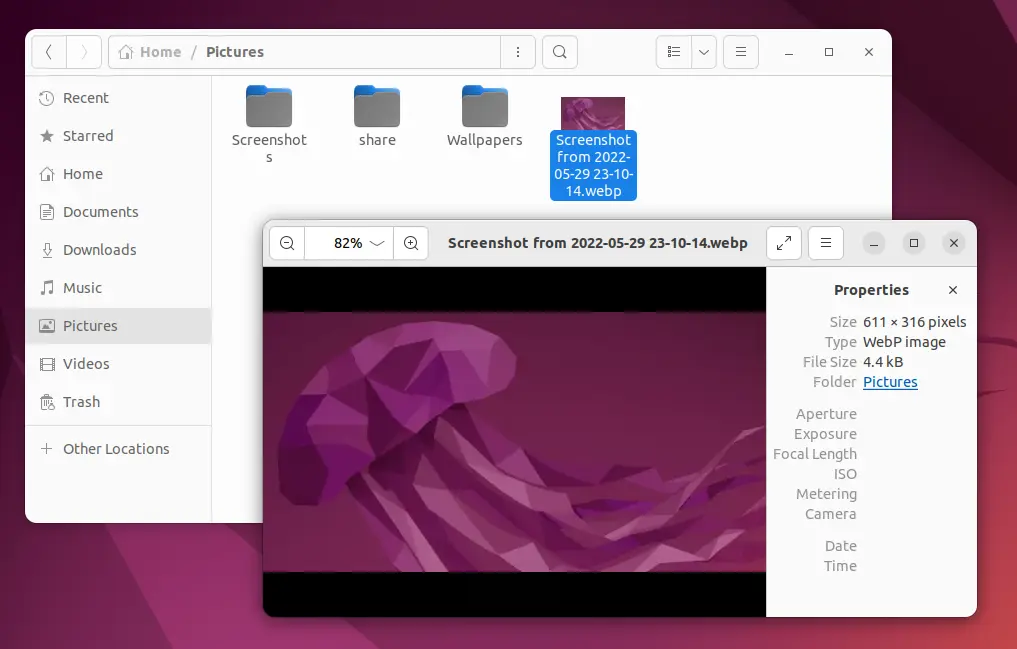
After installation, you can now open WebP images or animations with default image viewer (aka, Eye of GNOME).
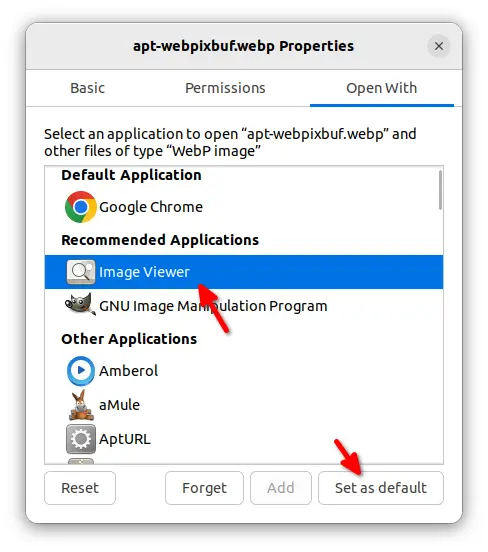
In case of you’ve previously opened it via anther image viewer (e.g., Firefox), right-click and go to file “Properties” dialog and set “Image Viewer” as default app to open it. So, you may then double-click to open WebP images.
And, some GTK apps (e.g., GIMP and Shutter screenshot tool) will now support for import/exporting WebP after app restart.
How to remove the library
For any reason, you can remove the library by opening terminal (Ctrl+Alt+T) and run command:
sudo apt remove webp-pixbuf-loader
And, remove the PPA either via “Software & Updates” utility under “Other Software” tab or by running command in terminal: