This simple tutorial shows how to speed up the downloading process of snap application package by associating IP address with the snapcraft server in Ubuntu.
Snap is a containerized package format, that makes many great applications (e.g., Spotify, Skype, the latest Blender, and more) easy to install in Ubuntu 18.04 and higher.
However snap is LARGE in file size. Due to slow international network speed, downloading a snap in 20MB even take more than half an hour in my case.
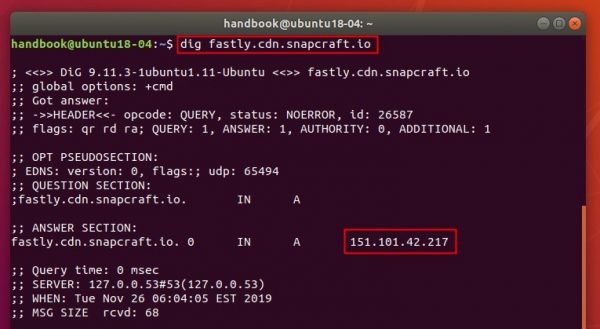
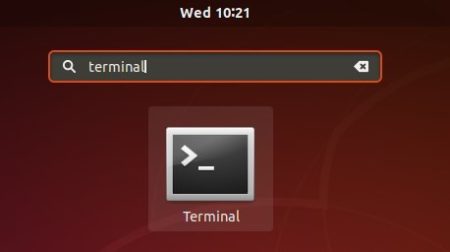
1.) Open terminal either via Ctrl+Alt+T keyboard shortcut or by searching for ‘terminal’ from application menu. When terminal opens, run command:
dig fastly.cdn.snapcraft.io
In the terminal output, copy the IP address under ‘ANSWER SECTION’:
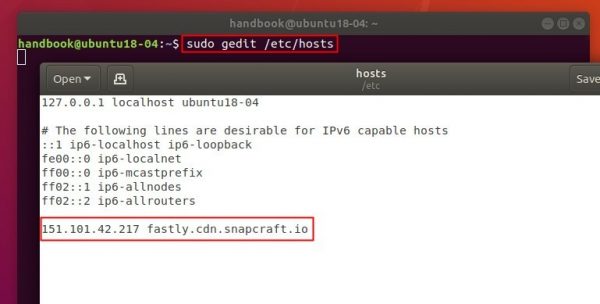
2.) Then run commands to edit the hosts file:
sudo gedit /etc/hosts
Type user password (no asterisk) when it prompts and hit Enter.
When the files opens in gedit text editor, paste following line:
151.101.42.217 fastly.cdn.snapcraft.io
Replace the IP address with which you got in step 1, and finally save the file.
“Not a lot happened this last week, which is just how I like it. And as expected, most of the pull requests I got were for the 5.5 merge window, which I’ll obviously start working through tomorrow.”
Linux 5.4 Kernel brings a lot of new hardware support,including AMD Arcturus GPU, Navi 12 and Navi 14 GPUs, AMD Dali and Renoir APU support,Intel Tiger Lake “Gen 12” graphics,Qualcomm Snapdragon 855 SoC, Intel Ice Lake Thunderbolt support. The new release also features Logitech Linux LOCKDOWN LSM, Lightspeed receiver support, Microsoft exFAT support, and a plethora of other new features and improvements.
How to Install Linux Kernel 5.4 in Ubuntu:
The mainline kernel packages for Linux 5.4 are available for download at the link below:
Depends on your OS type, download and install the packages in turns:
Select generic for common system, and lowlatency for a low latency system (e.g. for recording audio), amd64 for 64bit system, i386 for 32bit system, or armhf, arm64, etc for other OS types.
Alternatively you can download and install the kernel binaries via terminal commands ( open terminal via Ctrl+Alt+T):
No 32-bit packages so far as build for 32-bit failed.
Once installed, restart your computer and enjoy!
Uninstall Linux Kernel 5.4:
Restart your machine and select boot with the previous kernel in boot menu ‘Grub2 -> Advanced Option for Ubuntu’. Then run command to remove Linux Kernel 5.4:
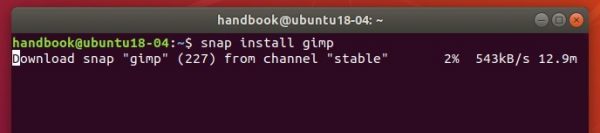
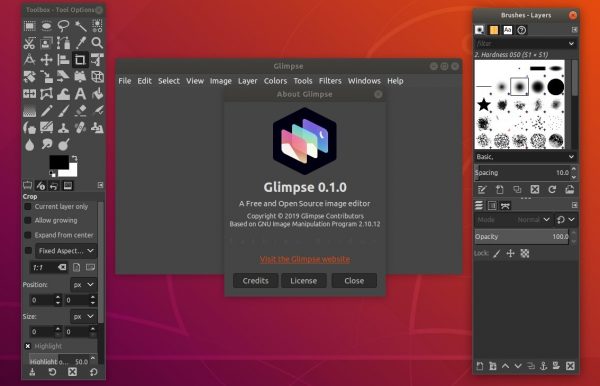
Glimpse, a downstream fork of the GNU Image Manipulation Program (GIMP in short), released version 0.1 a few days ago. It can be installed in Ubuntu 18.04 and higher via either Snap or Flatpak.
Due to the problematic word “gimp”, Glimpse forked the well known image editor so there are no potential barriers to using the software in businesses and educational institutions.
“If English is not your first language, then you may not have realised that the word “gimp” is problematic. In some countries it is considered a slur against disabled people and a playground insult directed at unpopular children. It can also be linked to certain “after dark” activities performed by consenting adults.
…”
Glimpse 0.1 is based on GIMP 2.10. So far they just look like same application with different names (in my own opinion).
How to Install Glimpse in Ubuntu:
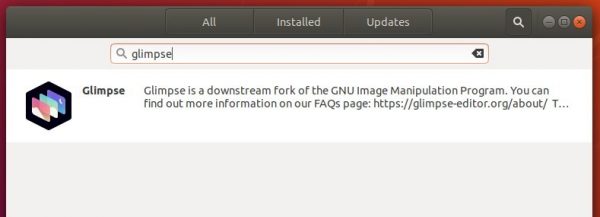
For Ubuntu 18.04 and higher, you can easily install the community build Snap package of Glimpse image editor from Ubuntu Software.
If you’re familiar with command line, run command in terminal to install the Snap package:
sudo snap install glimpse-editor
The software also offers official Flatpak package available in Flathub repository:
This quick tutorial shows how to install RTL8814AU and RTL8812AU/21AU drives in Ubuntu 19.10 with Kernel 5.13.
First plug your Ubuntu machine into a wired internet connection. Then open terminal either from application menu or by pressing Ctrl+Alt+T on keyboard. When it opens, run commands:
1. Run command to install dkms, git, and building tools:
sudo apt install git build-essential dkms
Type user password (no asterisk feedback ) when it prompts and hit Enter.
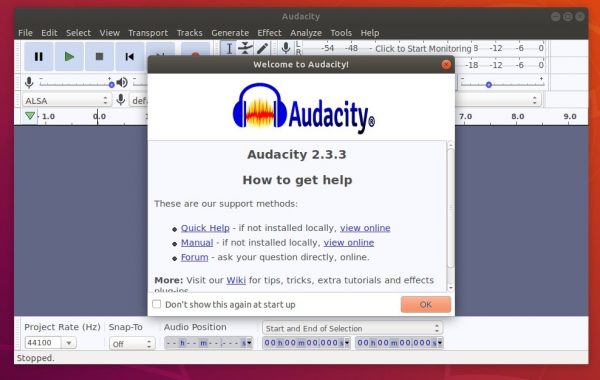
Audacity audio editor released version 2.3.3 a few hours ago. Here’s how to install it in Ubuntu 18.04, Ubuntu 19.04, and Ubuntu 19.10.
Audacity 2.3.3 features over 150 bug-fixes, and following improvements:
Equalization effect now split into two effects, Filter Curve and Graphic EQ.
Presets (using manage button) now active/working.
Can now have two points at same frequency for steep steps.
‘What you hear is what you get’ for exports.
Leading silence (blank space) not skipped over in exports.
Quality setting on AAC/M4A exports.
Some confusing functionality removed.
How to Install Audacity 2.3.3 in Ubuntu:
The unofficial PPA has built the 2.3.3 packages for Ubuntu 18.04, Ubuntu 19.04, Ubuntu 19.10, and their derivatives, e.g., Linux Mint 19.x.
1. Open terminal either via Ctrl+Alt+T keyboard shortcut or by searching for ‘terminal’ from application menu. When it opens, run command to add the PPA:
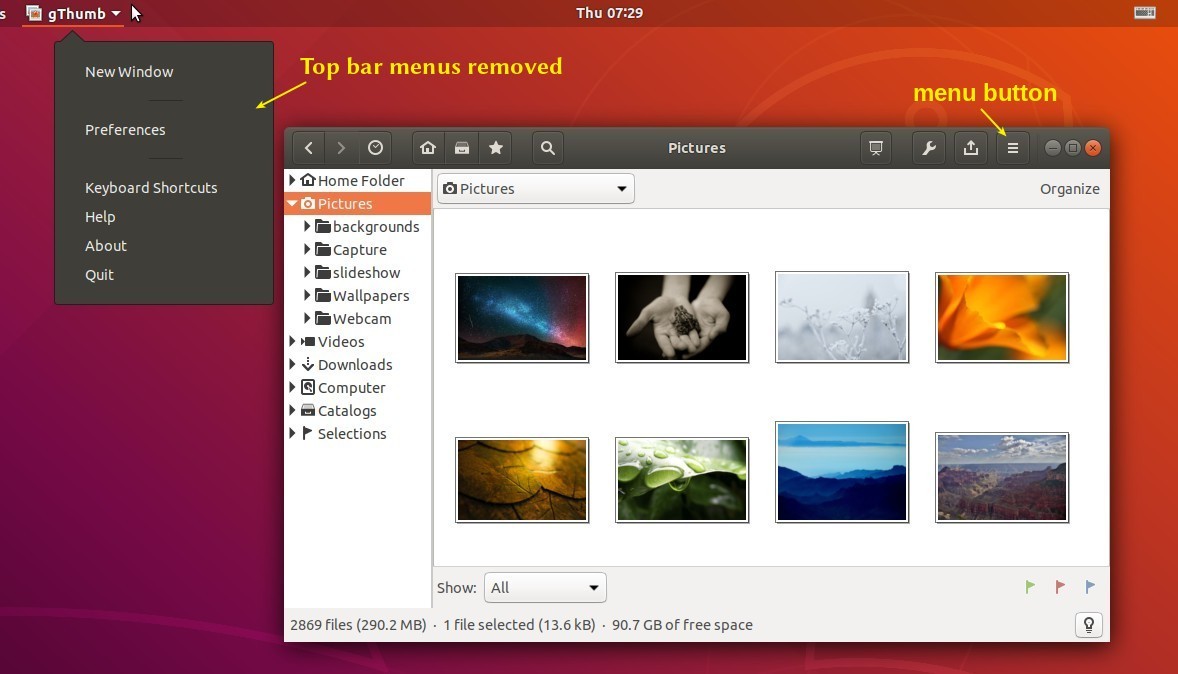
Gnome image viewer and organizer gThumb 3.8.2 was released a few days ago with app menu improvements. Here’s how to install it in Ubuntu 18.04 and higher.
gThumb 3.8.2 uses menu instead of popovers for menu buttons on the header bar, so the drop-down menu now has icons, and accelerator keys.
Gnome shows focused application’s icon and name with a drop-down menu in the top panel. In gThumb 3.8.2, the top panel app menu options are merged into the header bar menu button.
The new release also improved webp support. You can now open webp image from files’ context menu (‘Open With Other Application’). Or simply set gThumb as default image viewer to open webp in file’s Properties dialog (‘Open With’ tab.).
gThumb 3.8.2 changelog:
Use menus instead of popovers for menu buttons on the header bar.
Align menus to the right for menu buttons on the right side.
Search: show the matching files during the search operation.
Rename dialog: activate on enter.
Added image/webp support in .desktop file.
Translation updates and some bug-fixes.
How to Install gThumb 3.8.2 in Ubuntu:
While gThumb in Ubuntu main repository is always old, Dariusz Duma’s PPA maintains the latest software packages for Ubuntu 18.04, Ubuntu 19.04, Ubuntu 19.10, and Linux Mint 19.x.
1.) Open terminal either via Ctrl+Alt+T keyboard shortcut or by searching for terminal from application menu. When it opens, run command to add the PPA:
sudo add-apt-repository ppa:dhor/myway
Type user password (no asterisk feedback) for sudo prompt and hit Enter to continue.
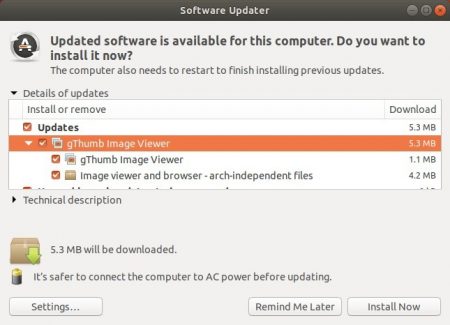
2.) If an old version was installed, upgrade it using Software Updater:
or run commands in terminal to install or upgrade the image viewer:
sudo apt update && sudo apt install gthumb
Uninstall:
To remove the PPA, either open Software & Updates and navigate to Other Software tab, or run command in terminal:
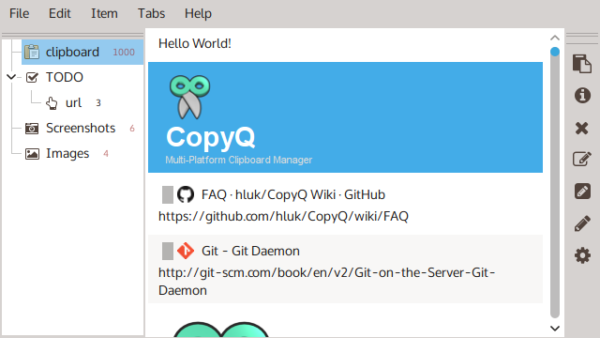
CopyQ, an open-source clipboard manager with editing and scripting features, released version 3.9.3 a few days ago. Here’s how to install it in Ubuntu 16.04, Ubuntu 18.04, Ubuntu 19.04, and Ubuntu 19.10.
CopyQ 3.9.3 features new loadTheme() script function loads theme from INI file. And there are also following changes in the release:
Currently selected item stays on top on PageUp/Down
Skips using a command from a disabled plugin
Logs information on slow menu filters and display commands
Fix taking screenshots on multiple monitors
Fix duplicate show/hide tray menu items
Fix moving synchronized items to top when activated
Performance improvements and other fixes.
How to Install Copyq 3.9.3 in Ubuntu:
The official PPA repository has made the latest packages for Ubuntu 16.04, Ubuntu 18.04, Ubuntu 19.04, Ubuntu 19.10, and Linux Mint 18.x, 19.x.
1. To add the PPA, open terminal (Ctrl+Alt+T) from application menu and run command:
sudo add-apt-repository ppa:hluk/copyq
Type user password (no asterisk feedback due to security reason) when it prompts and hit Enter to continue.
2. Then install CopyQ either via Synaptic package manager or by running commands in terminal:
sudo apt-get update

sudo apt-get install copyq
Once installed, start the clipboard manager from application menu and you’ll see the icon in system tray area.
Uninstall:
To remove the software, either use Synaptic package manager or run command:
sudo apt-get remove --autoremove copyq
To remove PPA repositories, launch Software & Updates and navigate to Other Software tab.
This quick tutorial is going to show you how to display custom text message, such as who to contact for support, in the login screen of Ubuntu 18.04, Ubuntu 20.04, Ubuntu 22.04, and Ubuntu 24.04 with default GNOME Desktop.
You’ll see the text message in the top center when an user is selected in the GDM login screen.
UPDATE: There’s now a graphical app called GDM Settings (Login Manager) can configure the GNOME login screen, including adding a welcome message.
1.) First open terminal either from application menu or by pressing Ctrl+Alt+T on keyboard.
When terminal opens, run command to install the required dbus-launch library:
sudo apt install dbus-x11
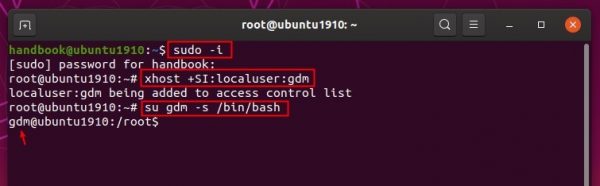
2.) Next, run command to switch to root:
sudo -i
You’ll be prompted to type user password (no asterisk feedback).
3.) Then run command in the terminal window to allow user gdm to connect to X:
xhost +SI:localuser:gdm
skip the command if you’re running on Wayland session.
4.) Switch to gdm via command:
su gdm -s /bin/bash
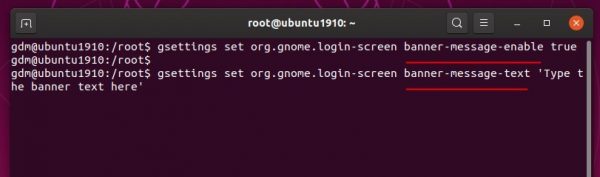
5.) Finally enable login screen banner text via gsettings command:
gsettings set org.gnome.login-screen banner-message-enable true
In recent Ubuntu releases, just ignore the warning message due to Flatpak:
(process:3606): dconf-WARNING **: 05:13:59.740: Unable to open /root/.local/share/flatpak/exports/share/dconf/profile/user: Permission denied
And then set the text message via command:
gsettings set org.gnome.login-screen banner-message-text 'TYPE MESSAGE TEXT HERE'
(Optional) To restore the changes, you have to RE-DO previous 3 steps in terminal to get gdm user privilege, and finally run command:
Though it’s not officially announced at the moment, Kodi (formerly XBMC) 18.5 was released earlier today, available to install via PPA in Ubuntu 16.04, Ubuntu 18.04, Ubuntu 19.04, and Ubuntu 19.10.
Kodi 18.5 is a bug-fix release contains following changes:
Support shoutcast over https
Add dual support for Artist Slideshow 2.x and 3.x
Fix screensaver not going black when video is paused.
Fix that Kodi 18.4 does not skip commericals
Make archive files work via UPnP
Fix scrollbar in skin settings.
Fix loading external subtitles in custom folder.
Fix that user-provided joystick configuration not applied.
Fix “queue item” and “play next” for STRM files with Plugin URL
Fix screen rendering issue in mac OS.
Fix crash issue when changing the artwork of multipart video files.
Fix the filename of the default studios icon.
Clear resume bookmarks also when marking as unwatched
Stop PVR services on logoff to avoid PVR reminder pop-up on login screen.
Add addon settings support for property condition (basic conditions only)
Fix wrong sort order list for music playlists node
Fix watched videos not being hidden
How to Install Kodi 18.5 in Ubuntu:
The Kodi stable PPA has made the new release packages for Ubuntu 16.04, Ubuntu 18.04, Ubuntu 19.04, and Ubuntu 19.10.
1. Open terminal either from application menu or by pressing Ctrl+Alt+T on keyboard. When it opens, run command to add the PPA:
sudo add-apt-repository ppa:team-xbmc/ppa
Type user password (no asterisk feedback) when it prompts and hit Enter to continue.
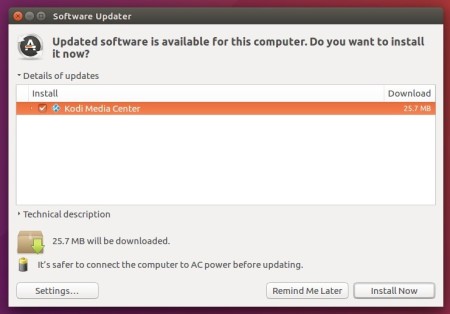
2. Then either upgrading Kodi from an existing version via Software Updater:
or refresh system package cache and install Kodi 18.5 via commands:
sudo apt update

sudo apt install kodi
Uninstall:
To remove the Kodi PPA repository, simply open Software & Updates -> Other Software.