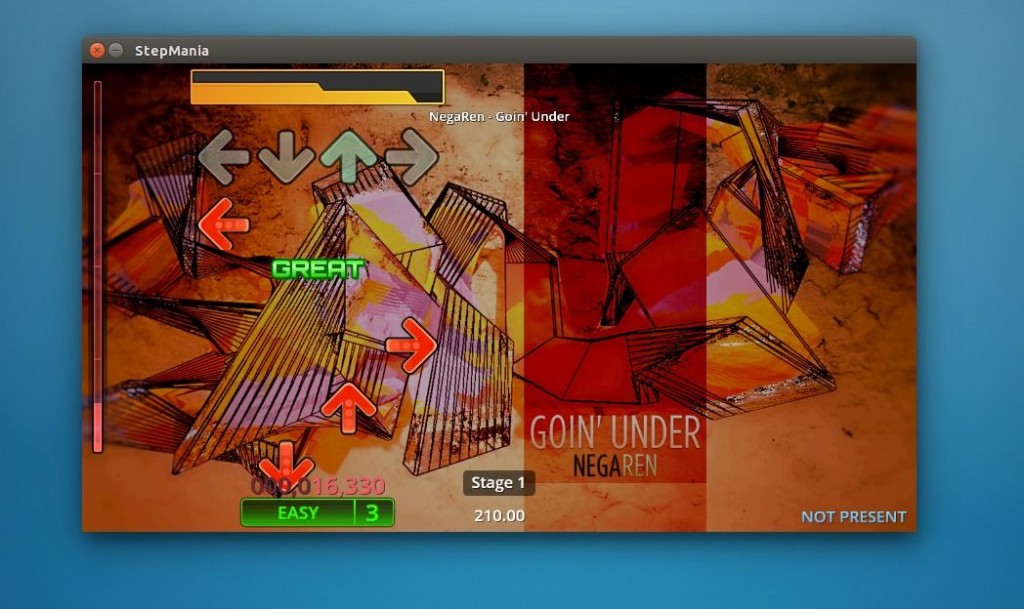
Archives For jimingkui

upgrade Linux Kernel

Linus Torvalds finally announced the release of Linux Kernel 4.3 at LKML last night. He wrote:

So it *felt* like the last week of the rc series was busy, to the point where I got a bit worried about the release. But doing the actual numbers shows that that really was just my subjective feeling,
probably due to the kernel summit and travel back home from Korea. It wasn’t actually a particularly busy week, it’s just that the pull requests were more noticeable in the last couple of days.

We had a network update and a late fix for a x86 vm86 mode bug introduced by the vm86 cleanups, but other than that it’s just a collection of various small oneliners all over. Ok, the vm86 mode thing was a one-liner too, it was just slightly more nerve-wracking because it looked scarier than it was before people (Andy) figured out what was going on.

The changes from rc7 are dominated by the network stuff, but as you can tell from the appended shortlog it’s not anything particularly scary.

So on the whole, this remains a rather calm release cycle until the very end. And with the release of 4.3, obviously the merge window for 4.4 is open, and let’s keep our fingers crossed that that will be an equally calm release. Especially since apparently Greg has decided ahead of time (as an experiment brought on by discussion at the kernel summit) that 4.4 will be another LTS release …

What’s New in Kernel 4.3:

  • Intel Skylake Graphics enabled by default.
  • Initial support for AMD Radeon R9 Fury
  • OpenGL 3.3 support for VMware.
  • Rework of the open-source NVIDIA/Nouveau driver
  • Remove EXT3 driver since existing EXT3 file-systems can be handled by the EXT4 driver
  • Many fixes for XFS, EXT4, F2FS, Btrfs RAID 5/6 and TRIM.

How to Install Kernel 4.3 in Ubuntu:

Ubuntu Kernel Team has made the binary packages for the new Kernel release, available for download at:

Download Linux Kernel 4.3 DEBs

You may first check out your OS type, 32-bit or 64-bit, and then download and install below packages one by one:

  1. linux-headers-4.3.0-xxx_all.deb
  2. linux-headers-4.3.0-xxx-generic_xxx_i386/amd64.deb
  3. linux-image-4.3.0-xxx-generic_xxx_i386/amd64.deb

If you need a low latency system (e.g. for recording audio) then download & install below packages instead:

  1. linux-headers-4.3.0_xxx_all.deb
  2. linux-headers-4.3.0-xxx-lowlatency_xxx_i386/amd64.deb
  3. linux-image-4.3.0-xxx-lowlatency_xxx_i386/amd64.deb

For Ubuntu Server or those who prefer Linux command, run below commands one by one to download and install the kernel binaries:

For 64-bit system:

cd /tmp/

wget http://kernel.ubuntu.com/~kernel-ppa/mainline/v4.3-wily/linux-headers-4.3.0-040300-generic_4.3.0-040300.201511020949_amd64.deb

wget http://kernel.ubuntu.com/~kernel-ppa/mainline/v4.3-wily/linux-headers-4.3.0-040300_4.3.0-040300.201511020949_all.deb

wget http://kernel.ubuntu.com/~kernel-ppa/mainline/v4.3-wily/linux-image-4.3.0-040300-generic_4.3.0-040300.201511020949_amd64.deb

sudo dpkg -i *.deb

for 32-bit system:

cd /tmp/

wget http://kernel.ubuntu.com/~kernel-ppa/mainline/v4.3-wily/linux-headers-4.3.0-040300_4.3.0-040300.201511020949_all.deb

wget http://kernel.ubuntu.com/~kernel-ppa/mainline/v4.3-wily/linux-headers-4.3.0-040300-generic_4.3.0-040300.201511020949_i386.deb

wget http://kernel.ubuntu.com/~kernel-ppa/mainline/v4.3-wily/linux-image-4.3.0-040300-generic_4.3.0-040300.201511020949_i386.deb

sudo dpkg -i *.deb

Once installed, restart to take effect.

Revert back and Uninstall the new Kernel:

Restart your computer and select boot with the old kernel entry under Advanced Options menu when you’re at Grub boot-loader.

When it boots up, run below commands to remove the kernel image:

sudo apt-get autoremove linux-image-4.3.0*

The latest Kodi Media Center, formerly known as XBMC, now is available for Ubuntu 15.10 users through its official PPA repository.

The current version is Kodi 15.2 ‘Isengard’ which was released in the middle of this month. For those who want to install this release and receive future updates via Software Updater, follow below steps.

1. Add Kodi PPA

Open terminal from the Unity Dash, App Launcher, or via Ctrl+Alt+T shortcut key. When it opens, run below command to add PPA:

sudo add-apt-repository ppa:team-xbmc/ppa

2. If you’ve installed an old release from Software Center. Run Software Updater to upgrade to Kodi 15.2.

Or run below commands one by one in terminal to install or upgrade the software:

sudo apt-get update

sudo apt-get install kodi

Once installed, log with Kodi session at next login or launch it from the Unity Dash at next boot.

3. (Optional) To remove Kodi PPA, go to the Software & Updates -> Other Software tab or run below command in terminal:

sudo add-apt-repository --remove ppa:team-xbmc/ppa

To remove Kodi, do it via Software Center or run command:

sudo apt-get remove kodi && sudo apt-get autoremove

Still need flash to view some websites in Firefox? Ubuntu users now can choose between the old Adobe Flash 11.2 and Google’s Pepper Flash with newer features.

Flash plugin for Linux provided by Adobe stopped at version 11.2. For Chrome and Chromium users there’s a Pepper Flash plugin but it’s not supported by Firefox. In Ubuntu 15.10 and 16.04, there’s now a new project called browser-plugin-freshplayer-pepperflash which makes the Pepper Flash working in Firefox.

1. Open Ubuntu Software Center, search for and install the package named browser-plugin-freshplayer-pepperflash

For those who prefer Linux command. Run below command in a terminal instead to install the package:

sudo apt-get install browser-plugin-freshplayer-pepperflash

The command should installs the recommended package pepperflashplugin-nonfree, which automatically downloads Chrome from Google and unpacks it to make the included Pepper Flash available for use with Chromium.

Then installs browser-plugin-freshplayer-pepperflash, which works as a wrapper to make the unpacked Pepper Flash working in Firefox.

2. After installation, restart Firefox browser and enjoy!

Minimize an application window by single clicking on its icon on system taskbar or dock app launcher is a common used functionality.

This ‘minimize on click’ behavior for Unity’s Left Launcher is not ready in Ubuntu out-of-the-box. So this simple tutorial is going to tell you how to enable this handy feature in Ubuntu 15.10 Wily Werewolf.

1. Install Unity Tweak Tool.

Search for and install unity tweak tool via Ubuntu Software Center:

2. Launch Unity Tweak Tool once installed. Then click the first icon that says ‘Launcher’ to go to its configuration page.

3. Check the box says ‘Minimize single window applications on click’ and done.

The change takes effect immediately. Enjoy!

Quick tutorial that shows beginner how to install the Skype 4.3 client for Linux in Ubuntu 15.10 Wily Werewolf.

This just is a rewritten of one my old tutorial when the 4.3 release was released to make the installation more clear and easy to understand!

Skype Audio/Video Call

1. Enable Canonical Partners repository.

The partner repositories offer access to proprietary and closed-source software and are not enabled by default, e.g., adobe-flashplugin, google-cloud-sdk, and skype.

To add the repository, launch Software & Updates and then go to Other Software tab. Check first two boxes as shown below:

2. Refresh package cache and install Skype

For graphical way, install Synaptic Package Manager in Software Center. Then launch the software to refresh your system repositories, search for and install skype.

For those who prefer Linux commands, launch terminal from the Unity Dash, App Launcher, or via Ctrl+Alt+T shortcut key. When it opens, run below commands one by one:

sudo apt-get update

sudo apt-get install skype

Finally, launch the client from the Dash/Launcher and Enjoy!

QupZilla web browser 1.8.8 was released a few hours ago. Official builds are now using Qt 5, which bring HTML5 Audio/Video support and a lot of fixes for bugs and crashes for Windows Vista+.

QupZilla 1.8.8 is still using QtWebKit. It’s a bug-fix release that feathers:

  • added interface for extensions to show action in Tools menu
  • add option to use TabManager as main tabbar replacement
  • fix build with Qt 5.5.1
  • fix crash when unloading plugin with visible sidebar
  • fix possible crash when accessing last active window
  • fix sometimes incorrectly loading background non-restored tab
  • fix showing speed dials in bookmarks icon
  • fix showing messages in statusbar in RTL mode
  • fix crash when application style is externally changed
  • fix labels color in access keys navigation with dark style
  • fix position of autoscroll indicator with site notification visible
  • Windows: fix setting as default browser
  • Windows: better toolbar background for Windows 10

How to Install QupZilla 1.8.8 in Ubuntu:

Ubuntu packages are now also using Qt 5, and they are available in its official PPA for Ubuntu 15.10, Ubuntu 14.04, and Ubuntu 15.04.

1. Add QupZilla PPA.

Open terminal from the Unity Dash, App Launcher, or via Ctrl+Alt+T shortcut key. When it opens, run below command in terminal:

sudo add-apt-repository -y ppa:nowrep/qupzilla

2. If have a previous release installed, run Software Updater (or Update Manager) and upgrade the browser by installing the updates in the list.

Or, run below commands one by one in terminal to refresh system repository cache and install/upgrade the browser:

sudo apt-get update

sudo apt-get install qupzilla

For those who don’t want to add PPA, select download the .deb package directly from THIS PAGE.

How to Install Cinnamon 2.8 in Ubuntu 15.04

Last updated: October 21, 2015

Linux Mint’s Desktop Environment Cinnamon 2.8 now is available for upgrade. Here’s how to install it in Ubuntu 15.04 via PPA.

Cinnamon 2.8 will be officially released and announced at the end of October. Currently known changes in the 2.8 release:

  • Better sound applet:

    The track info and media controls are now part of a new overlay which sits on top of the cover art. For supported players, a flat position bar is displayed underneath.

    Input controls, applications and output devices moved to the right-click context menu. Output devices now show their origins when multiple sound devices are detected (credits go to Cobinja for that).

  • Battery vendor/model info – display the presence of manufacturer data in the power settings and applet.
  • a couple of fixes to box pointers
  • The workspace switcher applet now shows a visual representation of your workspaces, with little cubes for the windows inside of them

Install Cinnamon 2.8 in Ubuntu:

There’s a PPA repository that contains Cinnamon 2.8 for Ubuntu 15.04. Ubuntu 15.10 should be support soon once it’s officially released. Check out the PPA page.

1. Add PPA.

Open terminal from the Dash, App Launcher, or via Ctrl+Alt+T shortcut key. When it open, run command:

sudo add-apt-repository -y ppa:moorkai/cinnamon

2. Update and install the DE via below commands one by one:

sudo apt-get update

sudo apt-get install cinnamon

Once installed, log out and select log back with Cinnamon session.

3. (Optional) To remove Cinnamon, run commands:

sudo apt-get purge --auto-remove cinnamon

sudo apt-get autoremove

Kodi 15.2, the final maintenance release for Kodi 15 ‘Isengard’, has been announced today. This release brings a lot of bug-fixes on top of the 15.0 and 15.1 release.

Here are the fixes according to the release note.

  • Fix non DVB subtitles
  • Fix incompatible MySQL queries
  • Improvements on PulseAudio for Linux
  • Fix multi images in grouplists/layouts
  • Updated PVR add-ons: Tvheadend HTSP and MythTV
  • Fix refresh-rate switching on Android. This should improve on most devices like Nexus Player and NVIDIA SHIELD TV and others which use the Android API
  • Fix file time used in scanning library which may speed up scanning times on 32bit platforms
  • Fix video rewind on Windows. May still leave artifacts for some seconds.
  • Fix continues check on system partitions on Android
  • Fix MicroDVD subtitles
  • Fix subtitles positioning below video
  • Fix memory leak on opening Bluray menu for stream selection
  • Fix default sorting for songs over UPnP
  • Updated taglib that fixes a crash when playing flac files
  • Fix volume adjustment for XBOX controllers
  • Fixes side flyout appearing when using touch
  • Fixes freeze on win32 on away mode
  • Fix crash on osx 10.7 when trying to resolve hdd names
  • Fix Amlogic zoom problems on Android
  • Set default screen region for dvb subs (wrong placed subtitles)
  • Fix missing lyrics from tag when playing from musicdb url
  • Properly set the time format when setting/changing regions
  • Fix playback problems on AMLogic after ffwd or skip
  • Fix fallback for nb_no language
  • Fix empty LatestAlbum.Artist
  • Fix watched flag in Confluence media info 3 view

Install or Upgrade to Kodi 15.2 in Ubuntu:

The new release has been made into Kodi Stable PPA, available for Ubuntu 14.04, Ubuntu 15.04, and derivatives, such as Linux Mint 17.x and Elementary OS Freya.

1. Add Kodi PPA

Open terminal from the Unity Dash, App Launcher, or via Ctrl+Alt+T shortcut key. When it opens, run below command to add PPA:

sudo add-apt-repository ppa:team-xbmc/ppa

2. Refresh system package cache and install the media center.

You can do it either via Synaptic Package Manager, or by running below commands one by one:

sudo apt-get update

sudo apt-get install kodi

Once installed, log out and select log back with Kodi session. Or launch the media center from the Dash (may need restart).

How to Upgrade from Ubuntu 15.04 to Ubuntu 15.10

Last updated: October 15, 2015

The Final release of Ubuntu 15.10 Wily Werewolf will be out in a few days on October 22. Below is how to upgrade your existing Ubuntu 15.04 to Ubuntu 15.10.

Preparation

1. Backup Data. You should back up your important documents, files, bookmarks, etc.

2. Disable PPAs. Some PPAs may cause the upgrade fail, so do disable all third-party PPAs in Software & Updates -> Other Software tab.

3. Uninstall video driver. If you’ve manually installed proprietary drivers directly from the manufacturer’s website, then before upgrading I recommend you removing these drivers first and reverting to the open-source drivers.

Upgrade Ubuntu Desktop:

1. Open terminal from the Unity Dash, App Launcher, or via Ctrl+Alt+T shortcut key. When it opens, run command to update your system:

sudo apt-get update; sudo apt-get dist-upgrade

2. After that, launch Software Updater via below command:

sudo update-manager -d

Below window should pop-up and prompt that Ubuntu 15.10 is available for upgrade:

Click the Upgrade button and confirm again in next window. Software Updater will fetch and install the files and prompt you to remove unnecessary applications.

Restart your computer once the upgrade process finished.

Upgrade Ubuntu Server:

1. Backup your configuration files if you’re running any services on Ubuntu server.

2. install the update-manager-core via command:

sudo apt-get install update-manager-core

3. Edit the config file via below command to make sure there a line says “Prompt=normal” (without quotes):

sudo nano /etc/update-manager/release-upgrades

After editing, press Ctrl+X -> type y -> finally hit Enter to apply changes.

4. Finally upgrade Ubuntu Server via command:

sudo do-release-upgrade -d

Follow the on-screen prompts and done!.

QupZilla, an open-source Qt web browser, has reached the 1.8.7 release with enhancements and various bug-fixes.

QupZilla 1.8.7 is still using QtWebKit. New version QupZilla 2.0 will be using QtWebEngine, and it’s now under development. Changes in the 1.8.7 release:

  • save pinned tabs per-window when set to restore session
  • Shift+Left click on links now opens link in new window
  • show web inspector action now toggles inspector
  • add button to create new userscript in GreaseMonkey
  • add “Anti-Adblock Killer” AdBlock subscription
  • add Ctrl+G and Ctrl+Shift+G shortcuts in search toolbar
  • fix enabling select all and find actions in menu
  • fix searching for strings with special whitespaces from locationbar
  • fix build with KF5 KWallet, Qt 5.5 and gcc 4.9.
  • fix crash when blocking popup window with AdBlock
  • fix icon animation when blocking popup window with AdBlock
  • fix incorrectly accepting some cookies
  • fix creating new config directory
  • fix saving settings without changing pages in SpeedDial
  • fix center dials option in SpeedDial
  • fix not escaping characters for (file, ftp) dir listings
  • fix not showing restore page when opening new url from cli
  • fix adding search engine from form on page with Qt 5
  • fix saving homepage/new tab urls from preferences
  • Linux: use run-time detection of X11 platform

How to Install / Upgrade QupZilla in Ubuntu:

For all current Ubuntu releases, there’s an official PPA repository for QupZilla browser. Follow below steps to add the PPA and install/upgrade the latest browser:

NOTE: The new release is not ready for upgrade at the moment. CHECK OUT THE PPA PAGE.

1. Add QupZilla PPA.

Open terminal from the Unity Dash, App Launcher, or via Ctrl+Alt+T shortcut key. When it opens, run below command in terminal:

sudo add-apt-repository -y ppa:nowrep/qupzilla

2. If have a previous release installed, run Software Updater (or Update Manager) to upgrade the browser once a new release is out and made into PPA.

Or, run below commands one by one in terminal to refresh system repository cache and install/upgrade the browser:

sudo apt-get update

sudo apt-get install qupzilla