Elementary OS Freya provides only 2 themes, the default transparent and Matte, for its Plank dock launcher by default.
For those who want to try more themes, Ken Harkey has made 13 Plank themes into PPA available for Ubuntu 14.04 and Elementary OS Freya. Here are the screenshot for some of them.
Plank Theme Camilaes
Plank Theme Capeos
Plank Theme Chameleon
Plank Theme Cratos Lion
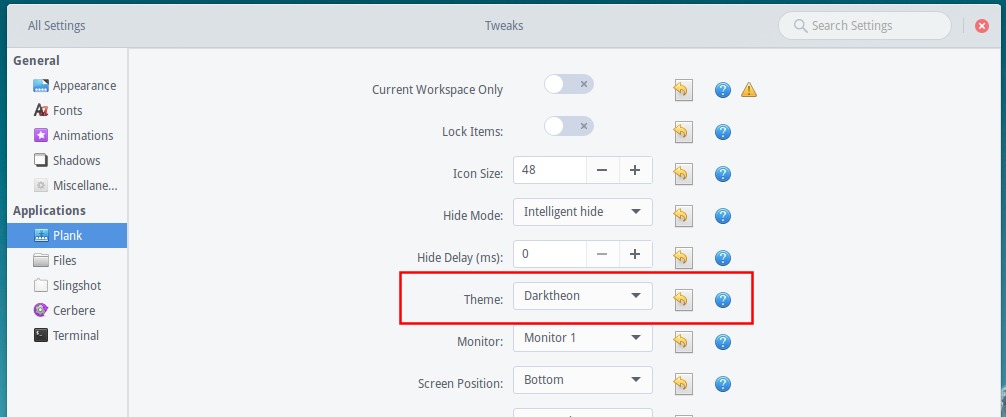
Plank Theme Darktheon
Plank Theme Pantiva
Plank Theme Paperterial
How to install these themes:
Open terminal from the launcher, and run below command to add the PPA:
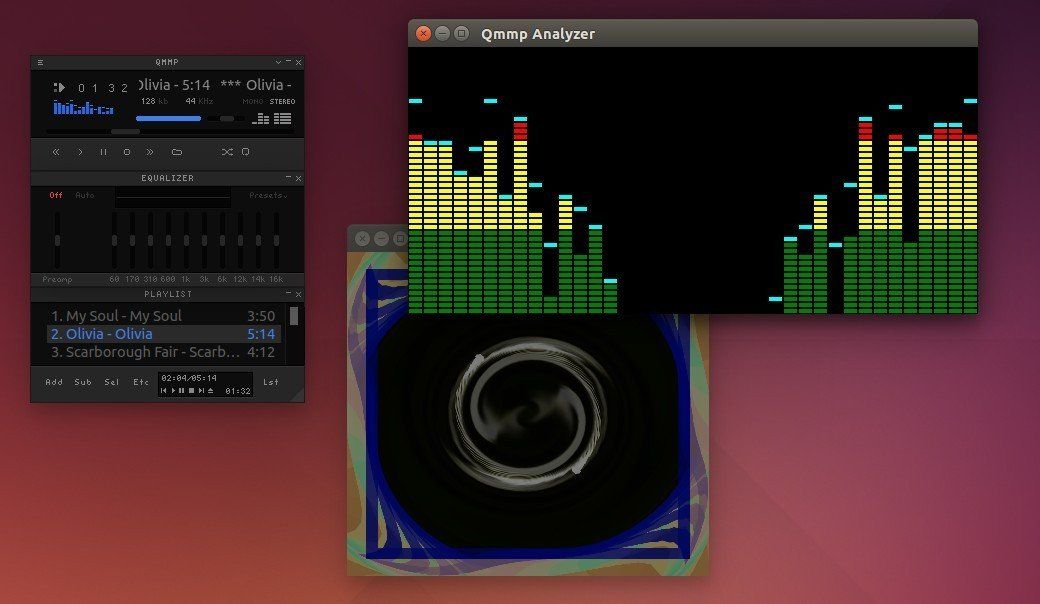
Qmmp, Qt-based audio player with winamp or xmms like user interface, now is at 0.9.0 release. PPA updated for Ubuntu 15.10, Ubuntu 15.04, Ubuntu 14.04, Ubuntu 12.04 and derivatives.
Qmmp 0.9.0 is a big release with many new features, improvements and some translation updates. It added:
audio-channel sequence converter;
9 channels support to equalizer;
album artist tag support;
asynchronous sorting;
sorting by file modification date;
sorting by album artist;
multiple column support;
feature to hide track length;
feature to disable plugins without qmmp.pri modification (qmake only)
feature to remember playlist scroll position;
feature to exclude cue data files;
feature to change user agent;
feature to change window title;
feature to reset fonts;
feature to restore default shortcuts;
default hotkey for the “Rename List” action;
feature to disable fadeout in the gme plugin;
Simple User Interface (QSUI) with the following changes:
added multiple column support;
added sorting by album artist;
added sorting by file modification date;
added feature to hide song length;
added default hotkey for the “Rename List” action;
added “Save List” action to the tab menu;
added feature to reset fonts;
added feature to reset shortcuts;
improved status bar;
It also improved playlist changes notification, playlist container, sample rate converter, cmake build scripts, title formatter, ape tags support in the mpeg plugin, fileops plugin, reduced cpu usage, changed default skin (to Glare) and playlist separator.
Install Qmmp 0.9.0 in Ubuntu:
New release has been made into PPA, available for all current Ubuntu releases and derivatives.
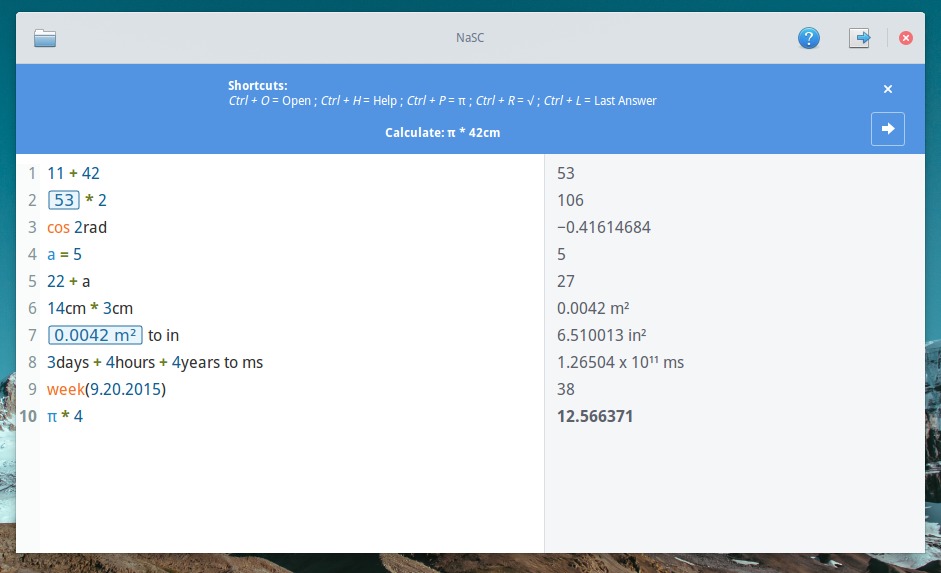
NaSC (Not a Soulver Clone) is an open source software designed for Elementary OS to do arithmetics. It’s kinda similar to the Mac app Soulver.
Its an app where you do maths like a normal person. It lets you type whatever you want and smartly figures out what is math and spits out an answer on the right pane. Then you can plug those answers in to future equations and if that answer changes, so does the equations its used in.
With NaSC you can for example:
Perform calculations with strangers you can define yourself
Change the units and values (in m cm, dollar euro …)
Knowing the surface area of a planet
Solve of second-degree polynomial
and more …
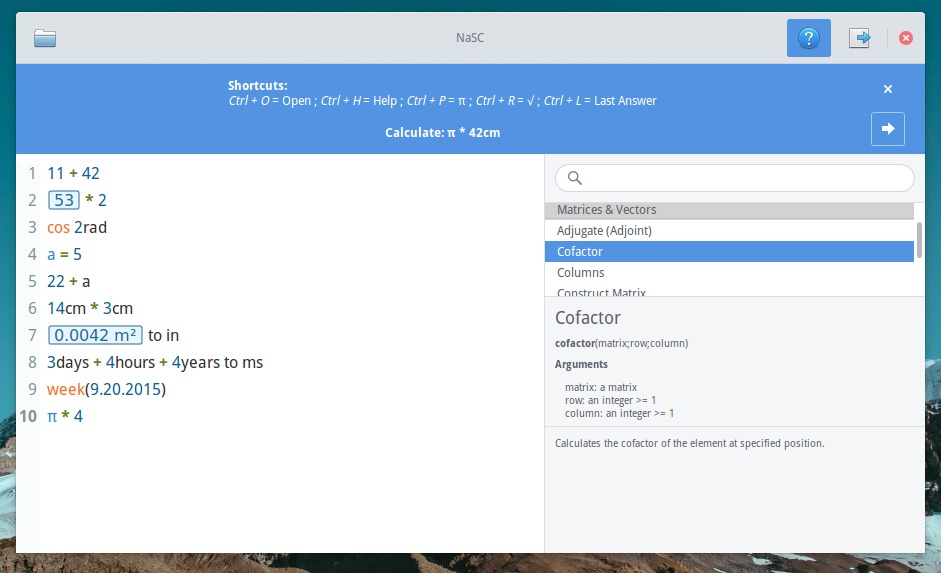
At the first launch, NaSC offers a tutorial that details possible features. You can later click the help icon on headerbar to get more.
In addition, the software allows to save your file in order to continue the work. It can be also shared on Pastebin with a defined time.
Install NaSC in Ubuntu / Elementary OS Freya:
For Ubuntu 15.04, Ubuntu 15.10, Elementary OS Freya, open terminal from the Dash, App Launcher and run below commands one by one:
Linux Kernel 4.2 was released yesterday, at noon. Linus Torvalds wrote on lkml.org:
So judging by how little happened this week, it wouldn’t have been a mistake to release 4.2 last week after all, but hey, there’s certainly a few fixes here, and it’s not like delaying 4.2 for a week should have caused any problems either.
So here it is, and the merge window for 4.3 is now open. I already have a few pending early pull requests, but as usual I’ll start processing them tomorrow and give the release some time to actually sit.
The shortlog from rc8 is tiny, and appended. The patch is pretty tiny too…
What’s New in Kernel 4.2:
rewrites of Intel Assembly x86 code
support for new ARM boards and SoCs
F2FS per-file encryption
The AMDGPU kernel DRM driver
VCE1 video encode support for the Radeon DRM driver
Initial support for Intel Broxton Atom SoCs
Support for ARCv2 and HS38 CPU cores.
added queue spinlocks support
many other improvements and updated drivers.
How to Install Kernel 4.2 in Ubuntu:
The binary packages of this kernel release are available for download at link below:
NOTE: The kernel binaries are marked as UNSTABLE (see the link url). You may not do this in a production machine, or you have to know what you’re going to do and know about how to restore if something goes wrong (or see the link at bottom).
First check out your OS type, 32-bit (i386) or 64-bit (amd64), then download and install the packages below in turn:
For those who don’t want to add PPA, select download the .deb installer from the link below, easytag_2.4.0-xxx_amd64.deb for 64-bit OS, or easytag_2.4.0-xxx_i386.deb for 32-bit OS.
Finally click to open it via Ubuntu Software Center and install the software.
NVIDIA driver 352.41 for Linux was released a few hours ago with GeForce GTX 950, Quadro M4000 and M5000 GPUs support.
The new driver also brings two important fixes:
Fixed a bug that caused VDPAU to only display the top half of a video frame when decoding and displaying H.265/HEVC encoded video streams.
Fixed a bug that caused the X server to crash if an OpenGL application tried to allocate a drawable when GPU-accessible memory is exhausted.
Install / Upgrade to Nvidia 352.41 in Ubuntu:
Thanks the Ubuntu community for maintaining a new NVIDIA PPA that contains the most recent Nvidia proprietary GPU drivers. So far Ubuntu 15.04, Ubuntu 15.10, and Ubuntu 14.04 are supported.
1. To add the PPA.
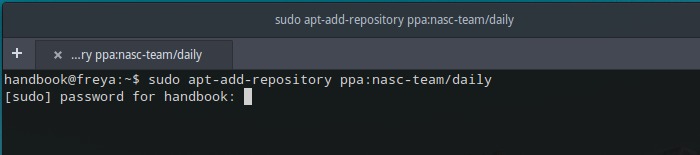
Open terminal from the Dash, App Launcher, or via Ctrl+Alt+T shortcut keys. When it opens, run command:
sudo add-apt-repository ppa:graphics-drivers/ppa
For those who’ve added Xorg-edgers PPA and Michael Marley’s Nvidia PPA (deprecated), remove them via:
2. After that, update system cache and install new driver package via either Synaptic Package Manager after clicking Refresh button or below commands in terminal:
Want to install the latest Linux Kernel? A simple script can always do the job and make things easier in Ubuntu.
Michael Murphy has created a script makes installing the latest RC, stable, or lowlatency Kernel easier in Ubuntu. The script asks some questions and automatically downloads and installs the latest Kernel packages from Ubuntu kernel mainline page.
Install / Upgrade Linux Kernel via the Script:
1. Download the script from the right sidebar of the github page (click the “Download Zip” button).
2. Decompress the Zip archive by right-clicking on it in your user Downloads folder and select “Extract Here”.
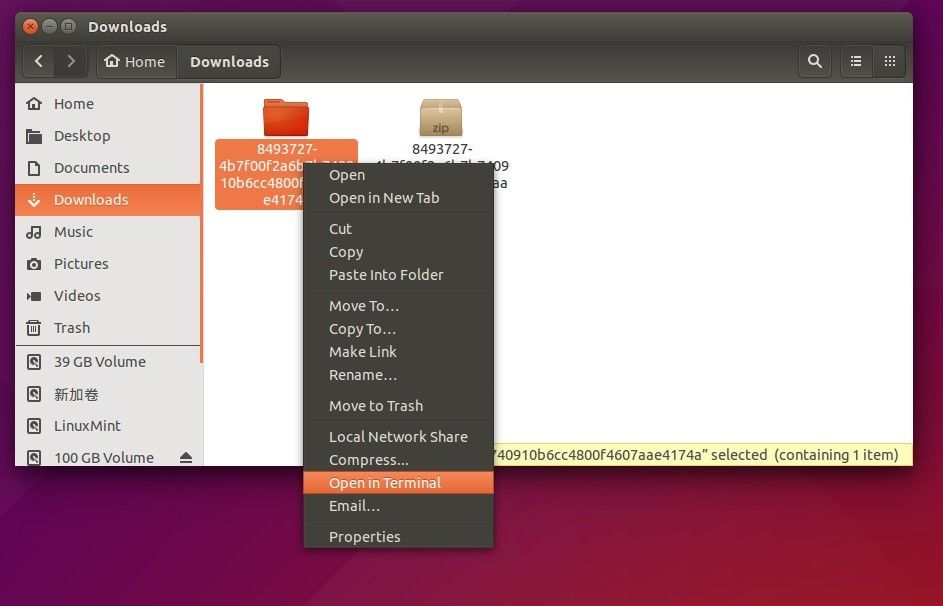
3. Navigate to the result folder in terminal by right-clicking on that folder and select “Open in Terminal”:
It opens a terminal window and automatically navigates into the result folder. If you DON’T find the “Open in Terminal” option, search for and install nautilus-open-terminal in Ubuntu Software Center and then log out and back in (or run nautilus -q command in terminal instead to apply changes).
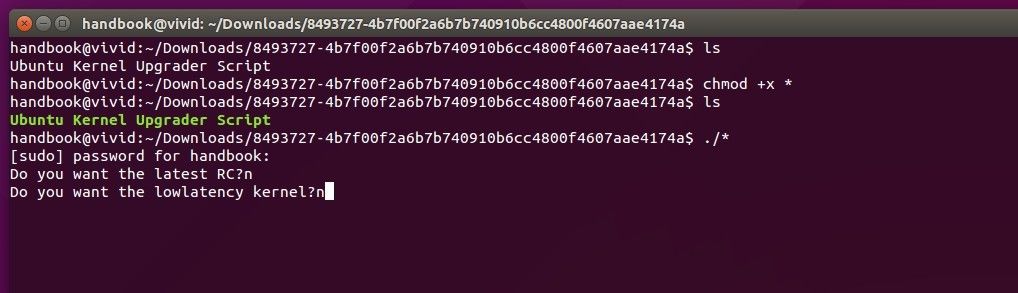
4. When you’re in terminal, give the script executable permission for once.
chmod +x *
FINALLY run the script every time you want to install / upgrade Linux Kernel in Ubuntu:
./*
I use * instead of the SCRIPT NAME in both commands since it’s the only file in that folder.
If the script runs successfully, restart your computer when done.
Revert back and Uninstall the new Kernel:
To revert back and remove the new kernel for any reason, restart your computer and select boot with the old kernel entry under Advanced Options menu when you’re at Grub boot-loader.
When it boots up, see below section.
How to Remove the old (or new) Kernels:
1. Install Synaptic Package Manager from Ubuntu Software Center.
2. Launch Synaptic Package Manager and do:
click the Reload button in case you want to remove the new kernel.
select Status -> Installed on the left pane to make search list clear.
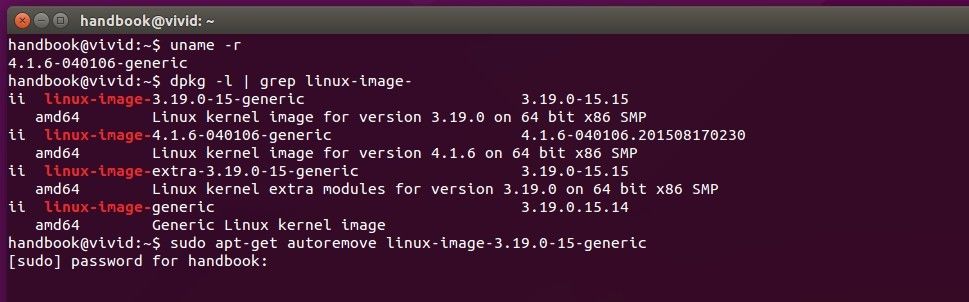
search linux-image- using Quick filter box.
select a kernel image “linux-image-x.xx.xx-generic” and mark for (complete) removal
finally apply changes
Repeat until you removed all unwanted kernels. DON’T carelessly remove the current running kernel, check it out via uname -r (see below pic.) command.
For Ubuntu Server, you may run below commands one by one:
Due to the changes to incorporate Adobe Flash DRM technology, Hulu movies and TV shows are not longer working on Ubuntu Linux without HAL support since a couple of weeks ago.
A couple of weeks ago, Hulu made some changes to their video playback system to incorporate Adobe Flash DRM technology. Unfortunately, this meant that Hulu no longer functioned on Ubuntu because Adobe stopped supporting Flash on Linux several year ago, and therefore Adobe’s DRM requires HAL which was likewise obsoleted about 4 years ago and was dropped from Ubuntu in 13.10. The net result is that Hulu no longer functions on Ubuntu.
Fortunately, Michael Blennerhassett has maintained a PPA repository with HAL packages for all current releases and derivatives, e.g, Ubuntu 15.10, Ubuntu 15.04, Ubuntu 14.04, Linux Mint 17.
Below is how-to install the HAL (Hardware Abstraction Layer) from PPA:
1. Add the PPA. Open terminal from the Dash, App Launcher, or via Ctrl+Alt+T shortcut key. When it opens, run command:
sudo add-apt-repository ppa:mjblenner/ppa-hal
2. After adding the PPA, install hal package via Synaptic Package Manager. Or by running below commands in terminal:
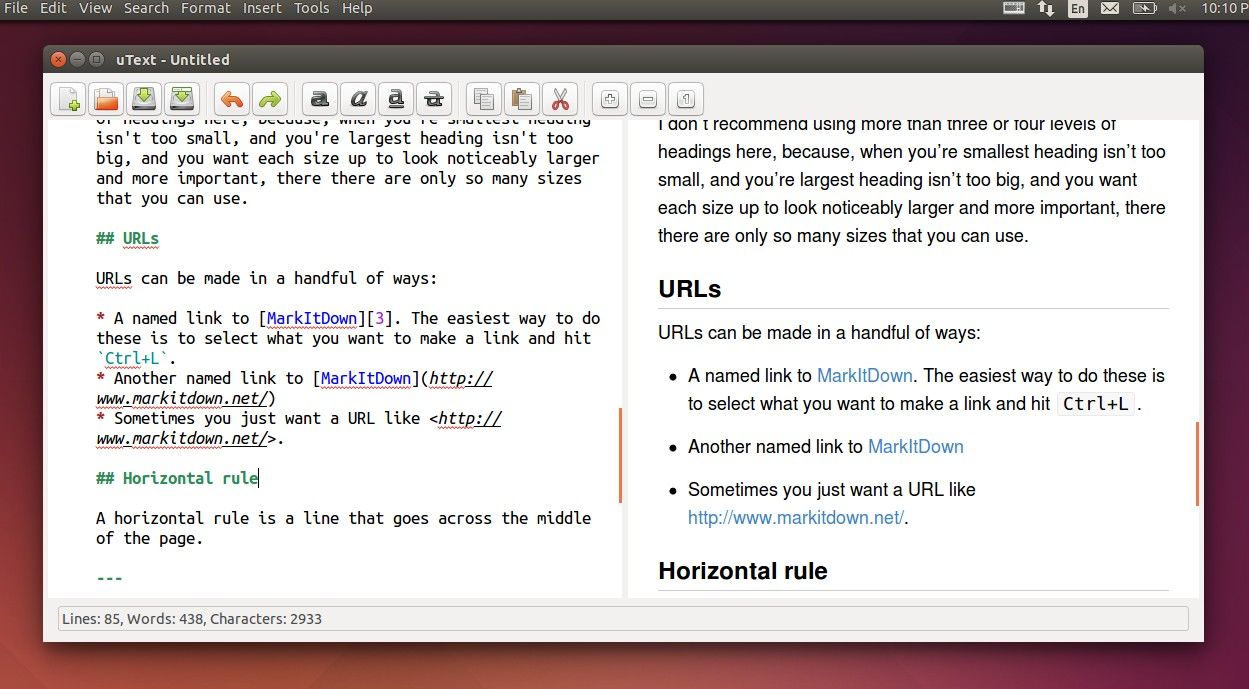
uText is a very simple markdown editor with live text preview and syntax highlighting support. Supported export formats: HTML, ODT, PDF
uText is a minimalist text editor with syntax markdown focused on writing, providing all the tools and facilities that the user may need. It’s written in Python and developed by atareao team who’s behind touchpad-indicator and my-weather-indicator.
The editor features:
Live text preview
Day, Night, and fullscreen mode to focus on writing.
Search and replace, spell check
save in dropbox.
other common options
To install this editor:
Open terminal from the Dash, App Launcher, or via Ctrl+Alt+T shortcut keys. When it opens, run below commands to get it from the developer’s PPA:
Or you can directly download and install the “utext_x.x.x_all.deb” package from PPA ARCHIVE. The .deb works on all current Ubuntu releases though it’s built against Ubuntu 15.04.