Archives For November 30, 1999

Linux Mint is a Linux distribution forked from Ubuntu since Classic Gnome Desktop was dropped.

The Linux Mint team introduced many great new apps in recent releases. And now an Ubuntu PPA is available that contains these apps for all current Ubuntu releases.

Without adding Linux Mint repository and setting the priority, an Ubuntu PPA is good choice to install or receive the package updates.

And ‘Butterfly’, a top contributor of Linux Mint project on launchpad, maintains the PPA repository with packages so far for Ubuntu 22.04, Ubuntu 20.04, Ubuntu 23.10, and Ubuntu 24.04 support. And the PPA contains updated version of the following packages:

  • Bulky batch file renamer.
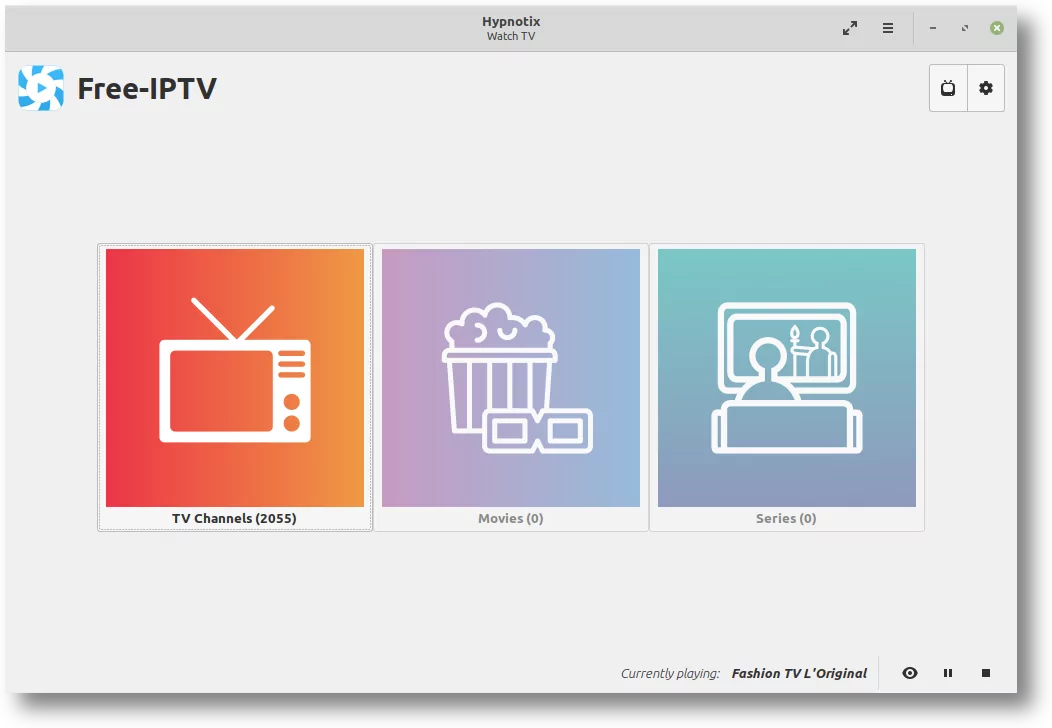
  • Hypnotix IPTV player.
  • Pix image viewer and browser.
  • Sticky notes app.
  • Warpinator LAN file transfer.
  • Mint’s Web App Manager.
  • And some more.

Add PPA and Install Linux Mint Apps in Ubuntu:

1. Add the PPA.

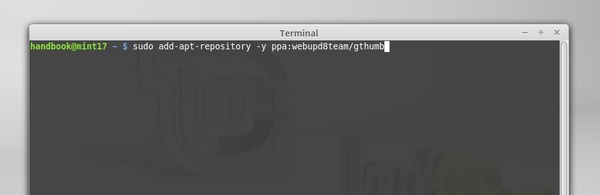
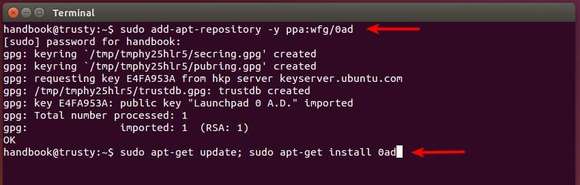
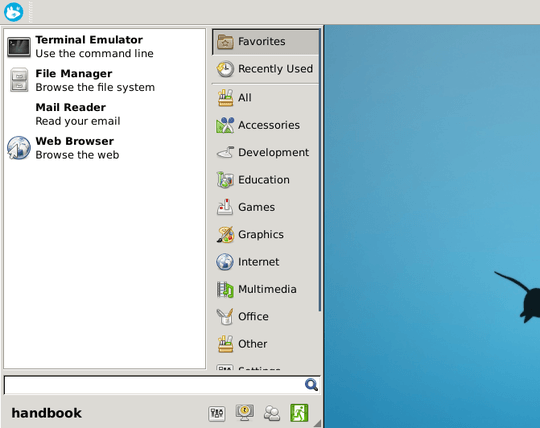
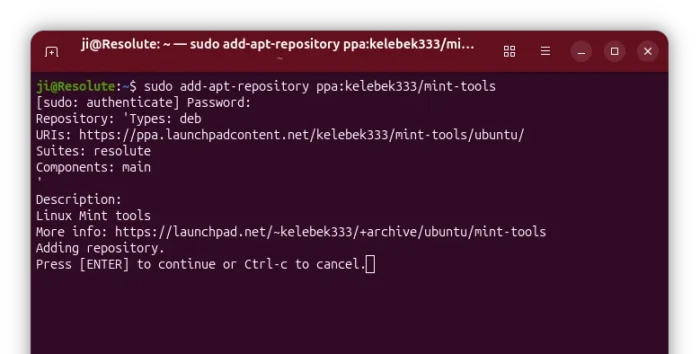
Firstly, open terminal either from start menu, or press Ctrl+Alt+T on keyboard. When terminal opens, paste the command below and hit Enter to add the PPA:

sudo add-apt-repository ppa:kelebek333/mint-tools

Type user password, no visual feedback, when it asks and hit Enter to continue.

2. Next install or update Linux Mint apps:

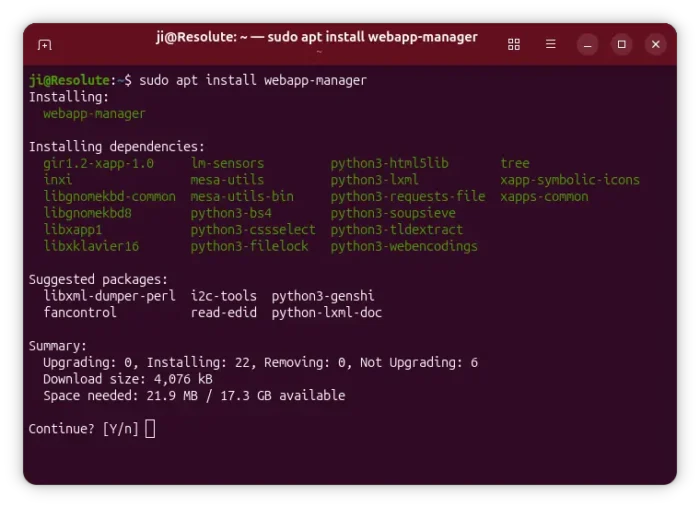
After adding the PPA, you can now install one or all of the previous apps via apt command.

For example, install the web app manager via command:

sudo apt install webapp-manager

For other apps, replace webapp-manager in the command with bulky, hypnotix, pix, or warpinator.

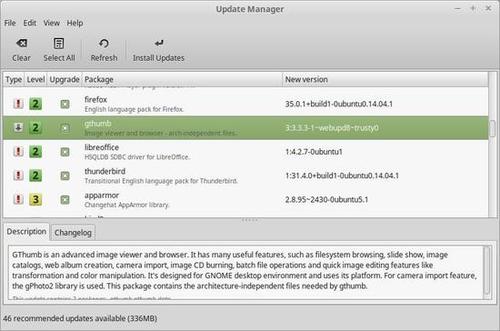
And if an update version is available, you’ll be able to upgrade the package via Software Updater along with system updates.

Uninstall PPA and Linux Mint Apps:

To remove these Linux Mint apps, run apt command with remove flag. For example, remove bulky via command:

sudo apt remove --autoremove bulky

As well, replace bulky in command with other package to remove.

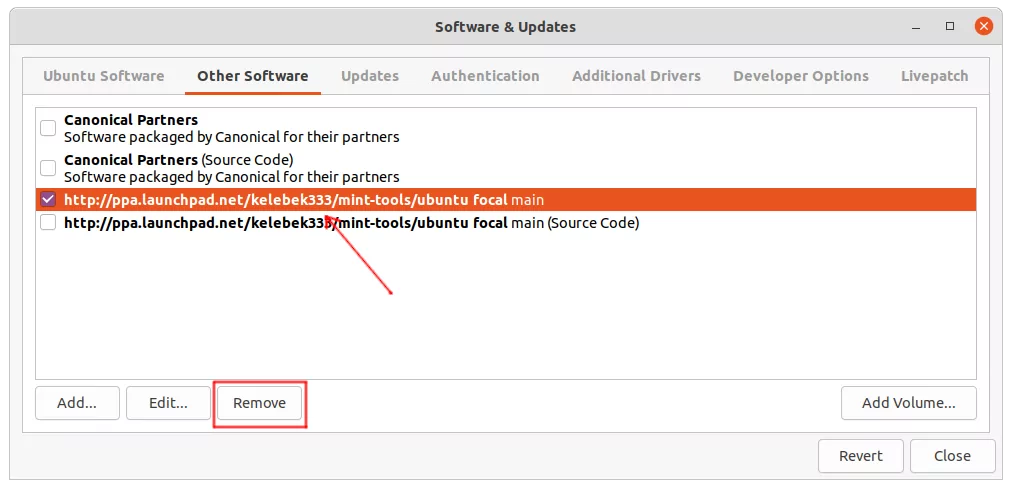
And remove the Ubuntu PPA either via command:

sudo add-apt-repository --remove ppa:kelebek333/mint-tools

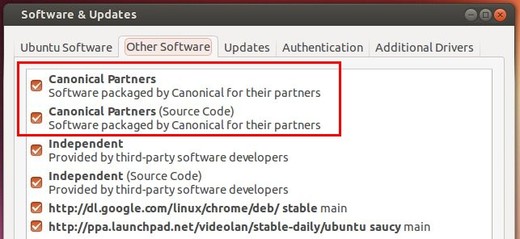
or by Software & Updates utility other “Other Software” tab.

Upgrade to Latest gThumb 3.3.3 in Linux Mint 17.1

Last updated: February 12, 2015

Quick tutorial shows how to upgrade to the latest gThumb image viewer and organizer in Linux Mint 17.1 Cinnamon.

gThumb is a free and open-source image viewer, browser, and editor for Gnome Desktop. While Linux Mint 17.1 still provides gThumb 3.27, the latest version has reached the 3.3.3 release with new image tools, bug fixes and translations updates.

New features and user visible changes:

  • Allow to apply the embedded color profile for jpeg images.
  • New image tools: special effects; curves.
  • Unified ‘equalize histogram’ and ‘adjust contrast’: show a preview of the various contrast filters.
  • Grayscale tool: show a preview of the different filters.
  • Fixed the interface style when used with gtk+ 3.14
  • File propery view: use a switcher; added a details page that show all the metadata, show only the important exif fields in the properties page.
  • UI changes to the preferences dialog: use a sidebar instead of a notebook to avoid a large dialog with some translations; better spacing; removed the Ok button.
  • Video player: save the screenshot without showing the dialog. Allow to set the screenshots location in the extension preferences dialog. Show a message in the statusbar after saving.
  • Gear menu: use the new icon if using gtk+ 3.13 or newer

Bugs fixed:

  • video player: do not hide the mediabar when using the volume control
  • Forbidden when trying to upload to Flickr (#732557)
  • Build against either webkit2gtk-3.0 or webkit2gtk-4.0 (Dominique Leuenberger)

How to install / upgrade gThumb in Mint Cinnamon:

1. Open terminal and run below command to add the Webupd8 PPA:

sudo add-apt-repository -y ppa:webupd8team/gthumb

2. Open Update Manager from menu, click “Refresh” button and then you should see the gThumb 3.3.3 available for upgrade (make sure you have upgrade to mintupdate 4.8.1).

Select it and click Install Updates.

Linux Mint Team finally announced the release of 17.1 “Rebecca” Cinnamon and MATE editions, which is a long term support release based on Ubuntu 14.04 that will be supported until 2019.

According to the release note, the Linux Mint 17.1 “Rebecca” comes with updated software and brings refinements and many new features to make your desktop even more comfortable to use.

Linux Mint 17.1 features:

  • Cinnamon 2.4 / MATE 1.8
  • MDM 1.8
  • Out of the box support for Compiz (MATE edition)
  • Linux kernel 3.13
  • Ubuntu 14.04 package base
  • Update Manager now groups packages together according to their source package.
  • Redesigned UI of Language Settings.
  • Redesigned Login Window Preferences.
  • System, Artwork, and Other Improvements.

Both the Linux Mint 17 and 17.1 RC can upgrade to the new release through Updater Manager. For the 17.1 RC release just install any level 1 update you haven’t installed already.

ISO download link: www.linuxmint.com/download.php
Release notes: blog.linuxmint.com/

Cinnamon Desktop 2.4 has been announced recently, which will be featured in Linux Mint 17.1 “Rebecca” planned for the end of November and in LMDE 2 “Betsy” planned for Spring 2015.

According to the release note, the new Cinnamon Desktop brings below new features and improvements:

  • Little improvements on memory usage and responsiveness to make your experience smoother and more enjoyable.
  • Similar to Windows, “Super+e” now opens up the home directory.
  • Single-button touchpads are now supported and actions for 2-finger and 3-finger clicks are configurable.
  • Compositing in full-screen mode is now configurable and does not require to restart Cinnamon.
  • The desktop font is now configurable.
  • It is now possible to give the screensaver a custom date format, but also to change the font and the color of the text.
  • Theme and Background Settings were completely redesigned, Background Slideshow supported.
  • A “Slideshow” applet can be added to panel to control background slideshow.
  • The Network Settings were rebased on GNOME’s latest configuration module.
  • Add Notification and Privacy Settings.
  • Nemo now allows quick customization of folder icons with folder-color-switcher.

For details, see the official release note.

Install / Upgrade to Cinnamon in Ubuntu / Linux Mint:

NOTE that Cinnamon 2.4 is released a month earlier than Linux Mint 17.1 for the specific purpose to squash new bugs and to gather feedback. So there’ll be bugs.

To help test the new desktop, you can follow below steps to install or upgrade to Cinnamon 2.4 from a nightly build PPA:

For Ubuntu 14.10 and Ubuntu 14.04, run commands below one by one in terminal (Ctrl+Alt+T):

sudo add-apt-repository ppa:gwendal-lebihan-dev/cinnamon-nightly

sudo apt-get update; sudo apt-get upgrade

sudo apt-get install cinnamon

(Optional) To remove it, run:

sudo apt-get remove cinnamon && sudo apt-get autoremove

sudo add-apt-repository -r ppa:gwendal-lebihan-dev/cinnamon-nightly && sudo apt-get update

For Linux Mint 17, do:

  1. Launch Menu->Administration->”Software Sources”.
  2. Tick the option “Unstable Packages (Romeo)”.
  3. Carefully read the warning in the dialog that pops up and click “Yes” if appropriate.
  4. Launch the Update Manager and click on “Refresh”.
  5. If a new mintupdate version is shown, apply it.
  6. Apply all updates related to Cinnamon (sort by version, 2.4.0 or 2.4.1, or by update type since they all come from Romeo).

Folder Color, simple Nautilus extension to colorize folder icons, now adds support for Cinnamon’s Nemo and Mate’s Caja File Manager.

Folder Color is a simple extension to customize your Ubuntu / Linux Mint folder icon, create colorful and unique folder icons for your computer to classify and manage your folders highly efficient.

The project was originally designed for Ubuntu Nautilus file browser. Now, it supports Caja – default for Mate Desktop in Linux Mint and Ubuntu Mate, and Nemo – default for Linux Mint Cinnamon.

Colorize Nautilus Folder Icons (Ubuntu)

Colorize Nemo Folder Icons (Linux Mint Cinnamon)

Install Folder Color in Ubuntu/Linux Mint:

The developer has made the binary packages into PPA, available for Ubuntu 14.10, Ubuntu 14.04, Ubuntu 12.04 and Linux Mint 13/17.

To get started, press Ctrl+Alt+T on keyboard to open terminal. When it opens, do:

1. Add PPA

Paste the command below into terminal and hit Enter to add the PPA:

sudo add-apt-repository -y ppa:costales/folder-color && sudo apt-get update

Type in your user password when it asks, note that there’s no visual feed back.

2. Install the extension:

Select install below package via your Package Manager or by running the given command:

  • For Ubuntu Nautilus file browser, install folder-color:
    sudo apt-get install folder-color
  • For Linux Mint Cinnamon’s Nemo file brower, install folder-color-nemo:
    sudo apt-get install folder-color-nemo
  • For Linux Mint/Ubuntu Mate’s Caja file browser, install folder-color-caja:
    sudo apt-get install folder-color-caja

Tip: For those don’t want to add the PPA, grab the .deb installer directly from the launchpad page. Note that folder-color-common need to be installed first.

3. Apply changes

Finally restart your file browser by either logging out and back in or running the command below and re-open it:

  • For Nautilus run: nautilus -q
  • For Nemo run: nemo -q
  • For Caja run: caja -q

4. Fix Caja issue

For Mate Caja file browser, if you don’t see the Folder Color in context menu, run command to fix:

For 32-bit:

sudo ln -s /usr/lib/i386-linux-gnu/girepository-1.0/Caja-2.0.typelib /usr/lib/girepository-1.0/Caja-2.0.typelib

For 64-bit:

sudo ln -s /usr/lib/x86_64-linux-gnu/girepository-1.0/Caja-2.0.typelib /usr/lib/girepository-1.0/Caja-2.0.typelib

And finally restart caja by running caja -q.

via: tuxfamily.org

0 A.D. Alpha 17 Quercus, an open-source game of ancient warfare, has been released recently. Here’s how to install it from the official PPA and receive future updates.

0 A.D. is a free, open-source, cross-platform real-time strategy game under development by Wildfire Games. It is a historical war and economy game focusing on the years between 500 B.C. and A.D. 500. The game aims to be entirely free and open-source, using the GPL 2+ license for the game engine and the CC-BY-SA for the game art.

0 A.D. Alpha 17 Quercus features a major gameplay rebalance, units on walls, trigger support, improved mod support and more!

For the detailed changes, see the official release note.

How to Install & Upgrade 0 A.D. in Ubuntu:

An official Ubuntu PPA has been created for Ubuntu 14.10, Ubuntu 14.04, Ubuntu 12.04, Linux Mint 13, and Linux Mint 17.

To add the PPA and install 0 A.D., press Ctrl+Alt+T to open terminal and run below commands one by one:

sudo add-apt-repository -y ppa:wfg/0ad

sudo apt-get update

sudo apt-get install 0ad

After that, you can receive future updates by running regular updates via Software Updater utility.

Whisker Menu is an alternate application launcher for Xfce, it gives you a unity/gnome3 style search in xfce4 desktop. As well as that you can browse through all of your installed applications by clicking on the category buttons on the side.

Whisker Menu is the default app launcher in Linux Mint Xfce edition since Mint 15 Olivia. The developer has released version 1.4.0 with new features and various translation updates:

  • Add option to switch position of categories and launchers
  • Add waiting for grabs
  • allows modifier as shortcut
  • Add padding to username
  • Add single panel row option
  • Add about entry to context menu
  • Load applications immediately
  • Recognize keypad enter as return for searching
  • Set menu window type hint to DIALOG
  • Translation updates: Bulgarian, Catalan, Chinese (Taiwan), Czech, Dutch, French, German, Hebrew, Italian, Japanese, Malay, Norwegian Bokmål, Polish, Portuguese, Russian, Slovak, Spanish, Swedish

Install Whisker Menu 1.4.0 in Ubuntu 14.10 / 14.04:

The binary packages has been built into developer’s PPA, available for Ubuntu 14.10, Ubuntu 14.04, Ubuntu 12.04 and their derivatives such as Linux Mint 13 and 17.

Press Ctrl+Alt+T on keyboard to open the terminal. When it opens, paste the command below and run to add the PPA:

sudo add-apt-repository ppa:gottcode/gcppa

After that install it via your package manager after checking for updates. Or run:

sudo apt-get update; sudo apt-get install xfce4-whiskermenu-plugin

If you don’t like Ubuntu PPAs, grab the .deb package directly from the launchpad page.

Once installed, add the launcher menu onto panel and move it to the left.

Skype for Linux has been updated to version 4.3.0.37 with updated UI, new cloud-based Group chat experience, and more.

Microsoft finally announced Skype for Linux 4.3 on June 18, 2014. The new release dropped support for direct Alsa support, now it uses PulseAudio for better calling experience. Also Skype 4.3 contains below changes:

  • An updated UI
  • Our new cloud-based Group Chat experience
  • More reliable file transfer support when using multiple devices at once
  • Greater accessibility by blind and visually impaired users
  • PulseAudio 3.0 and 4.0 support
  • Lot of bug fixes
  • Skype 4.3 release note.

Install Skype 4.3 in Ubuntu or Linux Mint:

At the moment, Skype for Linux 4.3 is not available in any Linux repository. Below steps will tell you how to install the official .deb package in Ubuntu 14.04, Ubuntu 12.04, and their derivatives.

1. Install required libraries (for 64-bit system)

Skype website only provides 32-bit package for Ubuntu 12.04 and higher. You’re unable to install it directly on 64-bit system due to dependencies issue.

However, install the old skype from Canonical partners repository will also install the required libraries we need for NEW skype.

a.) Press Ctrl+Alt+T on keyboard to open terminal. When it opens, run commands one by one to remove old skype and .skype folder:

sudo apt-get remove skype skype-bin

rm -rf ~/.skype

b.) Open “Software & Updates” and enable Canonical partners repository under Other Software tab.

c.) Press Ctrl+Alt+T on keyboard to open terminal. When it opens, run the commands below to install old skype:

sudo apt-get update; sudo apt-get install skype

UPDATE: Below steps are no longer required! Just do the above step a.), b.) and c.) will install Skype 4.3 in your system.

c.) Once installed, remove the old skype package:

sudo apt-get remove skype skype-bin

2. Download & install Skype 4.3

Download the “Ubuntu 12.04 (multiarch)” package from: www.skype.com/go/linux

Click to install the package via Ubuntu Software Center. Or run command below in terminal (Ctrl+Alt+T):

cd ~/Downloads/ && sudo dpkg -i skype-ubuntu-precise_*.deb

Once installed, you’re able to open Skype 4.3 from Unity Dash result:


HP print, scan and fax Drivers for Linux just got an update a few hours ago with new printers and Linux Distros support, Linux Mint 17 Qiana is included.

HPLIP (Hewlett-Packard Linux Imaging & Printing) is an HP-developed solution for printing, scanning, and faxing with HP inkjet and laser based printers in Linux. It is free, open source software distributed under the MIT, BSD, and GPL license.

The latest HPLIP 3.14.6 was released on June 4th, which added support for Boss 5.0, Debian 7.5, Linux Mint 17, and following new printers:

  • HP DesignJet Z6600 PostScript
  • HP DesignJet Z6800PS Photo
  • HP DesignJet D5800 60-in Production Printer
  • HP DesignJet T3500 36-in Production eMFP
  • HP Designjet T7200 42-in Production Printer
  • HP Deskjet 2543 All-in-One Printer
  • HP Deskjet 2549 All-in-One Printer
  • HP OfficeJet Pro 8640 e-All-in-One Printer
  • HP OfficeJet Pro 8660 e-All-in-One Printer

Also there are a few bug fixes:

  • Fixed Device Communication Error on launching HP Device Manager
  • Unable to add/remove file in ‘hp-sendfax’ wizard
  • Fax cover page does not get changed after changing recipient second time
  • Improved scan performance for ‘hp-scan’ utility

Install HPLIP 3.14.6:

1. Download the installer:

Or check out if there’s a new release at official page.

2. Press Ctrl+Alt+T on keyboard to open the terminal. When it opens, run the installer via:

cd ~/Downloads && chmod +x hplip-3.14.6.run && ./hplip-3.14.6.run

Answer the questions to finish the installing process. Once done, restart your computer.

Linux Mint 17 Qiana, a long term support release which will be supported until 2019, is finally available for download for both the Cinnamon and the MATE flavors.

Linux Mint 17 “Qiana” is based on Ubuntu 14.04 Trusty Tahr LTS and all future Mint releases will be based only on Ubuntu LTS.

The first flavors released are Cinnamon and MATE and the ISOs come before the official announcement, available for download at Irish mirror:

The official announcement is coming soon, be sure to check out release details at LinuxMint.com