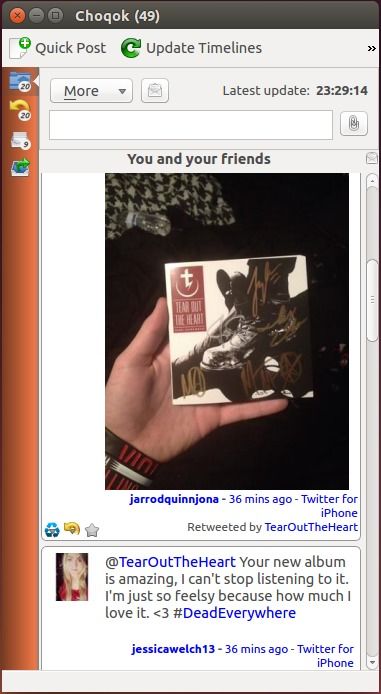
Choqok, a free and open-source micro-blogging client for KDE, has reached the 1.5 release recently. It has been more than one year since the previous version was released in September 2013.
Choqok features Twitter, Pump.io (Formerly known as Identi.ca), and OpenDesktop.org services support and KWallet integration. The 1.5 release brings below changes
There’s a new option to disable the system tray.
As mentioned above, we now have a plugin for Pump.io microblogs.
We have a new plugin for expansion of short URLs, and dropped old UnTiny plugin. **
A preview for photos posted to Twitter.com is now available.
Issues in updating friends list of Twitter is fixed and sending direct message is working again.
There’s a new option in User menu for Reporting a User to Twitter.
A long wanted request on StatusNet(Gnu social) plugin was ability to take into account the server’s custom set, char limit. now we have it.
IMStatus plugin now supports KDE Telepathy.
Yourls and Goo.gl shortening plugins are fixed and now they are working again.
Broken shortening plugins are dropped.
How to Install / Upgrade Choqok in Ubuntu:
The latest binaries have been made into Adilson’s PPA, available for Ubuntu 15.04, Ubuntu 14.10, Ubuntu 14.04 and Linux Mint 17 (fail to build for Ubunt 12.04 at the moment).
Note: as a KDE app, installing Choqok also installs numerous Kubuntu libraries.
To add the PPA, open terminal from menu and run command:
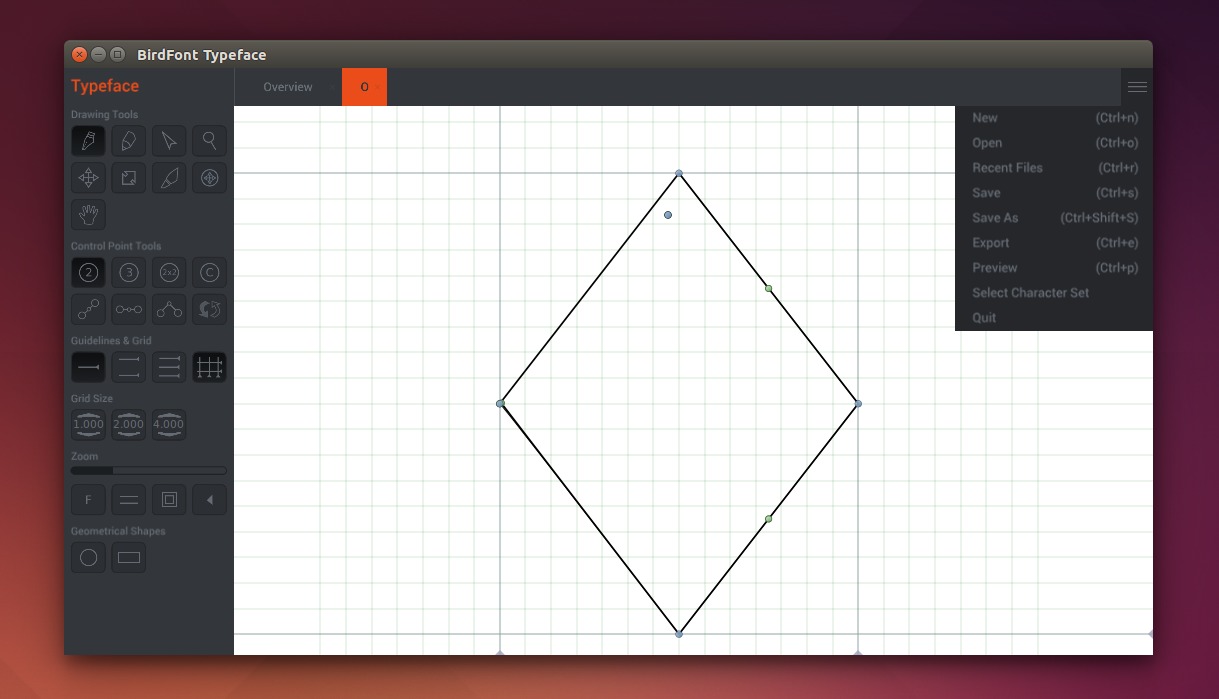
Birdfont, a free and open source font editor, has reached the 2.0 release recently with new UI layout, bug fixes and a few improvements.
BirdFont is a free font editor that lets you create vector graphics and export TTF, EOT & SVG fonts. It is written by Johan Mattsson using Vala programming language, works on Windows, Mac OS X and Linux.
The 2.0 release brings:
New UI layout
New zoom tool
Improved background import
Customizable short cuts
New tab for changing font name
Illustrator SVG import and other bug fixes
Load bf fonts faster
How to Install/Upgrade birdfont in Ubuntu:
The binary packages have been made into my personal PPA (unofficial), available for Ubuntu 14.04, Ubuntu 14.10 and Ubuntu 15.04.
Open terminal from the Dash or by pressing Ctrl+Alt+T. When it opens, run command below to add the PPA:
TimeShift, the open-source System Restore software, has reached the 1.7.x release recently. The new release added new command line options to restore, list and delete snapshots, added backup and restore support for LUKS-encrypted partitions.
Never heard of it? TimeShift for Linux is a application that provides functionality similar to the System Restore feature in Windows and the Time Machine tool in Mac OS. It takes snapshots of your system files and settings. User files such as documents, pictures and music are excluded. Your files remains unchanged when you restore your system to an earlier date.
The 1.7 version brings command line options to restore, delete snapshots. For example:
If your system is installed on a LUKS-encrypted partition then you can now restore snapshots both online (from running system) and offline (from another system / LiveCD).
How to Install/Upgrade TimeShift:
TimeShift is available in the developer’s PPA for Ubuntu 15.04, Ubuntu 14.10, Ubuntu 14.04, and Ubuntu 12.04.
To add the PPA, open terminal from the Dash or by pressing Ctrl+Alt+T on keyboard. When it opens, run command:
sudo add-apt-repository ppa:teejee2008/timeshift
After that, update package cache and install the software by running below two commands one by one:
Still using the VirtualBox 4.2 series? Oracle has recently released an update, VirtualBox 4.2.28, with various Linux related bug fixes, including Linux Kernel 3.19 fixes, Gnome Session crashes, etc.
Below is the full list of changes:
VMM: fixed a potential misbehavior after restoring the A20 state from a saved state
VRDP: fixed a rare crash when using remote audio input
Floppy: fixed read errors and guest memory corruption when running under control of QEMM
Storage: fixed data corruption when resizing VHD images under certain circumstances
NAT: fixed handling of the RFC 1533 DHCP PAD option
X11 hosts: Made the extra key on Brazilian Thinkpads work (bug #8745)
X11 hosts: fixed a problem of input focus cycles and immediately released key presses in full screen mode (bug #13238)
Linux guests: fix a crash in gnome-session (bug #13335)
Linux Additions: fixed a potential use-after-free when unloading the VBoxGuest module
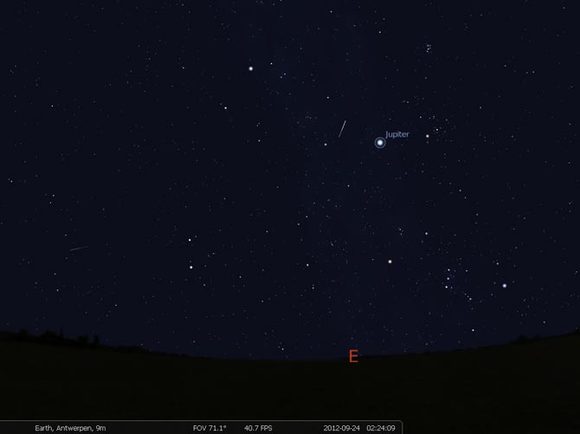
Free planetarium software Stellarium has reached 0.13.2 release with over 70 bug-fixes and new nice features – like visualization of the zodiacal light and new sky cultures.
Stellarium is a free and open source planetarium software that uses OpenGL to render a realistic projection of the night sky in real time. It works in Windows, Mac OS X, and Linux.
According to the changelog, the new release fixed below important bugs:
The orbits of Neptune’s moons are not rendered correctly
fail to start stellarium compiled by Qt5.3.1
No disk in station F on start
Mac OS X Yosemite 10.10 mouse bug
Unable to select objects after zoom.
The textures of Hyperion (Saturn VII) fails to render.
Wrong value of proper motion for some stars
Memory leak in 64-bit version
Visual artifacts on the Moon
Insufficient OpenGL version for 0.11.96.MESA-win32
Other bug fixes and installer for Windows and OS X are available at launchpad page.
Install / Upgrade Stellarium in Ubuntu:
For Ubuntu 14.04, Ubuntu 14.10, Ubuntu 15.05 and Linux Mint 17 users, latest Stellarium packages are available in PPA repository.
To add the PPA, open terminal from the Dash or by pressing Ctrl+Alt+T on keyboard. When it opens, run command:
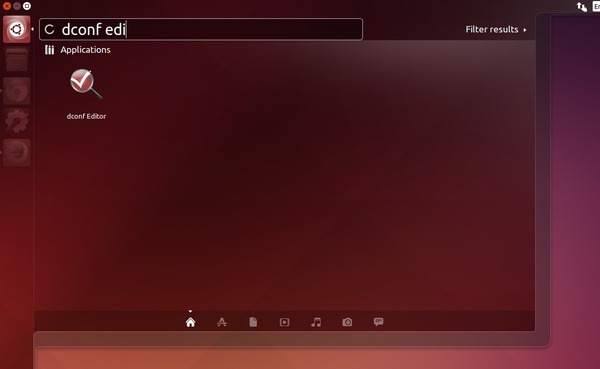
Quick tutorial shows how to save current session status so that Ubuntu remembers and automatically restores the current running applications at next login.
This can be done by a simple graphical configuration tool called Dconf-Editor. So first click the link below to bring up Ubuntu Software Center and install the tool:
Once installed, launcher dconf-editor from the Dash or the Launcher.
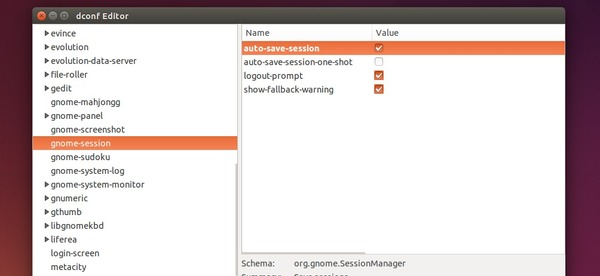
When it opens, navigate to org -> gnome -> gnome session in the left pane. Then enable ‘auto-save-session’ by checking the box.
That’s it! Next time you login, the current running applications will be restored automatically.
Picty is a free, open-source, and lightweight manager for large photo collections. It is designed around managing metadata and a lossless approach to image handling.
metadata: descriptive and other information about images (created by you, your camera or the programs you use) that are embedded inside image files alongside the pixels.
lossless: by only ever writing information about images, including image processing instructions, as metadata, the original image pixels are never altered allowing you to preserve the images as they were taken on your camera.
Picty is lightweight and has a snappy interface. All the heavy lifting is done on background threads or external processes to ensure the UI never blocks. User is informed of what is going on in the background with progress notifications etc.
Picty Features:
Supports big photo collections (20,000 plus images).
Open more than one collection at a time and transfer images between them.
Collections are:
Folders of images in your local file system.
Images on cameras, phones and other media devices.
Photo hosting services (Flickr currently supported).
picty does not “Import” photos into its own database, it simply provides an interface for accessing them wherever they are. To keep things snappy and to allow you to browse even if you are offline, picty maintains a cache of thumbnails and metadata.
Reads and writes metadata in industry standard formats Exif, IPTC and Xmp
Lossless approach:
picty writes all changes including image edits as metadata. e.g. an image crop is stored as any instruction, the original pixels remain in the file
Changes are stored in picty’s collection cache until you save your metadata changes to the images. You can easily revert unsaved changes that you don’t like.
Basic image editing:
Current support for basic image enhancements such as brightness, contrast, color, cropping, and straightening.
Improvements to those tools and other tools coming soon (red eye reduction, levels, curves, noise reduction)
Image tagging:
Use standard IPTC and Xmp keywords for image tags
A tag tree view lets you easily manage your tags and navigate your collection
Folder view:
Navigate the directory heirarchy of your image collection
Multi-monitor support
picty can be configured to let you browse your collection on one screen and view full screen images on another.
Customizable
Create launchers for external tools
Supports plugins – many of the current features (tagging and folder views, and all of the image editing tools) are provided by plugins
Written in python – batteries included!
How to Install Picty in Ubuntu:
The developer maintains a PPA repository contains the latest Picty packages for Ubuntu 15.04, Ubuntu 14.10, Ubuntu 14.04, Ubuntu 12.04, Ubuntu 10.04, and derivatives (Linux Mint 13/17/17.1).
To add the PPA, open terminal from the Dash or by pressing Ctrl+Alt+T. When it opens, run command:
sudo add-apt-repository ppa:damien-moore/ppa
Type in your password when it asks and hit Enter to continue.
After you added the PPA, update package cache and install the software by running below two commands one by one:
sudo apt-get update

sudo apt-get install picty
For basic raw processing, video thumbnailing, flickr collection, and geotagging support, run command to install below packages:
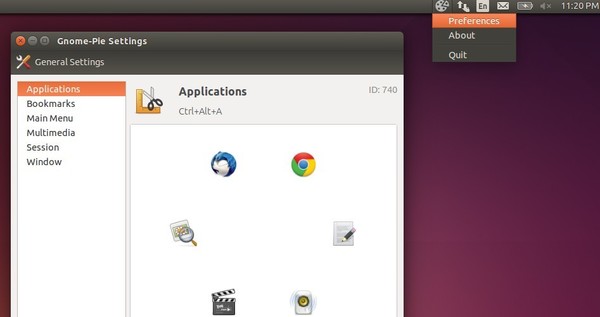
The Gnome-Pie project now goes alive by releasing the version 0.5.6, since the last release was announced in March 2013.
For those who have never heard of Gnome-Pie. It is a circular application launcher which is made of several pies, each consisting of multiple slices. The user presses a key stroke which opens the desired pie. By activating one of its slices, applications may be launched, key presses may be simulated or files can be opened.
See how it works:
The developer announced the 0.5.6 release recently with some fixes and planed to drop any GTK2 support and update Gnome-Pie fully to current software versions (GTK 3.14, Vala 0.27, etc.)
Changes in Gnome-Pie 0.5.6:
Transparency under Gnome 3.10+ (thank you, Raphaël Rochet)
Pie hotkeys start numbering with one (instead of zero, since the zero key is really hard to press)
option windows are now resizable since they are too small with certain window managers (e.g. Gala)
Install Gnome-Pie 0.5.6 in Ubuntu:
The binary packages have been made into PPA repository, available for Ubuntu 12.04, Ubuntu 14.04, and Ubuntu 14.10.
To add the PPA, open terminal from the Dash or by pressing Ctrl+Alt+T on keyboard. When it opens, run command:
Once installed, start Gnome-Pie from the Dash. From the indicator applet on panel start its settings window and configure keyboard shortcuts and pie items.