![]()
Wallch is an automatic wallpaper changer for Ubuntu Linux. It features random image, Unity indicator, Live Earth wallpaper, wallpaper clocks, and Picture of The Day (wikipedia).
Wallch is a free and open source app that works on Gnome, Unity, LXDE, Xfce and Mate. This quick tutorial will show you how to install and get Wallch working in Ubuntu 14.04 LTS.
See the pictures:
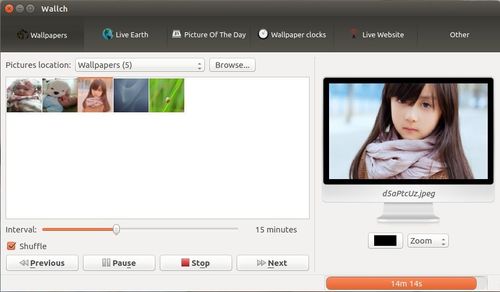
Wallch automatically change desktop background with selected Picture folder
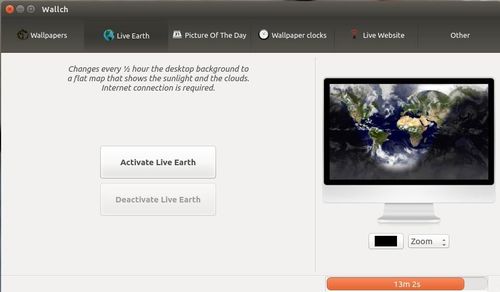
Wallch displays a Live picture of earth updated every 1/2 hour

Wallch displays a wallpaper with real time clock
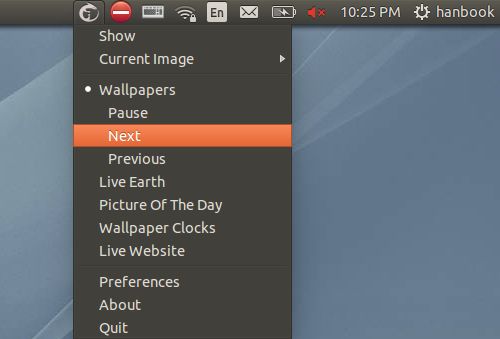
Control wallch via an Unity indicator
Install Wallch in Ubuntu 14.04:
Wallch is available in Ubuntu repositories, you can click the link below to bring up Ubuntu Software Center and click install it:
Download and click install the wallch_4.12-1trusty_*.deb from the link below. You may check your OS type 32-bit = i386 or 64-bit =amd64 by going to System Settings -> Details.
Once installed, open it from Unity Dash search results.
UPDATE: Below bugs are fixed by Wallch 4.12!
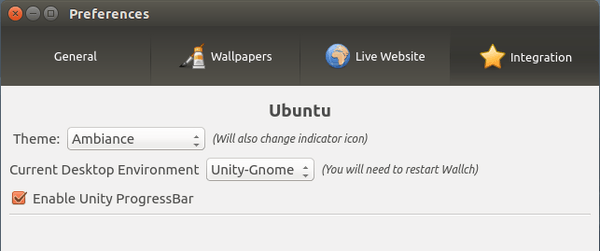
NOTE 1. Due to bug, Wallch does not work after you installed it. Go to menu or indicator Edit -> Preferences -> Integration. Change the theme from Autodetect to Ambiance, and choose your desktop environment will fix the issue.
NOTE 2: Wallch in Ubuntu 14.04 is a little buggy. When you click on Start changing wallpapers, it crashes sometimes. Just restart the app and do it again, it will be working good once it starts changing your desktop background.