![]()
This is a step by step tutorial shows how to manually remap (or disable) keyboard keys in Ubuntu without using any third-party apps.
There are a few free open-source applications that can re-map your mouse, keyboard, and other input devices keys in Linux. As far as know, they include input remmaper and AntiMicroX.
For GNOME, the default desktop for Ubuntu and Fedora Workstation, there’s popular GNOME Tweak tool (available in AppCenter/GNOME Software) with options to remap Ctrl, Alt, and Caps Lock keys.
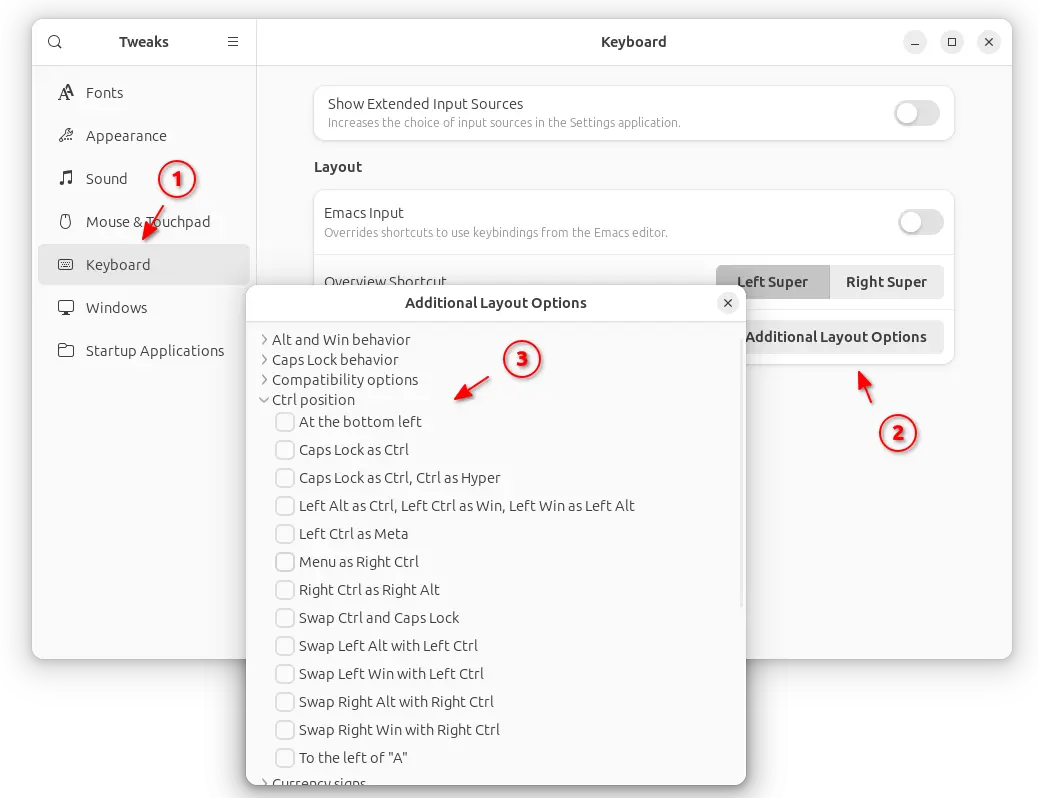
GNOME Tweaks