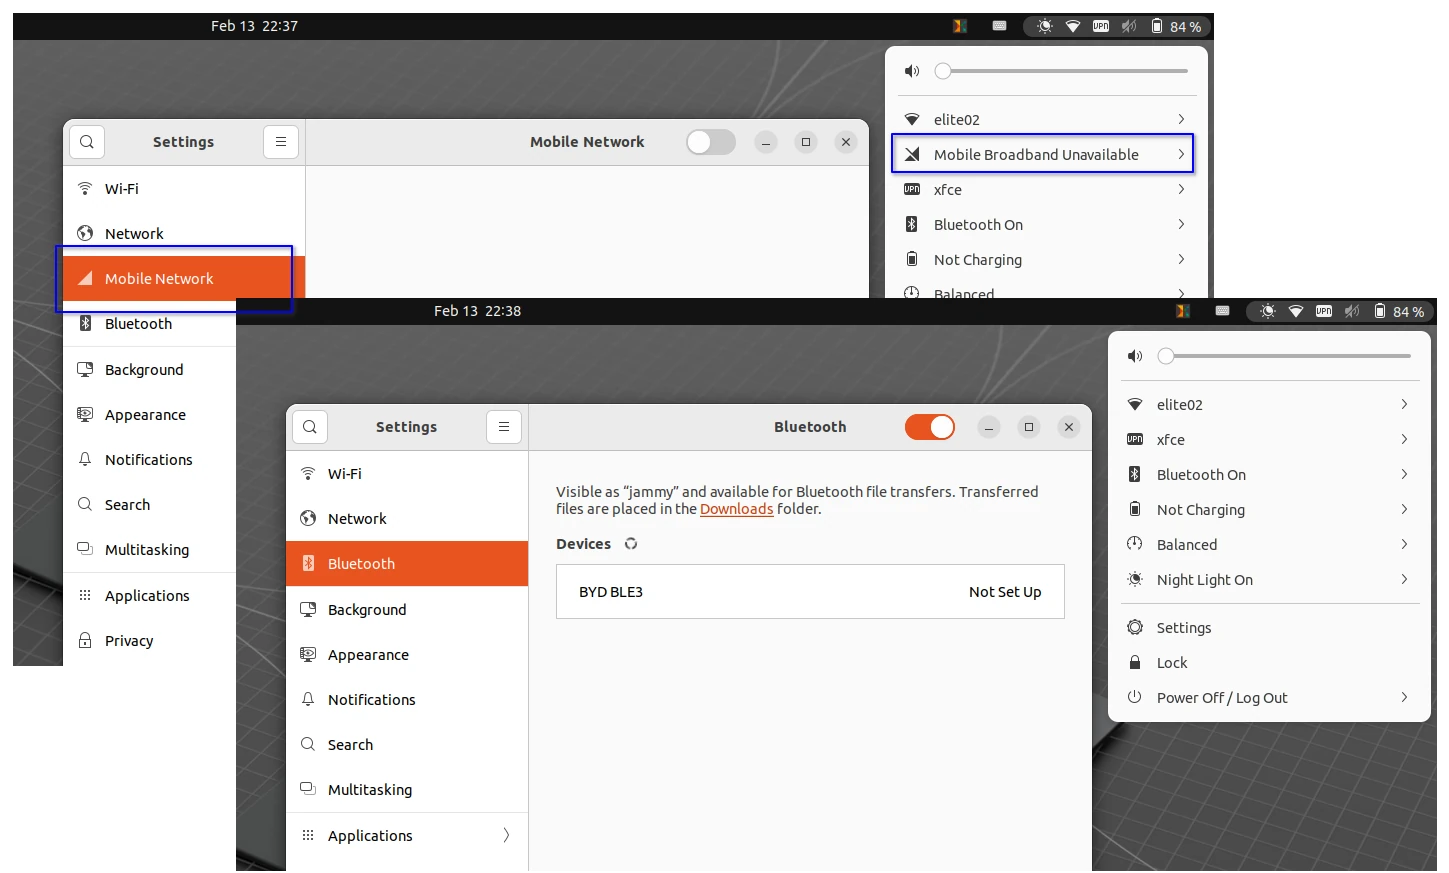
This simple tutorial shows how to get rid of the “Mobile Broadband” menu option from the upper right system status menu in GNOME Desktop.
GNOME, the default desktop in Ubuntu and Fedora Workstation, has built-in support for mobile broadband. If your computer (usually laptop) has a built-in SIM card slot, then it will show you the “Mobile Network” page in Settings and “Mobile Broadband” option in upper right menu.
For those who rarely use this feature, the option is useless but makes the menu longer. So, it’s a good choice to completely disable it!
This simple tutorial shows how to install and enable the Classic Gnome 2 style desktop session in Ubuntu 22.04 and/or Ubuntu 24.04.
Though the title said for Ubuntu, this tutorial also works in Debian 12 & 11. Fedora, Arch, and their based systems also have corresponding packages for the similar job.
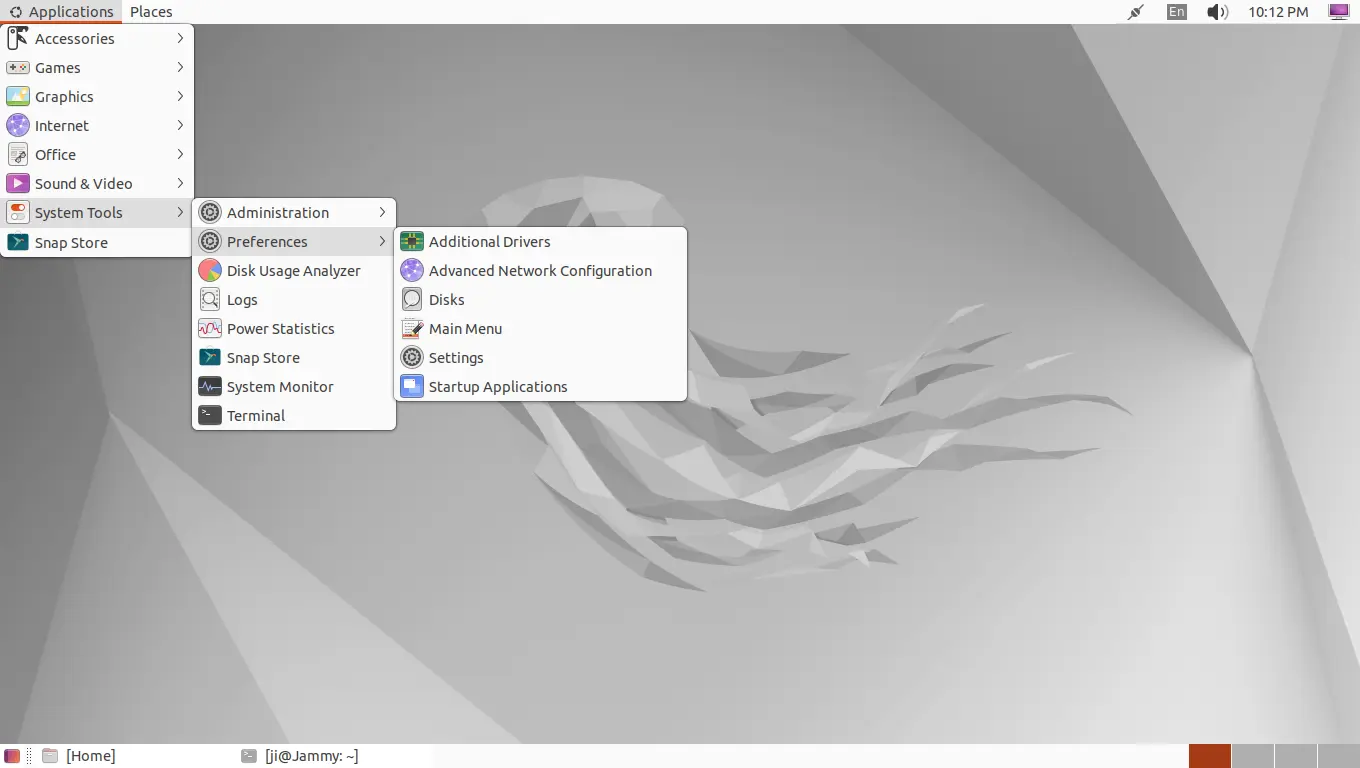
As far as I know, there are 3 ways to get back the classic Gnome 2 layout. They include:
Option 1: gnome-flashback -traditional desktop session based on GNOME technologies.
Option 2: gnome-shell-extensions – Classic Gnome 2 layout through some Gnome Shell extensions.
Option 3: MATE Desktop – a free open-source fork and continuation of Gnome 2 Desktop.
This is a beginner’s guide shows you how to rotate your images using either a Linux command or built-in apps such as file manager and image viewer.
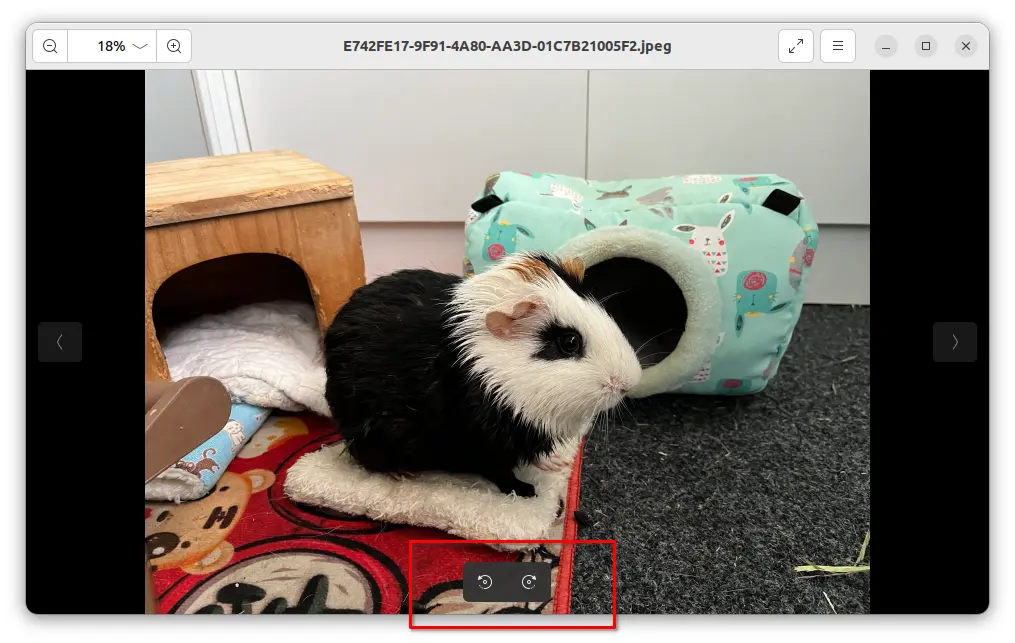
Option 1: Rotate an image using built-in image viewer
If you want to change the orientation for only a few photo images, then the built-in image view is always the best choice.
Simply click open your image file through the image viewer. Move mouse cursor over the app window, then you’ll see the buttons to rotate to the left and rotate to the right in bottom.
The image viewer app varies depends on your desktop environment, the rotate options may be available other-where such as in app menu.
After rotated your image, either click Save (Ctrl+S) to override the original image file, or choose Save as (Ctrl+Shift+S) to save the rotated image as another file.
GNOME 46 reached UI, ABI/API, and feature freeze stage today. Let’s see the top new features in this popular desktop environment.
GNOME 46 will be the default desktop environment for Fedora 40 Workstation, Ubuntu 24.04, and optional in Arch, Manjaro, etc Linux.
It continues polish the desktop appearance by redesigning the improving the core app experiences.
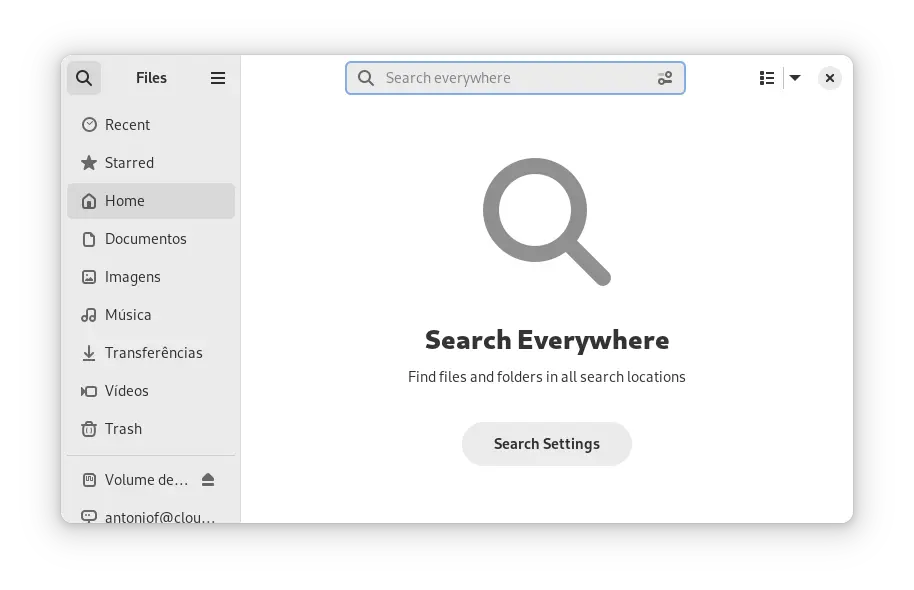
GNOME Files, aka Nautilus, to have explicit Global Search mode, allowing to find files and folders in all search locations. And a “Search Settings” button is available to filter search results.
Wallpaper Contest for the next Ubuntu 24.04 LTS, Noble Numbat, is open! Top 8 winner images will be shipped in the iso image.
A bit different to the previous contests, this time the submissions are separated into 4 categories: Mascot Theme, Digital / Abstract Art, Nature, and Other. Each category will have 2 winners, and finally 8 mixed images will be made as optional wallpapers in Ubuntu 24.04 out-of-the-box.
The AI generated artwork is NOT allowed! Because there are active legal debates on the ownership of AI generated artwork and whether it can be copyrighted or not. And, many popular AI generation tools use a license that does not align with those for the contest.
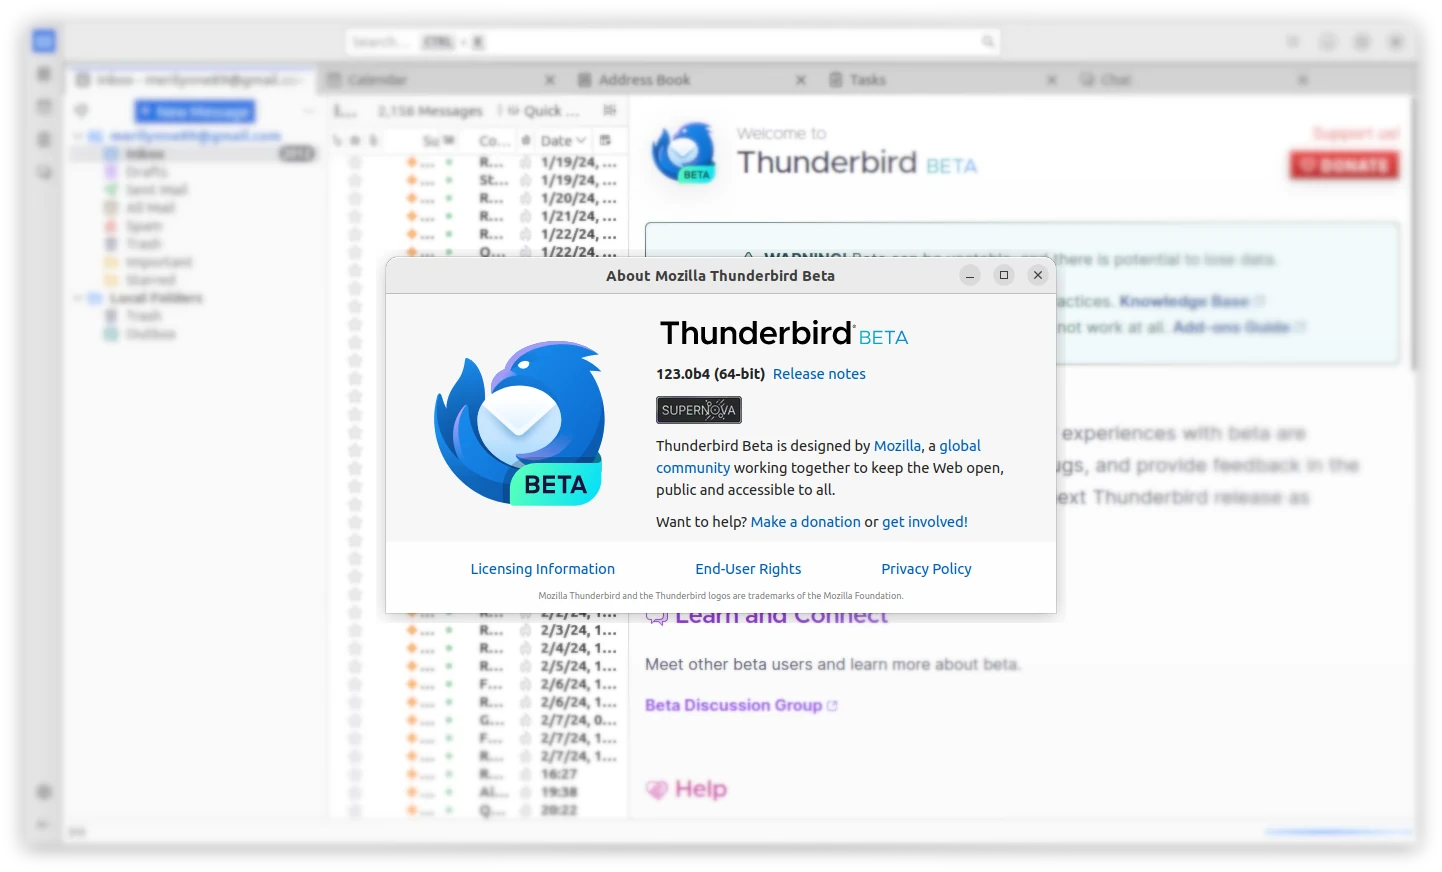
Like Firefox, Thunderbird email client in Ubuntu is going to be replaced as a Snap app runs in sandbox.
Canonical, the company behind Ubuntu, is working on porting core apps to Snap package format in recent years. Firefox, Chromium (in system repository), and Ubuntu Software (App Center) are now Snap apps in current Ubuntu releases. Next will be probably Thunderbird!
Canonical has built Thunderbird as Snap package for a period of time. It’s a re-pack of the upstream binary, only available for amd64 (Intel/AMD CPUs), as alternative package for the pre-installed .deb package.
Just one day ago, the Ubuntu Desktop team announced that the Thunderbird Beta Snap now is building from source instead of repacking. Meaning it can be built on other CPU architecture types, such as arm64 and armhf.
And, the Thunderbird Snap built from source aims to be default in next Ubuntu 24.04 LTS.
We are aiming at using the snap built from source instead of the deb in Noble. (the reasons are the same than for Firefox, making it easier to roll new versions on older supported series and reducing the maintenance efforts).
Meaning in future, there will be (mostly) NO .deb package for the Thunderbird email client in Ubuntu repository!
Thankfully, those who prefer the classic .deb to Snap can use the Mozilla Team PPA instead, which is maintained by members from Ubuntu Developer Team.
For more about the Thunderbird package format transition, see it in discourse.ubuntu.com.
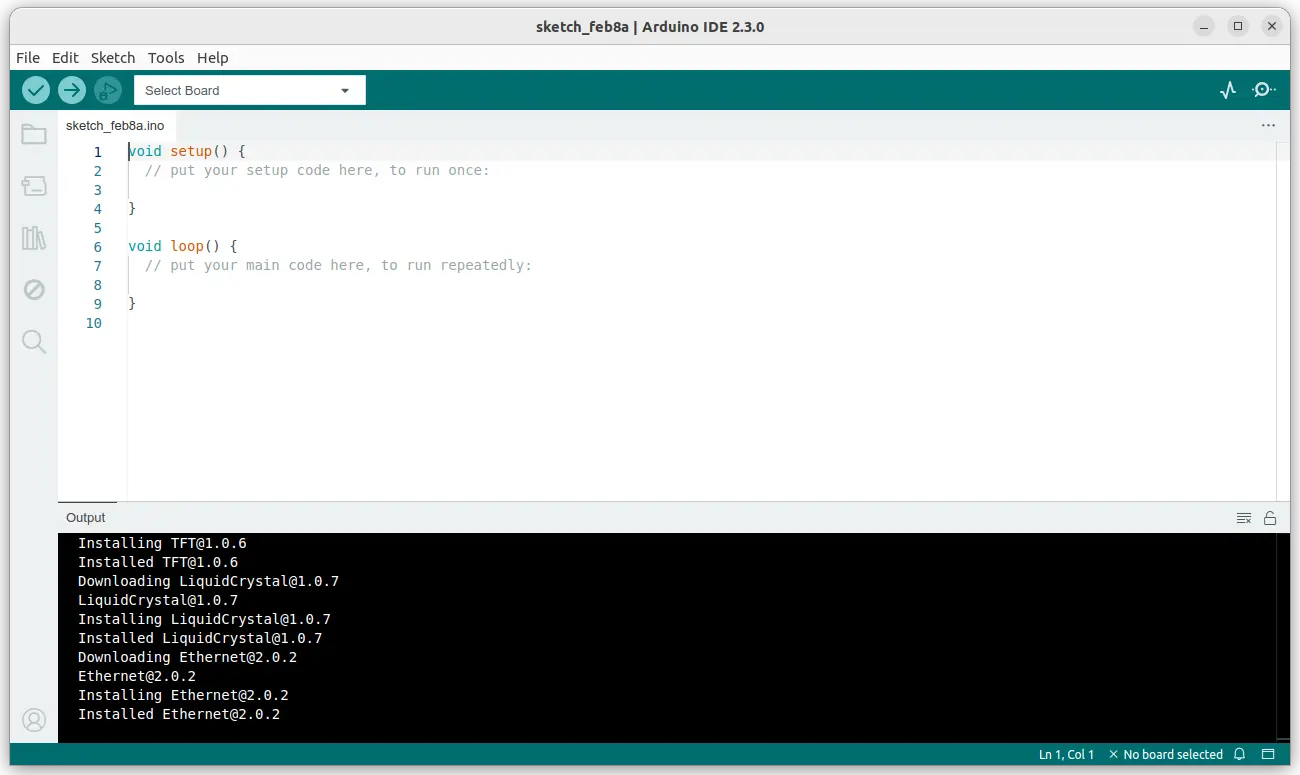
The Arduino team announced the 2.3 release of the Arduino IDE this Wednesday.
Since v2.3, the debug feature is now stable and fully incorporated into the IDE! It’s now based on a standard framework, and enabled for all the Arduino boards based on the Mbed™ core, include GIGA R1 WiFi, Portenta H7, Opta, Nano BLE and Nano RP2040 Connect.
Maintainers of Arduino cores can now add debugging for any board. And, the upcoming release of the Arduino-ESP32 core will support the new debug framework! Continue Reading…
Go programming language announced the new 1.26 release on 10 February, 2026! Here’s the new features and how to install guide for Ubuntu & other Linux.
What’s New in Go 1.26:
The built-in new function, which creates a new variable, now allows its operand to be an expression.
Generic types may now refer to themselves in their own type parameter list.
Completely rewritten go fix command.
Deleted go tool doc, use go doc as a replacement.
The pprof tool web UI, enabled with the -http flag, now defaults to the flame graph view.
The Green Tea garbage collector is now enabled by default.
Reduce the baseline runtime overhead of cgo calls by ~30%.
Randomizes the heap base address at startup on 64-bit platform.
New experimental profile type that reports leaked goroutines.
Compiler can now allocate the backing store for slices on the stack in more situations.
The linker now supports internal linking mode of cgo programs on 64-bit Windows on ARM.
This is a step by step guide shows how to enable fingerprint reader support for Lenovo ThinkPad T480/T480s, X1 Carbon 6th gen, X1 Yoga 3rd gen, X280, etc with 06cb:009a device in Ubuntu 22.04, Ubuntu 24.04, Ubuntu 25.04, and Ubuntu 25.10.
Ubuntu has fingerprint reader support out-of-the-box using libfprint, and provides option to enable fingerprint login in Users settings page. However, the library has a list of unsupported devices, including 06cb:009a that’s built-in in my used ThinkPad T480s laptop.
Thankfully, there’s a free open-source alternative python-validity that works in my case. Here’s how to install and set it up in Ubuntu 22.04, while Ubuntu 20.04 is also supported.
NOTE: This tutorial may also work in many other fingerprint readers, however, the project so far does NOT provide a page to list all supported devices.
Step 1: Tell Which Fingerprint Reader device your laptop have
First of all, you may press Ctrl+Alt+T on keyboard to open up a terminal window.
Then run command to find out the device name of your fingerprint reader: