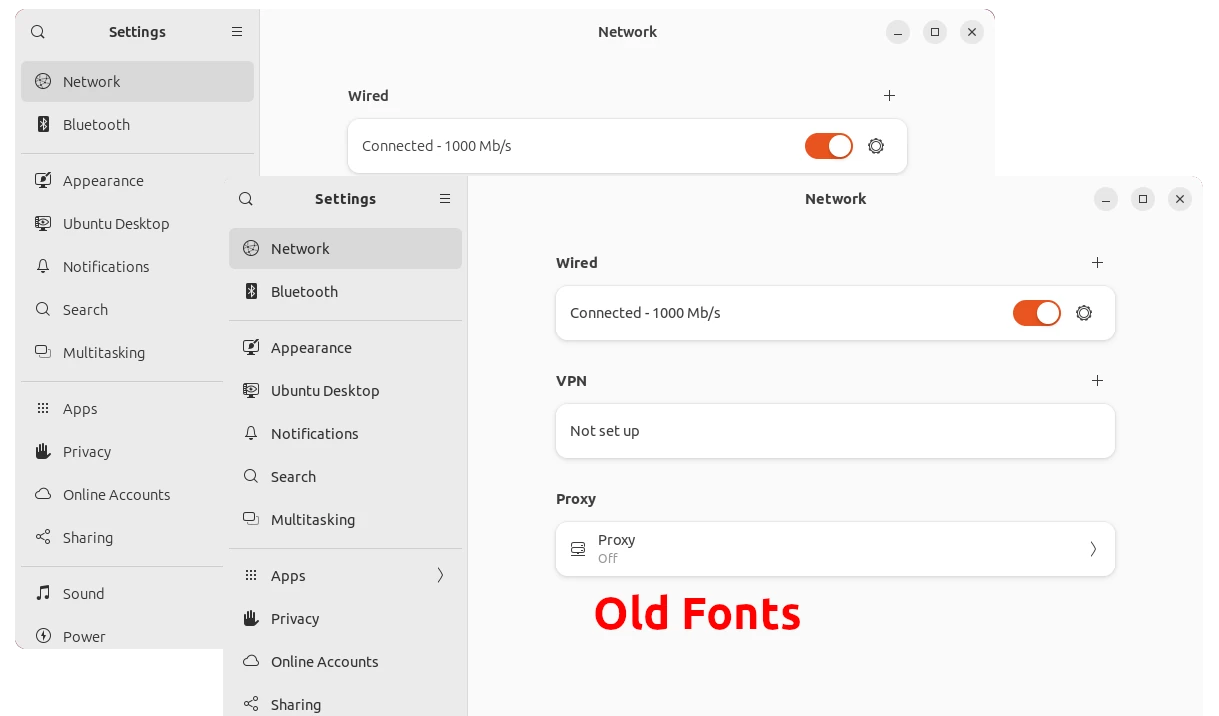
For those who prefer the old system font, now it’s easy to get it in Ubuntu 23.10 via a new package!
Since Ubuntu 23.04, Ubuntu takes use a new slim font for the text in system menus, documents, and app windows.
Some users do NOT like the change, because the new font is thin and hard to focus on. And, I’ve written about how to get the previous font back in Ubuntu 23.04.
Now, Ubuntu 23.10 includes a new package fonts-ubuntu-classic in system repository. Make it easy to do the job even without a system restart.
Install the Classic Font in Ubuntu 23.10
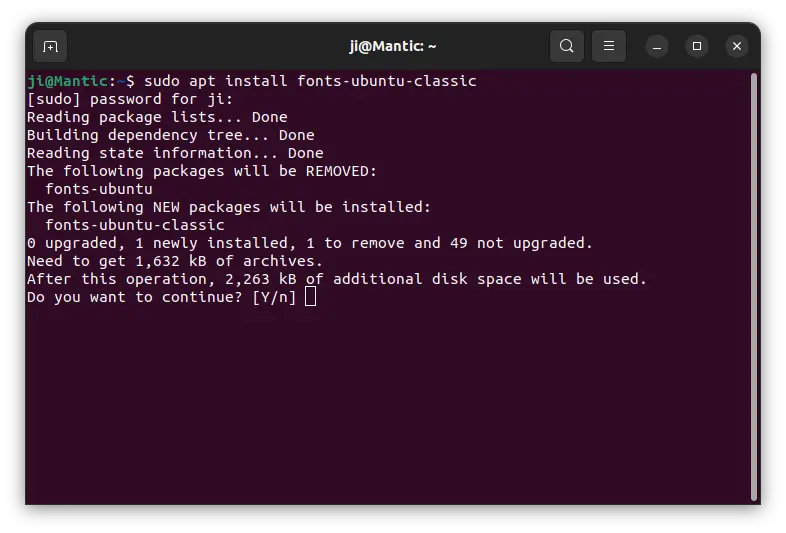
To install the font, simply press Ctrl+Alt+T on keyboard to open terminal.
When terminal opens, run command:
sudo apt install fonts-ubuntu-classic
Run sudo apt update to update package cache if it says package not found.
After installation, your system font change without restart! For opened app windows, you need to close and re-open them. For ‘Files’, just run nautilus -q to reload.
(Optional) Install ‘fonts-ubuntu-console’
The package above does not install the old font for the command console.
For choice, you may download the package for Ubuntu 22.04:
This simple tutorial shows how to reset Ubuntu Dock, the left panel, to its original status in Ubuntu 22.04 & Ubuntu 23.10.
As you may know, Ubuntu Dock (aka Dash-to-Dock) is an extension to the GNOME Desktop. It has many configure options, however most of them are hidden.
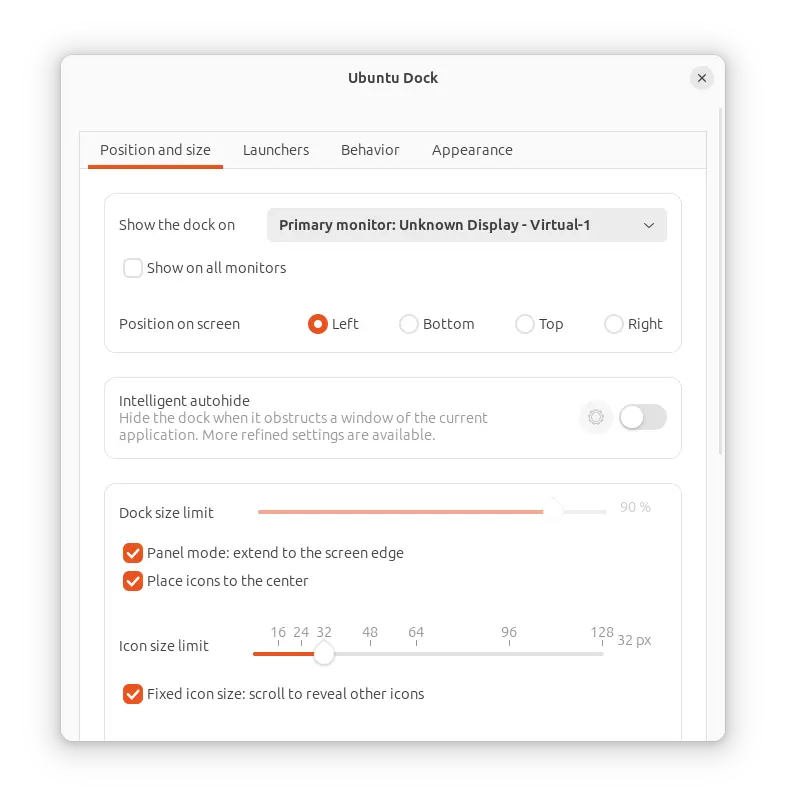
In Ubuntu 23.10, it finally provides a preference dialog to configure its appearance with full options. See HERE for how to get it.
Ubuntu Dock preference dialog
The preference dialog so far does not have ‘Reset’ buttons. If you messed thing up or want to restore Ubuntu Dock to factory setting, then this tutorial may help!
Reset Ubuntu Dock
The steps below should work in all current Ubuntu releases, include other Gnome-based Linux (such as Manjaro) using Dash-to-dock extension.
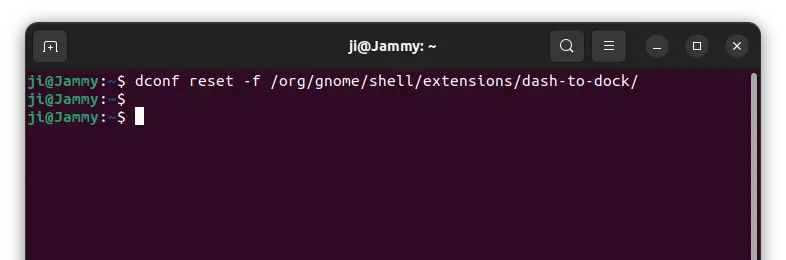
Option 1: Single command to reset Ubuntu Dock
Without installing anything, running a single command in terminal window can do the job.
First, open terminal either by searching from the overview screen, or by pressing Ctrl+Alt+T shortcut key on keyboard.
When terminal opens, copy and paste the command below and hit Enter.
The command above resets Ubuntu Dock, but leaves your favorite apps (pinned app icons) unchanged.
If you want to also reset the app icons on the Dock, run command:
gsettings reset org.gnome.shell favorite-apps
Option 2: Use Dconf Editor (graphical way)
For a graphical way, the advanced ‘Dconf Editor’ configuration tool can do the job.
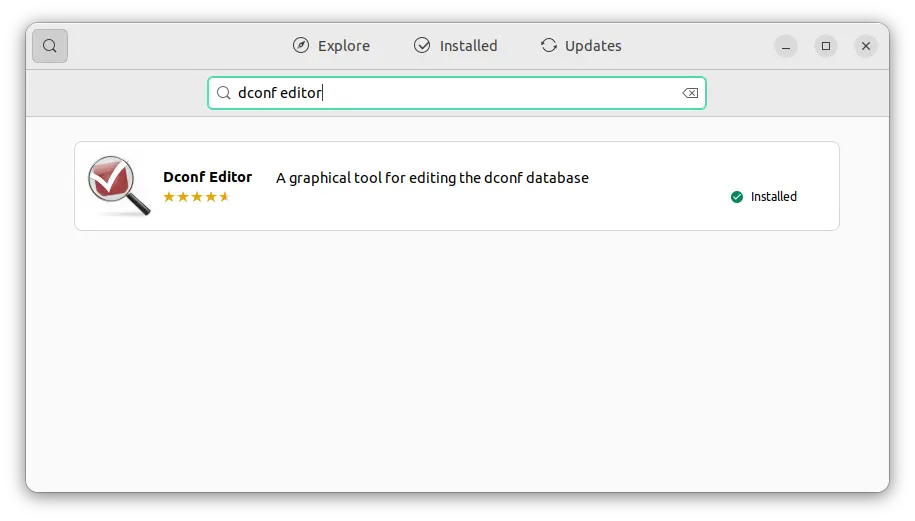
First, either search for and install ‘Dconf Editor‘ from Ubuntu Software:
Or, install it by running a command in terminal:
sudo apt install dconf-editor
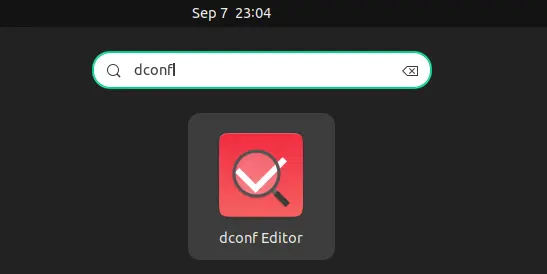
Then, launch Dconf Editor by searching from the overview screen.
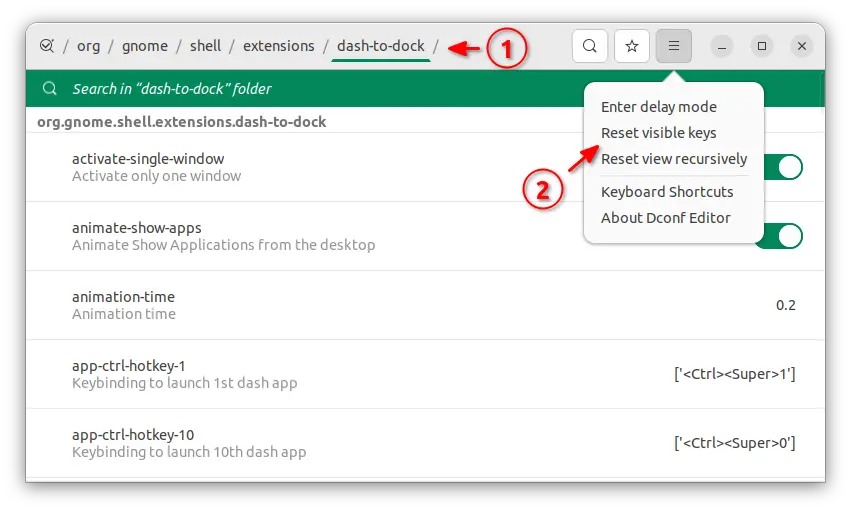
When it opens, navigate to ‘org/gnome/shell/extensions/dash-to-dock‘. Finally, click on ‘≡’ menu, select “Reset visible keys“, and click “Apply” button in bottom.
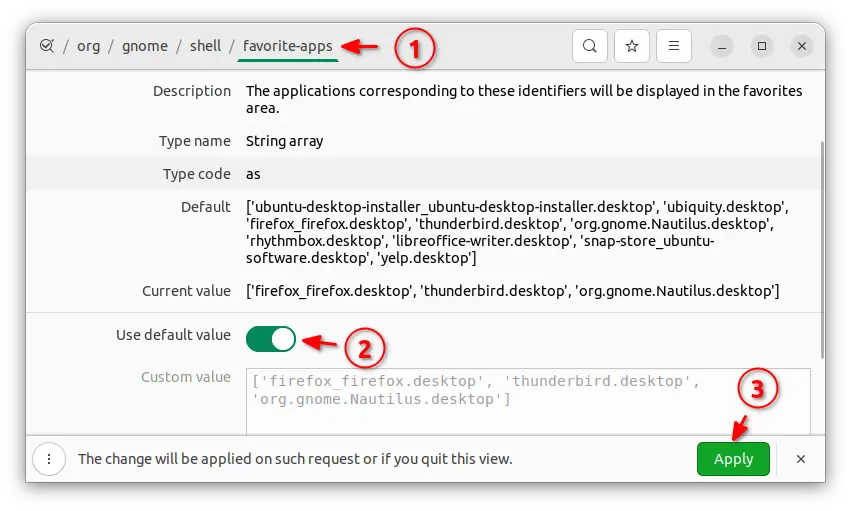
To reset the app icons, go to ‘org/gnome/shell/favorite-apps‘, turn on “Use default value” and finally click Apply.
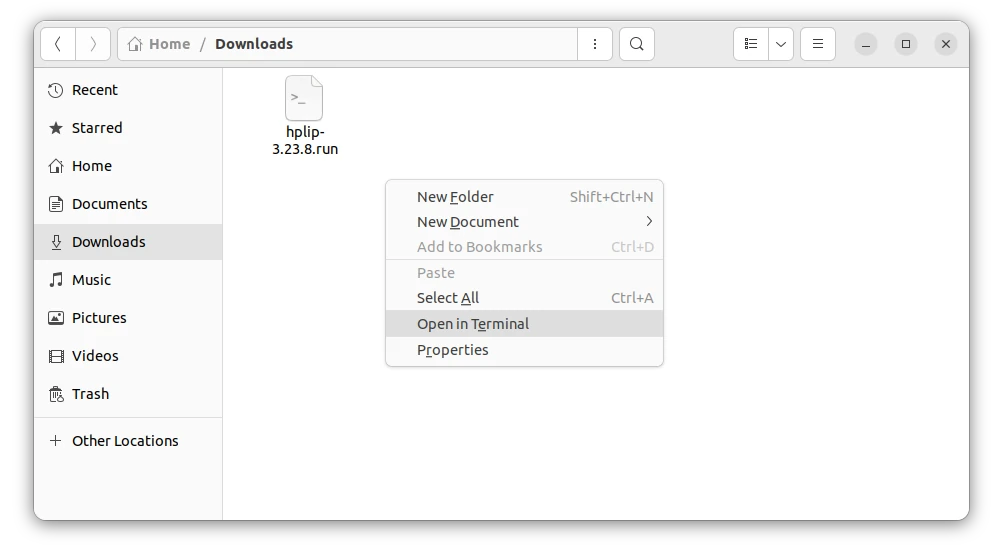
Once you downloaded the file, right-click on blank area in ‘Downloads’ folder and select “Open in Terminal“.
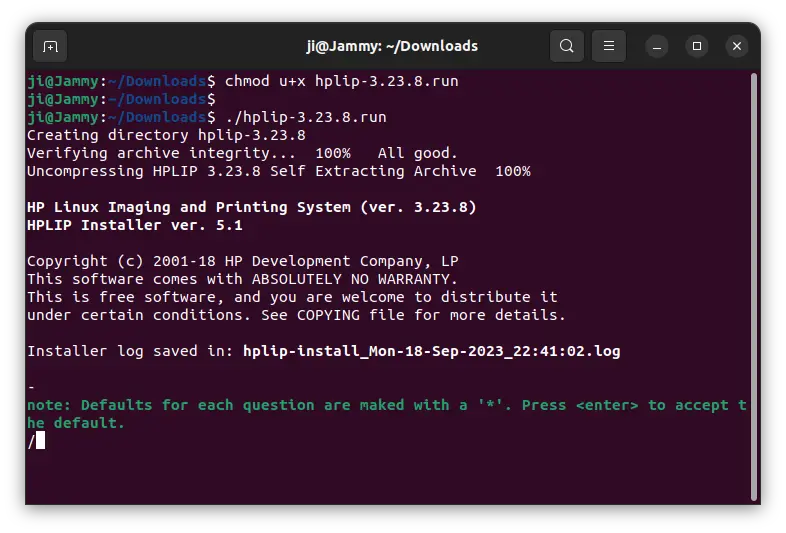
When terminal opens, run the commands below one by one:
Add executable permission for the file:
chmod u+x hplip-3.23.8.run
Run the file, follow the on-screen prompt and answer some questions:
./hplip-3.23.8.run
Until the command done without errors, you can plug or re-plug your HP printer for the new driver to work.
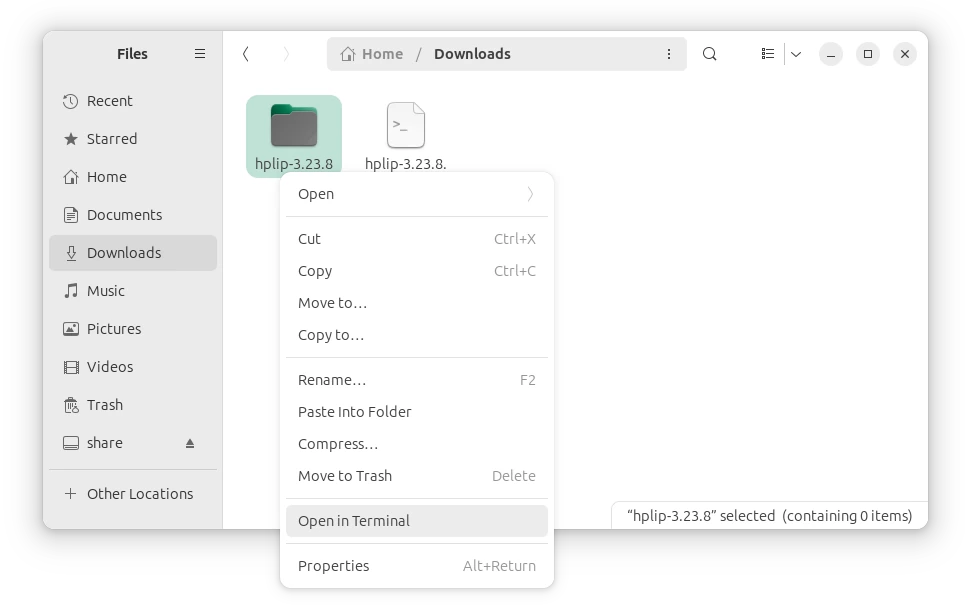
NOTE: The .run installer so far does not support Ubuntu 23.10! But, after running the previous commands, it generated the source folder in user ‘Downloads’ folder. Right-click on that folder and select ‘Open in Terminal’, then 23.10 user can try running the commands below one by one to build from source:
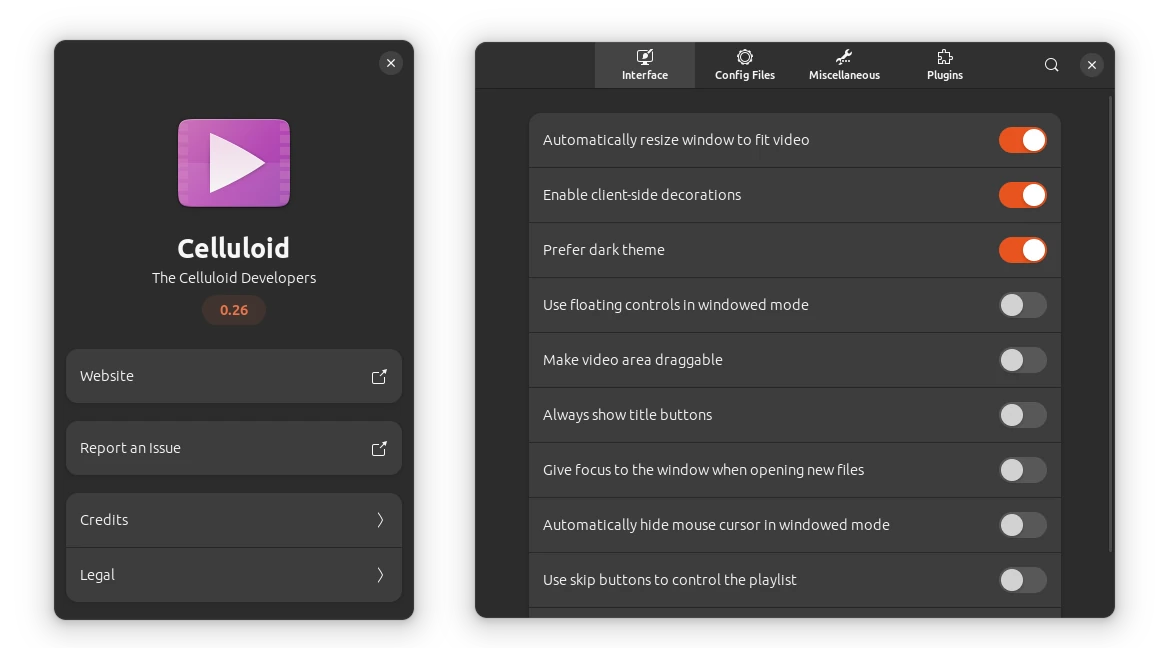
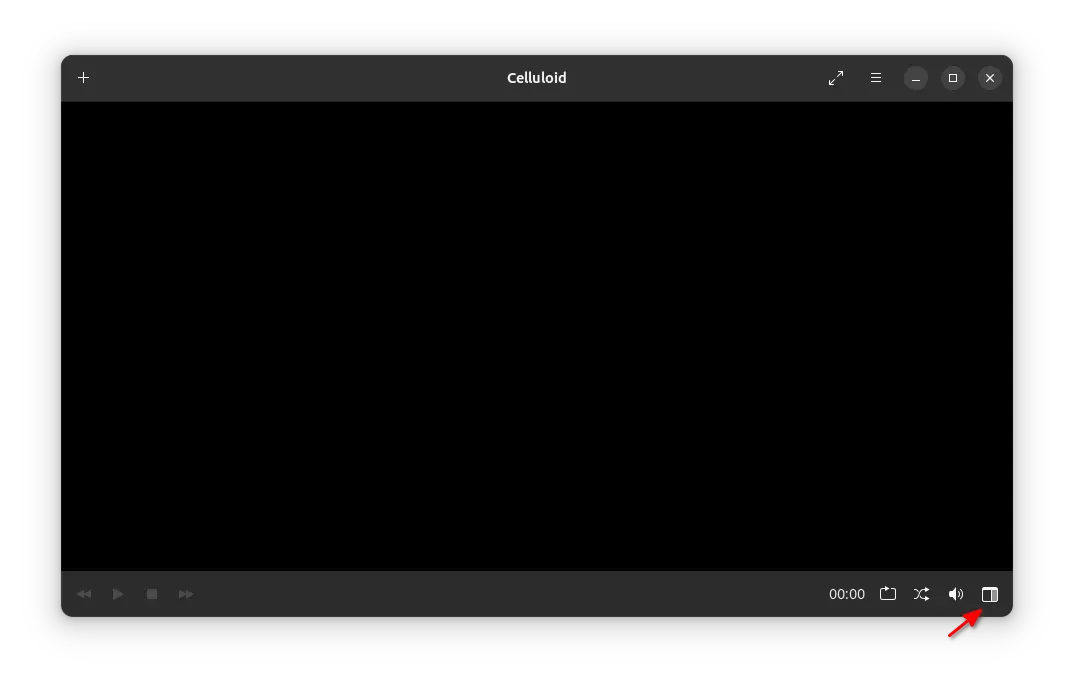
Celluloid, formerly GNOME MPV, released version 0.26 yesterday.
Celluloid is a free open-source video player uses mpv as backend, and is default in Linux Mint 21 Cinnamon. Since v0.24, it’s been ported to GTK4 and Libadwaita that looks native in modern GNOME desktop environment.
In the new 0.26 release, the ‘About‘ and ‘Preferences‘ dialog are also ported to LibAdwaita to follow GNOME’s step. Which, is adaptive to fit different screen sizes.
The ‘Toggle Playlist‘ option has been removed from the ‘≡’ menu. Instead, it added a new button in bottom right to show/hide the playlist. Though, it has wrong tooltip shows ‘Toggle Fullscreen’.
Remove media keys support, since it already uses MPRIS.
Remove support for X11 window embedding, since it doesn’t work with GTK4.
Fix header bar auto-hiding even when a menu is open.
Mark “Extra mpv options” for translation
Remove --mpv-options
Remove ‘vo‘ from the list of default options.
Take screenshots in .PNG file format instead of the previous .jpg.
Remove the old GSettings schema file (io.github.GnomeMpv.gschema.xml).
Export the Position property
Sync translations from Weblate
How to install Celluloid 0.26 in Ubuntu
The video player has an official Ubuntu PPA. Due to updated LibAdwaita library requirement, the new 0.26 release is available in the PPA for Ubuntu 23.04 and Ubuntu 23.10. While 22.04 stuck at v0.24.
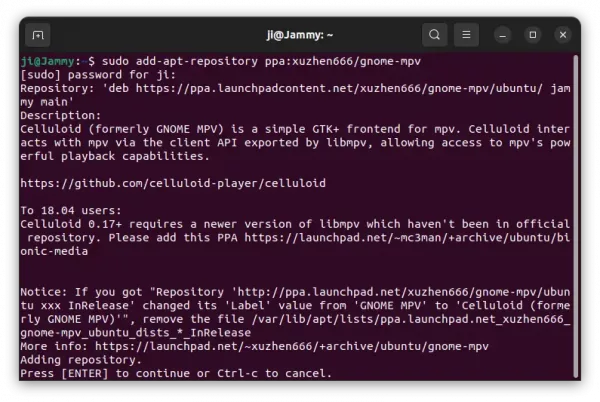
1. Firstly, press Ctrl + Alt + T on keyboard to open terminal. When it opens, run the command below to add the official PPA:
sudo add-apt-repository ppa:xuzhen666/gnome-mpv
Type user password (no asterisk feedback) when it asks and hit Enter to continue
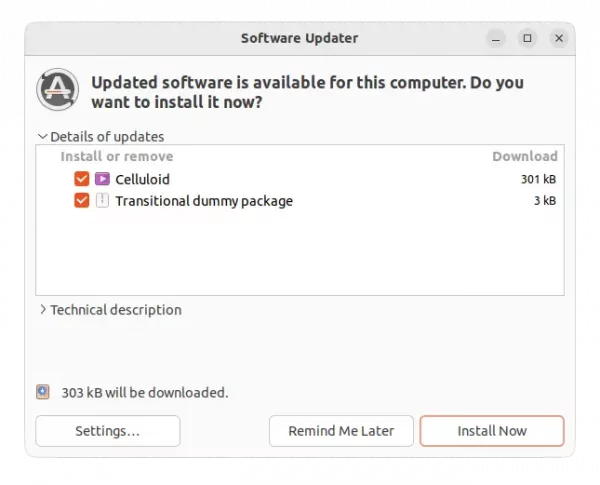
2. Then either use “Software Updater” (or Update Manager) to update the player if stock version was installed.
Or, run the command below to install/upgrade the app:
sudo apt update && sudo apt install celluloid
For Ubuntu 20.04 and Ubuntu 22.04 users who want to try the latest 0.26 release, just search for and install the Snap package from Ubuntu Software. Though, it runs in sandbox.
Uninstall:
To uninstall the celluloid video player, just run the command below in terminal:
For best integration, the LibreOffice PPA is finally updated with the LibreOffice 7.6.x packages for Ubuntu.
LibreOffice 7.6 was released almost one months ago. It features document themes support, zoom gestures in the main view, new “Page Number Wizard” dialog for Writer, new compact layout for pivot tables in Calc, and various other changes. See release note for details.
LibreOffice provides official packages through Flatpak in Flathub.org, Snap in Ubuntu Software. However, both run in sandbox. It also provides official .deb packages, which are however build against a very old baseline for maximum compatibility.
For those hate the office suite run in sandbox, the LibreOffice PPA maintained by Ubuntu members is the best choice. Though, it always has quite a few or even weeks delay for the new major release packages. And, LibreOffice 7.6 is finally available via the PPA, after almost 4 weeks by releasing the first point 7.6.1 version.
Install LibreOffice 7.6 (7.6.1 so far) in Ubuntu via PPA
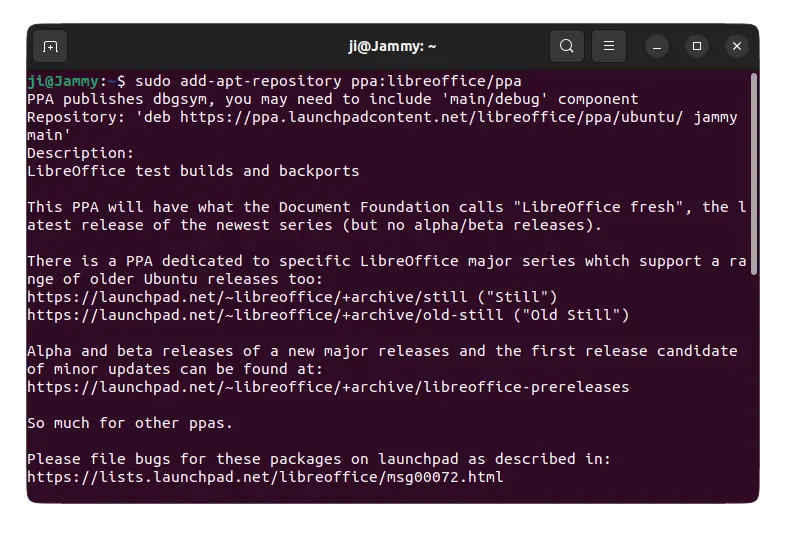
1. First, press Ctrl+Alt+T on keyboard to open a terminal window. When terminal opens, run command to add the PPA:
sudo add-apt-repository ppa:libreoffice/ppa
Type user password (no asterisk feedback) when it asks and hit Enter to continue.NOTE: the new release is available for Ubuntu 22.04, Ubuntu 23.04, Ubuntu 23.10, and derivatives at the moment.
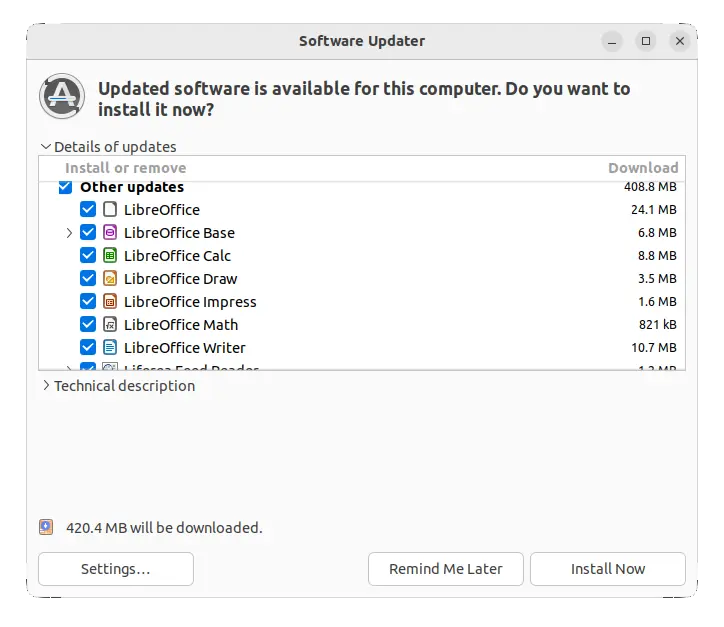
2. After adding the PPA, just search for and launch “Software Updater” (or Update Manager), then update the packages from the pre-installed office suite.
Or, run the command below in terminal instead:
sudo apt install libreoffice
Linux Mint needs to run sudo apt update first to update package index first.
Uninstall/Restore
To uninstall the packages, just purge the PPA, which will also downgrade LibreOffice to the original pre-installed versions depend on your Ubuntu edition.
To do so, open terminal (Ctrl+Alt+T) and run commands:
Ubuntu 23.10, code-name “Mantic Minotaur”, has reached Beta stage. See what’s new in the upcoming release of the popular Linux Distribution.
Ubuntu 23.10 will use Linux Kernel 6.5, and GNOME Desktop v45.
New App Center
Ubuntu Software, aka the previous GNOME Software and current Snap Store, is really painful! It does NOT work quite often in my case.
It’s always stuck at either “Downloading Software catalog“, or the spinning loading circle.
Now, in Ubuntu 23.10, the new Google Flutter based App Center is in the place for installing/updating applications.
New App Center
Personally, I really like the new ‘App Center’. It’s fast, and just works!
The only issue so far in the development build is that it support Snap packages only… It now supports both Snap and classic .deb package since Beta.
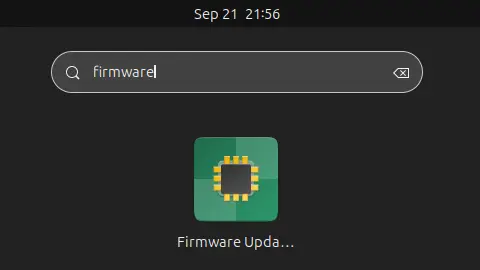
New Firmware Updater app
Ubuntu 23.10 also introduced a new “Firmware Updater” application, that is available out-of-the-box.
With it, user can update hardware firmware as easy as few mouse clicks.
TPM-backed Full Disk Encryption
Ubuntu 23.10 adds experimental support for TPM based full disk encryption. Meaning passphrases will be no longer needed on supported platforms, and that the secret used to decrypt the encrypted data will be protected by a TPM and recovered automatically only by early boot software that is authorised to access the data. See HERE for more about it.
GNOME 45
GNOME 45, developed by another group of people, is the default desktop environment in Ubuntu 23.10.
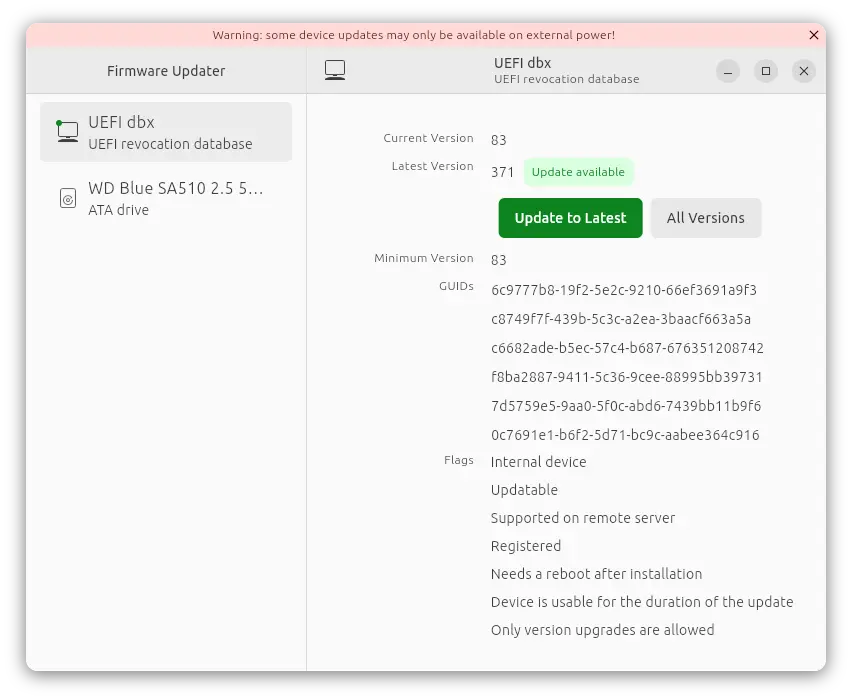
Features in GNOME 45, include new ‘workspace indicator’ in top-left to replace ‘Activities’ button, removal of current app menu in top-bar.
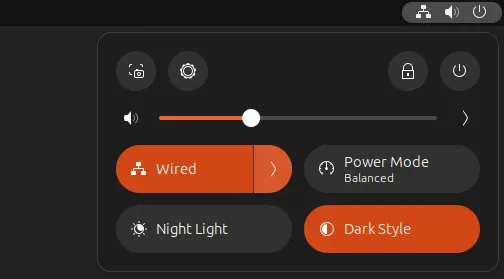
The top-right corner system status menu, aka Quick Settings, can now be opened/closed via Super (Windows logo key) + S shortcut key. And, it supports for toggle keyboard backlight with a flat button.
Super + S to open Quick Settings
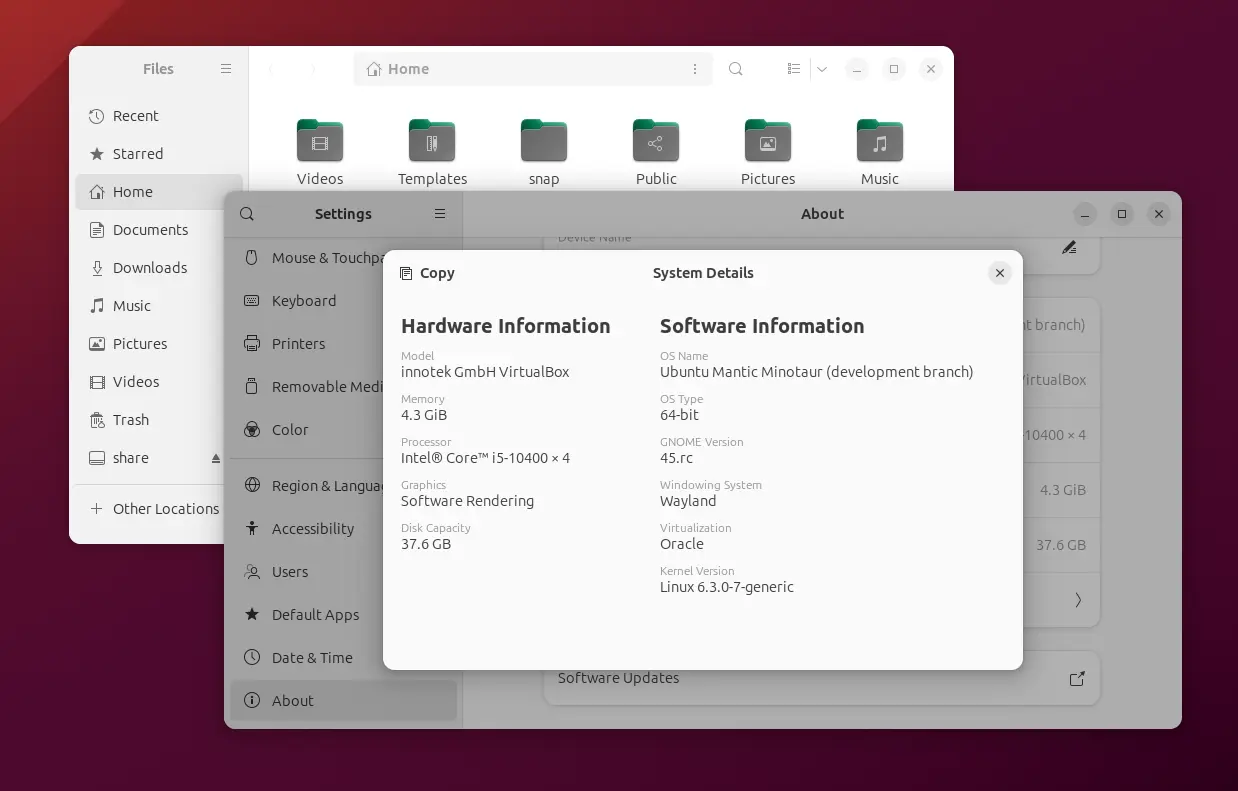
The ‘Files’ (Nautilus File Manager) and Settings (Gnome Control Center) has been redesigned to look even more modern. To follow the steps in GNOME 44, it also redesigned the ‘About’ and ‘Privacy’ pages.
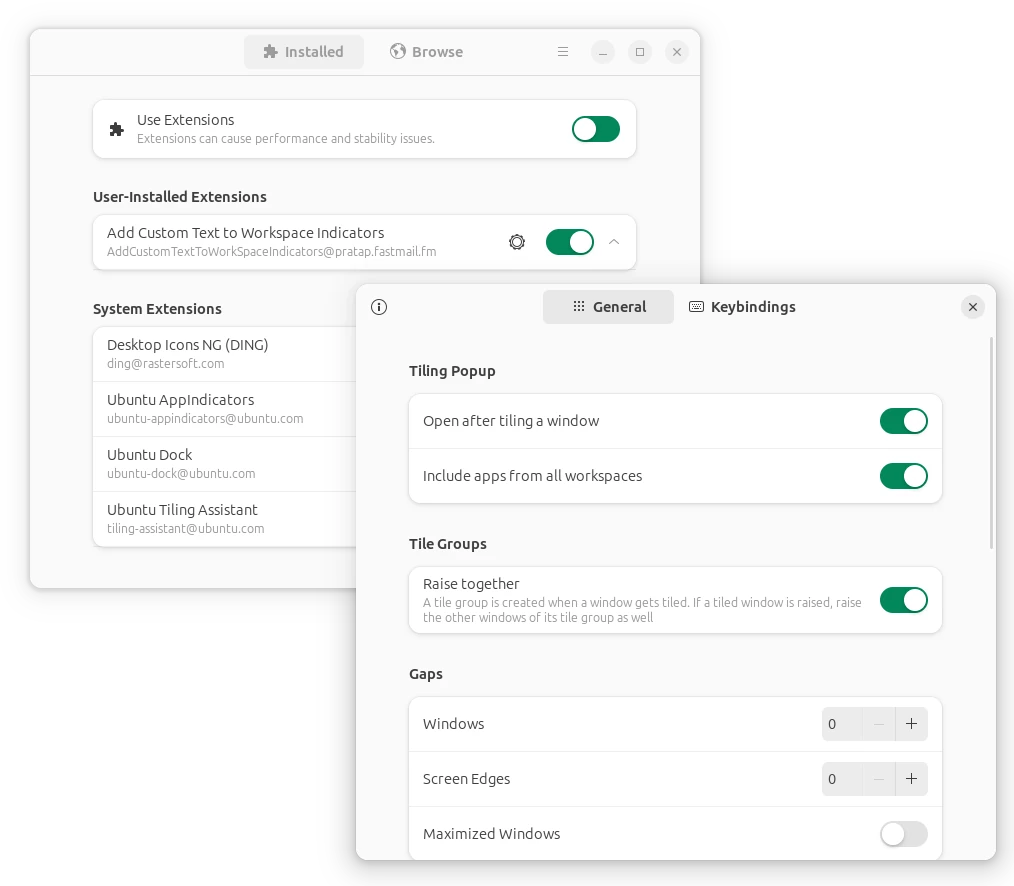
In the release of Ubuntu Desktop, it also introduced a new system extension called “Ubuntu Tiling Assistant“. It features “Tiling pop-up” and “Tiling Groups”, and allows to tile window to half or quarter screen size, either by dragging or keyboard shortcuts.
Other Gnome desktop changes include:
Camera usage indicator, but not work for Cheese.
Drag’n’drop to save web image to file.
New ‘keyboard’ option in top-right system menu to toggle keyboard backlight
New default wallpaper with dark variant.
Default to “Minimal” installation
Don’t know why (probably due to Snap), but Ubuntu’s .iso image is getting bigger and bigger in recent releases. The 64-bit Ubuntu 18.04 image is only 2.3G, while 22.04 & 23.04 now take about 4.6G.
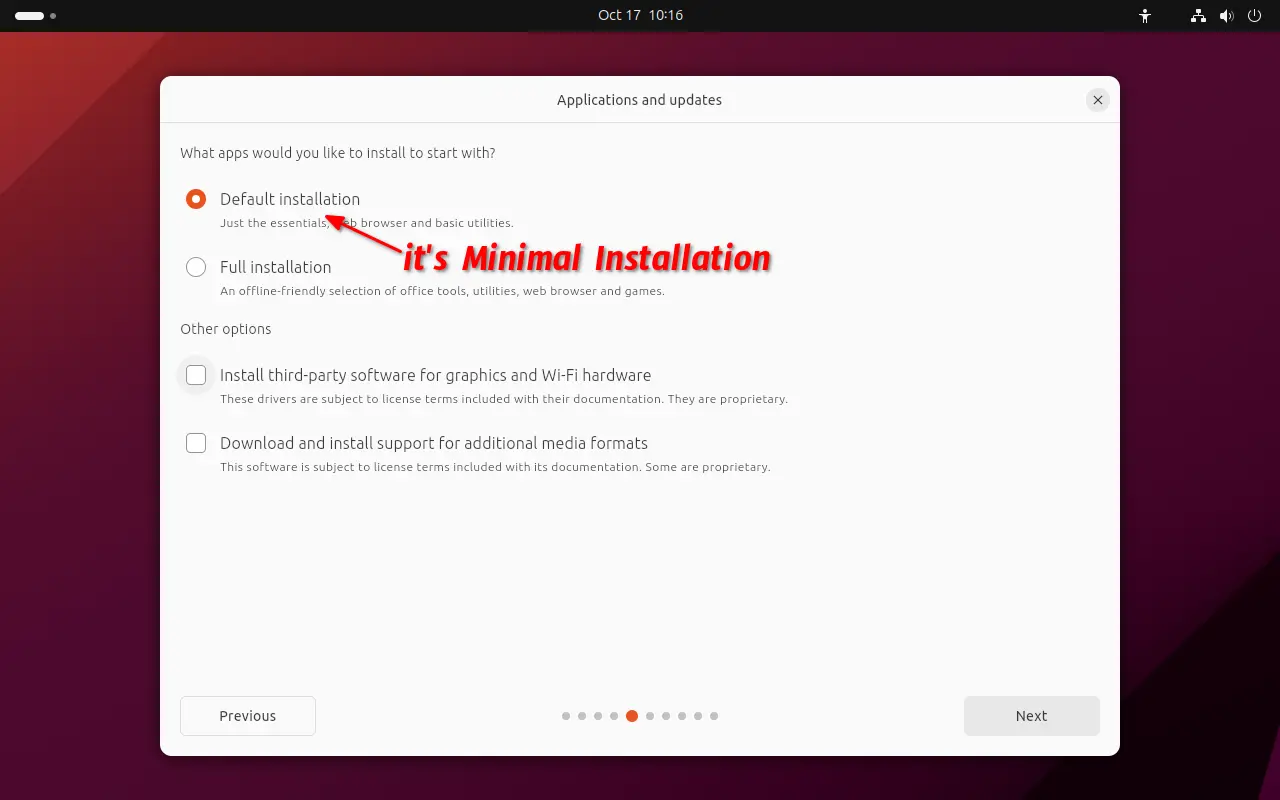
To lose weight, Ubuntu Team proposed to drop some applications from the default install, by introducing new “Default” option.
The change does not apply to Ubuntu 23.10, instead, the Ubuntu installer choose “Minimal” installation by default. It’s still called “Default Installation”, but excludes many applications, such as LibreOffice, Thunderbird. Though, the old default “Full” installation is still available for choice.
Other Changes
Ubuntu PPA now uses deb822 .sources files instead of the classic .list files in ‘/etc/apt/sources.list.d’. And, it includes the key code directly in the source file instead of saving as a separated file.
The network manager now uses Netplan as it’s default settings storage backend. All the config files are located in /etc/netplan now.
The pre-installed Firefox now uses Wayland by default instead of XWayland, which has better touchpad / touch-screen user experience.
New fonts-ubuntu-classic package for those who prefer system font in Ubuntu earlier than 23.04.
For more about Ubuntu 23.10, see the official release note, though it’s not finished yet.
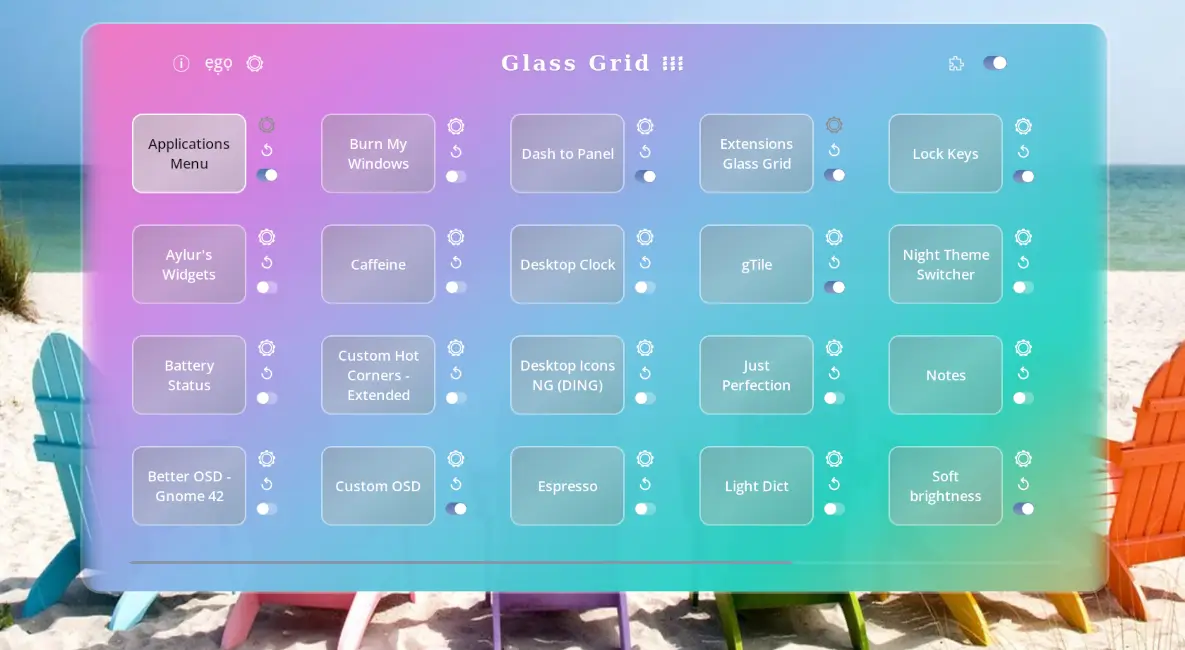
Have many extensions installed on your GNOME desktop? Here’s a new tool to help managing them with a more efficient way.
Without launching Gnome Extensions app or Extension Manager every time, the new “Glass Grid” allows user to either press a keyboard shortcut or click the indicator on panel to quickly trigger an overview of all the installed extensions.
Then, user can either click on extension name to open its preference dialog. Or, use the buttons right beside them to turn on/off, refresh or configure extensions. There’s also a global ON/OFF switch in top-right to toggle all extension with one click. If you have too many extensions more than a page capacity, it supports scrolling horizontally with either mouse or keyboard arrow keys.
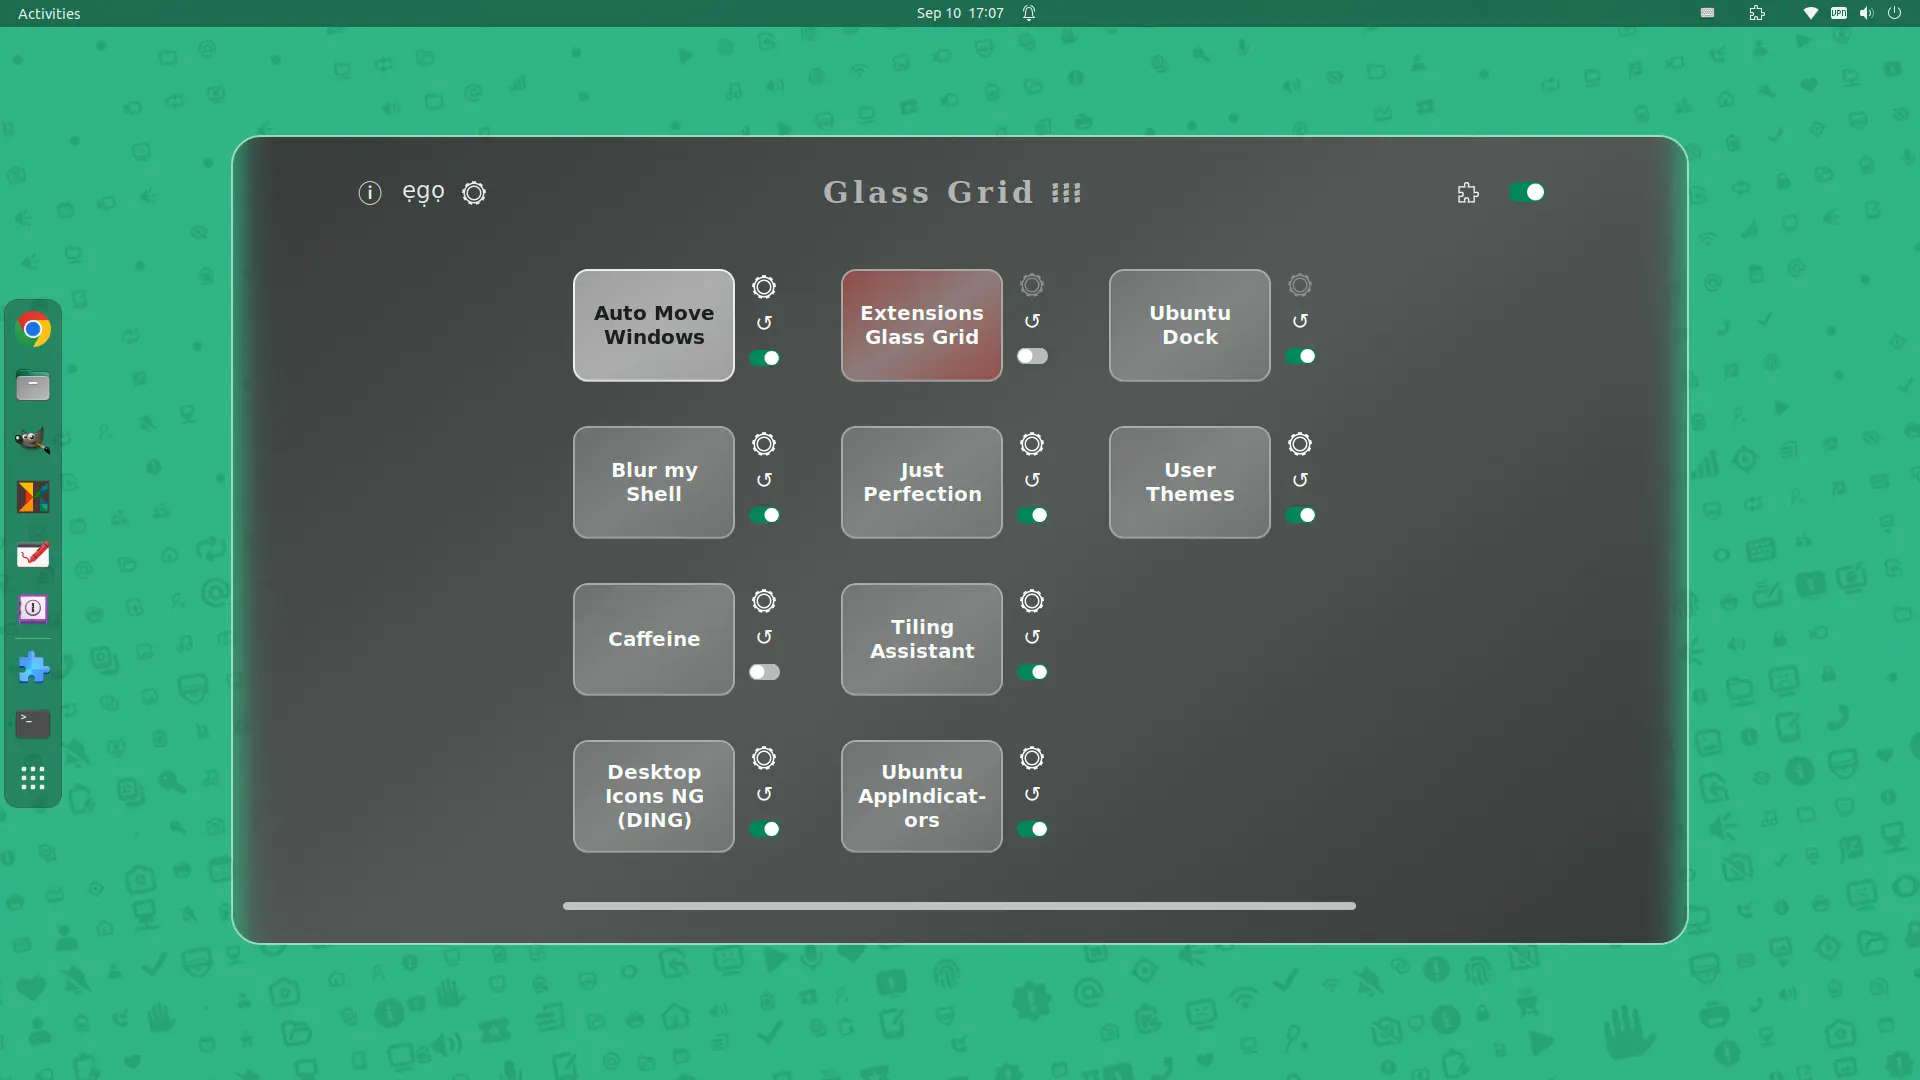
The extension grid view can be triggered either via keyboard shortcut or indicator applet. And, it will disappear when pressing Esc or clicking anywhere outside. It has a dark mode layout, and support quick launching extensions.gnome.org and Gnome Extensions app (if installed) via header buttons.
Extension Glass Grid dark layout
How to Install the ‘Glass Grid’ extension in GNOME
The extension so far supports GNOME 42, 43 & 44. Meaning, you can install it in Ubuntu 22.04/23.04, Fedora Workstation, Debian 12, and Arch etc with GNOME.
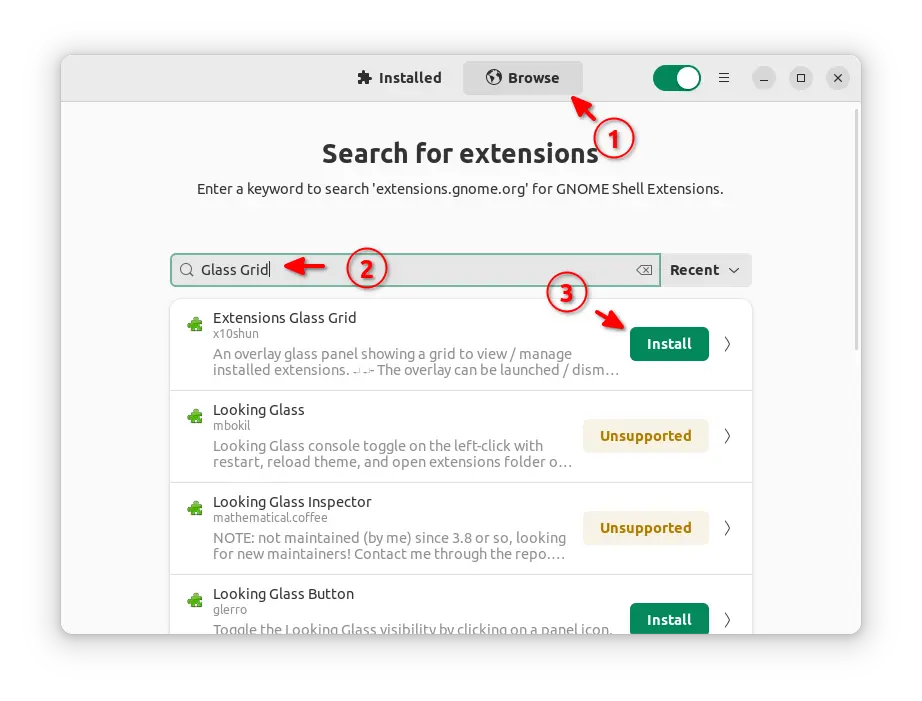
For Ubuntu, first search for and install “Extension Manager” from Ubuntu Software.
Install Extension Manager in Ubuntu 22.04+
Then, launch “Extension Manager” and navigate to ‘Browse’ tab. Finally, search for and install the Extensions Glass Grid extension.
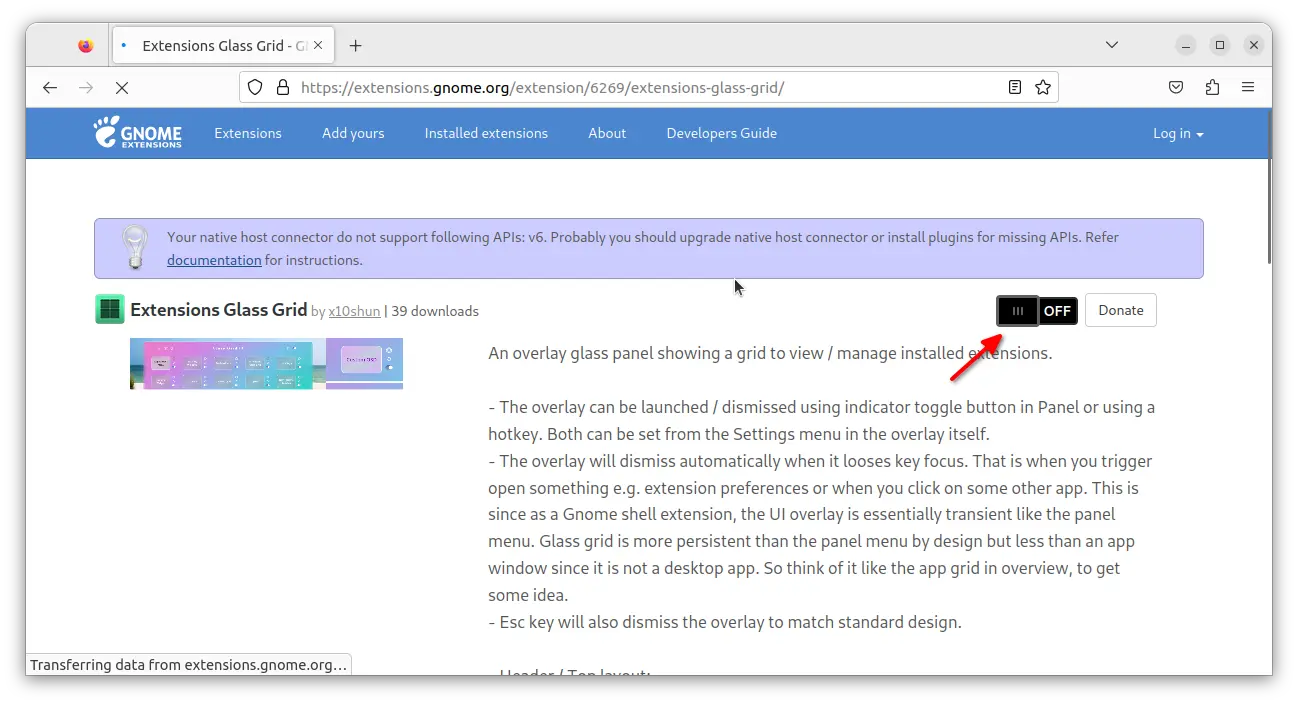
For other Linux with GNOME, just go to link below in your web browser:
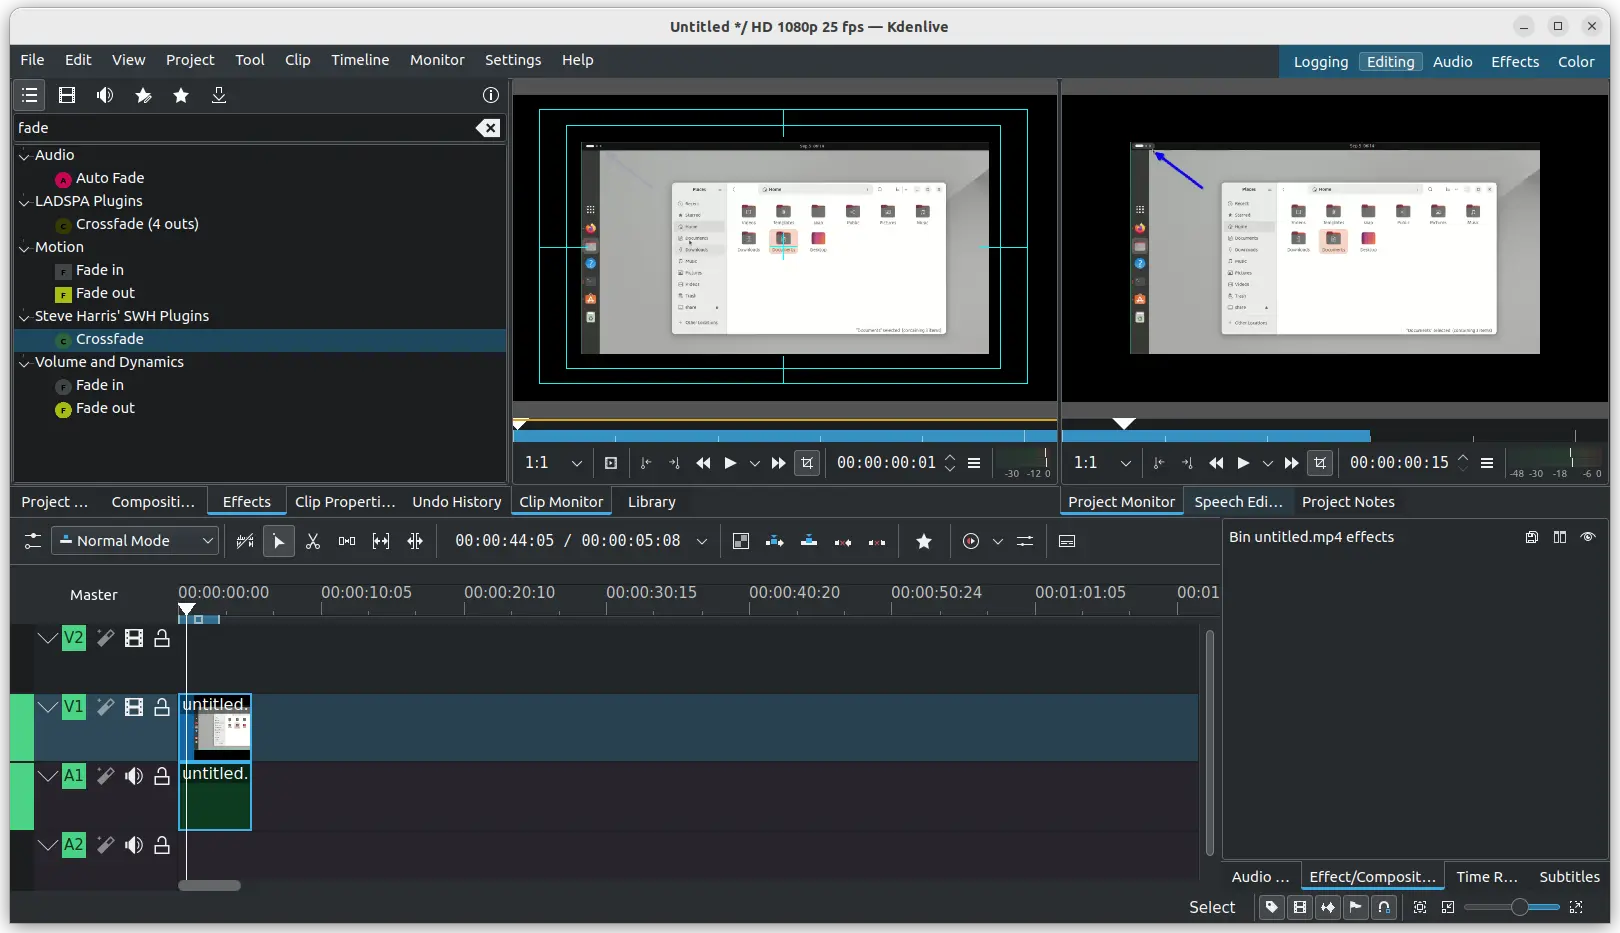
The popular free open-source Kdenlive video editor released version 23.08.0 more than a week ago. For those who are sticking to the native .deb package format, the official Ubuntu PPA finally updated with the new release package!
Kdenlive 23.08.0 introduced 2 new effects Audio Seam and Auto Fade, added AV1 NVENC profile, and had bug-fixes to Whisper engine with Nvidia GTX 16xx series.
There are also some usability improvements, such as new “Fit all tracks in view” context menu option, Shift + z shortcut adjusts timeline zone to selected clips, and keyboard shortcut to toggle between timeline tabs. See the release note for more details.
How to Install Kdenlive 23.08 in Ubuntu:
Kdenlive provides official Linux packages through AppImage, Flatpak, and Ubuntu PPA.
While the first two run in sandbox, the last PPA is a good choice for Ubuntu/Linux Mint users, which so far supports Ubuntu 22.04, Ubuntu 23.04, and Ubuntu 23.10.
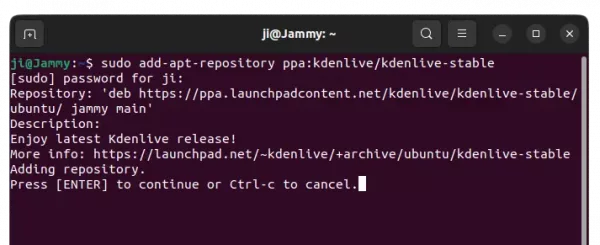
1. First press Ctrl+Alt+T on keyboard to open terminal, or search for and launch ‘Konsole‘ from start menu in KDE. When it opens, run command:
Type user password (no asterisk feedback) when it asks and hit Enter to continue.
2. After adding PPA, user can either open Software Updater (or Update Manager) to update the software package from an existing version:
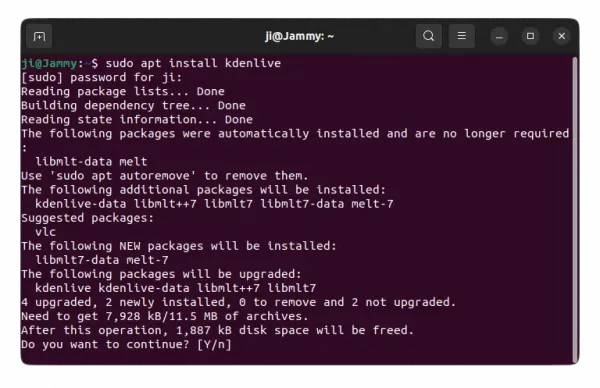
Or run the command below to install or update the video editor:
sudo apt install kdenlive
NOTE: Linux Mint user has to run sudo apt update first to manually refresh package cache
And, if you got overwriting files issue due to the old dependencies: libmlt-data and melt, run command to remove them and then re-run the apt command above:
sudo dpkg -r melt libmlt-data
Once installed, press Super (Windows logo key) to open ‘Activities’ overview or start menu, and search for and open Kdenlive.
Uninstall Kdenlive
To remove Kdenlive, either use your system package manager or run the command below in a terminal window:
sudo apt remove --autoremove kdenlive
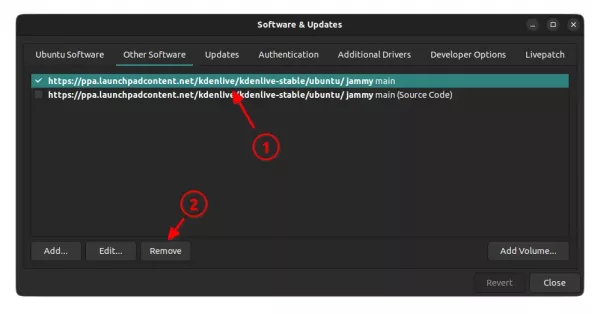
And remove the Ubuntu PPA either by running command in terminal:
This simple tutorial shows how to install the latest Firefox Nightly in all current Ubuntu releases!
Firefox Nightly is the bleeding edge version of the web browser that updates twice a day. It contains features that are still in developments months or even years before they become mainstream.
The Nightly build is more likely to crash than the stable release. For testing purpose or power-user who prefer the very latest features, here you can install Firefox Nightly via 3 ways!
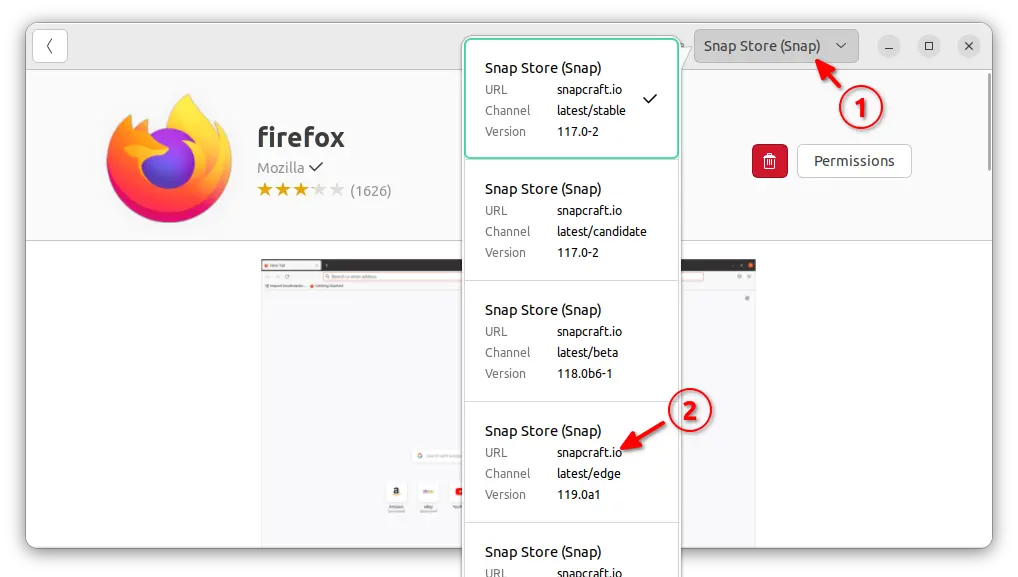
Method 1: Install Firefox Nightly via Snap package
The easiest way to get Firefox Nightly is using the Snap package. It receives updates automatically, however, will override the pre-installed Firefox, by updating it to the latest edge channel.
Ubuntu 22.04 and higher users, can simply open Ubuntu Software (or App Center). Search Firefox and switch channel/source to “latest/edge”.
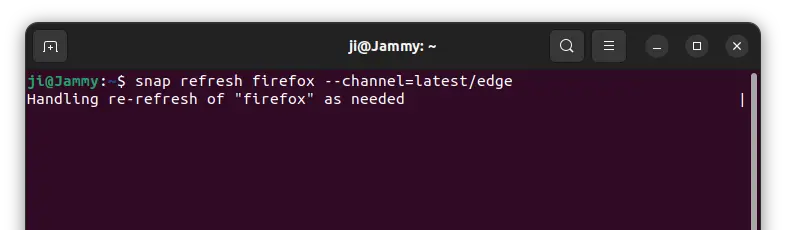
Or, press Ctrl+Alt+T on keyboard to open terminal. When terminal opens, run the command below instead to install Firefox Nightly:
snap refresh firefox --channel=latest/edge
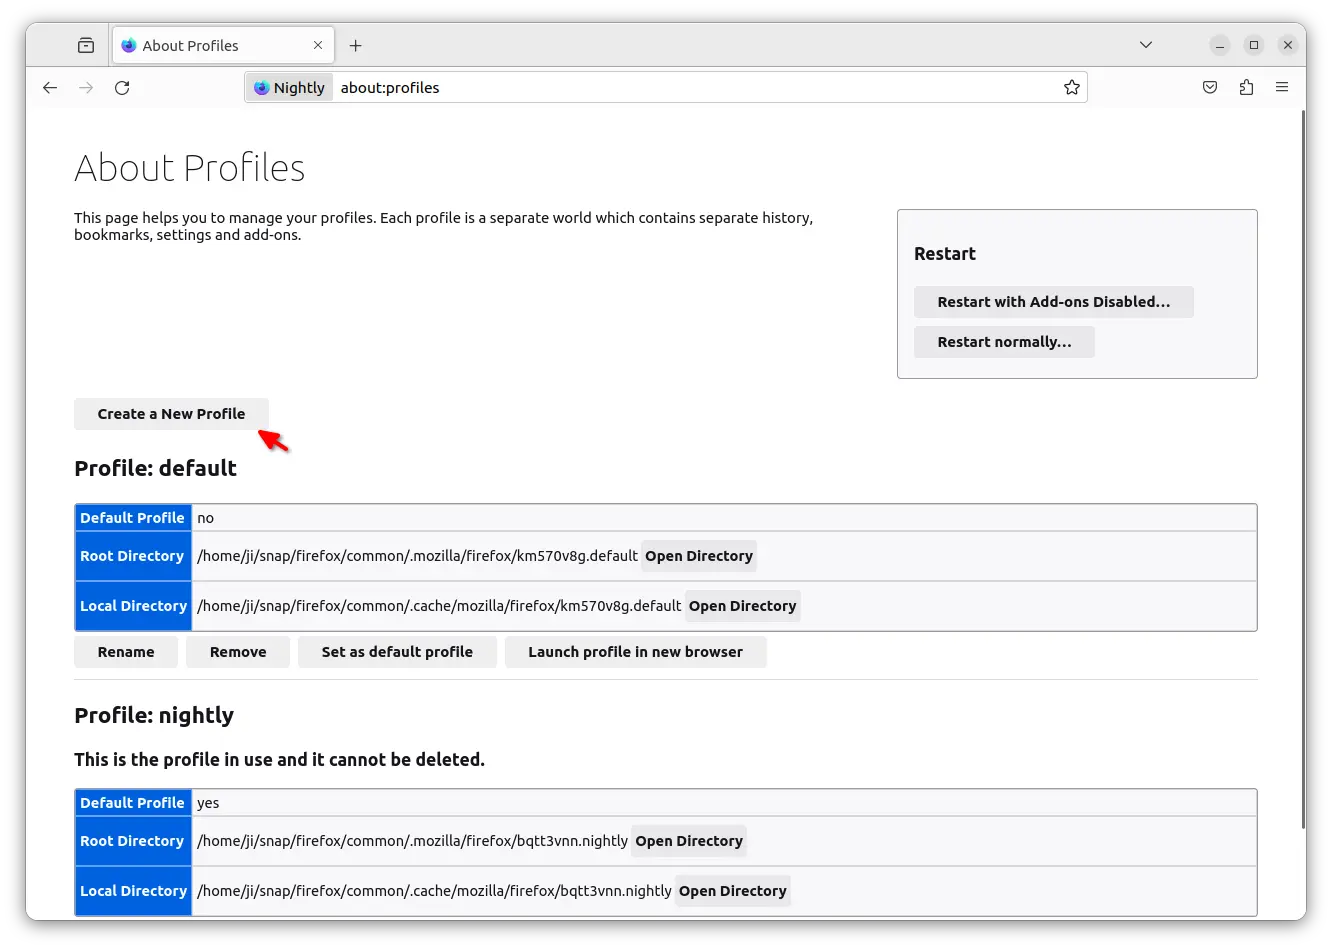
NOTE: The Snap package will take use the previous profile. In the case, you can open about:profiles page, then create a new profile and set it as default.
Method 2: Use New Apt Repository
Mozilla announced new official apt repository recently. It contains the .deb package of most recent Firefox Nightly package for all current Ubuntu and Debian releases.
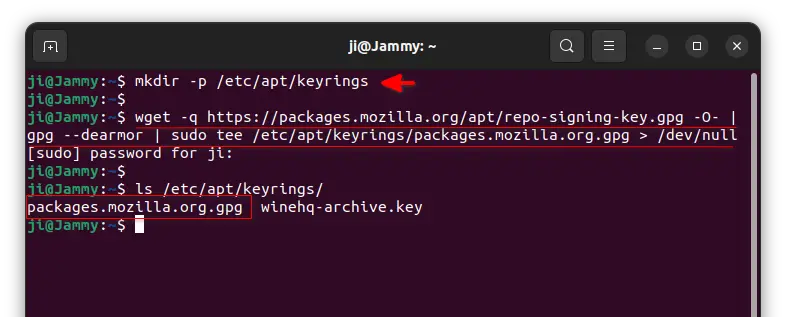
1. First, press Ctrl+Alt+T on keyboard to open terminal. When terminal opens, run command to download & install the key for that repository:
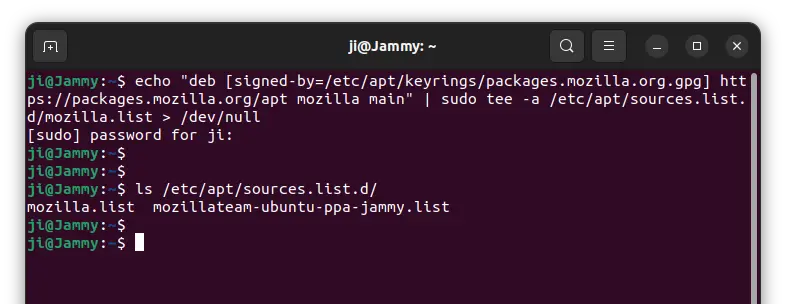
2. Next, add the apt repository by running the single command below:
echo "deb [signed-by=/etc/apt/keyrings/packages.mozilla.org.gpg] https://packages.mozilla.org/apt mozilla main" | sudo tee -a /etc/apt/sources.list.d/mozilla.list > /dev/null
This command will create the ‘mozilla.list‘ file under /etc/apt/sources.list.d directory and write the source line into it.
3. Finally, refresh the system package cache:
sudo apt update
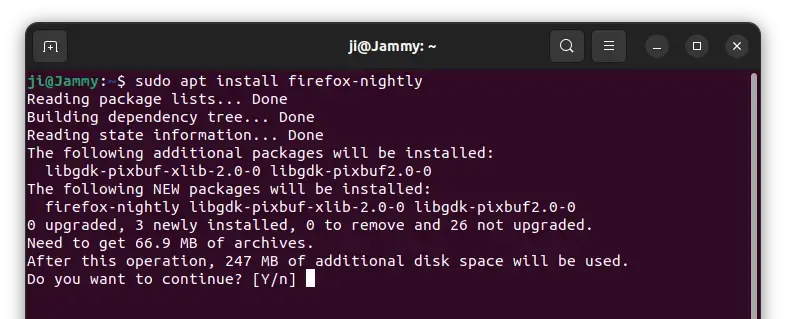
And, install the Nightly build of Firefox from that repository by running command:
sudo apt install firefox-nightly
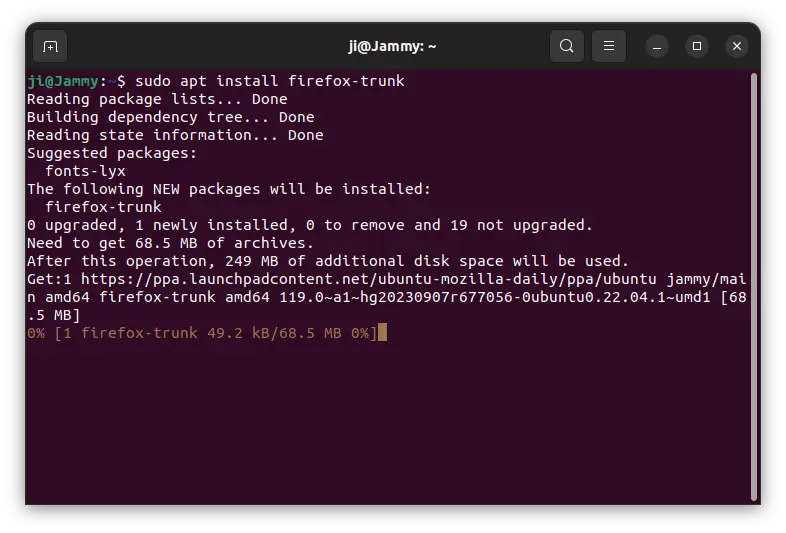
Method 3: Install Firefox Nightly via Ubuntu PPA
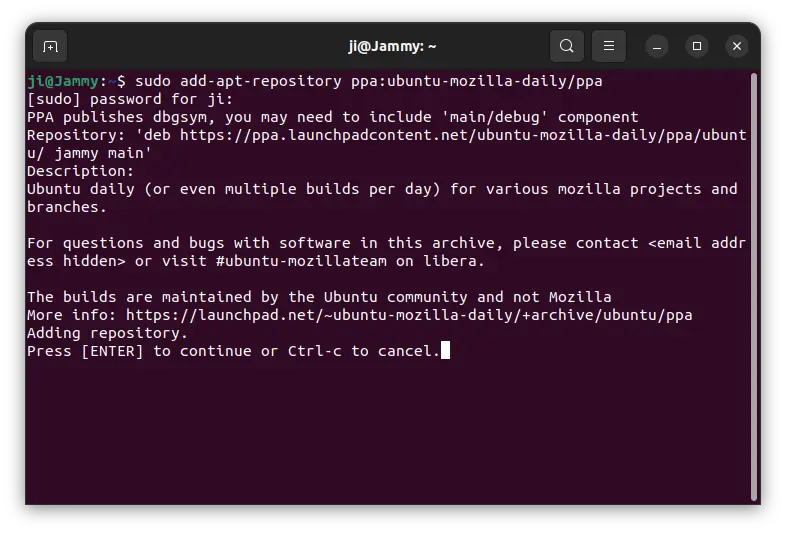
For choice, there’ a daily build PPA maintained by Ubuntu members. Which, so far supports Ubuntu 20.04, Ubuntu 22.04, Ubuntu 23.10, and Ubuntu 24.04
The PPA is a good choice, since it contains native .deb package. It will NOT override any other Firefox Stable package (neither deb nor snap), and uses its own profile for storing user data.
1. To add the PPA, first press Ctrl+Alt+T on keyboard to open terminal. When it opens, run command:
Type user password (no asterisk feedback) when it asks and hit Enter to continue.
2. Linux Mint user needs to manually update the system package cache after adding PPA, though its done automatically in Ubuntu 20.04 and higher:
sudo apt update
3. Finally, install the Firefox Nightly build by running command:
sudo apt install firefox-trunk
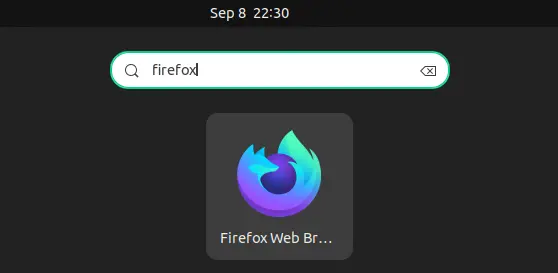
After installing the package, launch it from ‘Activities’ overview screen or app menu depends on your desktop environments. And, you can use “Software Updater” (or Update Manager) every day to keep the package up-to-date.
Uninstall Firefox Nightly
For the Snap package, just open terminal and run command will restore to the pre-installed Firefox package:
snap refresh firefox --channel=latest/stable
However, the restored Firefox Snap will create a new user profile instead of using the original one, though you can manually backup and restore your important data.
For the apt repository package, open terminal (Ctrl+Alt+T) and run command to remove it:
sudo apt remove --autoremove firefox-nightly
To remove the source repository, just delete the source file and key by running the 2 commands below one by one:
Unify Community and Professional Editions with single product.
New default theme, and new welcome screen.
Claude AI support.
Use uv as default environment manager if available.
New LSP tools, e.g., ty, Pyright, and Pyrefly.
New dedicated Python Process Output tool window
Support the asdf runtime version manager.
Support for PEP 765 (Python 3.14+).
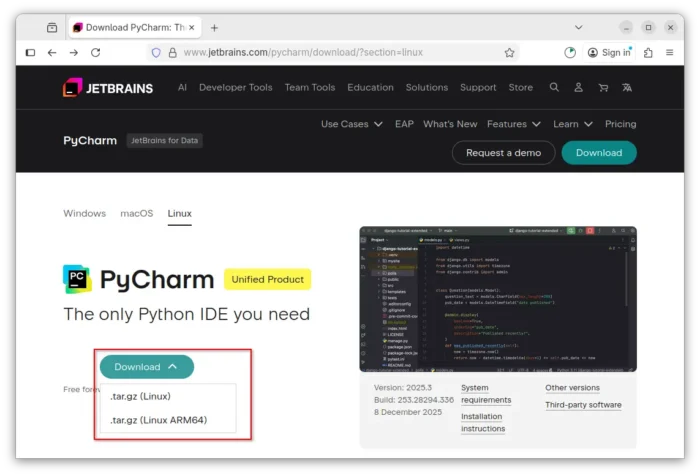
The new release is available to install in Ubuntu via different ways. They include Snap, Flatpak, official tarball, and Ubuntu PPA. Choose either one that you prefer.
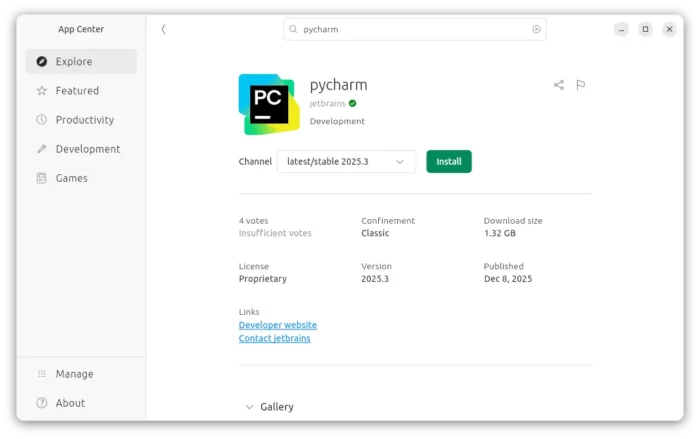
Method 1: Install PyCharm via Snap package
JetBrains provides official Linux package through both Snap and tarball. Which is super easy to install for Ubuntu users.
The Snap package Features:
Official package by JetBrains.
Run in sandbox environment.
amd64 (x86_64) and arm64 (aarch64) platforms support.
For all current Ubuntu releases, just launch Ubuntu Software (or App Center), then search and install pycharm.
Or, run command below in a terminal window (Ctrl+Alt+T) instead to install the package:
snap install pycharm --classic
The snap package installs updates automatically. To manually check (and install if any) updates, use command:
snap refresh pycharm
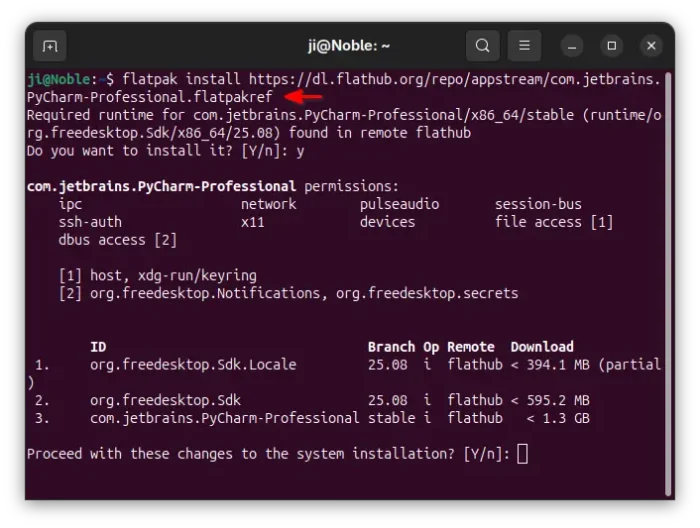
Method 2: Install PyCharm via Flatpak (Unofficial)
Another easy way to install PyCharm is using Flatpak package. Which works in most Linux, though also run in sandbox environment.
The Flatpak package Features:
Community maintained.
Run in sandbox environment.
amd64 (x86_64) and arm64 (aarch64) support.
Ubuntu users just need to press Ctrl+Alt+T on keyboard to open terminal. Then run the 2 commands below one by one to install the package.
First, run command to install the Flatpak daemon:
sudo apt install flatpak
Then, run the command below to install PyCharm as Flatpak:
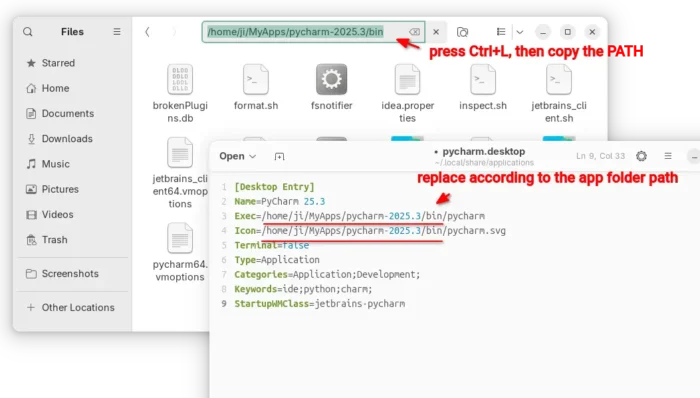
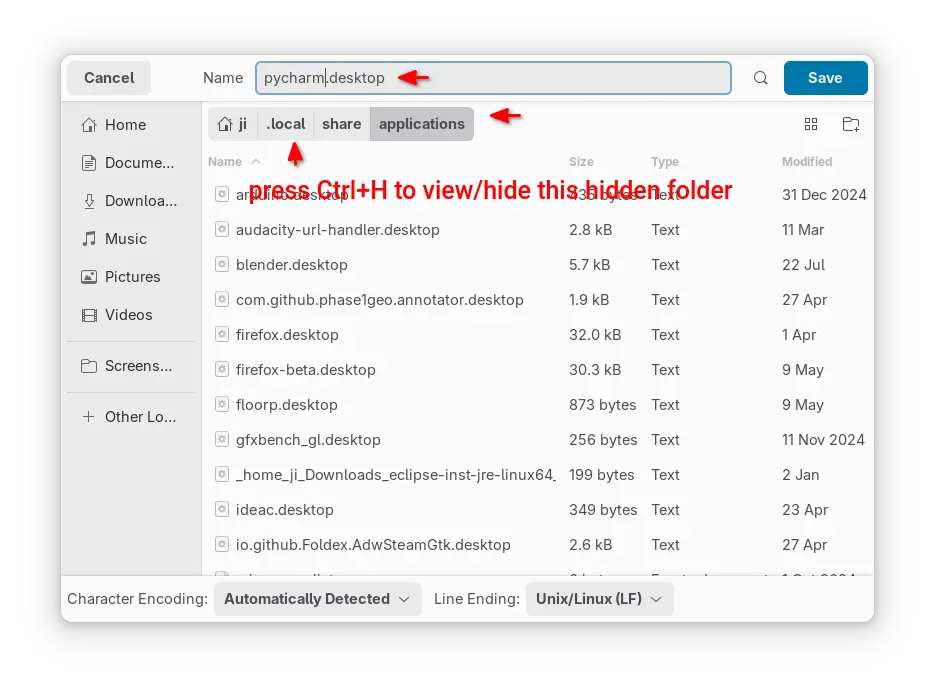
Here, replace the values of ‘Exec‘ and ‘Icon‘ according where you put the source folder. And, change ‘Name’ value for Professional edition.
Finally, save the document as (Ctrl+Shift+S) ‘pycharm.desktop‘ into .local/share/applications directory. Here, .local is hidden by default, press Ctrl+H to view/hide in file/folder chooser dialog.
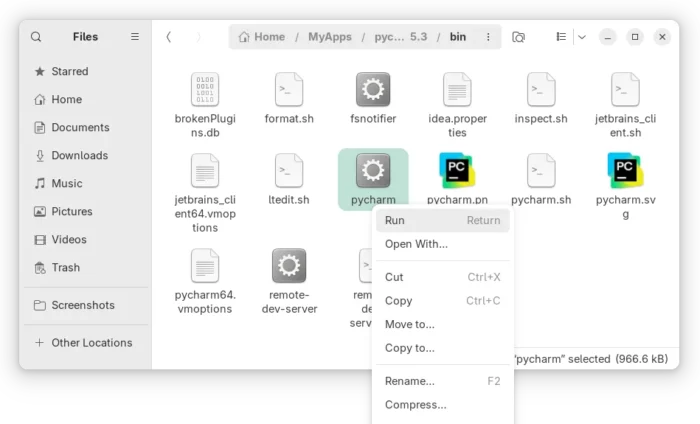
If everything’s done correctly, you can then search for and launch PyCharm from app launcher or the overview screen depends on your DE a few moments later:
Method 4: Install PyCharm .deb package via unofficial Ubuntu PPA
Another choice to avoid Snap and Flatpak, is using an Ubuntu PPA. However, there are only third-party maintained PPAs.
The PPA package is still at v2025.2.5 at the moment:
Third-party maintained.
PyCharm Community only so far.
amd64 (x86_64) only so far.
supports Ubuntu 24.04, Ubuntu 25.04 only so far.
As far as I know, the xtradeb PPA is keeping updated with the most recent packages including PyCharm Community.
To install PyCharm from the PPA, press Ctrl+Alt+T on keyboard to open terminal. And, run commands below one by one:
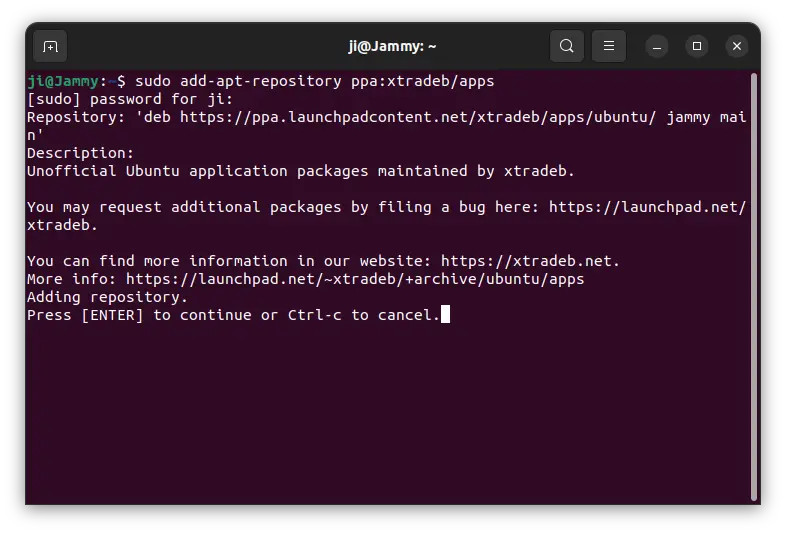
Add the PPA by running command:
sudo add-apt-repository ppa:xtradeb/apps
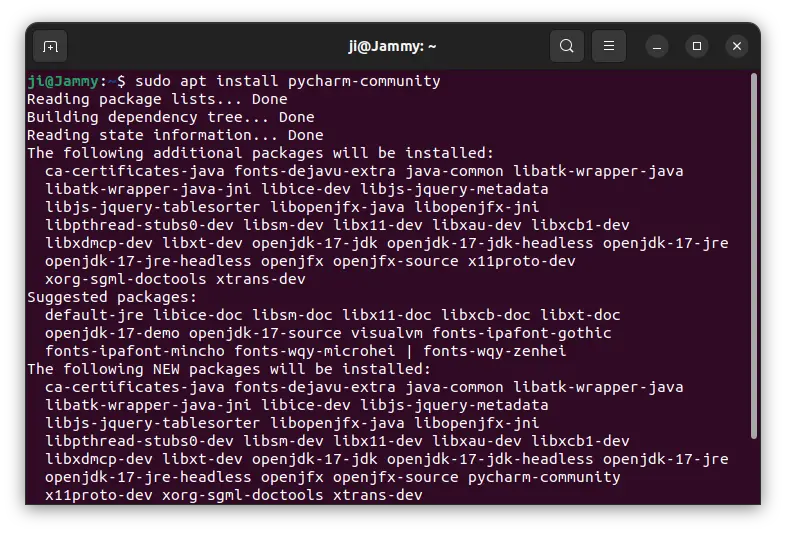
Then install the IDE:
sudo apt install pycharm-community
NOTE: Linux Mint user needs to run sudo apt update after adding PPA to manually refresh system package cache.
Uninstall PyCharm
For the Snap package, just remove it from Ubuntu Software or App Center, or use command:
snap remove --purge pycharm
For the Flatpak package, open terminal (Ctrl+Alt+T) and run command to remove it: