![]()
Quiet Audio Fade (aka Quite AF) is a small applet slowly reduces the volume on your computer over time, letting you find the quietest level that works.
It’s f.lux for your ears!
The tool is written in Go programming language, and it works in Windows, Linux, and Mac OS.
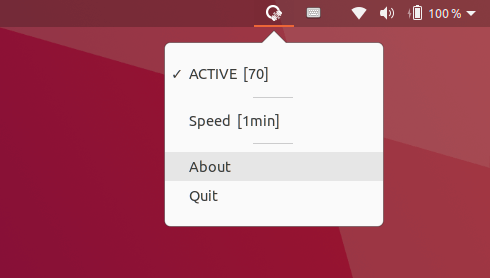
It works as a system tray indicator with only a few menu options. The first option shows the current tool status (ACTIVE or PAUSED) along with the volume level in number.
When it’s in ACTIVE mode, it slowly decreases your system volume bit by bit with time interval set in “Speed” option. Higher intervals mean a longer, more subtle decrease.
Eventually you’ll notice the sound is a tad too low and you’ll increase the volume, which will disable Quiet AF and leave your volume at the perfect level – not too loud, not too quiet!
How to Get Quiet Audio Fade in Ubuntu:
Besides building from source tarball, the applet offers single executable file in its project page:
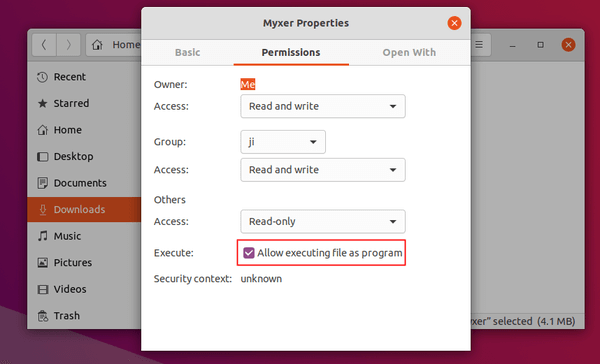
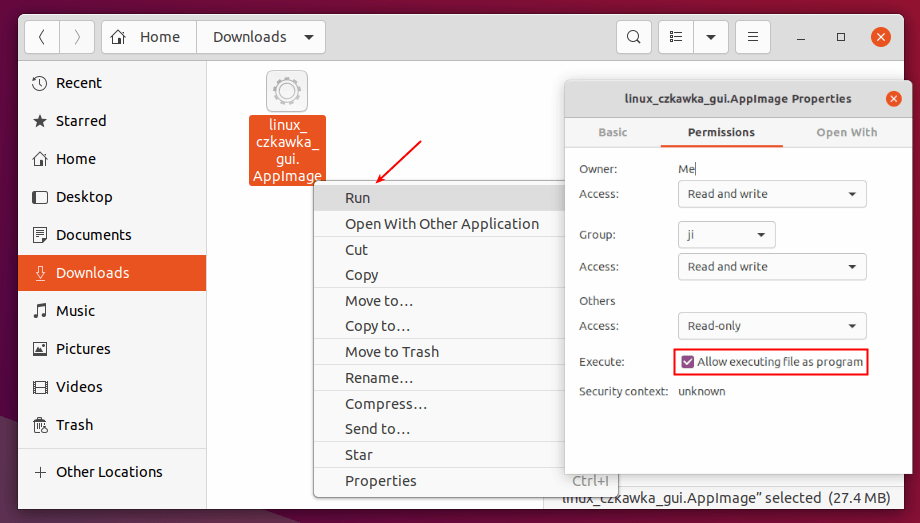
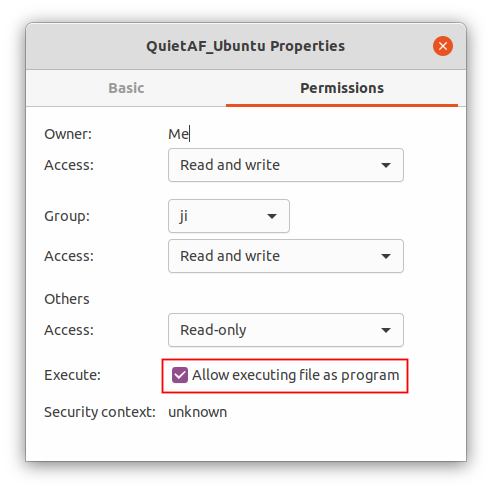
Grab the package for Ubuntu, and give executable permission in file’s Properties dialog.
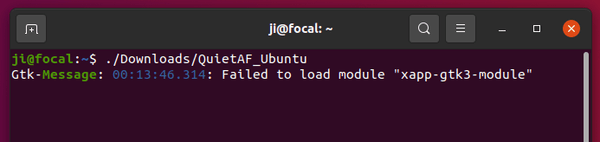
You’re finally able to start it via command in terminal (Ctrl+Alt+T):
./Downloads/QuietAF_Ubuntu
If you prefer the applet, you can move the executable file to /usr/local/bin, manually create app shortcut, or add it as startup application.