![]()
Want to limit the cpu usage of an app or process? It’s easy to do the trick in Ubuntu Linux via the LimitCPU tool.
LimitCPU is a simple command line tool that monitors a process and makes sure its CPU usage stays at or below a given percentage, by sending SIGSTOP and SIGCONT POSIX signals to process. All the children processes and threads of the specified process will share the same percentage of CPU.
LimitCPU is the direct child of the old CPUlimit. It’s available in the system repositories of all current Ubuntu repositories, though the package name is cpulimit.
Install LimitCPU in Ubuntu:
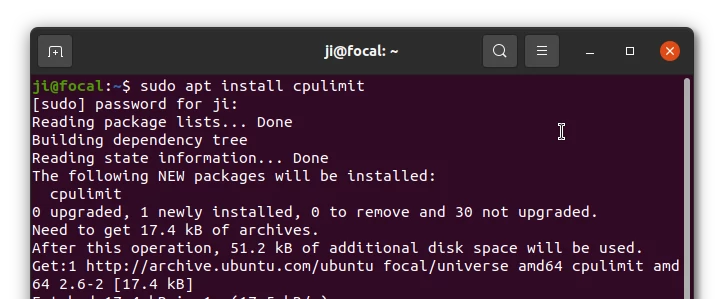
Press Ctrl+Alt+T on keyboard to open terminal. When it opens, run command to install the tool:
sudo apt install cpulimit
How to use Limit CPU in Ubuntu:
It’s quite easy to use the tool, because it has a good documentation. Just run man cpulimit in terminal, it will tell you how to use it. For lazy men, here are some examples.
1. Specify app or process to limit via:
- -p follow with process id
- -e follow with executable file name.
- -P follow with absolute path to executable file.
For example, make sure process ‘1123’ to use less than 50% CPU (-l follow with number specify allowed CPU).
cpulimit -p 1123 -l 50
Many apps now use multiple processes, so you may specify which to limit via path to executable:
cpulimit -P /usr/bin/firefox -l 50
2. The tool can also used to launch an app and limit its CPU usage. For example, launch Firefox and allow up to 50% CPU amount:
cpulimit -l 50 firefox
3. There are some other command line flags, including:
- -c specify the number of CPU cores available for the process.
- -b / -f run cpulimit in background / foreground.
- -q run in quite mode.
- -k, kill the process when reach CPU limit.
- -s, send alternative signal to watched process when kill it.
For example, launch Firefox and kill it when reach 30% CPU usage:
cpulimit -l 30 -k firefox
Limit process ‘1123’ to 25% CPU and allows 2 cores:
cpulimit -c 2 -p 1123 -l 25
Kill Firefox and send SIGTERM signal when it uses 20% CPU:
cpulimit -l 20 -e firefox -s SIGTERM
As mentioned, run man cpulimit in terminal for more information.