![]()
Want to emulate Nexus, Galaxy, or other Android Phone/Tablet on Ubuntu Desktop? Well, you may already know the handy tool Genymotion.
Genymotion is a complete set of tools that provides a virtual environment for Android. It can be very useful for developers, testers, salesman or even gamers. Genymotion is free for personal use. For full features, you need to buy a license.
Features:
- OpenGL acceleration to achieve the best 3D performance
- Enable full screen option and improve your experience
- Be precise in your UI development with the “pixel perfect” functionality
- Start multiple virtual device at the same time
- Override virtual device identifiers
- Directly command virtual devices sensors with Genymotion Shell
- Fully compatible with ADB. You can control your virtual device from the host
- Manage sensors: Battery level / status, GPS, Rotation, Camera
Since 2.1:
- supports copy/paste from the host to the virtual device, or from the virtual device to the host using Android builtin copy/paste feature.
- Android 4.4 support
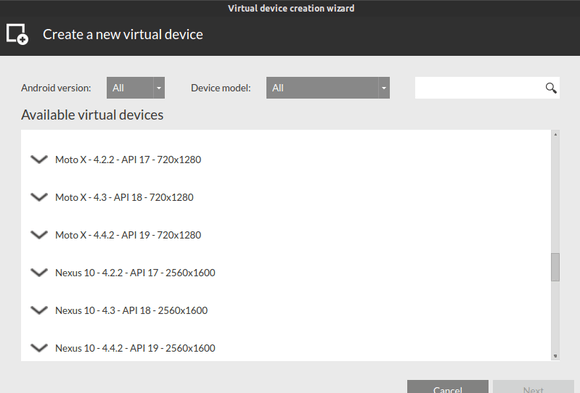
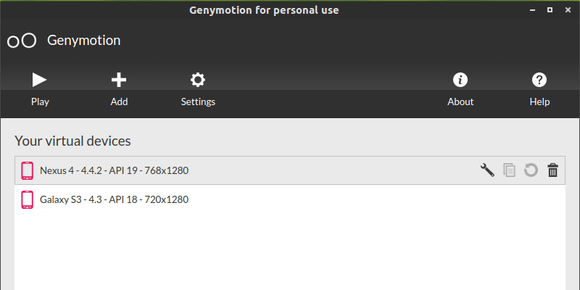
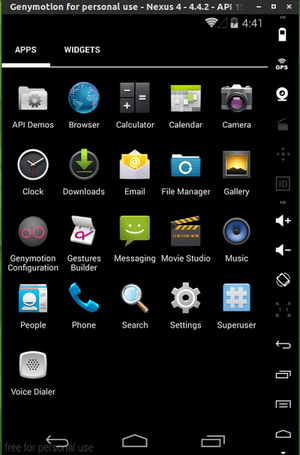
Screenshots:
Install Genymotion:
1. This Android Emulator requires Virtualbox, so first search for and install virtualbox in Ubuntu Software Center.
2. Register https://cloud.genymotion.com/ (free).
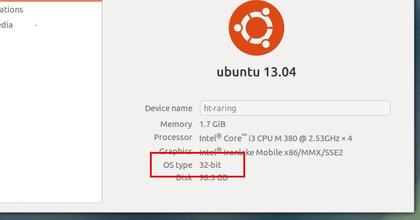
3. Download the installer after your login the website. Not sure Linux 32 bits or 64 bits? Go to System Settings -> Details and you’ll see the OS type:
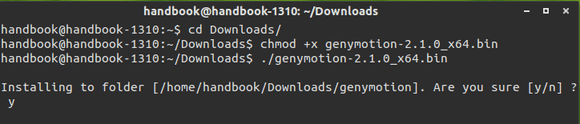
4. If you save the installer in the default Downloads folder, press Ctrl+Alt+T to open terminal. When it opens, run below commands one by one:
cd ~/Downloads/

chmod +x genymotion-2.1.0_x64.bin

./genymotion-2.1.0_x64.bin
It first navigate to Downloads folder, then give executable permission, and finally start the installer. Of course you need to change the file-name to yours.
5. According to the previous picture genymotion has been installed to “/home/handbook/Downloads/genymotion”.
So run below command to start it:
/home/handbook/Downloads/genymotion/genymotion