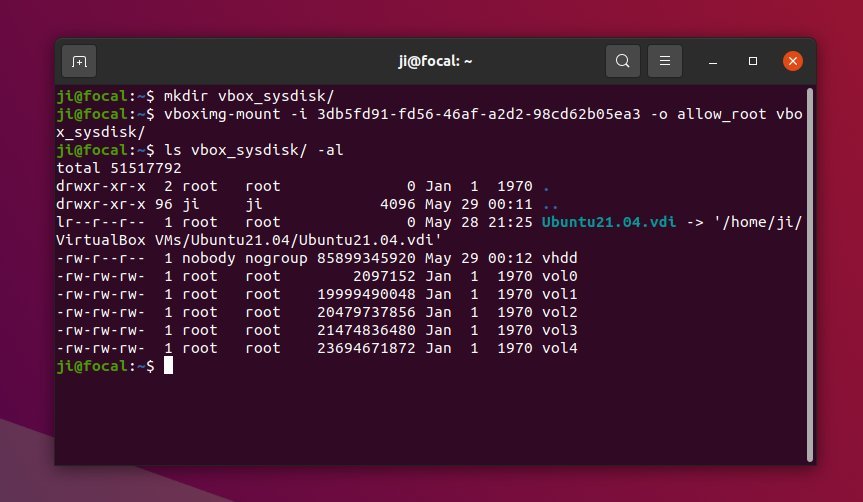
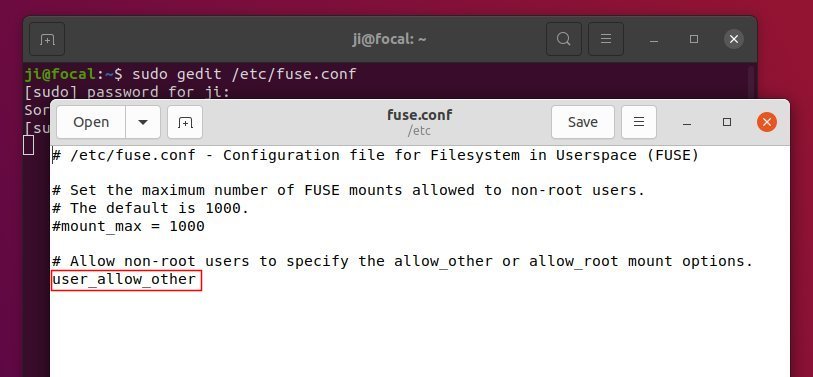
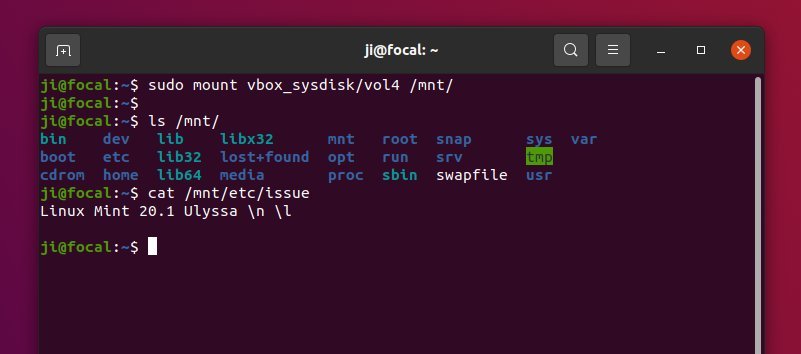
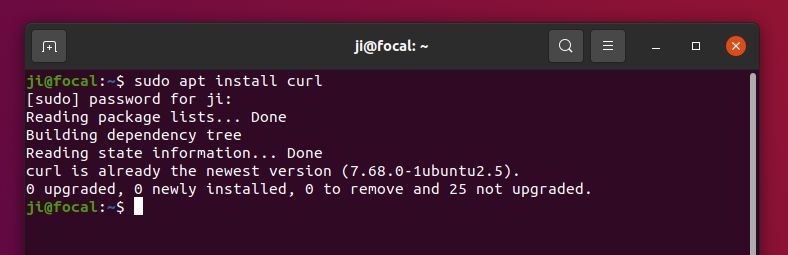
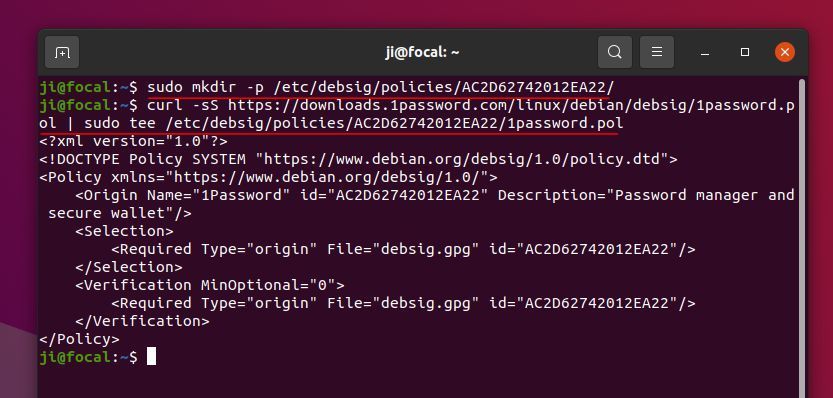
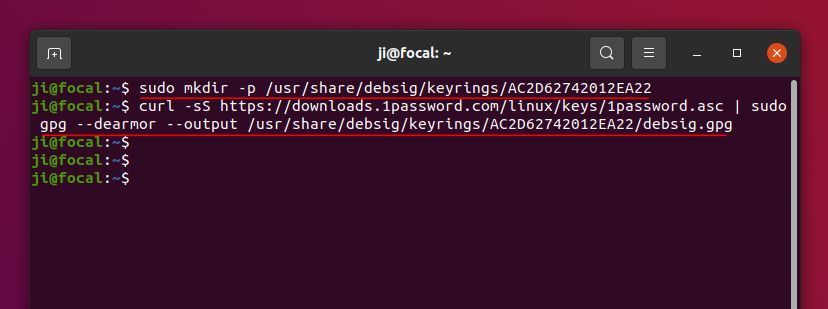
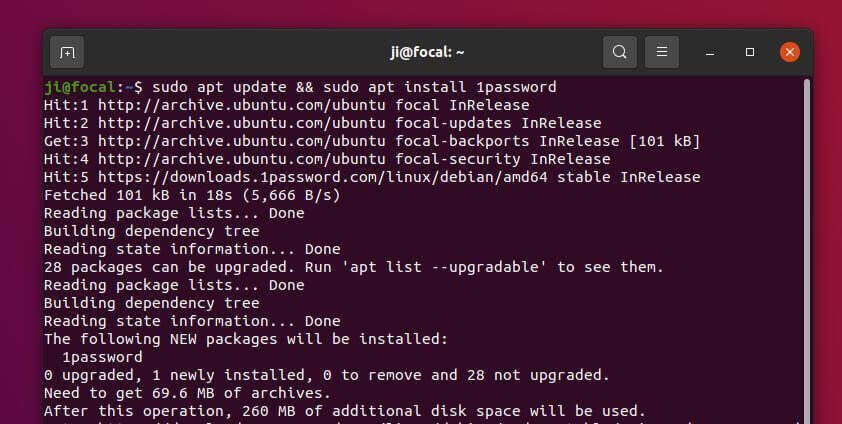
![]()
This simple tutorial shows how to install the NVIDIA proprietary driver in Ubuntu 22.04 and switch between dedicated and integrated GPU.
Since Ubuntu provides the proprietary driver packages via its restricted repositories, user may install NVIDIA driver as easy as a few clicks.
Install NVIDIA Driver
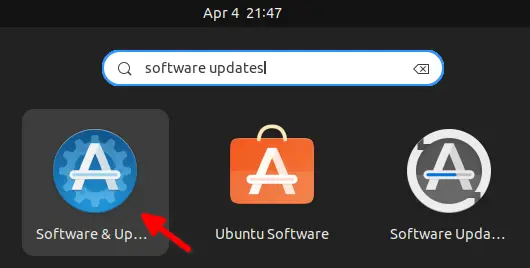
1.) Firstly, click on top-left corner ‘Activities‘, and then search for and open ‘Softwre & Updates’ utility.
When the tool opens, make sure the “Proprietary drives for devices (restricted)” is enabled.
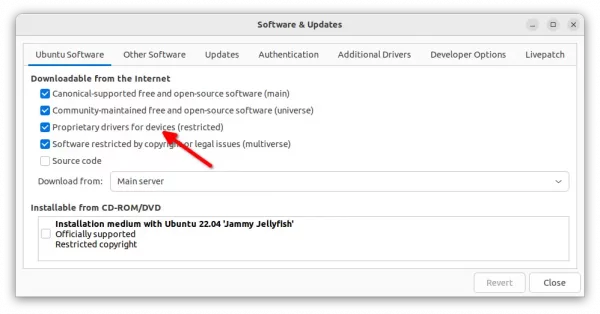
Make sure ‘restricted’ repository enabled
2.) Next, navigate to ‘Additional Drivers‘ tab. There it should list all available graphics drivers.
If it shows nothing, press Ctrl+Alt+T to open terminal and run command sudo apt update to refresh package cache. Then re-launch the ‘Software & Updates’ utility.

Choose one of the drivers from the list and click on ‘Apply Changes‘ to install it. There will be a little bar indicates the installing process. When done, restart your computer!
Switch between NVIDIA and Intel Graphics:
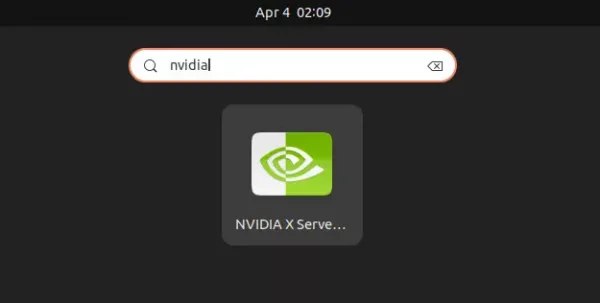
After restart, your machine will be on performance mode with the dedicated GPU. To switch GPU mode, search for and open ‘NVIDIA X Server Settings‘.
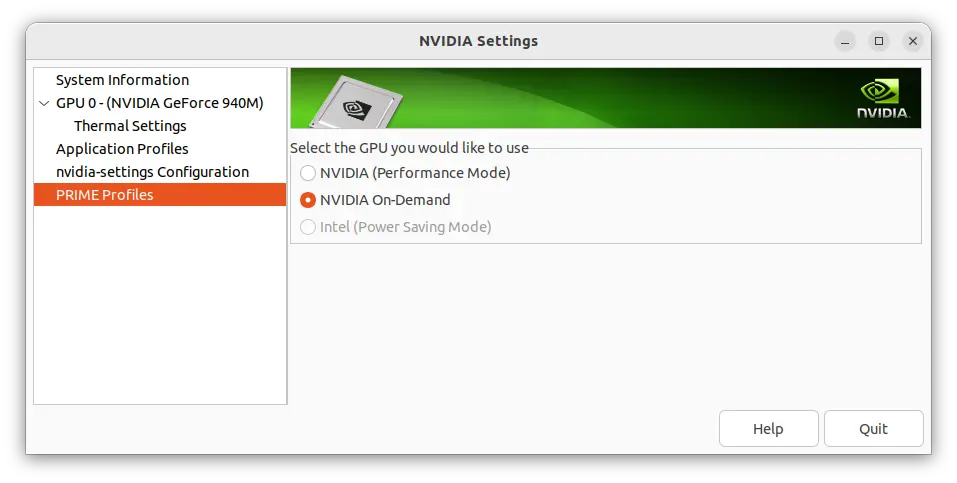
When the app opens, navigate to ‘PRIME Profiles‘. Then you’ll see three options available in the right:
- NVIDIA (Performance Mode) – use dedicated NVIDIA GPU to render Ubuntu desktop.
- NVIDIA On-Demand – use integrated graphics to render desktop, but possible to offload specific apps via dedicated GPU.
- Intel (Power Saving Mode) – use integrated graphics to render Ubuntu desktop.
In my case, the “Intel (Power Saving Mode)” is somehow grayed out. As a workaround, choose Intel graphics card by running sudo prime-select intel in terminal.
Changing GPU mode however needs log out and back in to apply changes.
Run certain apps via NVIDIA GPU while rendering desktop via integrated graphics
By setting GPU mode to “NVIDIA On-Demand”, you may run certain apps via NVIDIA GPU, while others handled by the integrated GPU.
1.) For CUDA apps, you need to run command in terminal (Ctrl+Alt+T) to install the nvidia-cuda-toolkit package.
sudo apt install nvidia-cuda-toolkit
Then there’ll be application-specific menu to tell it which device to use.
2.) For other apps, just use the following environment variables.
__NV_PRIME_RENDER_OFFLOAD=1
__GLX_VENDOR_LIBRARY_NAME=nvidia
You can do this by launching apps from command line. For example, launch SuperTuxkart (a kart racing game) via command:
__NV_PRIME_RENDER_OFFLOAD=1 __GLX_VENDOR_LIBRARY_NAME=nvidia supertuxkart
Or, edit the application’s .desktop file which is usually under “/user/share/applications” directory. And, change the line of ‘Exec’ to:
Exec=env __NV_PRIME_RENDER_OFFLOAD=1 __GLX_VENDOR_LIBRARY_NAME=nvidia supertuxkart
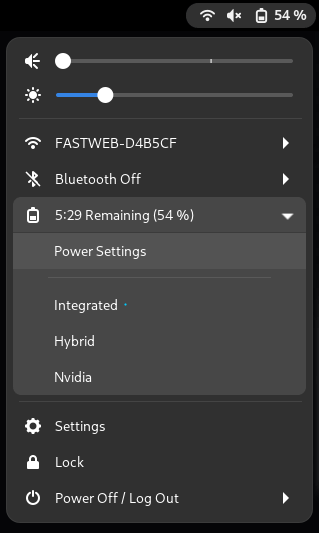
Add System Menu option to Switch CPU
To make it easy to switch between your GPUs, there’s a Gnome Extension available to add options into system tray menu.
1.) To get the menu option, you need to first install the open-source EnvyControl tool. Press Ctrl+Alt+T on keyboard to open terminal, and run the command below one by one:
- Use git command to grab the source:
git clone https://github.com/geminis3/envycontrol.git
- Navigate to the source folder, and install it for global use via pip package manager:
cd envycontrol && sudo pip3 install .
If the pip3 command does not exist, run sudo apt install python3-pip command to install it.

As the project page mentioned, users have to run the following 2 commands one by one to prevent Ubuntu’s own gpu-manager from interfering:
sudo prime-select on-demand
sudo systemctl disable gpu-manager.service
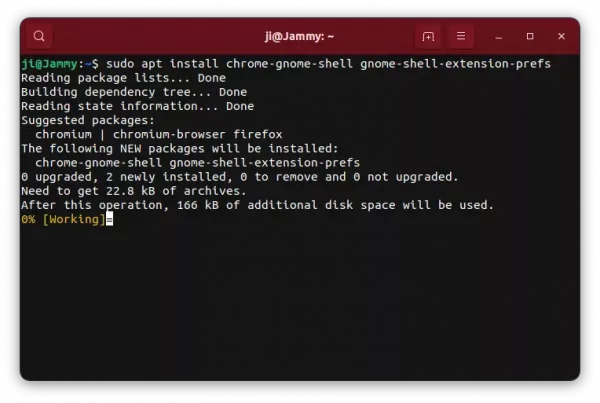
2.) Next, run command to make sure you have the agent packages installed for installing Gnome Extensions:
sudo apt install chrome-gnome-shell gnome-shell-extension-prefs
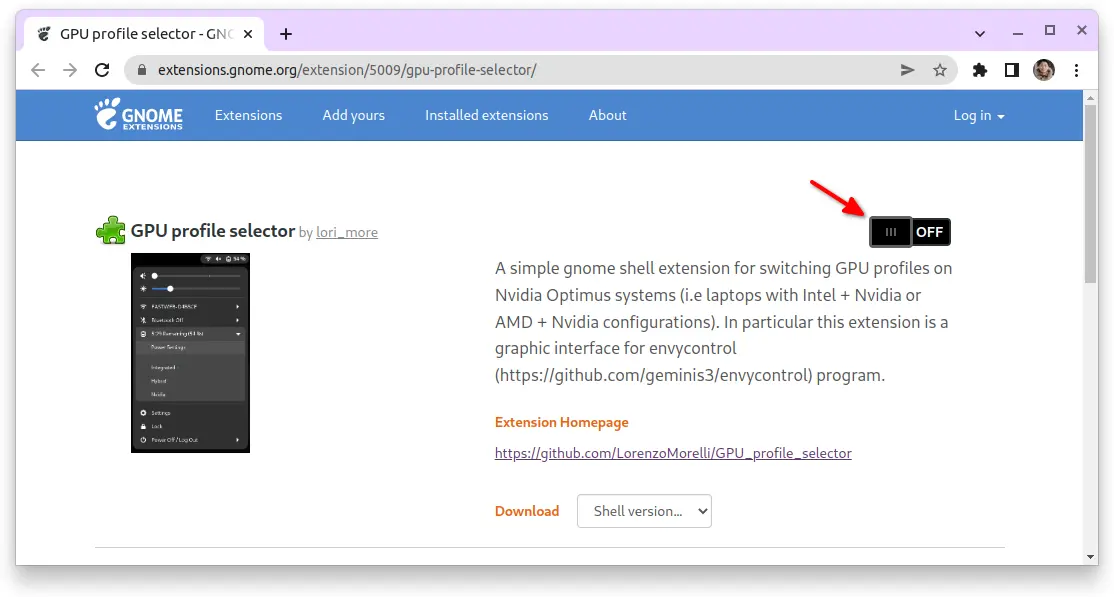
3.) Finally, go to the extension page and turn on the slider icon to install it:
NOTE 1: The pre-installed Firefox does not support this stuff so far! Use another browser, or install back Firefox as classic deb package.
NOTE 2: If you don’t see the on/off switch in that page, click the ‘click here to install browser extension‘ to install extension for your web browser and refresh the page.
The menu option should appear immediately after successfully installed the extension. If not, press Windows (Super) key on keyboard or click “Activities” on top panel, and then search for and open the “Gnome Extensions” app to manage your extension.