Dolphin, the popular free open-source GameCube and Wii emulator, released new 2412 version today!
The game emulator supported Linux previously through an official Ubuntu PPA, however discontinued! In the new release, it added back official Linux support through Flatpak package, which works in most Linux distributions, through runs in sandbox.
GDM Settings, the graphical configuration tool for GNOME Login Screen, released version 5.0 hours ago with new features!
GDM Settings (Gnome Display Manager Settings) is a free open-source tool that provides graphical options to configure background, themes, fonts, etc for login screen in Ubuntu, Fedora Workstation and other Linux with GNOME Desktop.
The application just released 5.0 version today. Here are the new features and how to install guide in Ubuntu 24.04 and Ubuntu 24.10!
Elementary OS announced new 8.0 release this Tuesday! The code-name is Circe, and it’s based on Ubuntu 24.04 LTS.
Elementary OS is a desktop Linux distribution that features Pantheon desktop environment along with its own core apps. It used to be attractive, due to its desktop appearance, though now the UI is a bit lagging behind in my opinion.
This tutorial shows how to install and play the popular Minecraft sandbox game in Ubuntu 24.04, Ubuntu 22.04, Linux Mint 21/22, and their based systems.
Minecraft has different editions, including Java, Bedrock, Legends, and Dungeons, as well as the discontinued Pi edition.
So far, only Minecraft Java edition runs natively in Linux. User can however install and play the Bedrock and Pi editions through sandbox environments, though they are unofficial and have limitations.
Blender, the popular free open-source 3D creation software, announced new major 4.3 release this Tuesday with many exciting new features and performance improvements.
In the new release, the real-time renderer EEVEE now supports Light Linking and Shadow Linking, which was previously available only in Cycles. It now has a new Metallic BSDF node in shader editor, and, new texture node that can create procedural Gabor noise for random interleaved bands with controllable direction and width.
Linux Kernel 6.12 was released! Linus Torvalds announced on Sunday:
“No strange surprises this last week, so we’re sticking to the regular release schedule, and that obviously means that the merge window opens
tomorrow. I already have two dozen+ pull requests in my mailbox, kudos to all the early birds.
But before the merge window opens, please give this a quick test to make sure we didn’t mess anything up. The shortlog below gives you the summary for the last week, and nothing really jumps out at me. A number of last-minute reverts, and some random fairly small fixes fairly spread out in the tree.”
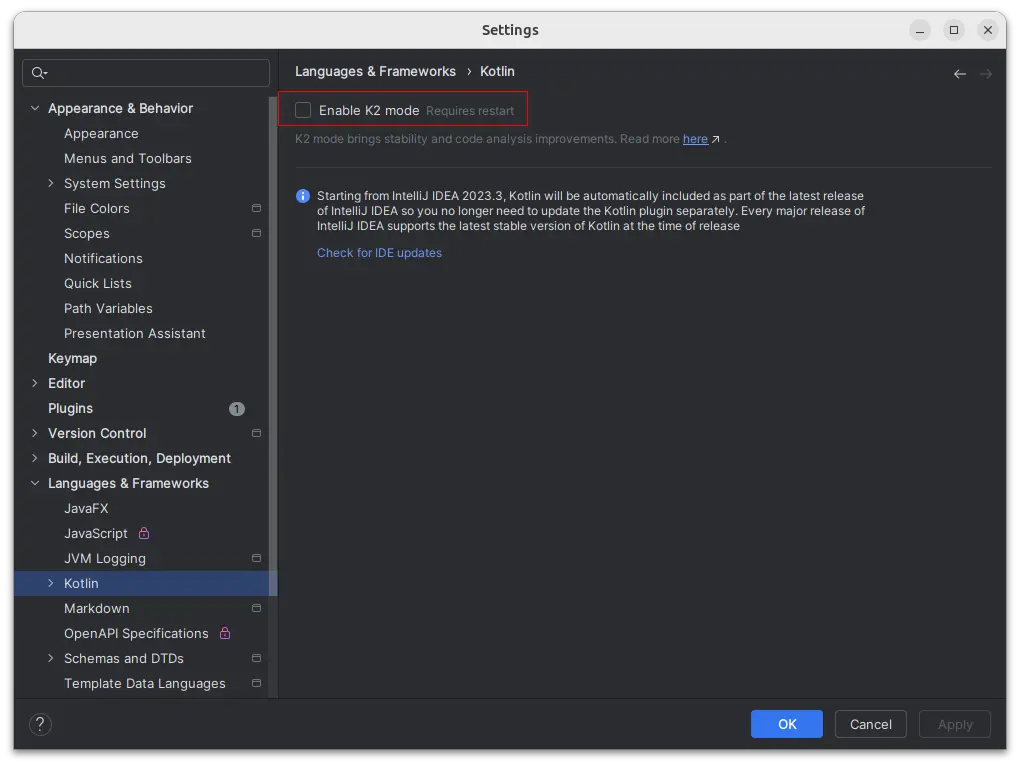
IntelliJ IDEA 2024.3, the last major release in 2024, was released few days ago!
The release introduced new Logical code structure in the Structure tool window, allows to view classes, methods, fields, as well as links and interactions between components in your project.
K2 mode with Kotlin now it stable. With it enabled, it supports using non-local break and continue statements inside lambdas, as well as multi-dollar interpolation.
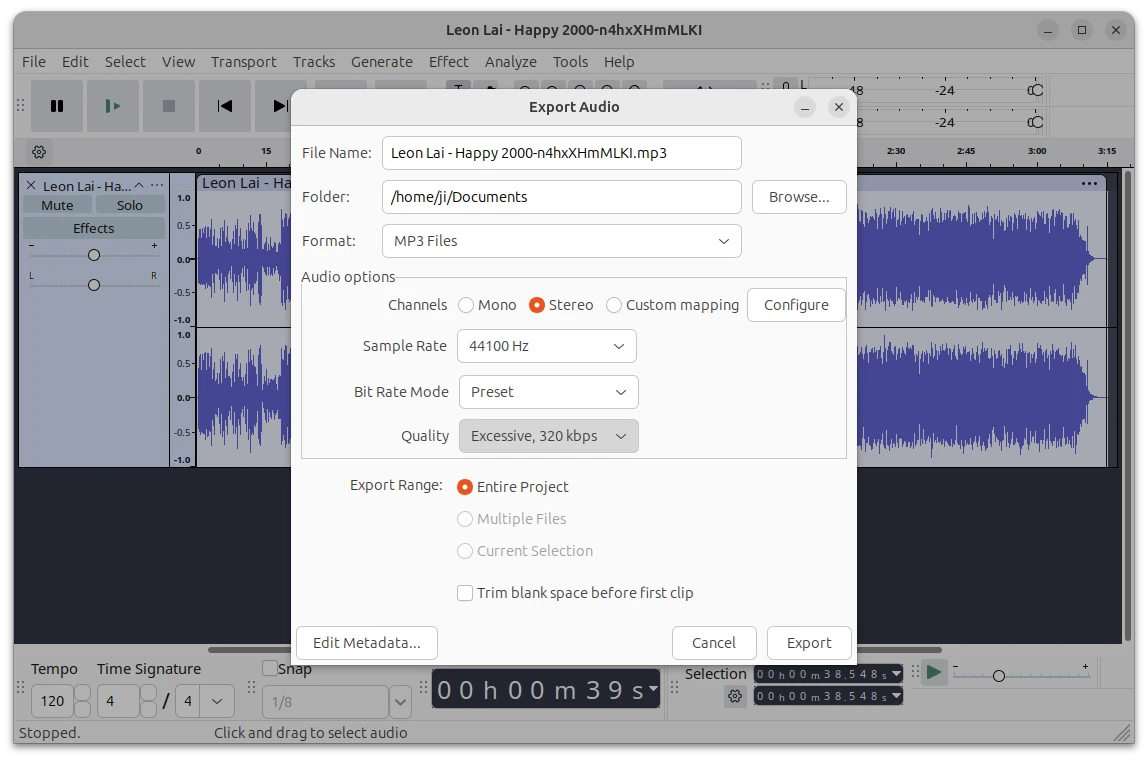
The popular free open-source Audacity audio editor announced new 3.7.0 release few days ago!
Unlike v3.5.0 or v3.6.0, this is NOT a feature release but maintenance updates with many bug-fixes and performance improvements. While, the developers are working on next major Audacity 4.0.
The new release improved contrast in the light theme. Which, fixed the issue that the focus border was hard to discern as it was blue against a blue-based background.
To not make disabled and neurodivergent people uncomfortable while they use Audacity, it renamed the word “Insane” in the Quality drop-down menu in the Export Audio dialog with “Excessive“.
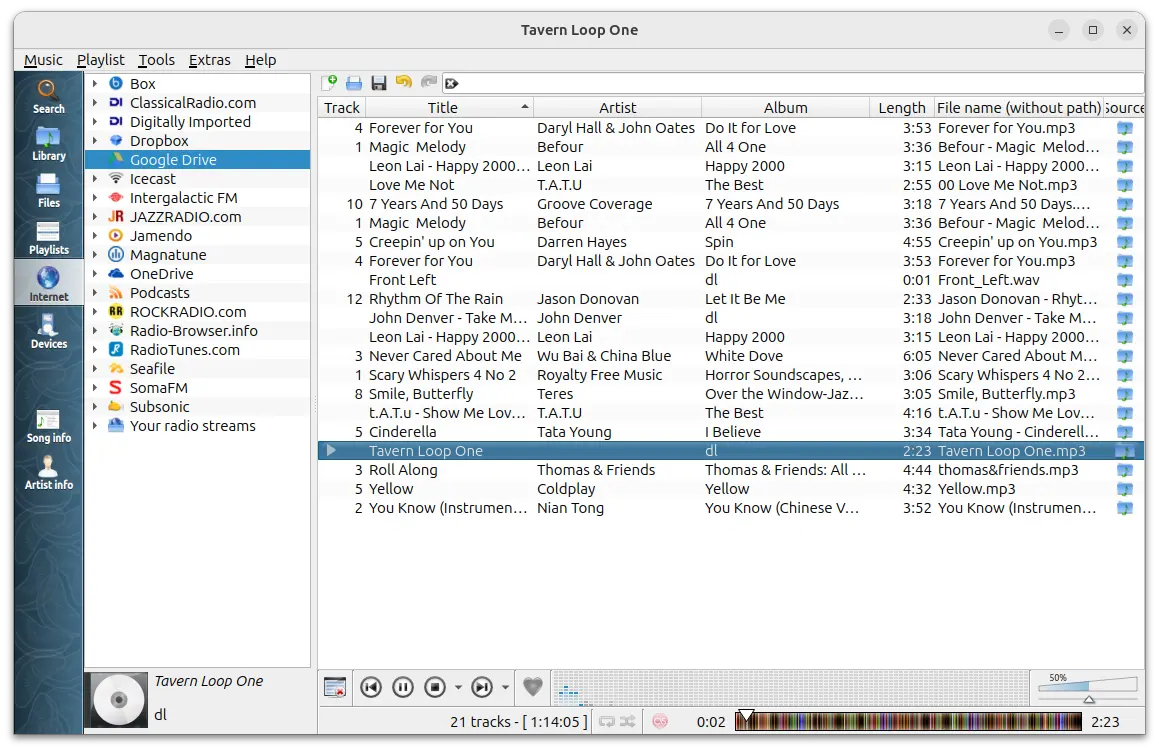
It’s been more than 8 years since the last 1.3.1 stable. Clementine, the old popular music player and library organizer, finally got a new stable release!
Clementine is a free open-source music player inspired by Amarok 1.4. It provides an easy to use Qt5 user interface to play and manage large music collections, while keeping fast and lightweight.
Besides local music playback, the player also supports internet radios, such as last.fm, radio-browser.info, Subsonic. And, it can search and play you music from cloud, including Google Drive, Dropbox, OneDrive, and more.
Moreover, it provides handy tools to transcode music, open and rip audio CD. See Clementine website for more about it.