![]()

Ubuntu 22.04 has better support for the low latency PipeWire multimedia framework. Here’s how to setup it for PulseAudio, ALSA, JACK and Bluetooth output.
Firstly, Pipewire is pre-installed out-of-the-box, and runs as background service automatically. You may check it out by running command below in terminal:
systemctl --user status pipewire pipewire-session-manager
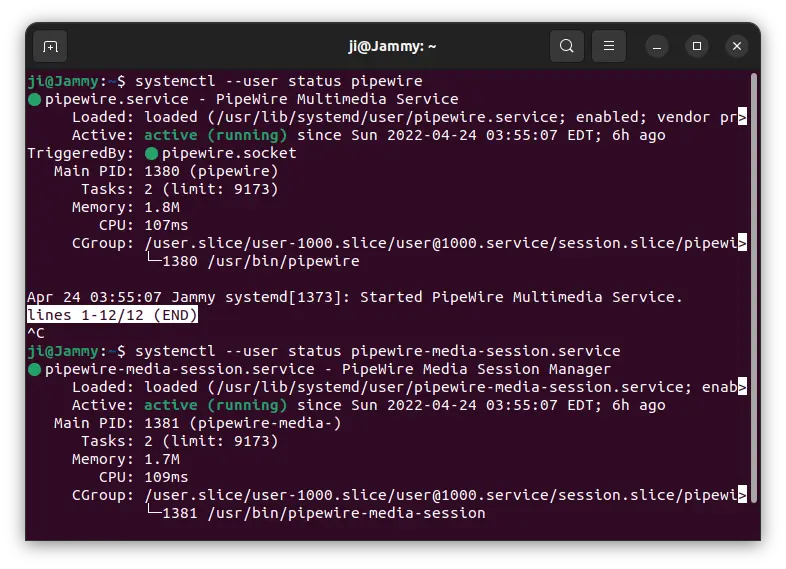
PipeWire installed out-of-the-box
IMPORTANT: This is NOT officially supported by Ubuntu so far. It still may not work on some devices. Don’t do it on production machine!
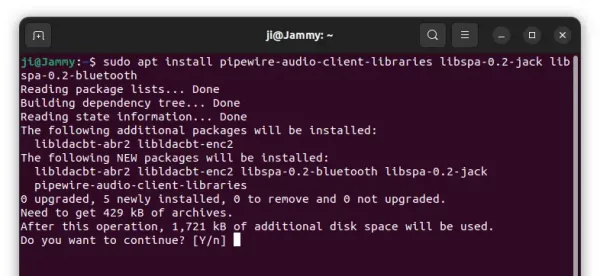
Step 1: install client libraries
Though available out-of-the-box, it’s not in use by default for audio output. To get start, first press Ctrl+Alt+T on keyboard to open terminal, and run command to install client libraries:
sudo apt install pipewire-audio-client-libraries libspa-0.2-bluetooth libspa-0.2-jack

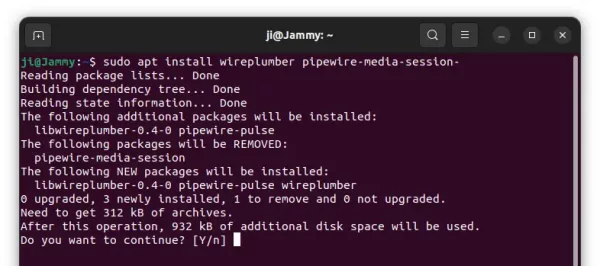
Step 2: install wireplumber to replace pipewire-media-session
The project maintainer now recommends more advanced “wireplumber” session manager when to use Pipewire as system sound server.
To install the package and remove “pipewire-media-session”, run the command below in terminal:
sudo apt install wireplumber pipewire-media-session-
NOTE: there’s a ‘-‘ in the end of the command indicates to remove the package. The command will also install the required pipewire-pulse automatically.

Step 3: Copy configuration files:
wireplumber makes things quite easy! If you just want to replace PulseAudio with Pipewire, enable the media session service and restart and that’s all!!
For ALSA clients to be configured to output via PipeWire, run command to copy the configure file:
sudo cp /usr/share/doc/pipewire/examples/alsa.conf.d/99-pipewire-default.conf /etc/alsa/conf.d/
For JACK client, run command:
sudo cp /usr/share/doc/pipewire/examples/ld.so.conf.d/pipewire-jack-*.conf /etc/ld.so.conf.d/
And then sudo ldconfig.
For Bluetooth, just remove the pulseaudio-module-bluetooth package via command:
sudo apt remove pulseaudio-module-bluetooth
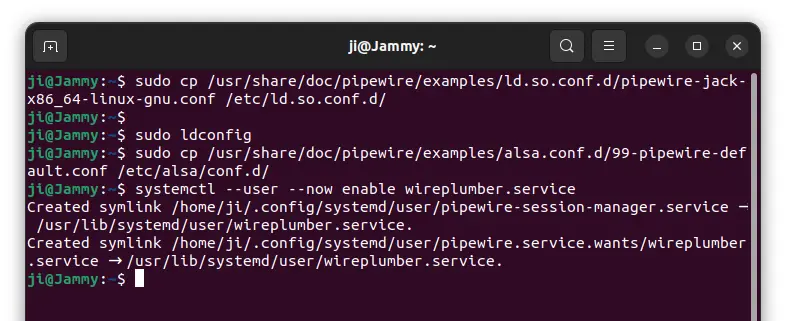
And, finally enable the media session by running command:
systemctl --user --now enable wireplumber.service
Step 4: Verify
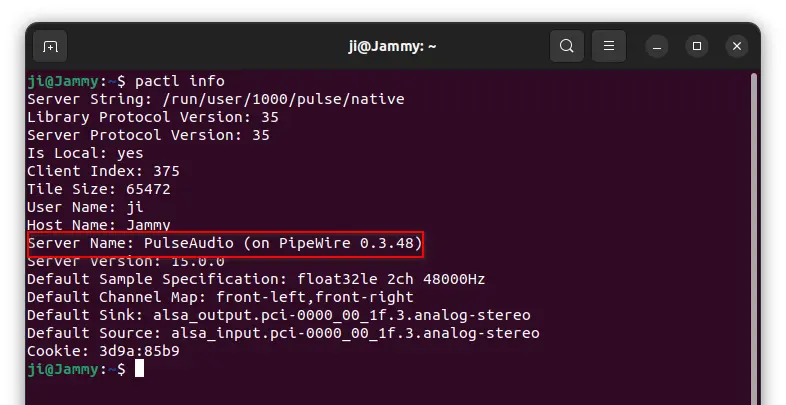
After restarted Ubuntu 22.04, run the command below in terminal.
pactl info
It should output Sound server: PulseAudio (on PipeWire x.x.x) indicates Pipewire is in use as sound output.
How to Restore:
To undo the changes, firstly remove the client libraries via command:
sudo apt remove pipewire-audio-client-libraries libspa-0.2-bluetooth libspa-0.2-jack
Remove wireplumber and install back the previous media session package (there’s also ‘-‘ in the end):
sudo apt install pipewire-media-session wireplumber-
Finally, re-enable pipewire-media-session service by running commands:
rm -f ~/.config/systemd/user/pipewire-session-manager.service
systemctl --user --now enable pipewire-media-session
Thanks to @lestcape, if sound’s still not working, try to disable pipewire-pulse services via command:
systemctl --user --now disable pipewire-pulse.service pipewire-pulse.socket
If you tried to enabled it globally, also disable it via command:
sudo systemctl --global --now disable pipewire-pulse.service pipewire-pulse.socket
And re-enable the original pulseaudio service via command:
systemctl --user --now reenable pulseaudio.service pulseaudio.socket
sudo systemctl --global --now reenable pulseaudio.service pulseaudio.socket