![]()

The GNOME image viewer and organizer app, gThumb 3.11.4 was released! PPA updated with Ubuntu 18.04, Ubuntu 20.04, Ubuntu 21.04, and upcoming Ubuntu 21.10 support.
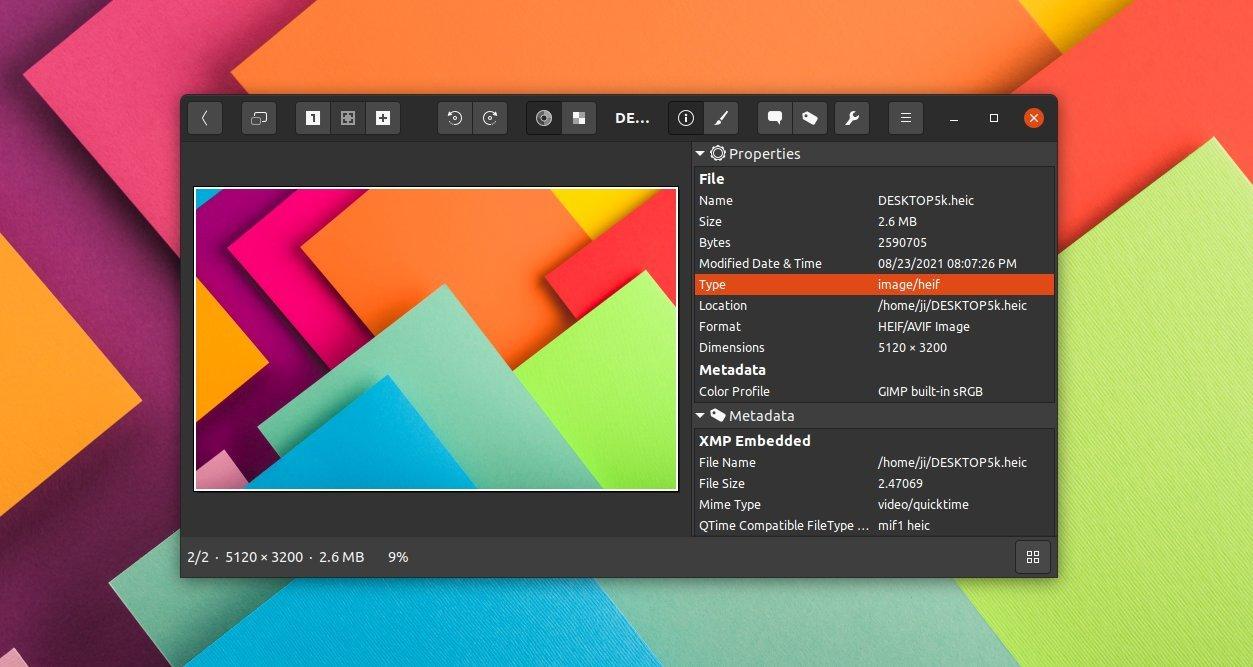
Thanks to libheif library, the new release introduced HEIF file format support, so it can now handle photos imported from your iOS devices. Also AVIF, an image file format specification for storing images or image sequences compressed with AV1 in the HEIF file format is supported, and you can save file as AVIF.
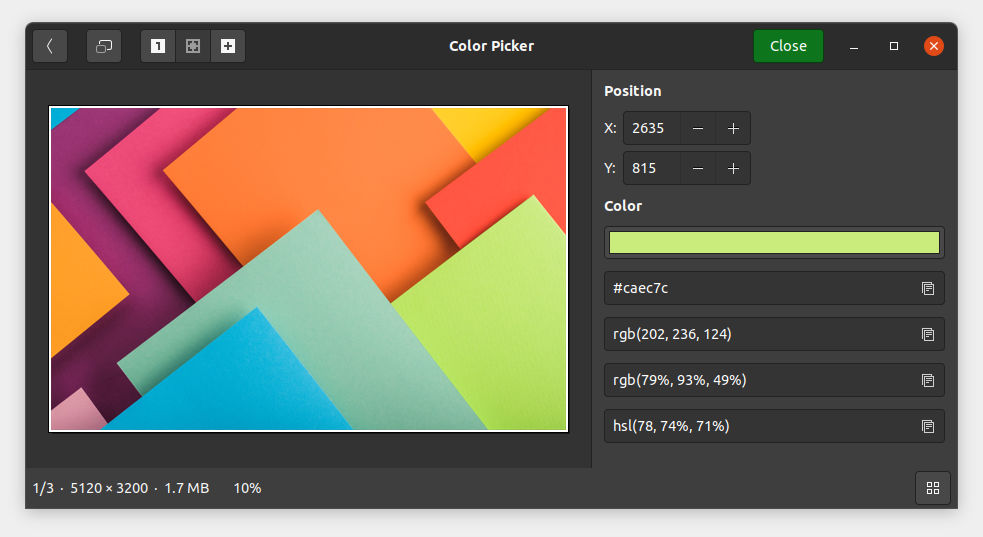
There’s a performance improvement for browsing directory with thousands of images, so users will get a smoother experience. The file list now starts more thumbnailers in parallel, status bar has a button to show the progress dialog. And the color picker tool shows colors in two more formats: rgb in % and hsl.
Other changes include:
- Allow to set shortcuts to activate filters.
- Added a template editor to edit text values with special codes: script commands, rename templates, print header and footer, etc.
- Allow to mount unmounted volumes.
- Allow to keep browsing while executing long-running external tools.
- Show the properties in a single column to save horizontal space.
- Bug-fixes and translation updates.
How to Install gThumb 3.11.4 in Ubuntu:
The software lacks a repository for Ubuntu packages. Besides building from the source tarball, I’ve made the packages into the unofficial PPA for Ubuntu 18.04, Ubuntu 20.04, Ubuntu 21.04, Ubuntu 21.10, Linux Mint 20 and derivatives.
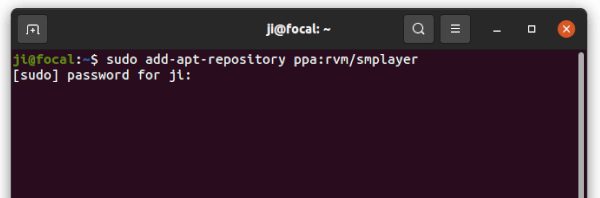
1.) Add the PPA
To add the PPA, open terminal either from the ‘show applications’ menu or by pressing Ctrl+Alt+T on keyboard. When terminal opens, run command:
sudo add-apt-repository ppa:ubuntuhandbook1/apps


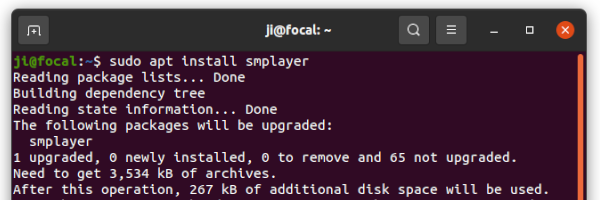
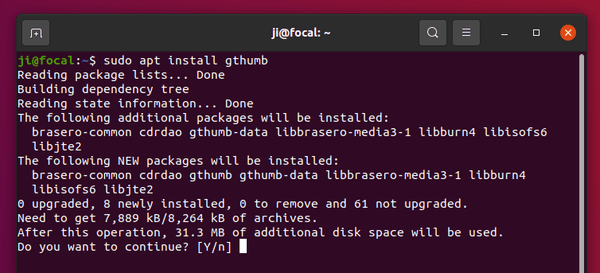
2.) Install / Upgrade gThumb
You can then either upgrade the image viewer from an old version via Update Manager (Software Updater), or run command in terminal:
sudo apt install gthumb

NOTE for Linux Mint, you have to run sudo apt update to refresh package cache first.
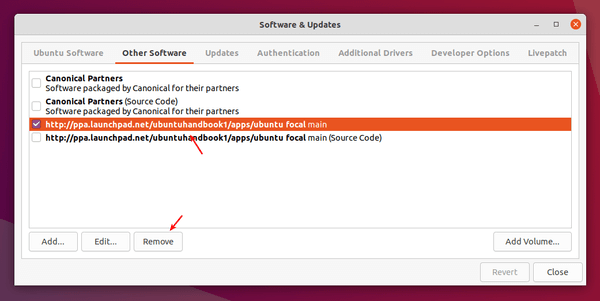
Uninstall gThumb & the Ubuntu PPA
To remove gThumb image viewer, run command:
sudo apt remove --autoremove gthumb gthumb-data
To remove the Ubuntu PPA, either run the apt-add-repository command with --remove flag, or use Software & Updates -> Other Software.