Archives For November 30, 1999

Indicator-terminal is an applet in Ubuntu top panel that shows a terminal window for running commands when you click on the icon.

terminal indicator

Install Indicator-terminal in Ubuntu:

NOTE: This project is still in early development. It has bugs and may break you system. Use it at your own risk!

There’s a PPA for Ubuntu 13.10 Saucy, Ubuntu 13.04 Raring, Ubuntu 12.10 Quantal. Press Ctrl+Alt+T to open terminal, when it opens, run below commands one by one:

sudo add-apt-repository ppa:erasmo-marin/indicator-terminal

sudo apt-get update

sudo apt-get install indicator-terminal

Once installed, restart you machine.

To remove this indicator, run below commands in terminal:

sudo apt-get install ppa-purge

sudo ppa-purge ppa:erasmo-marin/indicator-terminal

sudo apt-get remove indicator-terminal

Disable Global Menu on Ubuntu 13.10 Saucy

Last updated: October 23, 2013

This tutorial shows how to disable the global menu, so that each application having its own menu bar on Ubuntu 13.10 Saucy.

Before:

After:

To do it, press Ctrl+Alt+T on your keyboard to open terminal. When it opens, run the commands below to disable it.

sudo apt-get remove indicator-appmenu

Restart your computer to apply the changes.

For Firefox, go to Tools –> Add-ons –> Extensions and disable ‘Global Menu Bar integration’.

Enjoy!

Install uTorrent on Ubuntu 13.10

Last updated: November 3, 2013

This tutorial shows you how to easily install uTorrent sever on Ubuntu and Linux Mint. There’s no command, just a few clicks!

First, download uTorrent server: http://www.utorrent.com/downloads/linux. Check 32-bit or 64-bit by top-right corner shutdown menu (gear icon) -> About This Computer.

After downloading, navigate to the package in Nautilus file browser. Then decompress it.

Go into the extracted folder, right-click on utserver and select Properties.

Make sure that the box before “Allow execute as a program” is checked.

Before starting this service, search for and install libssl0.9.8 (SSL shared libraries) from Ubuntu Software Center.

NOTE: If you’re on 64-bit Ubuntu, press Ctrl+Alt+T and install the libssl0.9.8 with command below in terminal to fix utserver not launching problem:

sudo apt-get install libssl0.9.8:i386

Then double click utserver to start uTorrent server (or run ~/Downloads/utorrent-server-v3_0/utserver command to start it). That’s right you see nothing happens because the server is running as a background program.

Launch your web browser and go to http://localhost:8080/gui/. Type:

username: admin
password: leave password empty

You’re done!

Want to build a website? Then you need to setup a web server! Here I’ll show you how to install and setup LAMP pack on Ubuntu 12.04 LTS Server.

LAMP is a combination of Linux (OS), Apache HTTP Server, PHP (open-source scripting language), and MySQL (database software).

In this tutorial I use the hostname www.example.com with the IP address 192.168.0.100 as example.

1.) Login or Remote access your server as root, or run command to get root privileges.

sudo su

2.) Install Mysql:

apt-get install mysql-server mysql-client

You’ll be asked to set a password for root user of Mysql.

3.) Install Apache2:

apt-get install apache2

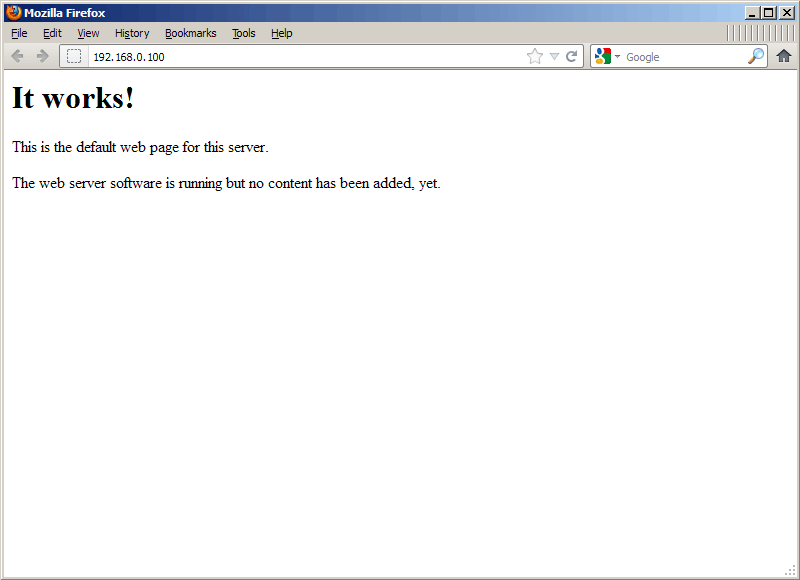
After installed, test if it works by going to http://192.168.0.100 in your web browser. Remember change the IP to yours.

The default default document root is /var/www/, and the configuration file is /etc/apache2/apache2.conf.

4.) Install PHP5:

apt-get install php libapache2-mod-php

Restart Apache2 service to get it works with PHP:

systemctl restart apache2

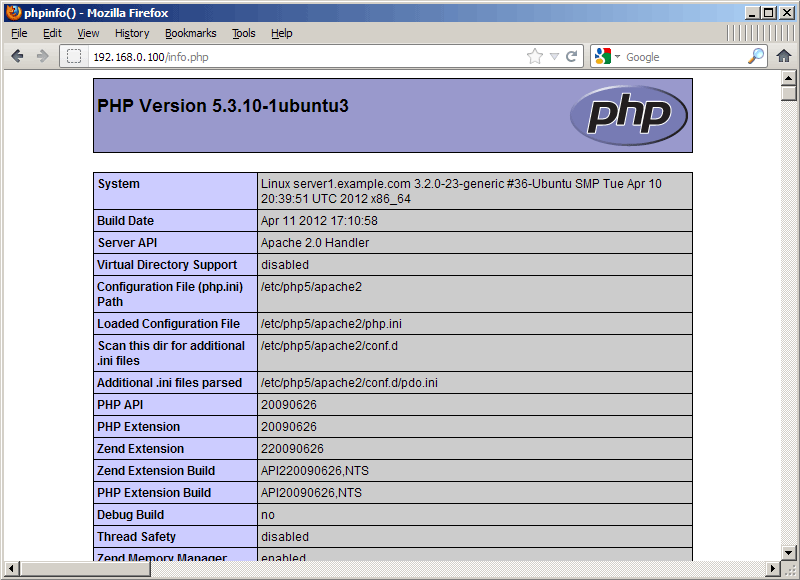
5.) To test if PHP works, create info.php in the root directory “/var/www/”:

nano /var/www/info.php

Then insert following lines:

<?php
phpinfo();
?>

Then press Ctrl+S to save file and Ctrl+X to exit. Then in browser go to http://192.168.0.100:info.php (replace ip to yours)

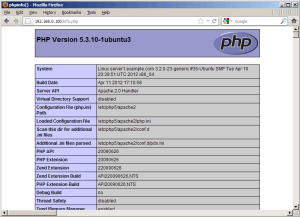
6.) To get Mysql support in PHP, install following packages:

apt-get install php-mysql php-curl php-gd php-intl php-pear php-imagick php-imap php-memcache php-ps php-pspell php-snmp php-sqlite3 php-tidy php-xmlrpc php-xsl

Then restart Apache2 service:

systemctl restart apache2

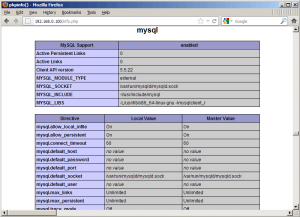
Go to or reload http://192.168.0.100/info.php in your browser:

7.) (Optional) Install phpMyAdmin, a web interface to manage Mysql Databases:

apt-get install phpmyadmin

After installed, go to http://192.168.0.100/phpmyadmin/, login with root and password you set in step 2.