Want to build a website? Then you need to setup a web server! Here I’ll show you how to install and setup LAMP pack on Ubuntu 12.04 LTS Server.
LAMP is a combination of Linux (OS), Apache HTTP Server, PHP (open-source scripting language), and MySQL (database software).
In this tutorial I use the hostname www.example.com with the IP address 192.168.0.100 as example.
1.) Login or Remote access your server as root, or run command to get root privileges.
sudo su
2.) Install Mysql:
apt-get install mysql-server mysql-client
You’ll be asked to set a password for root user of Mysql.
3.) Install Apache2:
apt-get install apache2
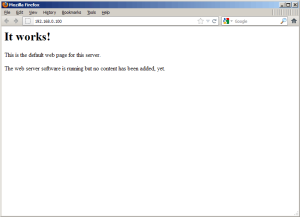
After installed, test if it works by going to http://192.168.0.100 in your web browser. Remember change the IP to yours.
The default default document root is /var/www/, and the configuration file is /etc/apache2/apache2.conf.
4.) Install PHP5:
apt-get install php libapache2-mod-php
Restart Apache2 service to get it works with PHP:
systemctl restart apache2
5.) To test if PHP works, create info.php in the root directory “/var/www/”:
nano /var/www/info.php
Then insert following lines:
<?php
phpinfo();
?>
Then press Ctrl+S to save file and Ctrl+X to exit. Then in browser go to http://192.168.0.100:info.php (replace ip to yours)
6.) To get Mysql support in PHP, install following packages:
apt-get install php-mysql php-curl php-gd php-intl php-pear php-imagick php-imap php-memcache php-ps php-pspell php-snmp php-sqlite3 php-tidy php-xmlrpc php-xsl
Then restart Apache2 service:
systemctl restart apache2
Go to or reload http://192.168.0.100/info.php in your browser:
7.) (Optional) Install phpMyAdmin, a web interface to manage Mysql Databases:
apt-get install phpmyadmin
After installed, go to http://192.168.0.100/phpmyadmin/, login with root and password you set in step 2.
