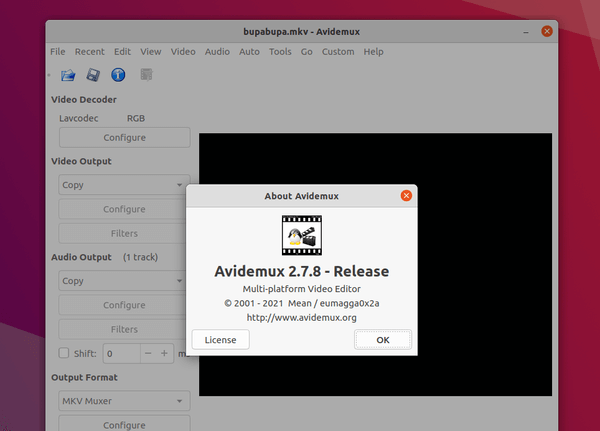
LiVES is a simple, yet powerful video editor and VJ tool. It allows you to combine realtime and rendered effects, streams and multiple video/audio files, and then encode to over 50 formats.
LiVES 2.2.0 was released a few days ago with new features, improvements and bug fixes. This tutorial is going to show you how to install it in Ubuntu 13.10 Saucy or Linux Mint 16 Petra via PPA.
What’s New in LiVES 2.2.0:
Add new avformat_decoder.
Optimisations for handling larger clips.
Use threading for pulling frames from video clips.
Much faster loading/saving of layouts in multitrack.
Fix crash in swscale when frame width is not multiple of 4.
Fix crash (regression) setting parameters in multitrack.
Fix breakage in multiple image loading.
Fix opening preview for quick opening clips.
Fix bug in “delete frames” for virtual clips.
Fix audio encoding in “Encode Selection”
Fixes for letterbox mode playback.
Compilation fixes for Debian Sid.
Various improvements to rte window.
Add “randomiser” data processing plugin.
Improvements to colour correction and tvpic effects.
Fix jack transport during playback (regression).
Fix for saving data connection mappings.
Implement multiple inputs per output in the data connector.
Optimised thread locking between audio and video effects threads.
Fix problems with setting defaults for colour values.
Decoder plugin fixes for ffmpeg 2.2 (needs further testing).
Preserve clip comments and renamed clip names between restarts (bugfix).
Small fixes for rfx_builder window.
Minor GUI improvements.
Add initial translation to Piemontese. (Simon Uslengh).
Updated translations to UK English, German, Russian and Ukranian.
Install LiVES:
For Ubuntu 13.10 and its derivatives, run commands below one by one in terminal (Ctrl+Alt+T) to install it from PPA:
The third release of Flowblade Nonlinear video editor has been released with a lot of new features and enhancements. In Flowblade 1.0:
Tools metaphor is used for editing instead of Edit Modes like before
Audio Mixer window with VU meter + gain and pan controls for all tracks and master out (Requires MLT 0.8.8)
Affine Blend compositor provides single point of control to create keyframed composites with both opacity and affine transform and all the standard blend modes (Requires Frei0r 1.4, which isn’t widely in repos)
Image sequences of numbered frames can be imported now as media
Preset rendering options for commonly used file types are made available to the user
Range Log panel enables user to save and name Mark In/Out ranges on media files. This is very useful when working with long files that have many areas of interest.
Marks can now be placed to identify positions on the timeline.
Single track rendered transitions for quick dissolves and wipes
Auto consolidate blanks, no more multiple blanks between clips after some edits
GUI Look’n’Feel was updated with over 20 new icons and new custom buttons
Other features and enhancements:
Updated application menu
Configurable Tabs position
Configurable Timecode display position
Keyboard shortcuts list window
“Centring” action for Compositor editors
TAB key switches between Timeline/Clip display on monitor
Keyboard shortcut CTRL+L for logging clip ranges
Arrow keys move source image in Compositor editors
Project events panel and persistent project events data
8 video/1 audio and 1 video/8 audio track layoutsn for sequences
Media objects are now displayed using large thumbnails with information overlays
Noise and EBUBars image producers
Bin panel is now resizable
Colgate white balance plugin
Tracks menu
Support for Copy/Paste in Title Editor
Runtime environment data can be saved into a file
Rename and Clip Color features added to Clip context menus
Make cut action available when working with trim edit tools
Image Grid filter
Audio information for clip is displayed with level data instead of waveform
Panel sizes are now persistent
UP/DOWN arrows move position to In/Out Marks and clip ends on Clip Monitor display
HOME/END keys move position to timeline start/end
Sync Parent feature GUI update
Timeline focus fixes to make keyboard shortcuts available better
M keyboard shortcut for adding markers
Sync frame offsets visible
Display selected range on timeline frame widget
Display selected range length for Clips under monitor
This has been tested on Ubuntu 13.04, Ubuntu 12.04 and Linux Mint 14, Linux Mint 15. Ubuntu 12.10, Ubuntu 11.10, Linux Mint 12, Linux Mint 13 and Debian 7 should work.
This tutorial shows how to install Cinelerra video editor in current Ubuntu 22.04 and Ubuntu 24.04.
Cinelerra is a free open-source video editor for Linux. It supports advanced composition operations such as keying and mattes, and many other professional functions depending on the variant.
Cinelerra has a few variants, including GG, CV, HV. The GG variant, which supports up to 8K video, and can also create DVDs and Blu-rays, is presently under active development and the only one that works in my case in current Ubuntu releases.
Download & Install Cinelerra GG
The GG edition now provides the official binary package for AppImage package.
1. Ubuntu does not support AppImage out-of-the-box since 22.04. To enable it, press Ctrl+Alt+T on keyboard to open terminal, then run command:
sudo apt install libfuse2
2. Then, select download the latest version of the AppImage from its website:
Scroll down in that page and click download the latest package. At the moment of writing, it’s “CinGG-20240229-x86_64.AppImage” (for modern Intel/AMD CPUs).
3. After downloaded the package, right-click on it in file manager, then click go to its “Properties” dialog.
Next, navigate to Permissions tab and click enable “Allow executing file as program”. Finally, click Run the AppImage file to launch the video editor:
4. Create an App icon for Cinelerra.
If you want to launch the video editor from start menu or Gnome ‘Show Apps’ screen just like other normal apps. Then, click launch text editor first.
When text editor opens, create a new empty file (if it does not open a new one), then write following lines into it:
IMPORTANT: In the lines above, you need to replace the value for “Exec”! In my case, I moved the AppImage file into my custom “Apps” folder in user home. So, it’s “/home/username/Apps/file-name.AppImage”. You have to change it to yours!
And for icon, you need to download one from web. Either .png or .svg file. Re-name to Cinelerra.png (or Cinelerra.svg depends on image type), and put it to “.local/share/icons” directory.
When done editing the text file, click “save” (or save as), then select save the file to .local/share/applications directory, whatever name as you want with “.desktop” extension.
If everything’s done properly, you’re able to search for and launch the video editor from menu a few moments later.
Uninstall Cinelerra GG
To uninstall the video editor, just delete the .AppImage file from your file manager. Then, also remove the .desktop file from ‘.local/share/applications’ directory, as well as the icon file from ‘.local/share/icons’.