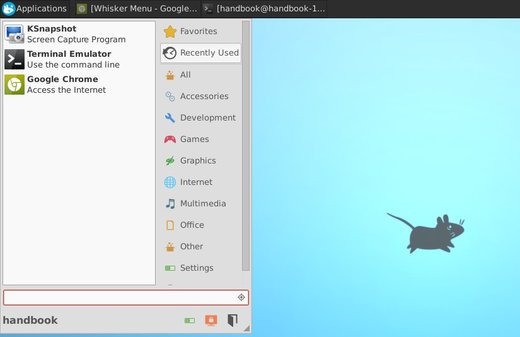
Whisker Menu for Xfce released v1.2.0 with more options and bugfixes. Here’s how to install it in XUbuntu 13.10, XUbuntu 13.04, Xubuntu 12.04, XUbuntu 12.10 and other Linux distributions.
Whisker Menu is an alternate application launcher for Xfce. With it, you can browser, search, and marked as favorites through all of your installed applications.
What’s New in version 1.2.0:
Fix popup script to show correct version information
Fix memory leak when reloading applications
Fix favorites and recent deleted when menu failed to load
Add option to load menu hierarchy
Add option to not include favorites in recently used
Add options to set custom commands
Add option to show recently used by default
Add option to position search entry next to panel button
Add option to position command buttons next to search entry
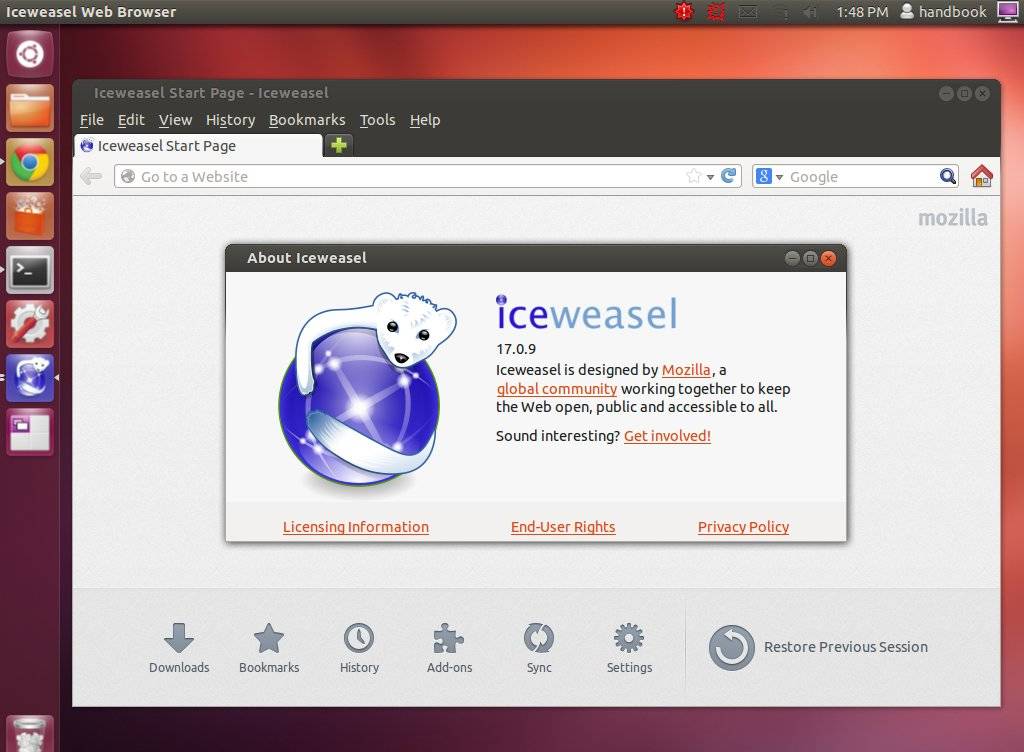
IceWeasel web browser is a fork from Firefox for the purpose: backporting of security fixes to declared Debian stable version and no inclusion of trademarked Mozilla artwork. Beyond that, they will be basically identical.
This simple tutorial shows you how to install IceWeasel 17 in Ubuntu 13.04 Raring and Ubuntu 12.04 Precise and their derivatives such as Linux Mint 13/15, Elementary OS Luna via PPA repository.
iceweasel 17 on Ubuntu 12.04
To get started, press Ctrl+Alt+T on your keyboard to open terminal. When it opens, run command below to add the PPA:
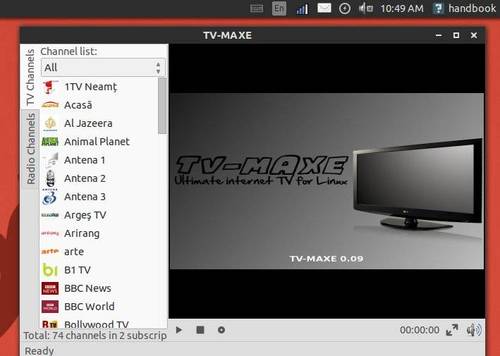
TV-MAXE is an app to watch TV stations and listen radio via different streams, such is SopCast. Now it’s available for Ubuntu 13.10, Linux Mint 16 in its PPA.
TV-MAXE has a large number of channels, both romanian and international:
ABC,    Acasă,    A and E TV,     Alfa Omega Movies,
Alfa Omega TV,     Alfa Omega Youth TV,
Animal Planet,    Antena 1,     Antena 2,
Antena3,    AXN,     AXN Crime,     AXN Sci-Fi
B1 TV,   BBC News,    BBC World
Biography channel,     Boomerang
Cartoon Network,   CBS,     CNBC,      CNN
Comedy Central,   Cosmos TV,       Dance TV
Digi Sport Plus,    Discovery Channel,    Discovery Science
Discovery Travel&Living,     Discovery World
Discovery ID,    Disney Channel,      DIVA International
DR1,     ESPN,    Eurosport,    Eurosport 2
Film4,     FOX 43,    FOX Sports,     France 24
France 24 (english),     GSP TV,    HBO
History Channel,    Hit Music TV,    Iaşi TV Life
Jurnal TV,  Kanal D,    KISS TV,    Lifetime Movie Network
Musicbox,    NatGeo Wild,   National Geographic
Naţional TV,    Nickelodeon,     OTV,     Prima TV
ProCinema,    Pro TV,    Pro TV Internaţional
Publika MD,     Realitatea TV,      Romstyle TV
Sony Entertainment,     Sport.ro,      Taraf TV
TBS,      TCM,      Tele'M Iaşi,     TNT
TV 1000,    TVM Piatra Neamţ
TVR 1,     TVR 2,     TvRM Cultural,     TvRM Educaţional
USA,    UTV,    Wgal 8
Also TV-MAXE allows you to listen to the following radio channels: BBC Radio 2
Europa FM, Impact FM, Kiss FM, Magic FM, Naţional FM, PRO FM, Radio Iaşi, Radio Intens, Radio România Actualităţi, Radio România Cultural, Radio Vocea Evangheliei, Radio ZU, Rock FM, Sky FM Dance, Sky FM Top Hits, Vibe FM.
Install TV-MAXE via PPA:
The latest TV-MAXE now is available in its PPA for Ubuntu 13.10, Ubuntu 13.04, Ubuntu 12.04, Ubuntu 12.10 and their derivatives, such as Linux Mint and Elementary OS.
To add the ppa, press Ctrl+Alt+T on your keyboard to open terminal. When it opens, run command below:
sudo add-apt-repository ppa:venerix/pkg
Then update system package lists and install the app:
This tutorial shows you how to install LEMP stack in Ubuntu 13.10. LEMP stands for Linux, Nginx (pronounced “engine x”), MySQL and PHP. The nginx project started with a strong focus on high concurrency, high performance and low memory usage. So it’s a good alternative to Apache webserver for building websites on low memory hosts.
Tutorial Objectives:
Install Nginx, Php5, MySQL (LEMP) in Ubuntu 13.10 Server
Enjoy!
To get started, first login your Ubuntu Server and follow the steps below:
1. Intall MySQL
MySQL is a database management system which stores and organizes references to the information the webserver needs.
To install it, run command:
sudo apt-get install mysql-server mysql-client
While the installing process, you’ll be asked to type a password for MySQL root user.
2. Install Nginx
Nginx is available in Ubuntu’s repository, run command below to install it:
sudo apt-get install nginx
Or you can install the latest stable version from Nginx PPA:
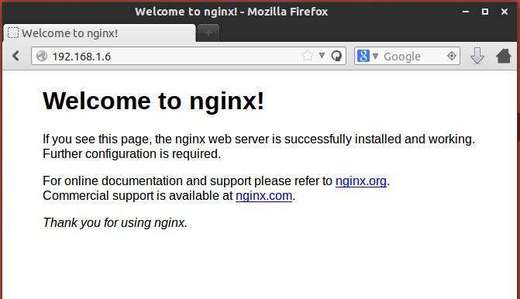
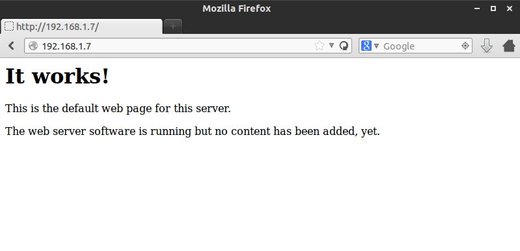
To check out if nginx is working, go to http://serverip:
nginx is working ubuntu 13.10
3. Install PHP5
PHP is a reflective programming language, which makes it possible for all these different parts to work together.
We can make PHP5 work in nginx through PHP-FPM, which is an alternative PHP FastCGI implementation with some additional features useful for sites of any size, especially busier sites.
Run command below to install php5-fpm:
sudo apt-get install php5-fpm
4. Setup Nginx
The nginx configuration is in /etc/nginx/nginx.conf, read this configuration example.
Now, let’s modify the default site example:
sudo vi /etc/nginx/sites-available/default
Here you can define root directory (to put WordPress files there), your site domain, as well as other settings. See the example below:
server {
	listen 80 default_server;
	listen [::]:80 default_server ipv6only=on;

	root /usr/share/nginx/html;
	index index.php index.html index.htm;

	# Make site accessible from http://localhost/
	server_name localhost;

	location / {

		try_files $uri $uri/ /index.php;

	}

	location /doc/ {
		alias /usr/share/doc/;
		autoindex on;
		allow 127.0.0.1;
		allow ::1;
		deny all;
	}

	#
	error_page 500 502 503 504 /50x.html;
	location = /50x.html {
		root /usr/share/nginx/html;
	}

	location ~ \.php$ {

		# With php5-fpm:
                try_files $uri =404;
		fastcgi_pass unix:/var/run/php5-fpm.sock;
		fastcgi_index index.php;
		include fastcgi_params;
	}

	# deny access to .htaccess files, if Apache's document root
	# concurs with nginx's one
	#
	location ~ /\.ht {
		deny all;
	}
}
After that, reload Nginx:
sudo service nginx reload
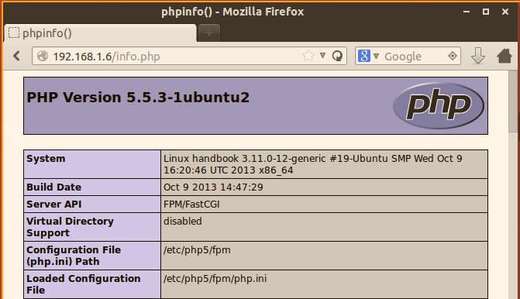
4. Check out if PHP is working
Create the test file:
sudo vi /usr/share/nginx/html/info.php
Add following lines and save the file:
<?php
phpinfo();
?>
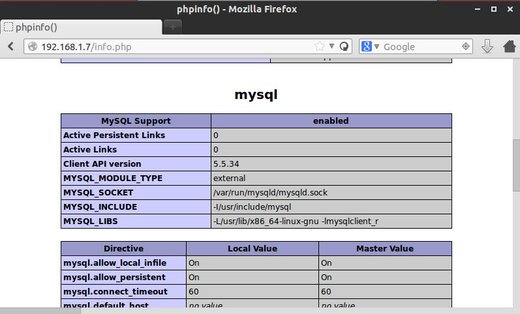
Go to http://serverip/info.php in client’s web browser and you’ll see:
php is working
5. Get MySQL working with PHP
Install Xcache, a free and open PHP opcode cacher for caching and optimizing PHP intermediate code, as well as other PHP modules:
This tutorial show you how to install LAMP in Ubuntu 13.10 Server. LAMP stands for Linux, Apache, MySQL, and PHP. It is a combination of these 4 that suitable for building high-availability heavy-duty dynamic web sites.
Linux is a Unix-like and POSIX-compliant operating system. Ubuntu is one of popular Linux distributions.
Apache is a HTTP web server, the most popular in use. It serves webpages when they’re requested by the web browsers. When you type an URL on your web server and press Enter, the pages you see on screen is most likely served by Apache webserver.
MySQL is a database management system now owned by Oracle Corporation. It stores and organizes references to the information the webserver needs.
PHP is a reflective programming language, which makes it possible for all these different parts to work together.
Tutorial Objectives:
Install LAMP Stack in Ubuntu 13.10 Server
Enjoy!
To get started, run single command below to install them:
sudo apt-get install lamp-server^
While the installing process, you’ll be prompt to set a password for MySQL root user.
To check out if Apache is working, type http://ubuntuserverip in client web browser or localhost in the local browser:
apache is working
To check out if PHP is working, run command below to create a test php file in root of Apache webserver directory:
sudo vi /var/www/info.php
Press i to start editing, and type in following lines:
<?php
phpinfo();
?>
After that, press Esc to exit editing. Press Shift + : and followed by wq and Enter to save the changes.
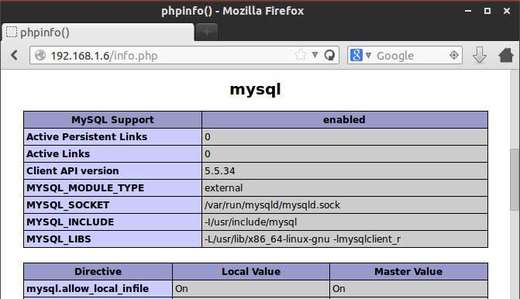
Now, type http://ubuntuserverip/info.php in client’s browser or localhost/info.php in local browser, you’ll see:
php & mysql is working
Scroll down to find out if there’s a section about Mysql, it means that Mysql is working too!
WordPress is a popular blogging tool and a content management system (CMS) based on PHP and MySQL. It’s free and open-source. In the steps below the lines that the user needs to enter or customize will be in red in this tutorial!
1. Create MySQL Database and User for WordPress
If you’re using LAMP, install PhpMyAdmin to get a graphical way setting your MySQL Database.
To install PhpMyAdmin, run command below in Ubuntu server:
sudo apt-get install phpmyadmin
Choose apache2 webserver while the installing process and say NO to “Configure database for phpmyadmin with dbconfig-common?”
Once installed, run commands below to get it working:
sudo sh -c 'echo "Include /etc/phpmyadmin/apache.conf" >> /etc/apache2/apache2.conf' && sudo service apache2 restart
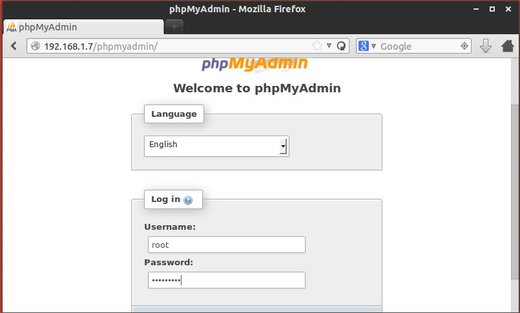
Now, go to http://UBUNTUSERVERIP/phpmyadmin/ in your client’s browser and type in root and the password you set when MySQL was installed to login.
phpmyadmin login
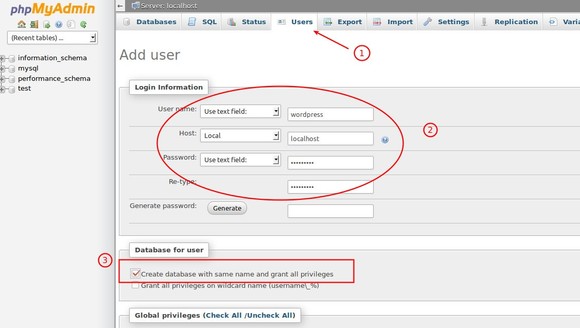
Follow the steps below to create Database and user:
Step 1 – Click on Users then click Add User.
Step 2 – Type in your desired User name (wordpress is a good one) and ensure Use text field is selected. Ensure Host is set to Local from the drop down list and the text box will change to localhost and enter a Password and then confirm it in the Re-type box. Ensure the Password Use text field is also selected.
Step 3 – Click on Create database with same name and grant all priviliges.
Step 4 – Click on Go.
phpmyadmin create user and database
If you’re using LNMP (Linux, Nginx, MySQL, PHP), follow the steps below to create user & database (both are wordpress in commands below).
Step 1 – Run command in Ubuntu Server to log into MySQL Shell with MySQL root password:
mysql -u root -p
Step 2 – Create database, here I named it wordpress:
CREATE DATABASE wordpress;
Step 3 – Create a new user also named wordpress:
CREATE USER wordpress@localhost;
Step 4 – Set a password for this user:
SET PASSWORD FOR wordpress@localhost= PASSWORD("12345678");
Step 5 – Grant all privileges to the new user:
GRANT ALL PRIVILEGES ON wordpress.* TO wordpress@localhost IDENTIFIED BY '12345678';
Step 6 – Refresh MySQL:
FLUSH PRIVILEGES;
Exit MySQL shell:
exit
2. Download WordPress
On Ubuntu Server, run command below to download the latest wordpress package from its official site:
cd && wget http://wordpress.org/latest.tar.gz
Then uncompress it via command below:
tar -xzvf latest.tar.gz
3. Setup WordPress Configuration
First copy the sample wordpress configuration file into a new config file:
cd && cp wordpress/wp-config-sample.php wordpress/wp-config.php
Then edit the file with command below:
vi wordpress/wp-config.php
Find the section that contains the field below and substitute in the correct name for your database, username, and password:
// ** MySQL settings – You can get this info from your web host ** //
/** The name of the database for WordPress */
define(‘DB_NAME’, ‘wordpress‘);
/** MySQL database username */
define(‘DB_USER’, ‘wordpress‘);
/** MySQL database password */
define(‘DB_PASSWORD’, ‘12345678‘);
Press i to start editing, and Esc to end editing. Finally press Shift+: followed by wq and Enter to save and exit the file.
4 Copy the files
Now move WordPress files to webserver root directory:
For LAMP:
cd && sudo rsync -avP wordpress/ /var/www/
For LNMP:
cd && sudo rsync -avP wordpress/ /usr/share/nginx/html/
Give ownership of the directory to the apache/nginx user:
cd /var/www/  ###For nginx: cd /usr/share/nginx/html/

sudo chown www-data:www-data * -R

sudo usermod -a -G www-data www-data
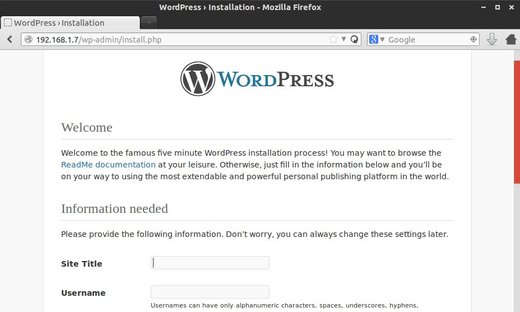
5. Install WordPress:
Now in your client’s web browser go to http://UBUNTUSERVERIP/wp-admin/install.php and install your wordpress site:
installing wordpress
Once done, if you still get “It Works!” Apache page. Run command below to edit dir.conf:
sudo vi /etc/apache2/mods-enabled/dir.conf
You will see a line of index files (index.html, index.php, index.cgi, etc) under the DirectoryIndex setting. Add index.php as the first item in the list.
Mixxx is a digital DJ system, where Wave, Ogg, FLAC and MP3 files can be mixed on a computer for use in live performances. Filters, crossfader, and speed control are provided. Mixxx can sync the 2 streams automatically, using an algorithm to detect the beat.
The default Mixxx in Ubuntu repository is v1.10 while the latest has reached v1.11.0 with many great new features, bug fixes and performance improvements! This tutorial shows you how to install Mixxx 1.11.0 in Ubuntu 13.10 Saucy Salamander or Linux Mint 16 Petra via PPA.
Here’s the skinny on all the new features in Mixxx 1.11.0:
Colored, 3-band Waveforms
Don’t miss a beat. These waveforms make every kick, snare, and thumping beat stand out.
Brand New Beat Detector
With a brand new beat detection system based on the latest academic research at Queen Mary University, Mixxx’s beat detection is now deadly accurate. This means your loops, hotcues, and beatsyncing will be spot-on.
HID and Bulk Controller Support
Mixxx now supports non-MIDI devices using its powerful scripting system.
Mixxx 1.11.0 comes with HID presets for the following devices:
EKS Otus
Traktor Kontrol F1
Hercules DJ Console Mk1
Hercules DJ Console Mk2
Hercules DJ Control MP3 e2 (driver no longer necessary on Linux)
Nintendo Wiimote
Pioneer CDJ 850/900/2000
Sony SixxAxis
Session History
Whether you need to report your setlists to ASCAP or just remember the tracks you played last night, the new Session History feature keeps track of every tune you drop so that you don’t have to.
Beatloop Rolls
This stunning new effect works just like a beatloop except when you release the button the deck jumps to where it would have been if you hadn’t started the loop. Try it out by right-clicking on a beat-loop button.
Preview Deck
A highly-requested feature, the new preview deck allows you to preview tracks in your headphones without having to load them into a main deck. Just click preview on any track in the library and it will start to play in your headphones.
Advanced Search
The library search box received some much-needed love. Try out these example queries:
bpm:100-120 rating:>4
All tracks between 100 and 120BPM with rating greater than 4.
artist:”Aphex Twin”
All tracks with “Aphex Twin” in the artist column.
Now you can customize the crossfade period, re-queue tracks instead of removing, and more.
Point-and-Click MIDI Mapping
Getting your controller mapped is now easier than ever. Just click on the button or knob you want to map in Mixxx and then wiggle the control on your MIDI controller to wire it up.
New Sample Grid skin
With 16 sample decks, this skin is perfect for radio DJs and advanced beat-jugglers alike.
Time Widgets
Skins now show the time so you can keep your eye on the clock while in full-screen.
Sample Deck Improvements
Sample decks now have sync buttons.
When there is room skins now include more sample decks.
Nvidia has released the Beta driver 331.17 for Linux with bug fixes and new NVIDIA Unified Memory kernel module which provides support for the new Unified Memory feature in an upcoming CUDA release.
What’s New in Nvidia 331.17:
Fixed a bug that prevented configuration files containing application profiles from being loaded when directories were present in the application profile configuration search path.
Deferred initialization of libselinux in the NVIDIA OpenGL driver, in order to avoid a problem where libselinux might not be ready when the NVIDIA libGL shared library is first loaded.
Added nvidia-uvm.ko, the NVIDIA Unified Memory kernel module, to the NVIDIA Linux driver package. This kernel module provides support for the new Unified Memory feature in an upcoming CUDA release.
How to install Nvidia 331.17
For Ubuntu 14.04, Ubuntu 13.10, Ubuntu 13.04, Ubuntu 12.04, Ubuntu 12.10 and Linux Mint users, you can easily install this driver from Xorg edge PPA.
Press Ctrl+Alt+T on your keyboard to open terminal. When it opens, run commands below one by one:
For other Linux distributions, such as Fedora, OpenSUSE, etc. You can download and install it from the official installer. Here are the links from Nvidia website:
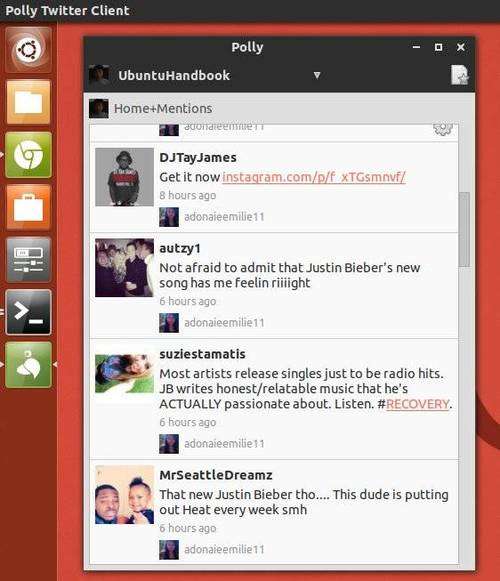
This tutorial shows how to install Polly Twitter Client via PPA in Ubuntu 14.04, Ubuntu 13.10, Ubuntu 13.04, Ubuntu 12.04, Linux Mint 13/14/15/16 and Elementary OS.
Polly is an open source Linux Twitter client designed for multiple columns of multiple accounts. It is now at version 0.93.11 (pre-alpha 3.11).
Most notable in this release is the addition of the beautiful Numix icon theme, but there are also fixes for Fedora packaging, some link optimizations, and the addition of an internal keyring module to avoid incompatibility with recent distros.
Install Polly via PPA:
Press Ctrl+Alt+T on your keyboard to open terminal. When it opens, run command below to add the Polly PPA: