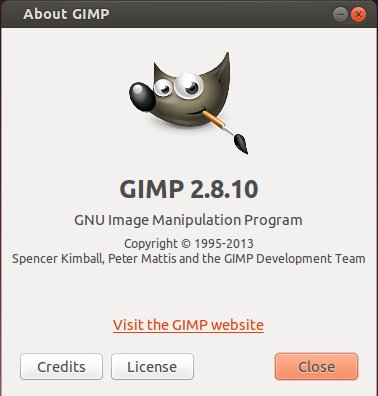
The popular image editing tool GIMP (GNU Image Manipulation Program) now is at version 2.8.10 stable. You can easily upgrade to the latest released via PPA. Here’s how to do it in Ubuntu 14.04 Trusty, Ubuntu 13.10 Saucy, Ubuntu 13.04 Raring, Ubuntu 12.10 Quantal, Ubuntu 12.04 Precise and their derivatives such as Linux Mint, Pear OS, Elementary OS Luna.
See What’s New in GIMP 2.8.10:
Core:
Set manifest as Windows 8 compatible
GUI:
Indicate if a file was exported in the Quit dialog
Add shortcuts and hint labels to the close and quit dialogs that make closing and quitting easier and more consistent
Rename the File->Export menu labels to match Save/Save as
Fix keyboard shortcuts on OSX Mavericks
Don’t open lots of progress popups when opening many files
Correctly restore the hidden state of docks in single window mode
Libgimp:
Fix exporting an image consisting of a single layer group
Don’t attempt to pick transparent colors
Plug-ins:
Fix crash in LCMS plugin if RGB profile was missing
General:
Fix compile on NetBSD (missing -lexecinfo)
Bug fixes
Translation updates
Install GIMP via PPA:
We can easily and always get the latest version of GIMP from otto06217’s PPA because the maintainer promised the PPA will never die.
To add the PPA, press Ctrl+Alt+T on keyboard to open terminal. When it opens, run commands below:
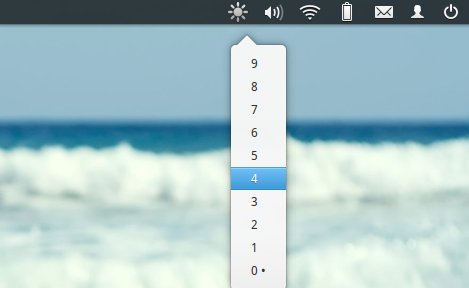
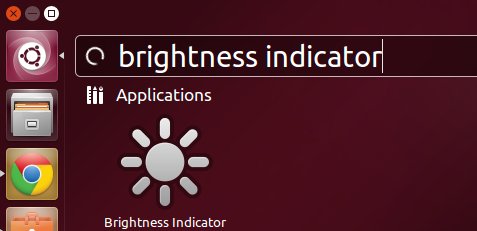
Want to control screen brightness through an indicator applet on panel? Well, you may want this app if your Fn key does not work properly.
Brightness indicator allows to change screen brightness by using the indicator menu or the scroll wheel of your mouse over the indicator icon. It’s inspired by the original Gnome brightness applet.
UPDATE: PPA has updated for Ubuntu 13.10, and Ubuntu 14.04. Run below commands one by one in terminal:
The PPA does not update the packages for Ubuntu 13.10 Saucy, but we can use the one for old releases. To get started installing this applet, follow the steps below:
1. Press Ctrl+Alt+T on keyboard to open terminal. When it opens, run command below to download DEB for raring:
Alternatively, download the package from launchpad page. Install the required package python-appindicator from Ubuntu Software Center and then double-click to install the brightness indicator package.
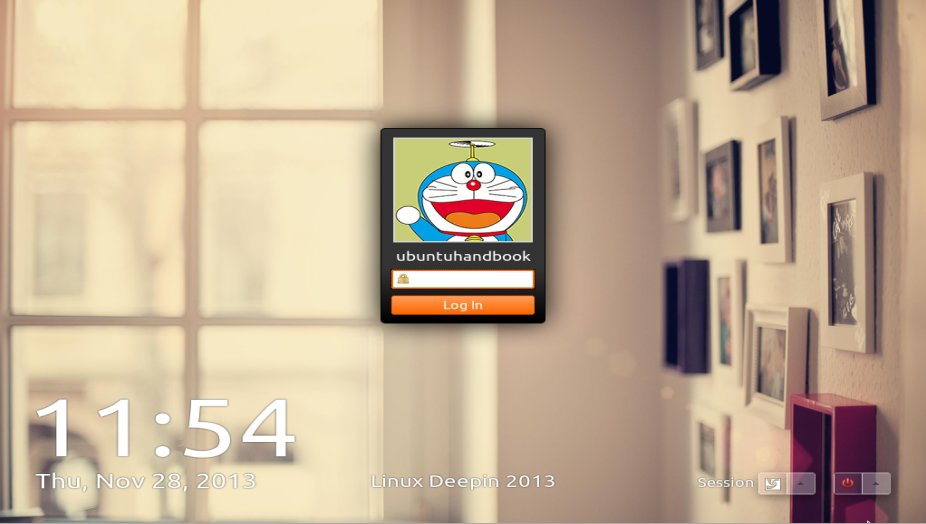
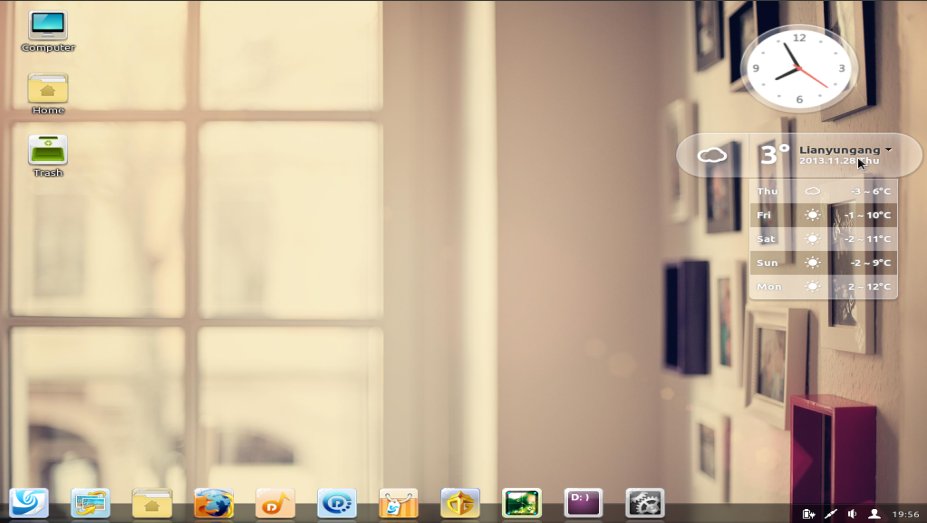
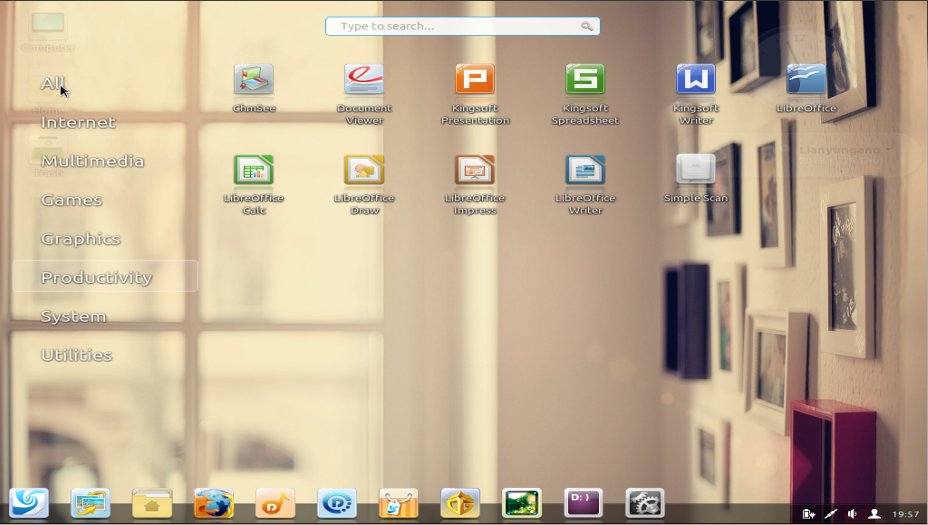
Linux Deepin 2013, Ubuntu 13.04 Raring based Linux distribution was released today. It brings Game Center, Face Recognition, Deepin Terminal and other new features, improvements as well as bug fixes.
As you may know, Linux Deepin (previously Hiweed Linux) uses a highly customized GNOME Shell as the default desktop environment. It was initially created for Chinese users only, but there are now ISO images for English language.
What’s New in Linux Deepin 2013:
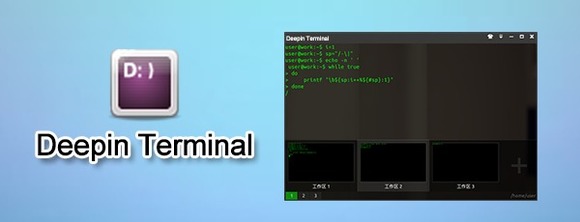
Deepin Terminal is shipped as the default terminal emulator for Linux Deepin 2013. The features of Deepin Terminal include vertical and horizontal split, workspace switching, SSH connection tool, font resizing and background transparency adjustment, etc.
Linux Deepin Terminal
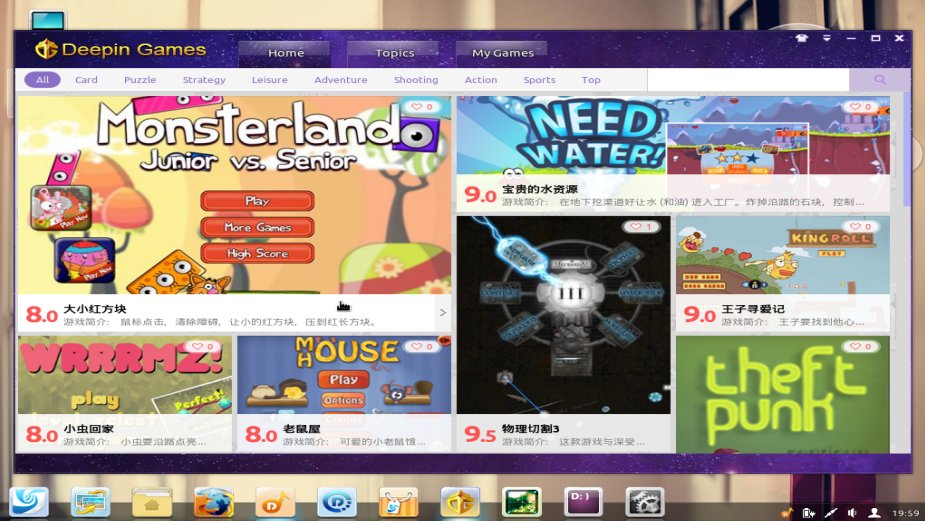
Deepin Game Center is a platform for online flash games. It aspires to give flash game lovers a one-stop experience. Unfortunately, games are mostly in Chinese.
Linux Deepin Game Center
Other changes:
In Linux Deepin 2013, you can choose to log in using face recognition.
An improved Deepin Software Center
The improved notification center no longer prompt for blacklisted application
Resize, move DSnapshot selected area using arrow keys.
notification center no longer prompt for blacklisted applications.
the default color of window manager changed from blue to black.
Improved power management
the “Windows” key to bring up launcher
Improved automount of removable devices
Files dragged from removable devices to hard disk will be copied rather than moved.
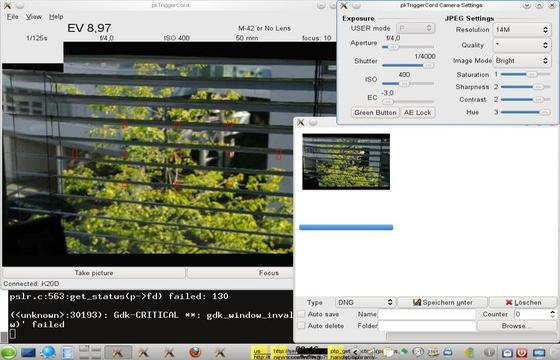
This tutorial shows you a tethered camera control tool pkTriggerCord which is base on PKRemote. After you connect the camera to your PC with the USB cable, you can control the camera from pkTriggerCord, such as read status information, change settings, and take pictures. The pictures are stored in the camera’s buffer and can be downloaded to the PC. Pictures are not written on the SD card of the camera.
Currently supported Cameras are:
Pentax K-x
Pentax K10D (Samsung GX-10)
Pentax K20D (Samsung GX-20)
Pentax K200D
Pentax K-7
Pentax K-r
Pentax K-5
Pentax K-m / K2000
Pentax K-30
Pentax K-01 (bugs)
Pentax K-5 II / K-5 IIs NEW
Install pkTriggerCord in Ubuntu via PPA:
Press Ctrl+Alt+T on keyboard to open terminal. When it opens, run commands below one by one to install the tool from PPA:
SuperTuxKart, a Free 3D kart racing game recently released v0.8.1 with Wiimote support, new karts, modes and track.
This tutorial is going to show you how to install this new release in Ubuntu 13.10, Ubuntu 13.04, Ubuntu 12.04 and enjoy the game.
New features in SuperTuxKart:
New track ‘STK Enterprise’
Updated tracks ‘Old Mine’, ‘Around the Lighthouse’ and ‘Zen Garden’
New modes ‘Soccer’ and ‘Egg Hunt’
New karts ‘Xue’ and ‘Sara’
Updated ‘Beastie’ kart
Wiimote support (for most Wiimotes; check supertuxkart.net/wiimote for instructions and compatibility)
Added tutorial
Added new ‘SuperTux’ difficulty
New bubblegum shield defensive weapon
New combined speedometer and nitro meter
Added ability to filter add-ons
Updated nitro models
Added ability to save and resume Grand Prix
Improved skid marks and particle effects
SuperTuxKart 0.8.1 official video:
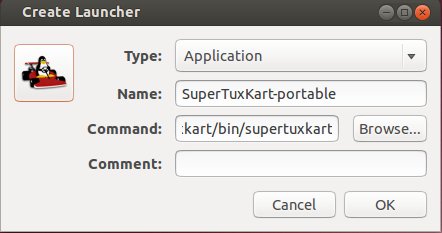
Install SuperTuxKart 0.8.1:
First check out system type (32 bit or 64 bit) under System Settings -> Details. Then download the portable version from the official download page for Linux.
Then extract the package and run executable from result folder/bin/
To create a launcher for SuperTuxKart 0.8.1, press Ctrl+Alt+T on keyboard to open terminal. When it opens, run command below to install required packages:
gscan2pdf is a GUI to ease the process of producing PDFs from scanned documents. You scan one or several pages in with File/Scan, and create a PDF of selected pages with File/Save PDF.
gscan2pdf 1.2.0 was released recently with various bug fixes and translation updates. This tutorial shows how to install it via PPA in Ubuntu 13.10, Ubuntu 13.04, Ubuntu 12.04, Ubuntu 10.04 and Linux Mint.
gscan2pdf 1.2.0 changelog:
Don’t lose extension if user-defined tool converts pnm to pbm, ppm or pgm.
Allow thread to import different number of pages than requested. Fixed import of pdf no longer working
Take the resolution directly from the scanner when scanning rather than assuming that the system value is up-to-date.
Fixed UTF8 handling with gocr
Fixed import existing multipage tif file loads only the first one
Actually change the device when the device combobox is changed.
Show/hide options in CLI frontends via Edit/Preferences
Fixed Thunderbird detection (for send email) does not work reliably on XFCE
Fixed bug opening a session file from multiple sessions
Added option in Edit/Preferences to automatically open the scan dialog in the background on program start.
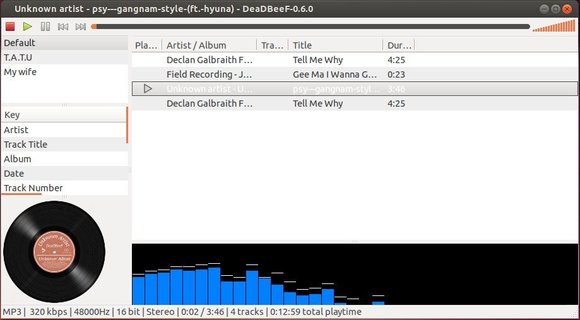
The open-source DeadBeef music player recently released v0.6.0 with great new feature: GUI layout designer. It allows to customize the user interface by splitting the main window and filling with button, spectrum, scope, album art display, selection properties, playlist, playlist browser, etc.
Below is my customized DeadBeef interface. You can design it to whatever you like.
customized deabeef music player in Ubuntu 13.10
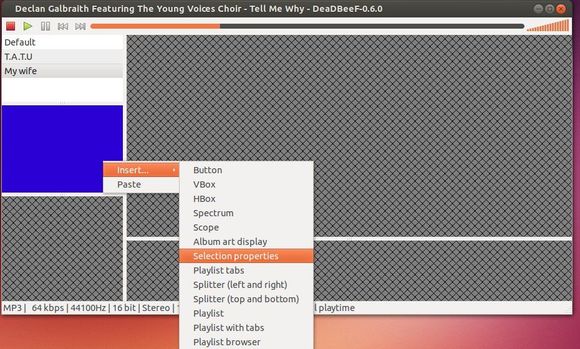
How to use Layout Designer
First enable design mode under menu ‘View > Design Mode’. Right-click on main window and choose ‘Insert -> Splitter (left and right) or (top and bottom)’ to split the window. When your splitter layout has loaded right click on each box in turn and add item to it.
deadbeef 0.6 design mode
Once done, disable design mode from the menu to apply changes.
What to do if you want to revert Deadbeef back to default layout?
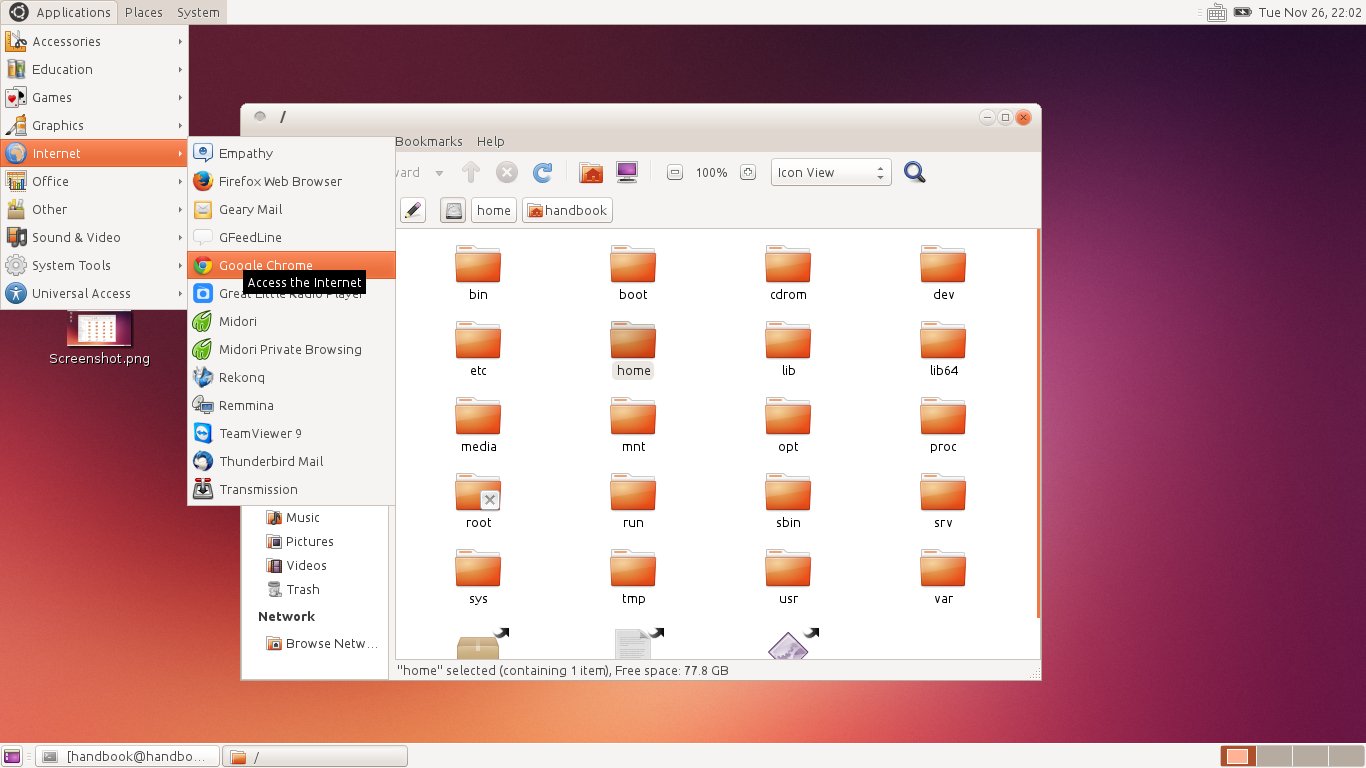
Well, in file browser go to user home -> .conf (press Ctrl+H to view hidden folders), remove the whole deadbeef folder.
Full changes in Deadbeef 0.6.0:
gui layout designer, with a set of widgets to choose from (View -> Design mode, then use right click)
new API for creating GUI extension plugins
visualization support, spectrum analyzer and scope widgets
new hotkeys system, which adds local hotkeys, and many more actions to choose from
playlist browser widget: a vertical alternative to playlist tabs
album art viewer widget
selection properties widget
button widget: put custom buttons to main window, and assign any actions to them
showing seek time in the bar during seeking
added worldofspectrum downloader to artwork plugin (for AY tunes)
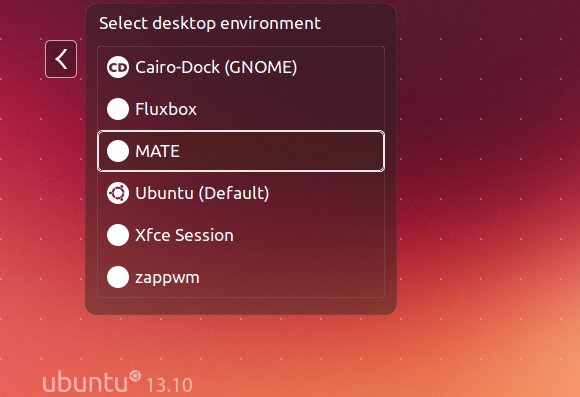
Gnome 2 Desktop was the default in Ubuntu (10.04 Lucid and earlier). If you would like to install this classic DE in Ubuntu 13.10 Saucy, try MATE, which is a fork of GNOME 2, aims to preserve the classic desktop metaphor.
NOTE: If you just want a classic Gnome style panel and app menu, search for and install gnome-session-fallback in Ubuntu Software Center and log out and back in with Gnome Flashback session.
First take a look at MATE 1.6:
MATE calssic gnome 2 menu
MATE gnome 2 panel items
To install MATE desktop environments in Ubuntu 13.10, follow the steps below:
1. Press Ctrl+Alt+T on keyboard to open terminal. When it opens, run commands to add MATE repository:
Stunt Rally is an open-source VDrift and OGRE based racing game with track editor. Stunt Rally 2.2 was released recently with many new features and bug fixes. Here’s how to install it in Ubuntu 13.10 Saucy.
What’s New in Stunt Rally 2.2:
146 tracks (19 new)
Game
Challenges (new game mode)
Short series of tracks. Only the best drivers will succeed.
Drive with no mistakes to win bronze,silver or gold prize.
Normal simulation, no driving aids.
Multiplayer updated
Host can press new game and continue on other track (no need to quit and create)
Game info text, track info now on track tab
Hud
New layout (gauges on right, minimap on left)
Times bar shows current points and time difference each checkpoint
Lap result window (last, best times, final points) on right
Input checkbox to bind 1 axis to both throttle and brake
Rocks with better collision (triangle mesh)
Better water and mud particles
Damage repair each lap option
Auto camera change in loops (by marking checkpoints in editor, key 7)
Common
Gui reworked, more icons, also on Input tab
Graphics presets now on Screen tab (need to quit after change)
All sliders have default value, press RMB on slider to reset
Other
New objects for caves, pipe obstacles, column for rocks
New loading screens
Tire force circles visualization
Separated differential settings in .car, center of mass length offset, better TW handling
Road total on-pipe percentage (need to mark segments in editor, key 8)
Road stats banked angle average and max
Editor
Some edit fields now also with slider and sliders with edits
Checkpoint radius restrictions (1 to 2.5 on terrain, constant on bridges and pipes), force with ctrl
Objects
Selection mark (glow)
Better mouse picking
Selection scale, rotate (only simple works)
Gui revamp
Split tabs into Track window, Grasses tab, Settings on 3 tabs
The game requires package ttf-liberation which is available in all other Ubuntu releases except Ubuntu 13.10. Don’t know why, but you can download it from:
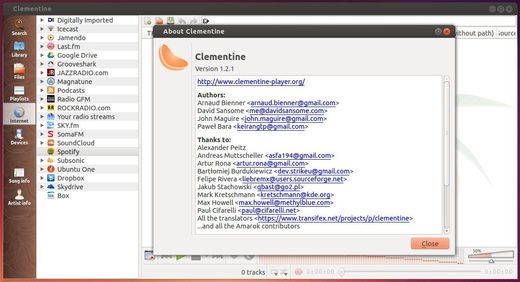
Clementine, Amarok 1.4 inspired music player recently released v1.2.1 with important bug fixes. They are network remote issues, login failures with box.com, and Spotify downloader button not shown issue.
The official changelog:
Fix library download in the network remote.
Fix removing songs from playlist in the network remote.
Fix login failures with box.com.
(Mac OS X) Add a workaround for a weird font issue on 10.9.
(Linux) Fix a typo that would prevent the Spotify downloader button from ever being shown.
If you’re using Clementine 1.2, it’s strongly recommended to upgrade and here’s how:
1. For Ubuntu 13.04, Ubuntu 12.04, Ubuntu 12.10, Ubuntu 10.04 and their derivatives, such as Linux Mint 13/14/15, Pear OS 7/8, Elementary OS Luna:
Press Ctrl+Alt+T on keyboard to open terminal and then run commands below one by one to install it and receive updates from PPA: