The first set of beta builds of Ubuntu 14.04 are now available for download in 8 different ‘flavors’, including:
Kubuntu 14.04 Beta 1
Ubuntu GNOME 14.04 Beta 1
Xubuntu 14.04 beta 1
Lubuntu 14.04 beta 1
Edubuntu 14.04 beta 1
Ubuntu Kylin 14.04 beta 1
Ubuntu Cloud 14.04 beta 1
Ubuntu Studio 14.04 beta 1
According to the Ubuntu 14.04 LTS release schedule, the next beta will be released on March 27th. After the Release Candidate (April 10th), the Ubuntu 14.04 final release will be available on April 17th.
This simple tutorial is going to show you how to easily install Oracle Java (JDK) 6, 7, or 8 in Ubuntu 14.04 Trusty Tahr via PPA.
There’s a Launchpad PPA (Personal Package Archive) maintained by webupd8.org, a popular Ubuntu Linux blog, which provides the most recent installers to automatically download and install Oracle Java JDK6 / JDK7 / JDK8 from oracle website. Note there are no actual Java files in this PPA.
To get started:
Press Ctrl+Alt+T on your keyboard to open a terminal window. When it opens, copy and paste the command below and hit enter. Input your user password when prompts and it will add the PPA repository into your system.
sudo add-apt-repository ppa:webupd8team/java
After that, update package lists via:
sudo apt-get update
To install Oracle Java 8, run:
sudo apt-get install oracle-java8-installer
Change the number 8 to 6 (or 7) in the code to install Java 6 (or 7).
While installation, you’ll be asked to agree the license and then the installer start downloading Java file from oracle website and install it on your system.
To set the default Java, run:
sudo apt-get install oracle-java8-set-default
Also change number 8 to the Java version you want.
Finally check whether everyting is OK:
java -version
It will output something like below:
java version “1.7.0_60”
Java(TM) SE Runtime Environment (build 1.7.0_60-b19)
Java HotSpot(TM) 64-Bit Server VM (build 24.60-b09, mixed mode)
The photo management software digiKam 4.0.0 has reached its third beta release just a few hours ago. There will be also beta4 and RC releases, and the digiKam 4.0.0 final will be released on May 11.
According to the release notes, following new features will be added in this version:
A new tool dedicated to organize whole tag hierarchies. This new feature is relevant of GoSC-2013 project from Veaceslav Munteanu. This project include also a back of Nepomuk support in digiKam broken since a while due to important KDE API changes. Veaceslav has also implemented multiple selection and multiple drag-n-drop capabilities on Tags Manager and Tags View from sidebars, and the support for writing face rectangles metadata in Windows Live Photo format.
A new maintenance tool dedicated to parse image quality and auto-tags items automatically using Pick Labels. This tool is relevant to anotherGoSC-2013 project from Gowtham Ashok. This tool require feedback and hack to be finalized for this release.
Showfoto thumbbar is now ported to Qt model/view in order to switch later full digiKam code to Qt5. This project is relevant to another GoSC-2013 project from Mohamed Anwer.
A lots of work have been done into Import tool to fix several dysfunctions reported since a very long time. For example, The status to indicate which item have been already downloaded from the device is back. Thanks to Teemu Rytilahti and Islam Wazery to contribute. All fixes are not yet completed and the game continue until the next beta release.
This release is now fully ported to Qt4 model-view and drop last Q3-Support classes. The last pending part was Image Editor Canvas ported and completed by Yiou Wang through this GoSC-2013 project. In the future, port to Qt5 will be easy and quickly done, when KDE 5 API will stabilized and released.
Install:
Besides building digiKam 4.0 from the source tarball. Ubuntu 13.10 Saucy users can install the beta release from the third-party PPA.
Press Ctrl+Alt+T on your keyboard to open a terminal window. When it opens, run the commands below to add the digiKam Beta repository:
There’s also a stable PPA created by the maintainer. It will provide the digiKam 4.0.0 final build for Ubuntu 13.10 Saucy and Ubuntu 14.04 Trusty. To add this PPA, run:
sudo add-apt-repository ppa:msylwester/digikam
After adding the PPA, run the commands below to update package lists and install digiKam:
sudo apt-get update

sudo apt-get install digikam
That’s it. Check out the PPA packages on Launchpad page.
This simple tutorial shows how to install the latest stable or development Pinta release in Ubuntu 14.04 Trusty Tahr.
As you may know, Pinta is a free, open source drawing/editing program modeled after Paint.NET. Its goal is to provide users with a simple yet powerful way to draw and manipulate images on Linux, Mac, and Windows. Pinta is available in Ubuntu Software Center by default, but it’s a little old.
Install Pinta Stable:
Press Ctrl+Alt+T on keyboard to open the terminal. When it opens, run the commands below one by one:
sudo add-apt-repository ppa:pinta-maintainers/pinta-stable

sudo apt-get update

sudo apt-get install pinta
Previous commands will add the official Pinta Stable PPA and install the latest build (so far it’s version 1.4) in your system.
Install Pinta Development
Also open a terminal window and run the commands below one by one:
sudo add-apt-repository ppa:pinta-maintainers/pinta-daily

sudo apt-get update

sudo apt-get install pinta
This will install Pinta 1.5 dev in your system from the Pinta Daily build PPA.
Linux Kernel 3.13.5 has been announced today, February 23, by the famous kernel developer Greg Kroah-Hartman. This release brings various important improvements and fixes, such as architecture updates (ARM, PowerPC, x86 and s390), and assorted fixes and improvements for the Intel i915 and Radeon drivers. For details, see the changelog.
Below steps will teach you how to install or upgrade to this kernel release in Ubuntu 14.04, Ubuntu 13.10, Ubuntu 12.10 and Ubuntu 12.04.
1. Download the .deb packages from THIS PAGE. Or, press Ctrl+Alt+T on keyboard to open the terminal and run below commands instead:
For 32 bit system:
cd Downloads && wget http://kernel.ubuntu.com/~kernel-ppa/mainline/v3.13.5-trusty/linux-headers-3.13.5-031305-generic_3.13.5-031305.201402221823_i386.deb

wget http://kernel.ubuntu.com/~kernel-ppa/mainline/v3.13.5-trusty/linux-headers-3.13.5-031305_3.13.5-031305.201402221823_all.deb

wget http://kernel.ubuntu.com/~kernel-ppa/mainline/v3.13.5-trusty/linux-image-3.13.5-031305-generic_3.13.5-031305.201402221823_i386.deb
For 64 bit system:
cd Downloads && wget http://kernel.ubuntu.com/~kernel-ppa/mainline/v3.13.5-trusty/linux-headers-3.13.5-031305-generic_3.13.5-031305.201402221823_amd64.deb

wget http://kernel.ubuntu.com/~kernel-ppa/mainline/v3.13.5-trusty/linux-headers-3.13.5-031305_3.13.5-031305.201402221823_all.deb

wget http://kernel.ubuntu.com/~kernel-ppa/mainline/v3.13.5-trusty/linux-image-3.13.5-031305-generic_3.13.5-031305.201402221823_amd64.deb
2. Install these .deb packages by running the below command:
cd Downloads && sudo dpkg -i linux-headers-3.13.5-*.deb linux-image-3.13.5-*.deb
Once installed, restart your computer and done.
NOTE: If you’re running a proprietary video driver, you may need to re-build or even re-install to get it work with the new kernel.
If for some reason this kernel release doesnt work properly for you, reboot into previous kernel (Grub -> Advanced -> select previous kernel) and run this command to remove Linux Kernel 3.13.4:
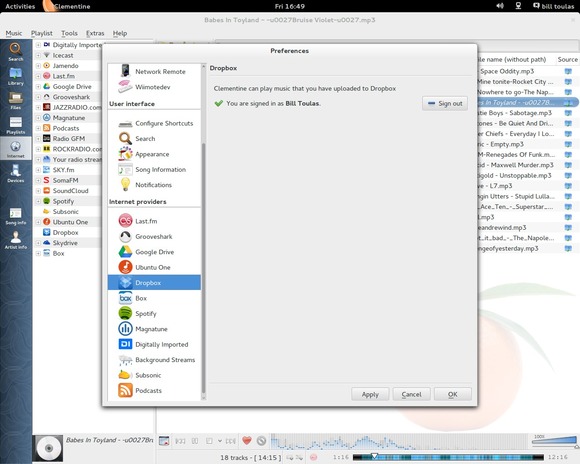
This tutorial will show you how to install the latest Clementine music player and library organizer in Ubuntu 14.04 Trusty Tahr.
As you may know, Clementine is a multiplatform music player inspired by Amarok 1.4, focusing on a fast and easy-to-use interface for searching and playing your music. Since version 1.2, you’re able to control Clementine remotely from an Android device and listen to your music stored in Box, Dropbox, Onedrive and Ubuntu One. Clementine 1.2.2 is the second update with following changes:
(Android Remote) Add kittens support.
Rename SkyDrive to OneDrive.
Don’t include the user’s IP address in the log (from the network remote settings dialog).
(Debian) Fix a bug with HTTPS logins to all cloud storage providers.
(Mac OS X) Fix a bug in the workaround for a weird font issue on 10.9.
(Mac OS X) Fix rendering of source icons on retina displays.
(Android Remote) Don’t advertise songs that aren’t available.
(Android Remote) Fix playing songs with special characters in filenames.
Install:
The official download page provides DEB packages for all supported Ubuntu releases, including Ubuntu 14.04. Just download the package for your Ubuntu and OS type, and install it via Gdebi (recommended, it’s available in Software Center) or Ubuntu Software Center.
If you would like to keep the player update-to-date by regular system update, you may add the Clementine PPA (check out the PPA in launchpad page).
Press Ctrl+Alt+T on keyboard to open the terminal. When it opens, run:
The latest Linux Kernel has reached Kernel 3.13.4. This tutorial is going to show you how to install or upgrade to this kernel in Ubuntu 14.04, Ubuntu 13.10, Ubuntu 12.04 and Linux Mint.
Linux Kernel 3.13.4 was release on February 20, which brings several fixes and updates for the ARM64 architecture, especially a coarse clock handling fix. It fixes a kernel bug on empty security contexts for SELinux, and adds some ALSA HDA fixes for Mac Pro 1,1, Toshiba Satellite L40, and the AD1983 audio codec. For details, read the changelog.
Upgrade / Install kernel 3.13.4:
The Ubuntu Kernel Team has build the Kernel release and DEB packages are available at this page.
If you’re comfortable with Linux command line, you can also follow the steps below to download & install them:
1. Press Ctrl+Alt+T on keyboard to open the terminal. When it opens, run commands below one by one to download the Kernel DEBs:
NOTE: If you’re running a proprietary video driver, you may need to re-build or even re-install to get it work with the new kernel.
If for some reason this kernel release doesnt work properly for you, reboot into previous kernel (Grub -> Advanced -> select previous kernel) and run this command to remove Linux Kernel 3.13.4:
The latest Nvidia Driver for Linux 331.49 has been released on February 18. This tutorial will show you how to install the new driver in Ubuntu 14.04, Ubuntu 13.10 and Ubuntu 12.04.
Nvidia 331.49 is a small release which brings a few bug fixes and 2 GPUs support. See the changelog:
Added support for the following GPUs:
GeForce GT 710
GeForce 825M
Fixed a regression that prevented nvidia-installer from cleaning up directories created as part of the driver installation.
Added a new X configuration option “InbandStereoSignaling” to enable/disable DisplayPort in-band stereo signaling. See “Appendix B. X Config Options” in the README for more information.
Fixed a bug that caused PBO downloads of cube map faces to retrieve incorrect data.
Fixed a bug in nvidia-installer that resulted in spurious error messages when opting out of installing the NVIDIA kernel module or source files for the kernel module.
Added experimental support for ARGB GLX visuals when Xinerama and Composite are enabled at the same time on X.Org xserver 1.15.
Install Nvidia 331.49:
1. Press Ctrl+Alt+T on keyboard to open the terminal. When it opens, uninstall the previous driver by running the below commands:
4. Press Ctrl+Alt+F1 to switch to command console and login.
5. Stop the graphic session with the appropriate command below:
sudo service lightdm stop     ## For the default LightDM

sudo service gdm stop     ## For the Gnome GDM

sudo service mdm stop     ## For the Linux Mint default MDM
6. Now give execute permission and start the installer, and follow the on-screen instructions to complete the process.
chmod +x NVIDIA-Linux-*-331.49.run && sudo sh ~/Downloads/NVIDIA-Linux-*-331.49.run
Tips: You may keep the installer file so that you can remove this driver via below command if for some reason this driver does not work properly:
sudo sh ~/Downloads/NVIDIA-Linux-*-331.49.run --uninstall
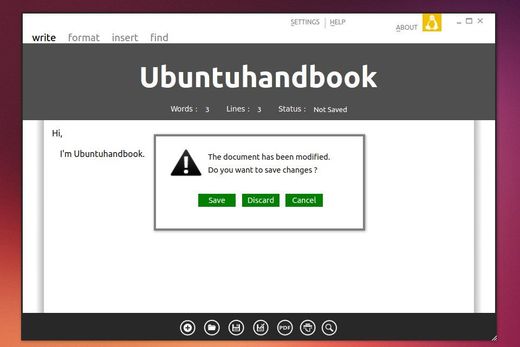
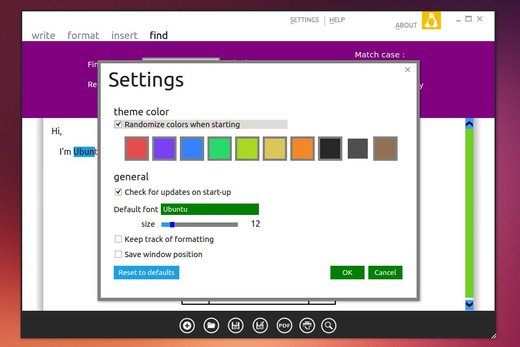
Dear readers, in this tutorial I’m going to show you a beautiful text editor called CutePad. Never heard of? CutePad is an open-source, simple and rather pretty text editor with some handy features. It’s available for Windows and Linux.
Features:
Simple and clean graphical interface.
Real fast start up time.
Ability to read and write any text document.
Can be export the document as PDF format.
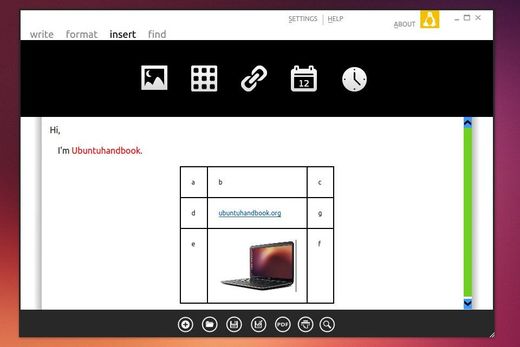
Insert Images, tables, dates and times easily.
Cross platform >> can be used in any Linux or Windows operating system.
Keyboard shortcut facilities.
Finally it’s modern and cute when comparing to a ordinary text editor.
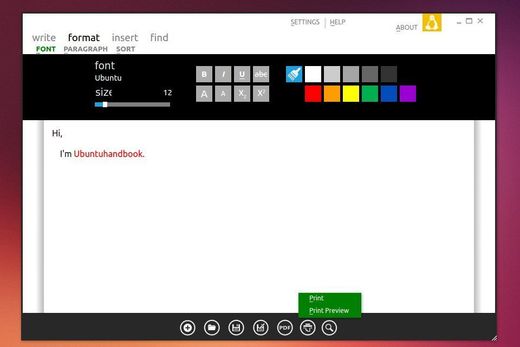
See some screenshots:
Install CutePad:
The EXE file for Windows and Linux installer (support Ubuntu, Fedora, Net Runner, Slitaz and others) are available in CutePad official download page.
If you’re comfortable with Linux command line, you can follow the steps below to install it:
1. Press Ctrl+Alt+T on keyboard to open the terminal. When it opens, run the commands below to download the Linux installer:
The video authoring tool ffDiaporama 2.1 has been released a few hours ago. This release brings the new feature Google Maps support.
As you may know, ffDiaporama is an app for creating video sequences consisting of title, photos, video clips, and music. The latest ffDiaporama 2.1 was released on February 18, 2014 with following new features and improvements:
Geolocation projects
It is now possible to geotag projects globally or by chapter
Google Maps maps can be added in the titles and in the slides
New dynamic variables are added on geolocation
Improved music track
From now, the options for pause and volume are available from the first slide on which are positioned music tracks
Drag & drop is improved to allow movement “using mouse” of music tracks from one slide to another
Improved rendering
Adding “variable bitrate” mode for encoding which reduces quite dramatically the size of videos produced for projects containing mostly pictures
Adding a hundred new models of equipment (phones and tablets)
Improved quality of transitions
Nearly half of the LUMA transitions have been redone (a quarter of the total transitions) to reduce noise (inelegant pixels) on projects in HD
numerous bug fixes.
Install:
The official PPA has built this release for Ubuntu 13.10 Saucy, Ubuntu 12.10 Quantal, Ubuntu 12.04 Precise, Linux Mint and their derivatives.
Press Ctrl+Alt+T on your keyboard to open the terminal. When it opens, run the commands below one by one to install or upgrade ffDiaporama from PPA: