


![]()
This simple tutorial shows how to easily setup OpenVPN in your Ubuntu 20.04, Ubuntu 22.04, and Ubuntu 24.04 server and connect remotely in Windows or Linux with GNOME.
My PPTP and IKEv2 VPN server refused to work recently due to the Great Firewall (maybe). So I decided to setup OpenVPN in my Ubuntu VPS as a workaround.
DigitalOcean has a step by step setup guide, but it’s really long and complicated for beginners. Thankfully, there’s a free open-source script make things as easy as few commands.
Step 1: Install OpenVPN
As mentioned, there’s a script in the github to make things easy. It automatically detects your system, environment variable, IP address, and setup OpenVPN and firewall.
The script is totally safe in my own opinion, and you can view the code by yourself. Though, there’s always disclaimer that use it as your own risk!
1. First, connect to your Ubuntu/Debian server either via SSH or other method that you favorite. Then grab the script by wget:
wget https://git.io/vpn -O openvpn-install.sh
In case wget command does not exist, install via sudo apt install wget.
2. After downloaded the script, add executable permission via command:
chmod u+x openvpn-install.sh
3. Finally, run the script:
sudo bash openvpn-install.sh
It will ask you a few questions to confirm IP address if your server is running behind NAT, choose UDP or TCP, set which port to listen to, and select a NDS server. For lazy men, it’s OK hit Enter to use default for all previous questions.
But, you need to finally type a name for the client. It will create a .ovpn file with the name you just typed.
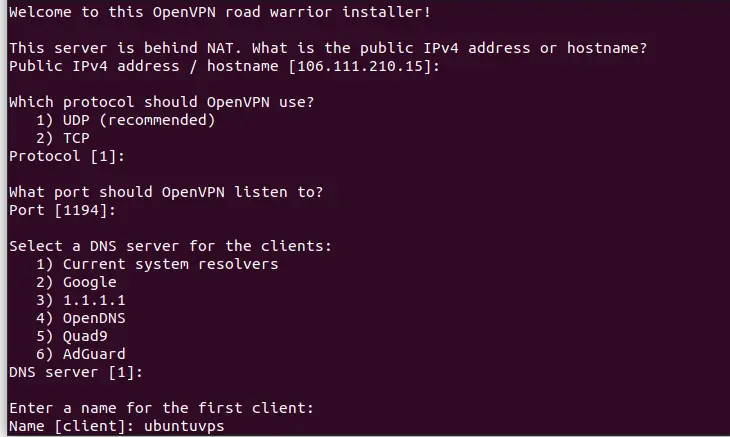
Default options are usually OK except the client name
After answering all the questions, hit any key to get start. It will do all the remained things, and generate a .ovpn file.
Step 2: Copy & paste the .ovpn to client machine
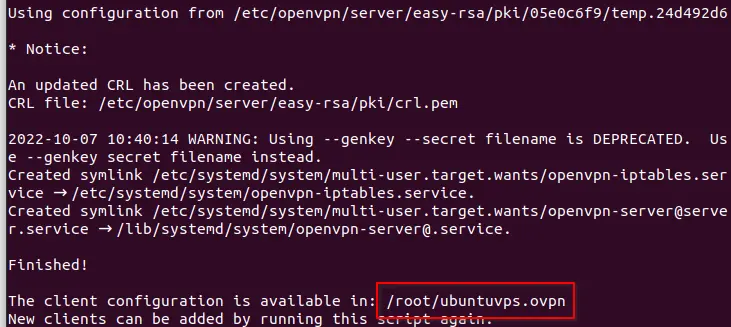
As the screenshot above shows you, it generates the .opvn file in /root directory in my case. In case you logged in via non-root user, copy the file to user’s home via:
sudo mv /root/*.ovpn ~/ && sudo chown $USER:$USER *.ovpn
Finally, you need to send the file to client machine, such as running the scp command below in your client PC (run this command in client/local machine):
scp -P 22 username@server-ip:~/*.ovpn ./
Replace * with the filename, though it works if there no other .ovpn files. And, change port number 22 if non-default SSH listening port in use.
Step 3: Connect to OpenVPN server in Ubuntu/Fedora
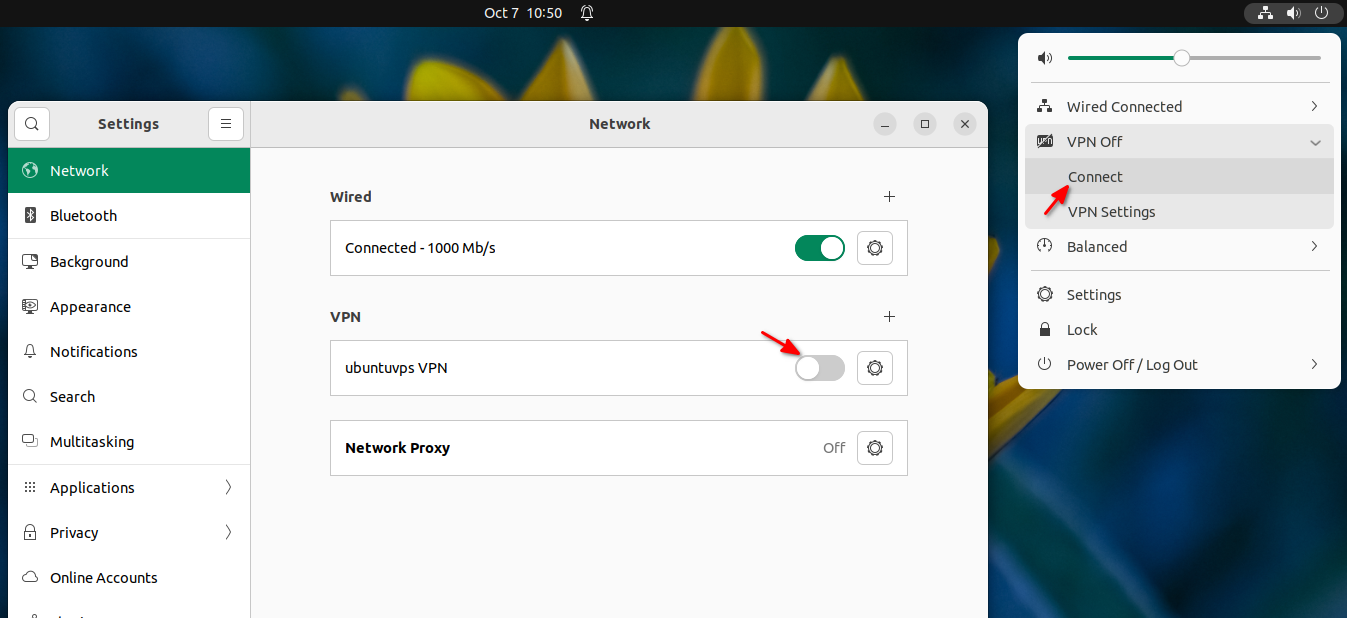
GNOME desktop has built-in client support for OpenVPN connection. Simply open Gnome Control Center (aka Settings) via the top-right corner system status menu.
Then, go to ‘network’ in left pane, and click on ‘+’ after VPN section. Finally, click ‘Import from file…’
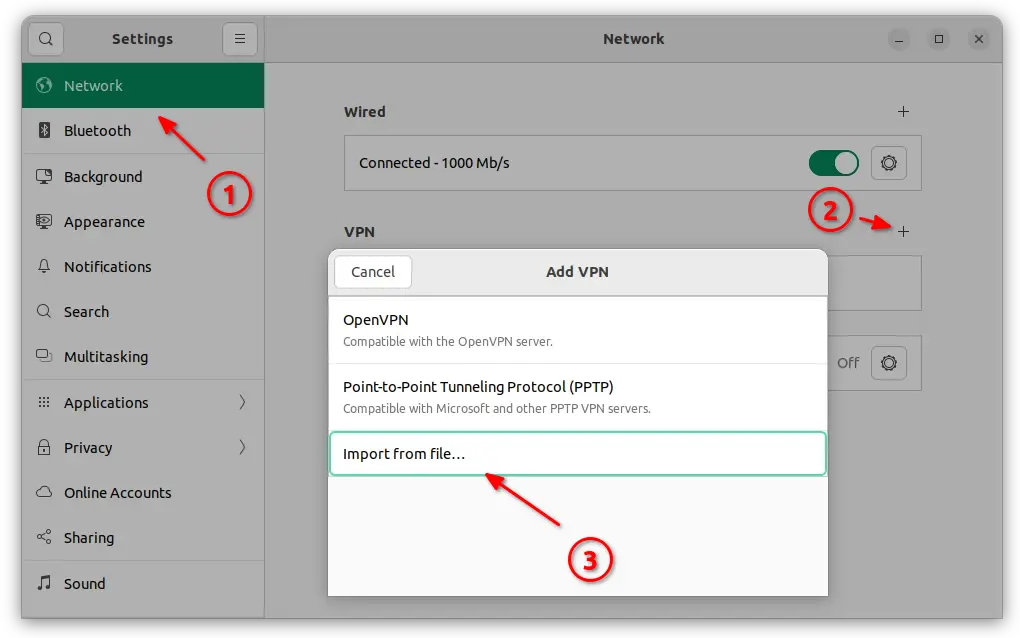
In the pop-up file selection dialog, choose the .ovpn file you got from the server side. It will generate the VPN network automatically once you click open (see the screenshot below).
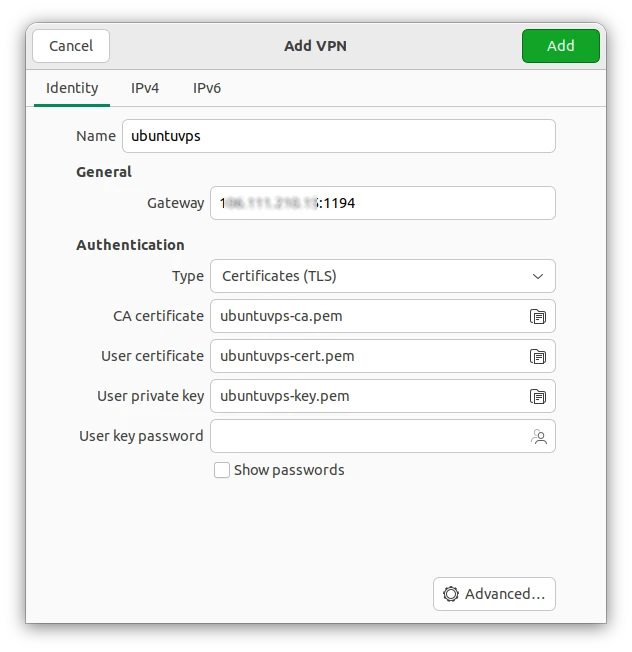
It automatically create the VPN network after selected the .ovpn file
The default configurations are OK, though you may click editing advanced options as you need. After clicking on ‘Add’ button, you can finally start connecting to the OpenVPN server either within Gnome Control Center or system status menu:
Connect from Windows & macOS:
OpenVPN website provides a client application for Windows and macOS users, simply download and install the app. Then, drop the .ovpn file into app window to create VPN connection.


