Want to change the background wallpaper or just set another color for Ubuntu Gnome login screen? Here’s how to do the trick in Ubuntu 22.04 and Ubuntu 24.04!
As you may know, the GDM background is not easy to modify since GNOME hard-coded the CSS into a .gresource file. Thankfully, there’s now a graphical configuration tool can do the job for Ubuntu 22.04 and higher.
It’s GDM Settings, a free open-source tool not only for changing the background for GNOME login screen, but also supports for configuring login screen for following things:
Then right-click on the Downloads folder, select “Open in Terminal”, and finally run the installer via command:
./hplip-3.22.4.run
Follow the on screen prompts, and re-plug your printer when everything’s done successfully.
Install HPLIP 3.22.4 for Ubuntu 22.04:
The installer so far does not support Ubuntu 22.04. If you do require the new version, here’s how to manually install dependencies and built the package (Thanks to fostips).
Firstly, run the previous “./hplip-3.22.4.run” command will generate the source folder in Downloads. Right-click on it and select “Open in Terminal” to open terminal.
Next, run command to manually install dependency packages:
To remove the driver package, you need to first open terminal with source folder as working directory (See the last picture). When it opens, run the command to start uninstall script:
sudo ./uninstall.py
Same to the installing process, it will asks few questions to confirm during the process.
The hugin package is removed from Ubuntu 22.04 repository. For those need this free open-source panorama stitcher, here are 3 alternative methods to install it back. Just choose the one that you prefer.
Option 1: Hugin Flatpak package
The panoramic photo stitcher is available as the universal Flatpak package than runs in sandbox.
Flatpak package installs on most Linux, but it takes more disk space for run-time libraries!
Firstly, open terminal by searching it from the ‘Activities’ overview screen (or press Ctrl+Alt+T on keyboard):
When terminal opens, run the command below to install the daemon package first:
sudo apt update && sudo apt install flatpak
And finally install Hugin as flatpak using command:
As you see, the flatpak package will also install run-time libraries that take more disk space.
Option 2: Non-install AppImage package
There’s a non-install AppImage package available for Hugin. No installation required, just add executable permission and run the file will launch the tool.
Then, give executable permission in file properties dialog and finally right-click run it to launch the app:
Option 2: Hugin PPA
For those prefer the classic .deb package, I’ve upload the package as well as dependencies into this Ubuntu PPA.
NOTE: Don’t know why Ubuntu 22.04 removed the package, but it still present in all Debian repositories. And the package in this PPA is just a backport from Debian Unstable. Use it at your own risk!
1. Press Ctrl+Alt+T on keyboard to open terminal. When it opens, run the command to add the PPA:
sudo add-apt-repository ppa:ubuntuhandbook1/apps
Type user password when it asks (no asterisk feedback) and hit Enter to continue.
2. Next, install the panorama photo stitcher by running the apt command below:
sudo apt install hugin
For Linux Mint and other Ubuntu based systems, you may need to run sudo apt update to refresh cache first.
How to Remove Hugin in Ubuntu 22.04
For the Flatpak package, uninstall it via command:
Cheese, the default app for taking photos or recording via webcam, is not working properly in my case in Ubuntu 22.04.
By launching the app, webcam light turns on and persists only for a few seconds. Then it displays a blank screen with following text:
“There was an error playing video from the webcam”
According to the Ubuntu bug report and the upstream one, it seems to have something to do with the patch for MJPEG output support that causes issue on low end PC (I guess).
And, here are a few workarounds that works in my laptop with HP TrueVision HD Camera.
Workaround 1: Change output resolution
Firstly, launch Cheese and open “Preference” dialog from the hamburger menu. When it opens, change the resolution from 1280×720 to 640×480. Then close the app.
Next, launch Cheese again. It display a blank screen but camera light keeps on in my case. Continue decreasing the resolution until it works again. Then switch back a higher photo/video resolution.
However, the highest 1280×720 resolution produces a corrupted display just as the bug reported. While 640×480 works great in my case.
Workaround 2: Install Cheese 3.38 via Flatpak
The previous v3.38 does not has the issue. It’s available to install via the universal Flatpak package.
1. Firstly, press Ctrl+Alt+T on keyboard to open terminal. When it opens, run command to install the daemon:
There’ll be a few hundreds more MB run-time libraries to install for the first time.
Finally, run the command below to launch the Flatpak to see if it works:
flatpak run org.gnome.Cheese
3. (Optional) Remove the pre-installed Cheese package.
The make the app icon in search result to launch Cheese as Flatpak instead of the pre-installed package. You may remove the original package via command:
sudo apt remove cheese
And a system restart is required if you’re first time installing an app as Flatpak.
How to Restore
To remove the Flatpak package, use command:
flatpak uninstall --delete-data org.gnome.Cheese
And install back the original Cheese package using command:
sudo apt install cheese
Workaround 3: PPA with Cheese package (patched)
As @matthew.ruffell mentioned in the bug report, revert the commit will make it work again. This could be a workaround until the upstream fixed the issue. However, in my build the 1280×720 resolution just disappeared…
Ubuntu 22.04 has better support for the low latency PipeWire multimedia framework. Here’s how to setup it for PulseAudio, ALSA, JACK and Bluetooth output.
Firstly, Pipewire is pre-installed out-of-the-box, and runs as background service automatically. You may check it out by running command below in terminal:
systemctl --user status pipewire pipewire-session-manager
PipeWire installed out-of-the-box
IMPORTANT: This is NOT officially supported by Ubuntu so far. It still may not work on some devices. Don’t do it on production machine!
Step 1: install client libraries
Though available out-of-the-box, it’s not in use by default for audio output. To get start, first press Ctrl+Alt+T on keyboard to open terminal, and run command to install client libraries:
NOTE: there’s a ‘-‘ in the end of the command indicates to remove the package. The command will also install the required pipewire-pulse automatically.
Step 3: Copy configuration files:
wireplumber makes things quite easy! If you just want to replace PulseAudio with Pipewire, enable the media session service and restart and that’s all!!
For ALSA clients to be configured to output via PipeWire, run command to copy the configure file:
Installing Ubuntu is quite easy today using an USB stick. Here’s the step by step guide that shows the details about the installing process for those new to this operating system.
Step 1: Create boot-able USB installer
We usually burn the Ubuntu iso image into a USB stick, then boot PC with it to get into a live Ubuntu system, and finally start the wizard to install the system to hard disk.
Firstly, a USB stick with 4 GB+ memory is required, download ISO image from releases.ubuntu.com, and follow this guide to burn it:
Next, plug the USB stick into the target PC, start or restart and press F2/F10 (or other keys depends on your machine) to get into BIOS/UEFI. Select boot the USB, and you should see the following screen:
live-USB boot menu
Finally, select boot the first menu entry, or the second “safe graphics” if the first entry does not work for your machine.
Step 3: Start install wizard, choose language & keyboard layout
It will automatically launch the install wizard after successfully boot into the live system.
In the first page, choose the language for this wizard and live system. Then:
click “Try Ubuntu” to try the live system. There’s a shortcut icon to launch installer again if you decide to install the system on your disk.
or click “Install Ubuntu” to get to next page.
In the next keyboard layout page, it should automatically select the correct keyboard layout. You may press any key on keyboard and see the screen output to verify. Use “Detect Keyboard Layout” or select layout manually if the default is not correct.
Next, it will prompt to choose between “Normal Installation” and “Minimal Installation”. We usually choose the former one, unless you just need a web browser along with core system libraries.
For updates and third-party software under “Other options”, check the boxes as you prefer if you has internet connection. They are also available to install after system installation.
Step 4: Choose disk or assign partition manually
In the next page, it will ask where to install the Ubuntu system. There are usually following options:
Erase disk and install Ubuntu – use the whole hard disk for Ubuntu. You’ll lost all the data in your disk. There’s also “Advanced features” allows to encrypt the system.
Install Ubuntu beside Windows – If you’ve a Windows system in the disk, there’ll be the option to use all the left space for Ubuntu installation. So you’ll have Ubuntu and Windows dual-boot.
Install/Reinstall Ubuntu on top of … – Clear the old Ubuntu system and use the disk partition for new Ubuntu system.
Something else – edit disk partition manually.
Step 5: Manually create system partition
If you choose “Something else” in the previous screen. It will bring you into the partition table.
In this page, you need to create following partitions using the free disk spaces (or remove and re-use unused spaces):
EFI – 100 ~ 500 MB. (optional for old legacy BIOS without secure boot)
Swap area – as large as RAM (optional if you have large RAM. And, a swap-file can take the job after installation)
/boot Ext4 partition – 500 ~ 1000MB (optional, but required for LVM or disk encryption)
Ext4 mounted at “/” – 20GB + the bigger the better (required)
Here are some partition combinations for installing Ubuntu:
EFI + Ext4 mounted at “/”
EFI + Swap + Ext4 mounted at “/”
EFI + Ext4 mounted at “/” + separated “/boot” partition
EFI + Ext4 mounted at “/” (Encrypted) + separated “/boot” partition (no swap and /boot is required)
Here are the screenshots of example partition table and partition create dialog (use ‘+’ to create yours).
For encrypted Ubuntu system, instead of directly creating “Ext4 file system” mount at ‘/’, create and select use as “physical volume for encryption”.
In this mode, you’ll need to type the secure key (password) every time you boot Ubuntu. And mount Ubuntu system volume from another machine/system need this key too.
Then right-click on it in partition table and select mount point “/”. NOTE: you have to remove Swap area if any and create separated ‘/boot’ partition first for encryption mode.
And under “Device for boot loader installation”, use the default “/dev/sdx” will install the Grub boot-loader for loading all systems in the disk. Though UEFI still allows to choose boot-loader at boot.
Step 6: Setup Account, Location and done
After click “Install Now” and confirm on pop-up dialog. The wizard will prompt to set up your account, computer name, and select location.
You may add more accounts after installation, and other information can be changed later. So just do the settings as you prefer.
Finally, wait the process done. If no error occur, it should prompt installation done with option to restart your computer.
It may sometimes refuse to restart after clicked the button. That’s not a big deal, just press and hold the power key to force shutdown and boot it again.
Ubuntu is always not ready for use out-of-the-box, because every user has his/her own preferences. And, here’s a list of things I did after installing Ubuntu 22.04 LTS.
1. Install Media Codec:
To speed up the installing process, I never enable the network connection in Ubuntu’s installer wizard. So, the media codecs is not installed and audio/video player does not work out-of-the-box.
Press Ctrl+Alt+T on keyboard to open terminal. And, refresh the package cache if you’ve not done that.
sudo apt update
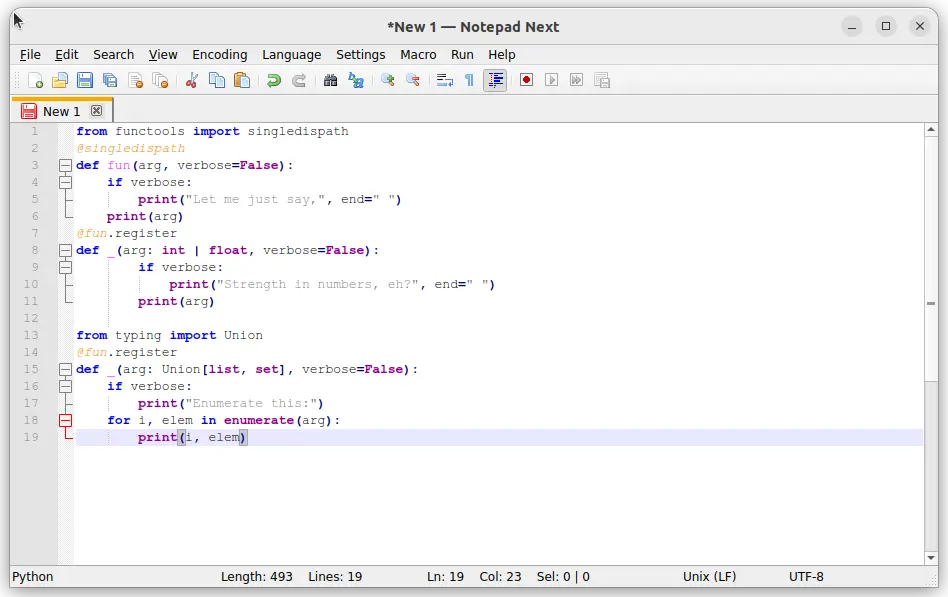
Then, install the codecs for audio, video playback, Microsoft fonts, rar support, and so forth via this command:
sudo apt install ubuntu-restricted-extras
Thanks to @Stephen, the command will output a TTF EULA message asks you to click ‘OK’ to confirm. In case you don’t know how to continue, press Tab to highlight the button and hit Enter.
2. Remove Firefox and install the Deb version:
I use Firefox to install Gnome Extensions regularly. But the pre-installed Firefox is a Snap package that does not support the feature.
It’s easy to remove the Firefox Snap by running command (back your data first!) in terminal:
sudo snap remove --purge firefox
However, Firefox Deb package in 22.04 repository is just a wrapper that links to Snap. Except the official Linux Tarball, there are only third-party repositories (though really trustworthy): Ubuntuzilla and “Mozilla Team” team PPA.
I personally prefer the “Mozilla Team” team PPA. And, simply run the commands below one by one will install Firefox Deb package from that repository:
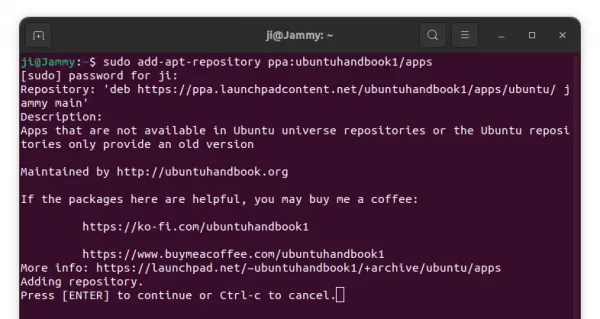
After installation, you need to set higher PPA priority to prevent Ubuntu from installing the Snap back. See here for details.
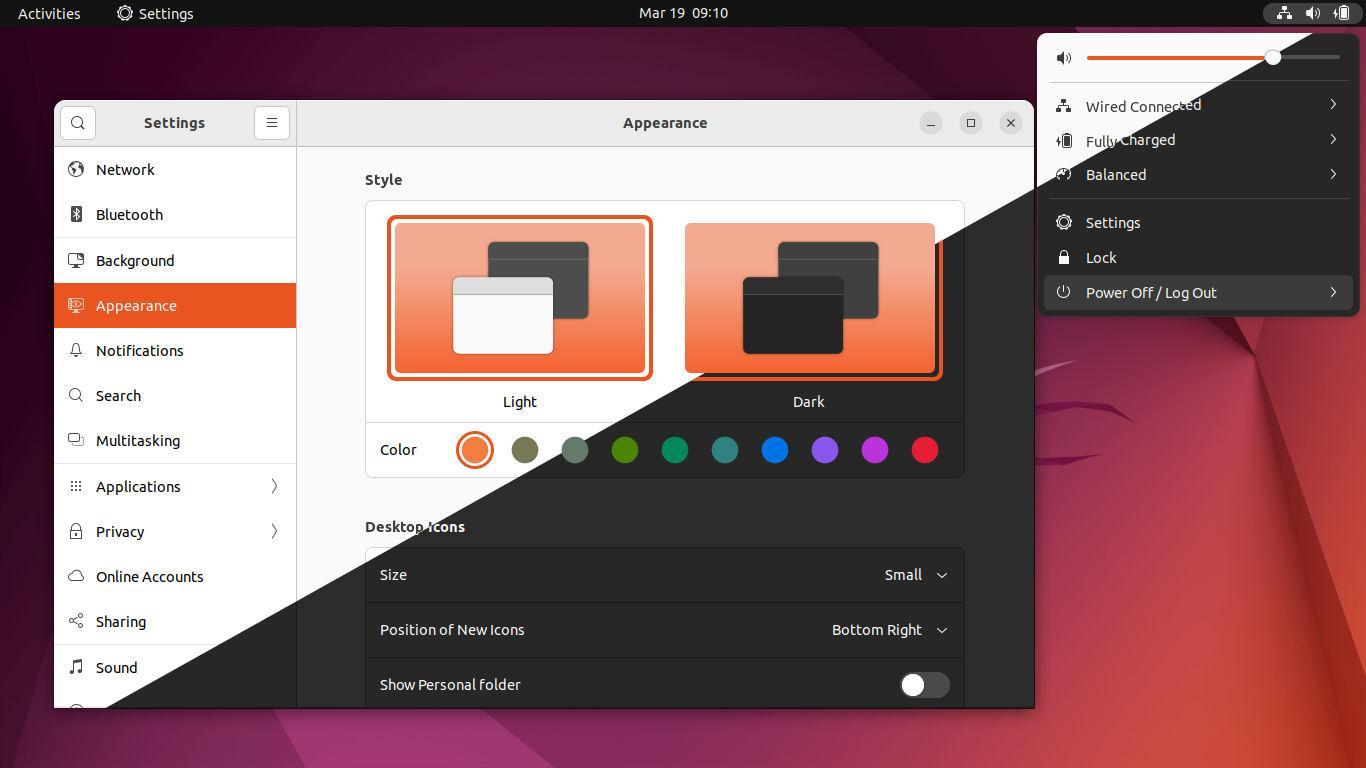
3. Select your favorite accent color
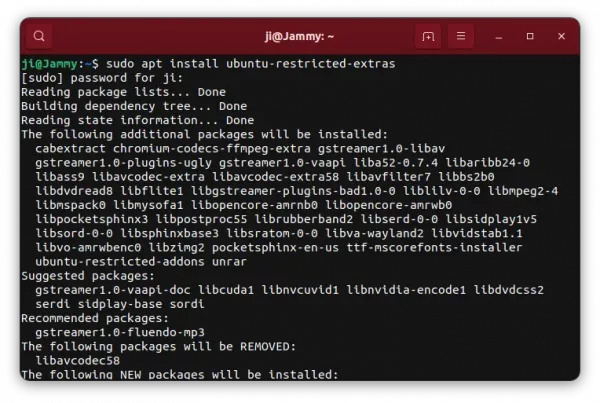
Ubuntu 22.04 introduced 10 accent colors in “Appearance” settings page. It allows you change the color of slider bar, on/off switch, check-box, highlight text background, input box border, and even folder icon.
Choose favorite accent color
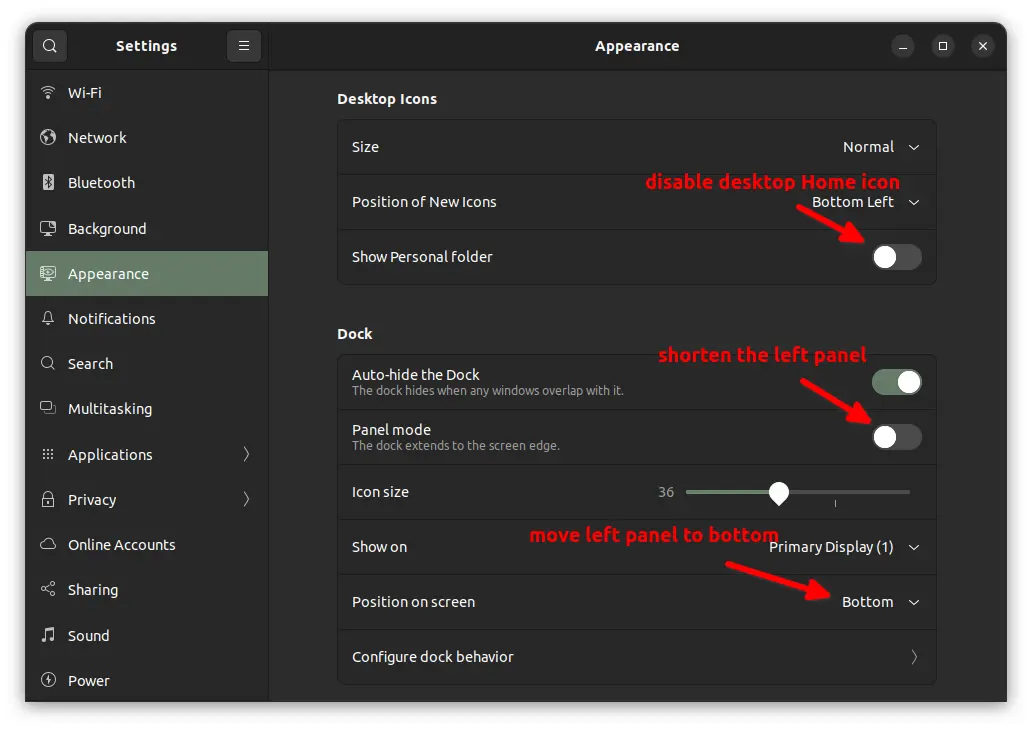
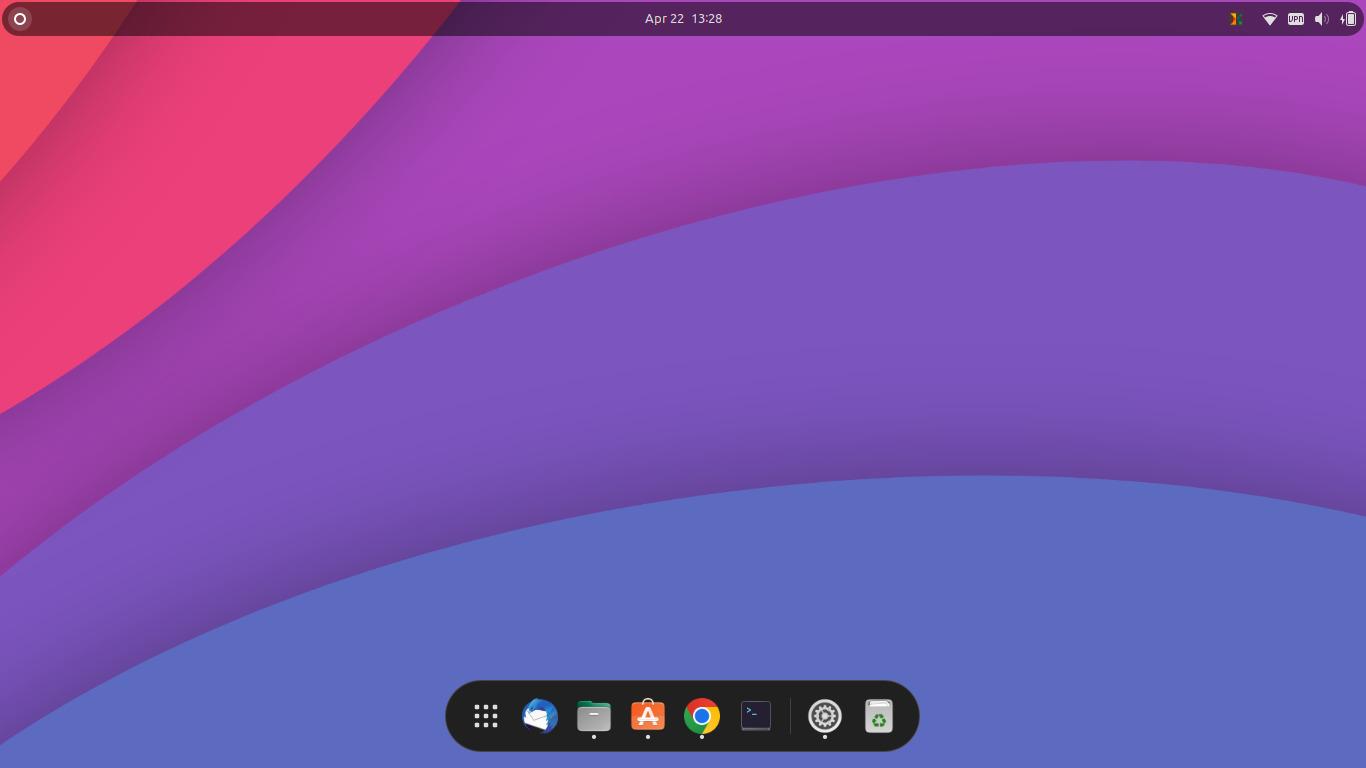
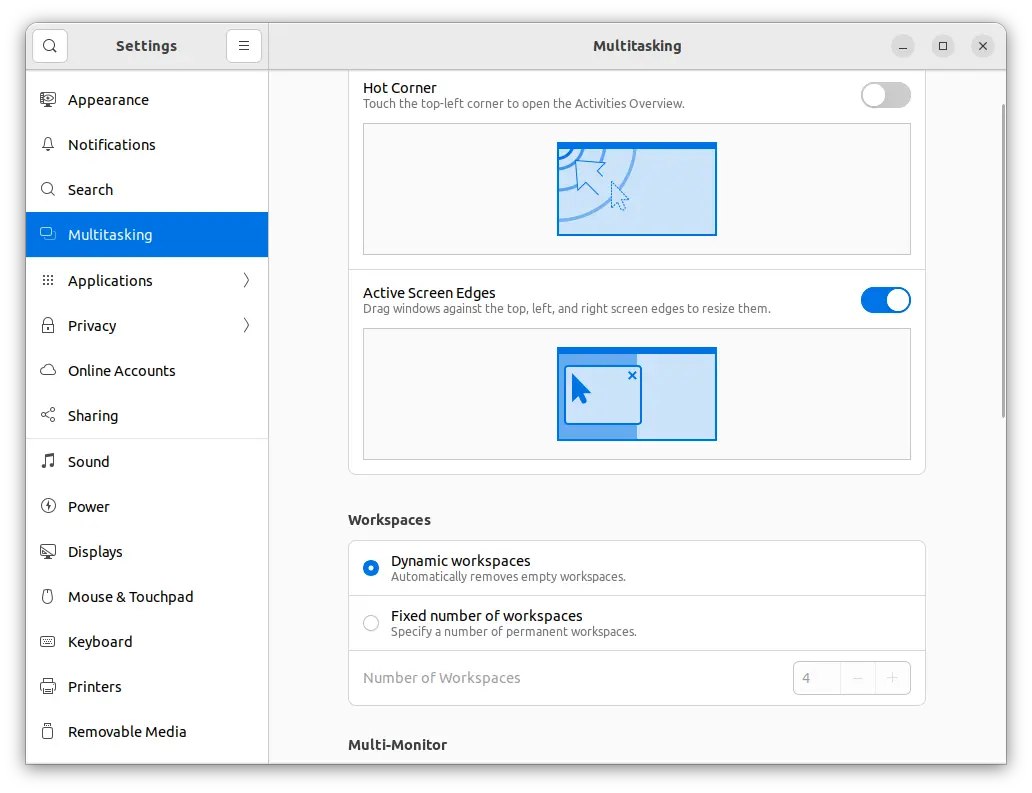
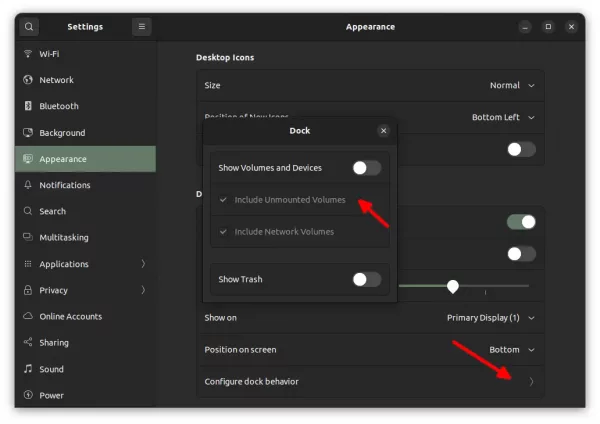
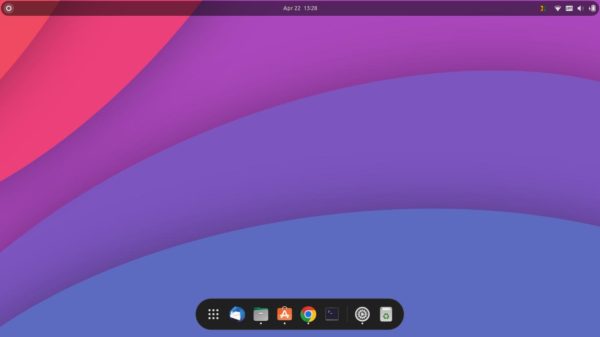
4. Tweak Ubuntu Dock (the left panel)
Click to minimize, minimize the app window when click on its icon on the dock by running command:
gsettings set org.gnome.shell.extensions.dash-to-dock click-action minimize
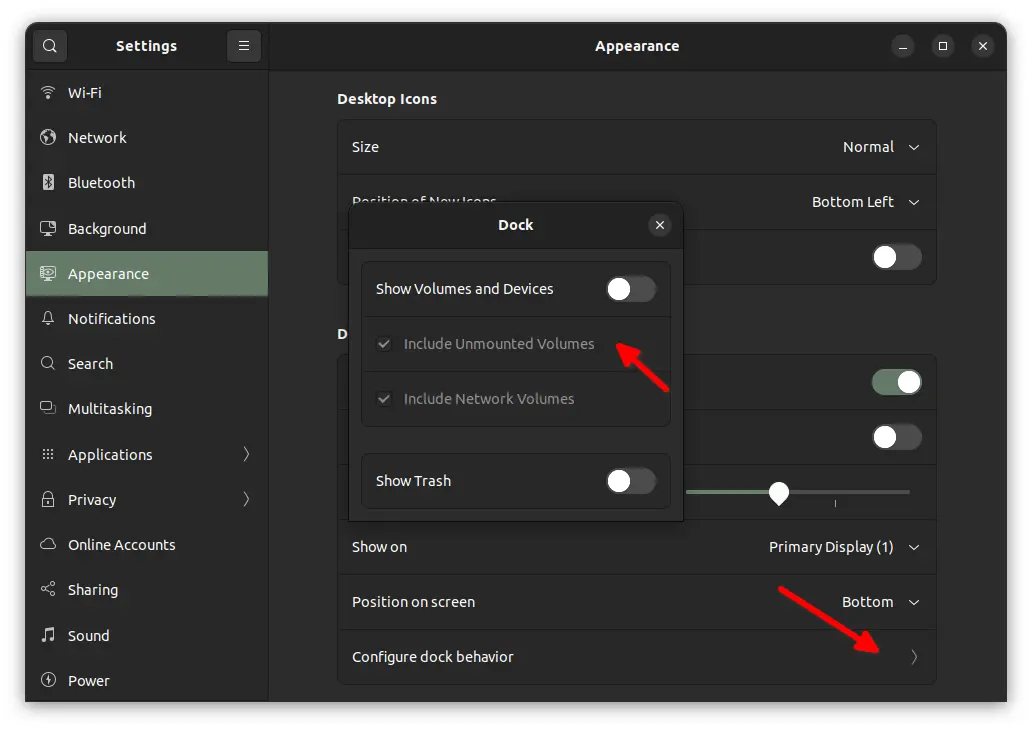
Shorten the left panel and move it to the bottom using system settings under “Appearance” page:
And, remove mounted and network volumes from the dock via “Configure dock behavior” setting options.
5. Setup Gnome Extensions support.
Most extensions are available to install from https://extensions.gnome.org/. Ubuntu however does not ready for it out-of-the-box.
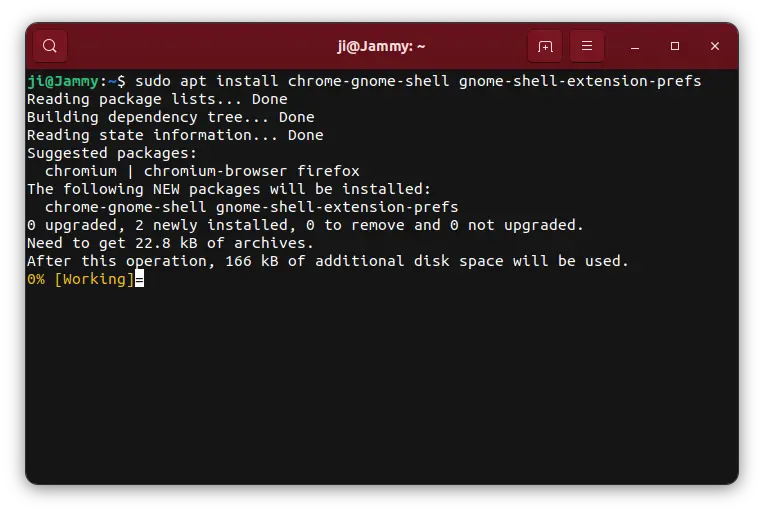
After switching Firefox Snap to another package (or another browser), you need to press Ctrl+Alt+T to open terminal and run command to install required packages:
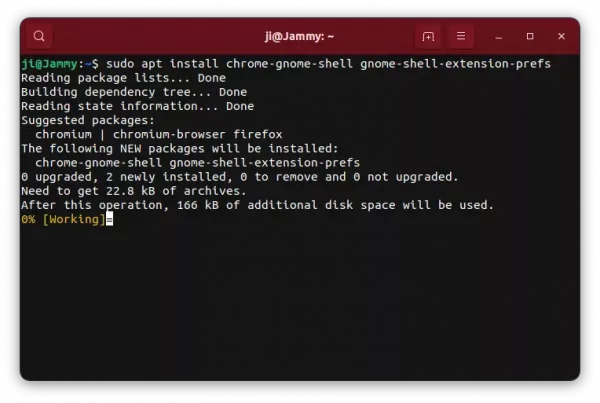
It installs the agent to be able to install Gnome Extensions from web browser, as well as the “Gnome Extensions” app to manage all available extensions on your system:
Manage Gnome Extensions
(Update) 6. Install Gnome Extension Manager:
Started in Ubuntu 22.04, there’s a cool new graphical tool made into official repositories. It’s “Extension Manager“, which allows to search, install, remove and manage Gnome Extensions.
With the tool, you do not have to remove the pre-installed Firefox or use another browser any more.
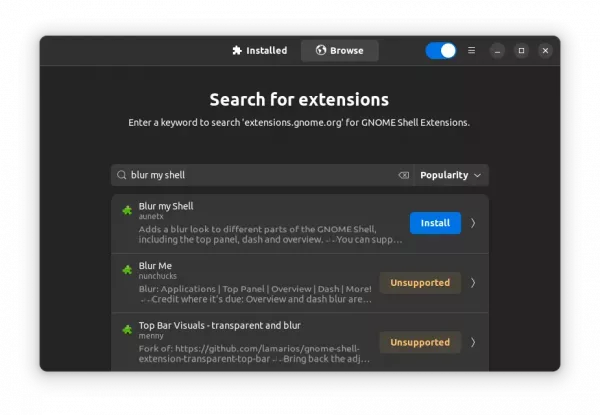
Search extensions
To install the Extension manager, open terminal by pressing Ctrl+Alt+T on keyboard and run command:
sudo apt install gnome-shell-extension-manager
7. Install Gnome Tweaks / Dconf Editor.
For more configuration options about desktop appearance and behavior, Gnome Tweaks and Dconf Editor are highly recommended.
And, they are both available to install either from Ubuntu Software or by running the command below in terminal:
sudo apt install gnome-tweaks dconf-editor
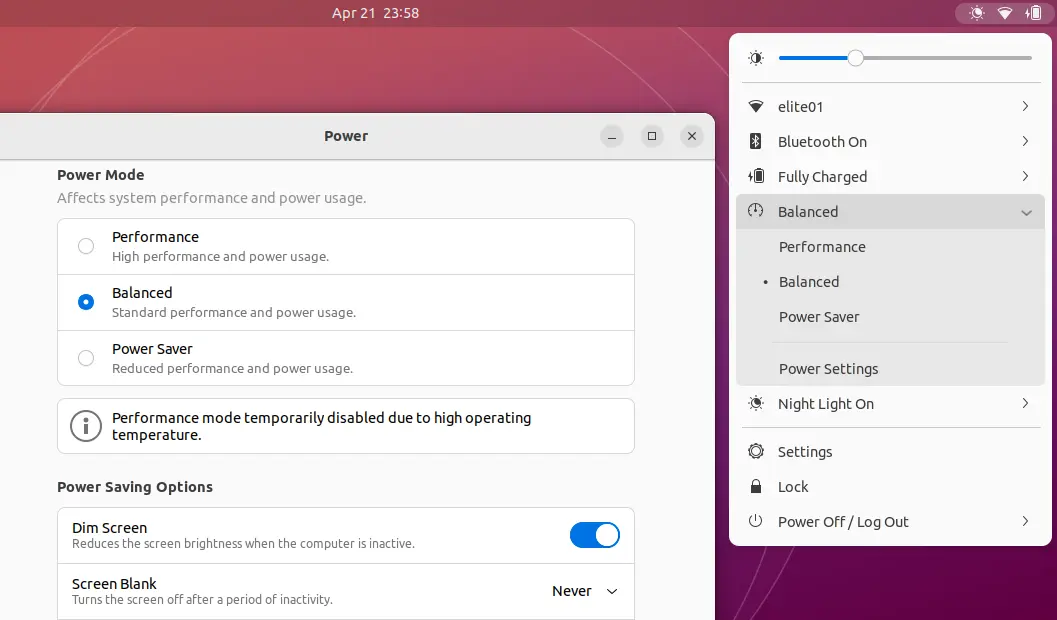
8. Weather forecast in Clock menu
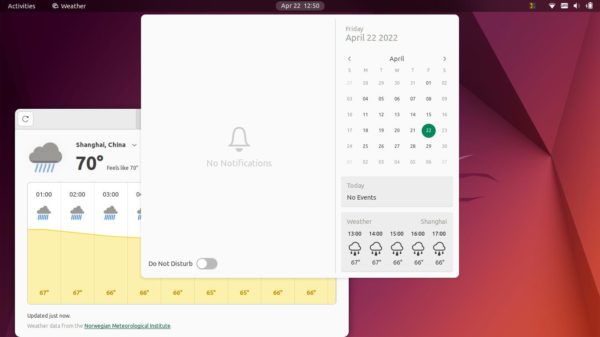
Gnome’s (the default desktop) core weather app will add weather condition about the next few hours in the clock menu.
Simply install the app by running the command below in terminal:
sudo apt install gnome-weather
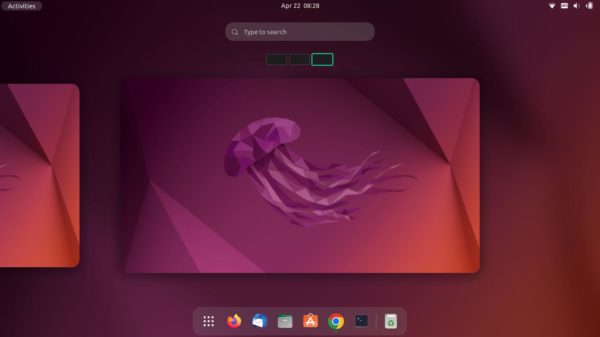
Then launch it from the ‘Activities’ overview screen. Setup your location and see the daily or hourly weather forecast. The clock menu will display hourly forecast automatically after that.
9. Install some extensions
There are many great Gnome extensions. Here are few of them that are highly recommended:
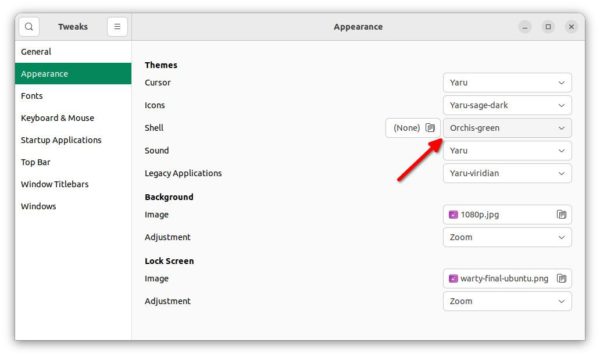
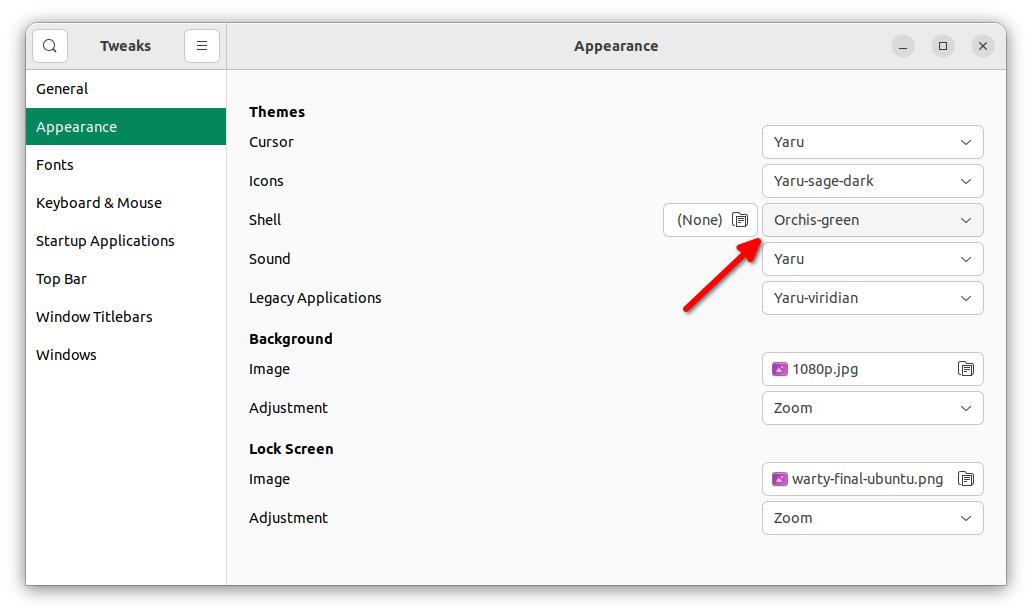
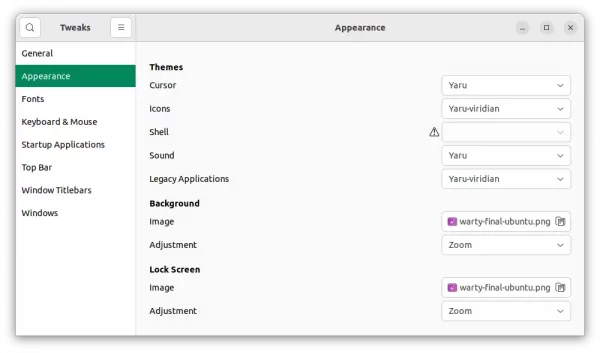
The new Ubuntu 22.04 LTS has been released! If you’re going to do a fresh install, then this tutorial may help to burn the ISO image into your USB stick.
Requirements:
To follow this tutorial, you need following things to get start:
Creating boot-able USB installer will format your USB stick. All data stored in USB will be cleared!! So it important make a backup first.
Step 3: Burn the ISO image
Firstly, plug in your USB stick and do following steps depends on which operating system you have.
Option 1: From Ubuntu PC:
If you’re now running with an old Ubuntu system, just search for and open “Startup Disk Creator” from the Activities overview screen.
When it opens, it should select the USB drive automatically as well as the ISO image. If not, click on “Other” button, then browse and select the Ubuntu 22.04 iso image.
Click on “Make Startup Disk” button, then type user password to authentication. Then just wait, the process should be done in a few minutes!
Option 2: From Windows, MacOS, and other Linux:
There are a few other tools to create Linux USB installer. Here I tried the UNetbootin, which works in Linux, Windows, and MacOS.
Firstly, download the free open-source tool from its website:
Then start the app, it should automatically detect your USB stick. Just click on the ‘…’ button to select the Ubuntu 22.04 iso image, and then click on OK to start burning it.
Ignore the second dialog, it’s a bug persists for a period of time, though it won’t affect the USB burning process.
Option 3: Use Ventoy
Ventoy is a new solution for booting iso image from USB. With it, you can just save images in normal way, along with other files. When you try to boot from USB, it will look for the iso images automatically and provide the option to boot them.
However, it seems not working quite good with UEFI. At least it does not work in my laptop with secure boot enabled. See here for more.
When everything’s done successfully, select boot your USB stick from BIOS (UEFI) and enjoy!
Ubuntu 22.04, code-name “Jammy Jellyfish”, is out! See what’s new in this Long Term Support (LTS) release!
Ubuntu 22.04 features Linux Kernel 5.15, GNOME 42 Desktop, New Logo, and tool-chain updates!
New Logo:
Ubuntu’s logo, the Circle of Friends, has been updated with new design more than a months ago. You’ll see the new logo in system startup, shutdown, and ‘About’ settings page of Ubuntu 22.04.
Gnome 42:
The release ships customized version of GNOME 42 desktop, which was released in last month. With the power of the new desktop environment, you may take screenshots and record desktop via its built-in UI (press PrintScreen to get it).
New Screenshot UI
The “Appearance” settings page now provides option to switch Full Dark Mode. Not only app windows, but also make dark for system menus, notifications, context menu, etc.
There are also 10 accent colors available under ‘light/dark’ switch. The color will apply in slide bar, check-box, on/off switch, input box, highlight text background, and even folder icon!
As you see in picture, some basic desktop icons settings (e.g., icon size, position, toggle display home icon) has been merged in “Appearance” page. As well, more dock settings (shorten height, hide trash/mounted volumes) has been added.
Desktop icons and Dock settings
For those need to share Ubuntu desktop for remote access, you’ll see Ubuntu 22.04 now defaults to use Microsoft’s RDP protocol, though the legacy VNC is still available. You can find it by going to “Sharing” in system settings.
Changes compare to Ubuntu 20.04 Desktop:
If you’re still using Ubuntu 20.04 LTS, there will be even more changes which have already introduced in Ubuntu 21.10/21.04.
It now makes easy to change your laptop power mode, either in system settings or upper right system tray menu.
A new “Multitasking” settings page is added to control hot corner (top-left only), screen edges, workspaces and app switching.
For laptop users, there are 3-finger touchpad gestures introduced in GNOME 40. They are:
3-finger up to trigger ‘Activities’ overview.
3-finger down to go back desktop.
3-finger left/right to switch workspaces.
Gnome Wayland has been the default session since Ubuntu 21.04. In Ubuntu 22.04, Wayland support also works for NVIDIA driver user. The legacy Xorg session is still available to choose in login screen in case your apps are not working properly.
For notepad++ fans, there’s a free open-source project that reimplement the text editor with native Linux support!
It’s Notepad Next, a C++ application uses Qt5 toolkit for its user interface. Compare to Notepadqq (another Notepad++ like editor), this app looks almost same to Notepad++.
And it’s a cross-platform app that not only supports for Linux, but also works Windows and MacOS.
Install Notepad Next:
I’m not a programmer and don’t even use Notepad++, so I can’t tell how it different to this original Windows app. Just try it out yourself:
NOTE: Though the application overall is stable and usable, it should not be considered safe for critically important work.