![]()
This simple tutorial shows how to increase or decrease the touchpad 2-finger scrolling speed in Ubuntu 22.04, Ubuntu 24.04 with default GNOME on Wayland session.
GNOME, the default desktop for Ubuntu, Fedora, and optional in many other Linux, so far lacks option to configure the mouse/touchpad scroll speed.
For Ubuntu 20.04, Ubuntu 18.04, and other Linux with GNOME on classic Xorg, there’s a command line tool imwheel available to do the job. And, here’s a step by step guide show you how.
For Ubuntu 22.04 and higher and other Linux with GNOME Wayland, this tutorial may help by settings virtual touchpad size.
UPDATE 2026: There’s now a STUPID SIMPLE WAY to do the job in GNOME Wayland. See this tutorial instead.
IMPORTANT: This tutorial is tested and works in Ubuntu 24.04 & 22.04 on my old HP & ASUS laptop. However, some users report it does NOT work. Don’t do it on production machine!
Step 1: Measure & Set virtual touchpad size
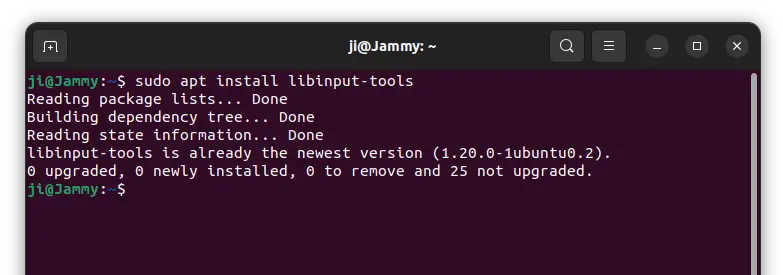
1. First, open terminal either by pressing Ctrl+Alt+T on keyboard, or by searching from ‘Activities’ overview screen.

2. When terminal opens, run command to install ‘libinput-tools’ package in case you don’t have it:
sudo apt install libinput-tools
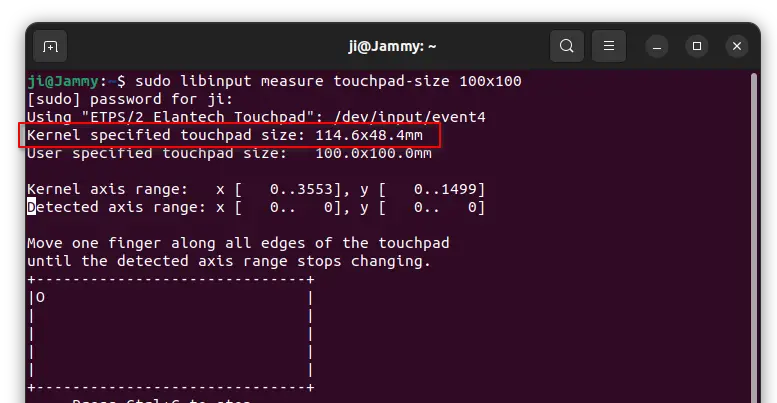
3. Next, run command to tell your touchpad size (width and height in mm):
sudo libinput measure touchpad-size 100x100
As the screenshot shows, may laptop has touchpad with 114.6 mm width and 48.4 mm height. Once you got the value, press Ctrl+C to exit.
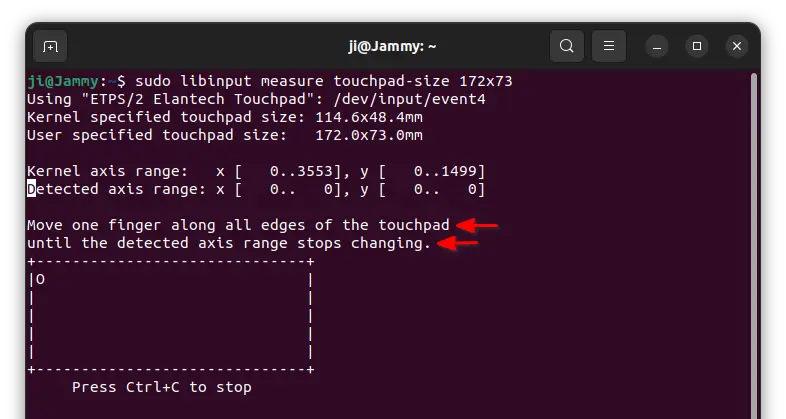
4. Finally, re-run the command in step 3, but with different args. For example, use 172×73 for 1.5x scroll speed (Here 172 ≈ 114.6 x 1.5, and 73 ≈ 48.4 x 1.5), run command:
sudo libinput measure touchpad-size 172x73
Or use 92×39 for 0.8x scroll-speed (92 ≈ 114.6 x 0.8, 39 ≈ 48.4 x 0.8):
sudo libinput measure touchpad-size 92x39
NOTE: You have to change the “width x height” number in command. Depends on your need to either increase or decrease scroll-speed, calculate them according the original size of your touchpad!!
Once you hit run the command, follow the terminal output to “Move one finger along all edges of the touchpad until the detected axis range stops changing.“ You’ll see the little ‘0’ in the terminal output moves correspondingly when you moving finger on touchpad.
5. When done, press Ctrl+C to stop it. And, you should get similar output as the screenshot shows, if you’ve done correctly.
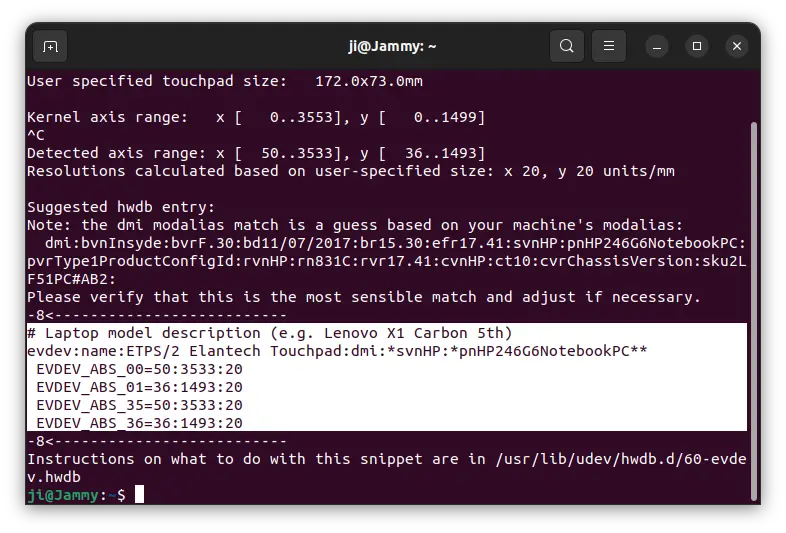
And, you need to copy the lines between the 2 “-8<————–” lines (in my case, the section with white background).
Step 2: Apply Changes
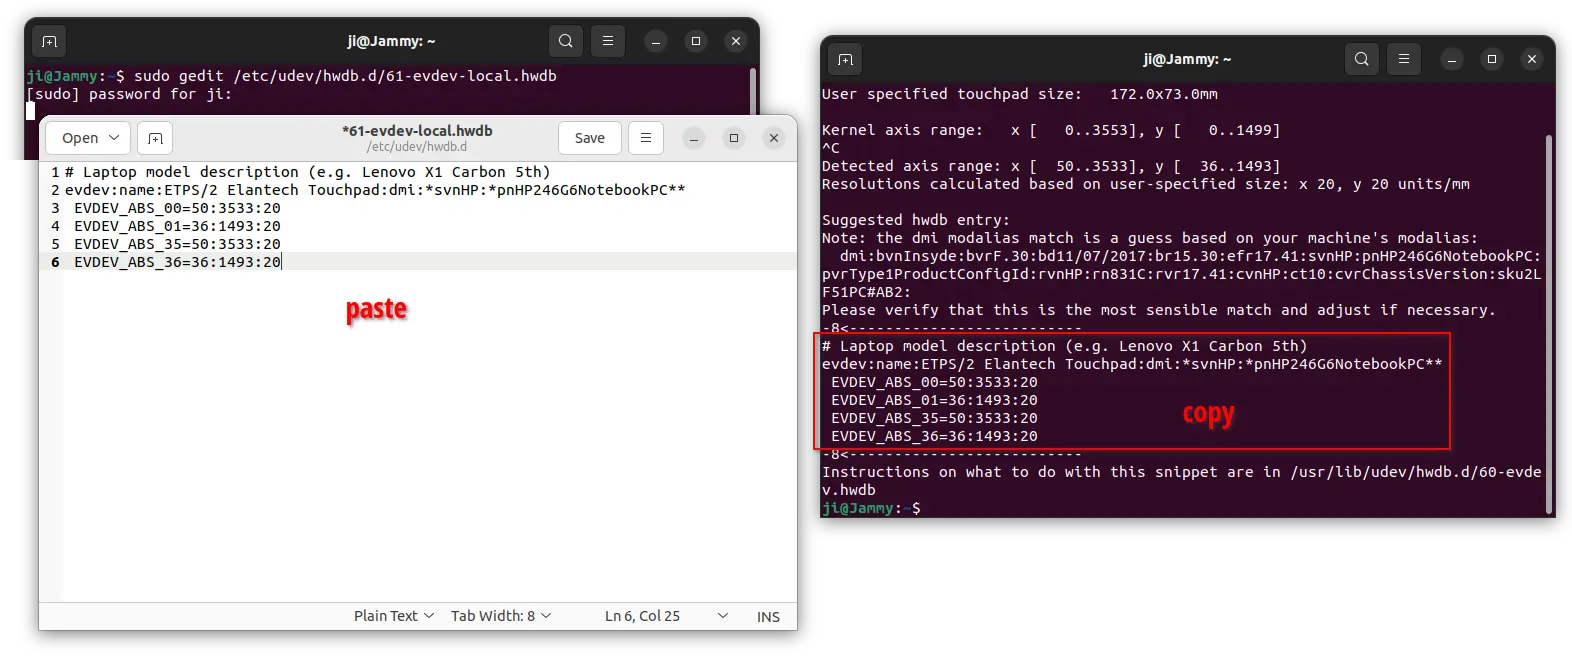
1. Now, open terminal (Ctrl+Alt+T) and run command to edit the config file:
sudo gedit /etc/udev/hwdb.d/61-evdev-local.hwdb
Replace gedit in command with gnome-text-editor for Ubuntu 24.04 and Fedora, or use nano instead that works in all desktops.
When file opens, paste the lines you just copied in ‘Step 1’ and save it.
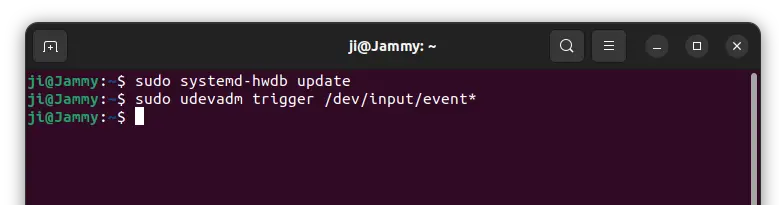
2. Finally, update hardware database by running command:
sudo systemd-hwdb update
And, reload udev rules by running command:
sudo udevadm trigger /dev/input/event*
When everything’s done. Restart your computer to see the effect!
As the steps above also increase or decrease the cursor movement speed, you may also need to open “Settings -> Mouse & Touchpad” and adjust ‘Touchpad Speed’ slider-bar.
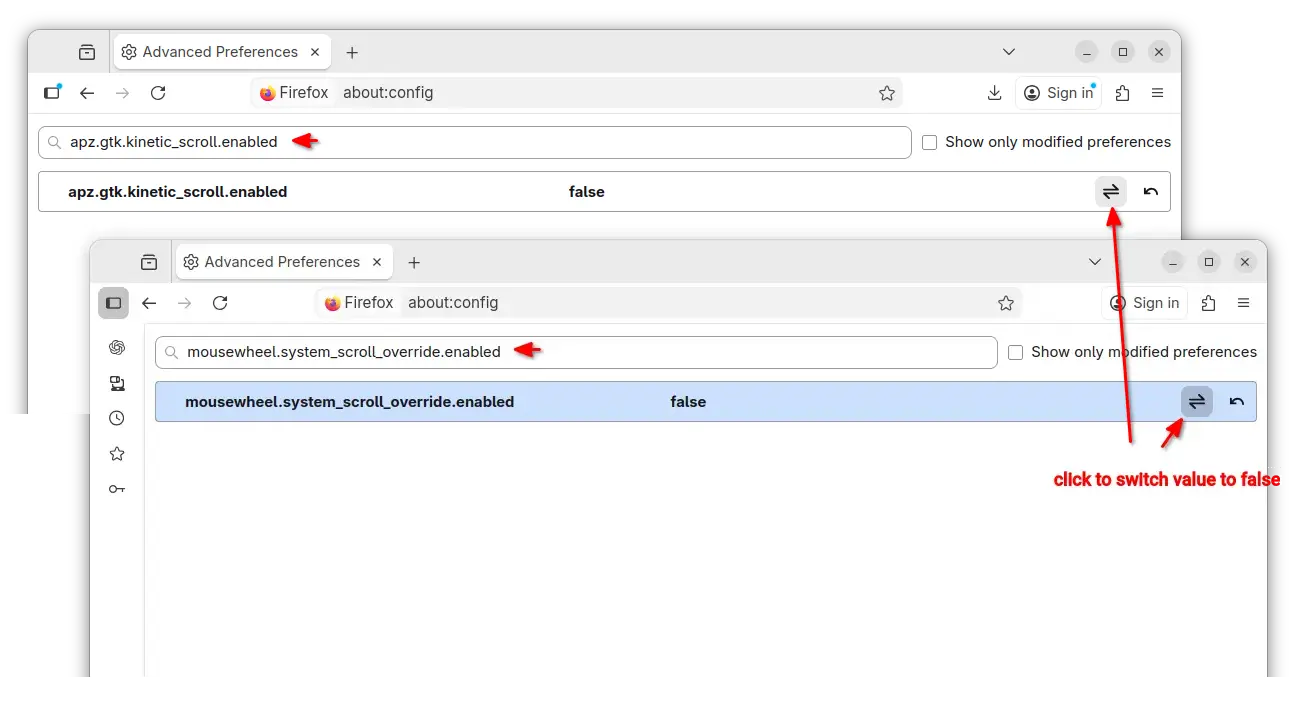
UPDATE for Firefox
Thanks for @Ellem, if you found the tutorial works for your Ubuntu desktop but NOT for Firefox, then open about:config page in your Firefox web browser, and try to
- set
mousewheel.system_scroll_override.enabledto false. - and set
apz.gtk.kinetic_scroll.enabledto false.
Finally, relaunch web browser to apply.
How to Restore
To undo the changes you made via the previous steps, first open terminal (Ctrl+Alt+T) and run command to delete the config file:
sudo rm /etc/udev/hwdb.d/61-evdev-local.hwdb
Then update database and reload udev rules by running 2 commands one by one:
sudo systemd-hwdb update
sudo udevadm trigger /dev/input/event*
Finally, restart your computer and done.
via: reddit thread.