
The LibreOffice office suite 7.2 was released with many new features and improvements. Here’s how to install it in Ubuntu 20.04, Ubuntu 21.04, and Ubuntu 21.10.
LibreOffice is the default office suite available in Ubuntu as well as many other Linux Distributions out-of-the-box. It’s made up of a Writer, Calc, Impress, Draw, Math, and database management tools, and supports the file formats of MicroSoft Office.
What’s new in Libreoffice 7.2
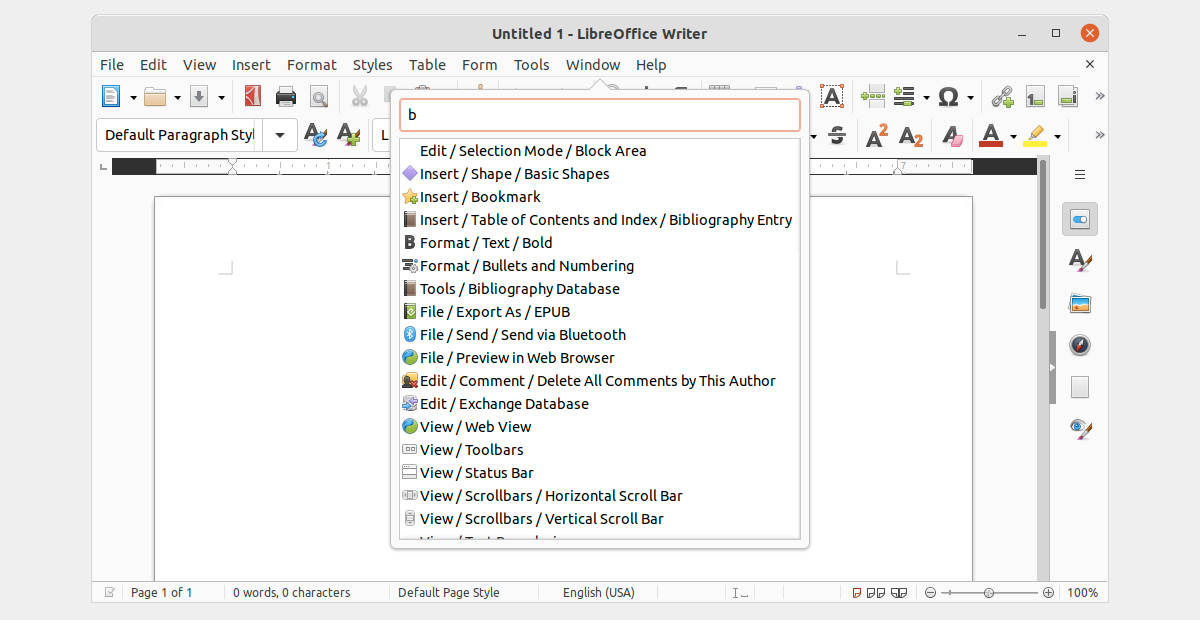
LibreOffice 7.2 was released as the latest major release with new command popup HUD (“Heads-up display”). By going to “Help -> Search Commands” or pressing Shift+Esc on keyboard, it brings up the command box allows to search for and execute actions.
The release introduced a Dark color scheme, so the app window can be set to fully dark for working at night. Also, it added new scrollable style picker in Notebookbar, fontwork panel in sidebar. And the templates dialog got a list view, the global toolbar lock can now switched off via “View -> Toolbars”.
For Libreoffice Writer, Impress & Draw, all background fills can now be set to either cover the page inside the margins or the entire page.
Other changes in LibreOffice 7.2 include:
- Writer:
- Show various indexes and the mouse-over tooltip for a hyperlink to a document index entry mark.
- Page styles now have a gutter margin
- Added label and business card paper: A-One, Hisago, Sanwa Supply, Daiso.
- Improved font caching to speed up text rendering.
- Reduced opening time for some DOCX file.
- Calc:
- Added traditional Japanese month names, Japanese era name.
- Implemented the Kahan summation algorithm.
- Introduced ‘fat-cross’ cursor.
- Redesigned Paste Special dialog.
- IMPRESS & Draw:
- Added Candy, Freshes, Grey Elegant, Growing Liberty, Yellow Idea templates.
- Removed Alizarin, Bright Blue, Classy Red, Impress, Lush Green.
- PDF signature verification is now based on PDFium
- Multiple columns layout in LibreOffice text boxes.
- Performance improvements for loading large images, and faster drawing of semi-transparent images.
How to Install LibreOffice 7.2 in Ubuntu:
There are a few ways to get the packages installed in Ubuntu, though the official PPA is highly recommended (see method 3)!
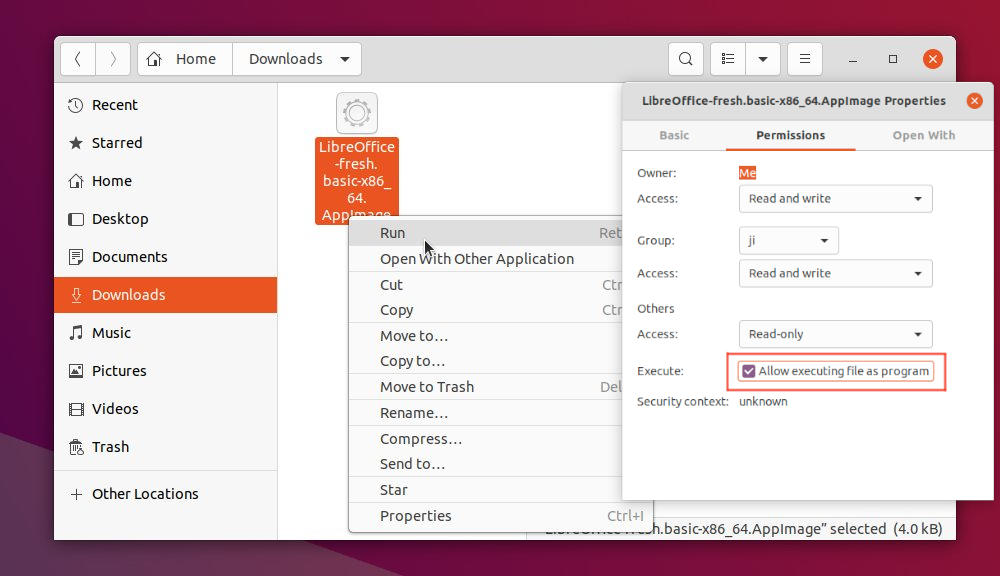
Method 1: LibreOffice Appimage
Without installing the software package, the Appimage is an universal Linux package format that can be run directly to launch the office suite.
Just grab the “Fresh” version from the link button above. Then add executable permission, and right-click to run it:
Method 2: LibreOffice Snap:
Snap is the easiest way to install the office suite in Ubuntu. It’s official and updates automatically! Just search for ‘LibreOffice’ in Ubuntu Software and install the one from ‘snapcraft.io’:
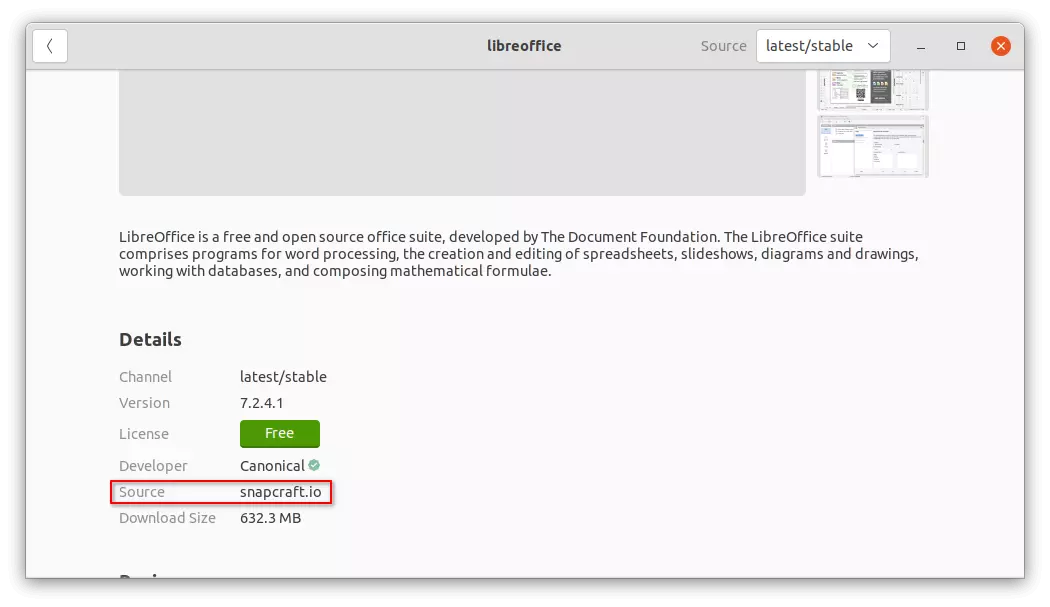
NOTE: since the pre-installed one is native DEB package. You’ll have duplicated LibreOffice icons in ‘Activities’ overview search result after installed the Snap package.
Method 3: Install LibreOffice via Ubuntu PPA (RECOMMEND)
The official PPA is always preferred and recommended. It will upgrade the pre-installed LibreOffice packages to the latest and integrate well into Ubuntu desktop.
I put it as the last method because the PPA is not updated for the release at the moment. The maintainer has been building and testing the packages. And, now it’s ready for all current Ubuntu releases.
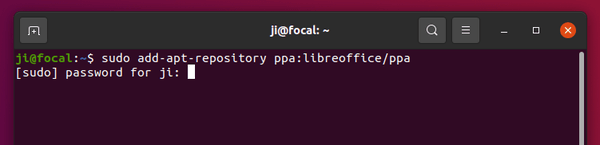
1. Add LibreOffice PPA
First open terminal from your system start menu (click top-left corner ‘Activities’, search for and open terminal). When it opens, run command:
sudo add-apt-repository ppa:libreoffice/ppa
So far, the PPA supports for Ubuntu 18.04, Ubuntu 20.04, Ubuntu 21.04, Ubuntu 21.10, and Linux Mint 20.
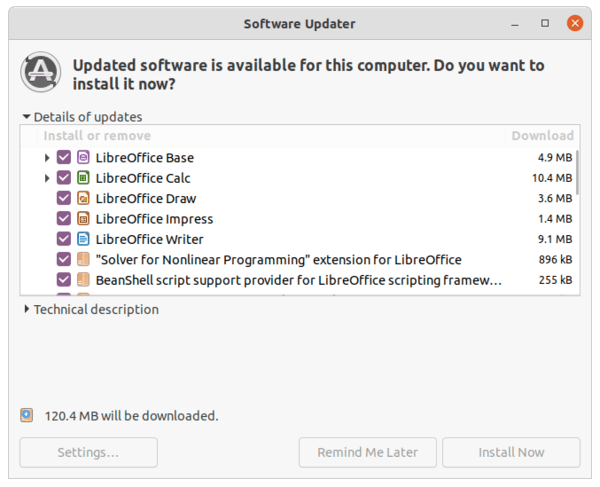
Next, you can upgrade the office suite using Software Updater (Update Manager) utility.