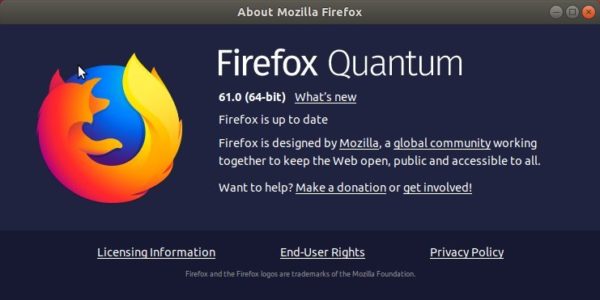
Mozilla Firefox 61.0 was released a few hours ago with further more performance improvements, new features, and safer online experience.
Firefox 61.0 release highlights:
- Faster page rendering with Quantum CSS improvements and the new retained display list feature
- Faster switching between tabs on Windows and Linux
- WebExtensions now run in their own process on MacOS
- Ability to add search engines to the address bar “Search with” tool from the page action menu.
- On-by-default support for the latest draft of the TLS 1.3 specification
- Access to FTP subresources inside http(s) pages has been blocked
- Improvements for dark theme support across the entire Firefox user interface
- Added support to allow WebExtensions to hide tabs
- Improved bookmark syncing
Download / Install Firefox 61
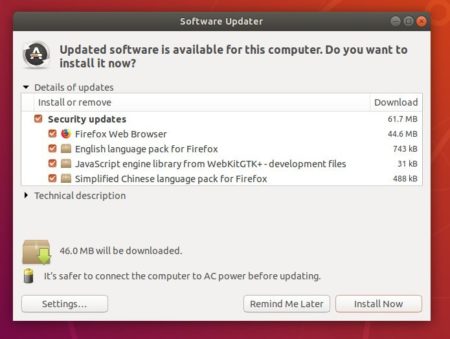
Ubuntu Mozilla team will package the new Firefox release, and publish it in updates / security repositories.
The new release packages will be usually available in a few days, at that time you can install it via Software Updater.