Archives For November 30, 1999

Ubuntu 17.04

A new point release of Ubuntu 16.04 LTS was released last night for its Desktop, Server, and Cloud products, as well as other Ubuntu flavors.

Lukasz Zemczak announced in the Ubuntu Release mailing list:

Like previous LTS series’, 16.04.4 includes hardware enablement stacks for use on newer hardware. This support is offered on all architectures except for 32-bit powerpc, and is installed by default when using one of the desktop images. Ubuntu Server defaults to installing the GA kernel, however you may select the HWE kernel from the installer bootloader.

As usual, this point release includes many updates, and updated installation media has been provided so that fewer updates will need to be downloaded after installation. These include security updates and corrections for other high-impact bugs, with a focus on maintaining stability and compatibility with Ubuntu 16.04 LTS.“

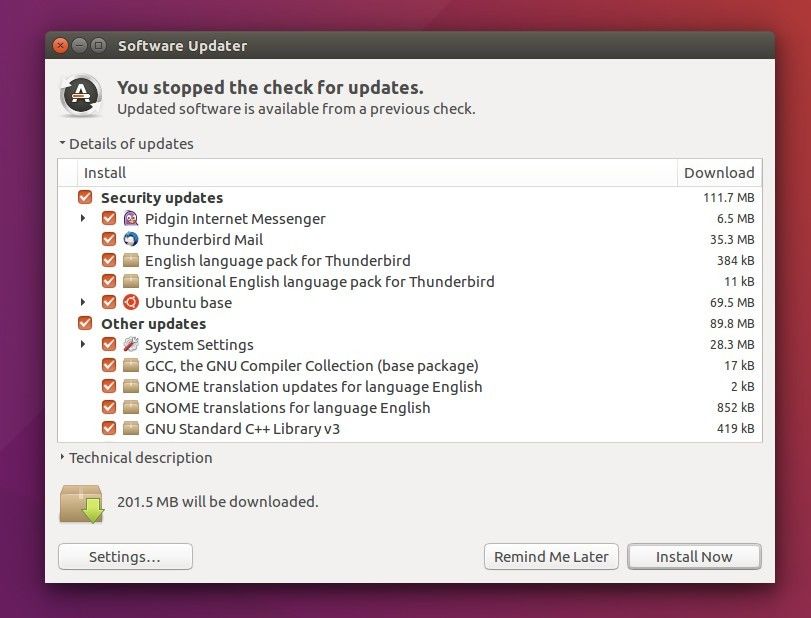
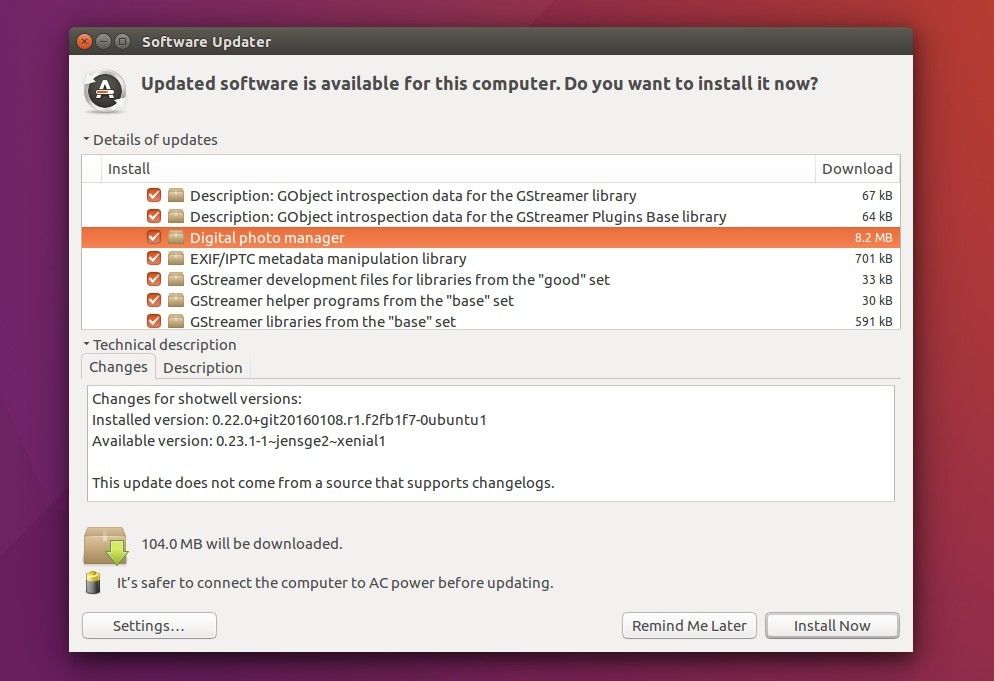
To upgrade from a previous Ubuntu 16.04 release, either run Software Updater and install all available updates or run command in terminal (Ctrl+Alt):

sudo apt-get update && sudo apt-get upgrade

Then check result via command:

cat /etc/issue

How to Install HWE Stacks in previous Ubuntu 16.04:

The new point release ships with an updated kernel and X stack (HWE Stacks) by default for the desktop in its ISO images.

These HWE Stacks were released in the LTS point releases as a means to enable newer platforms and components.

For those upgrading from a previous release, you need to manually install the stacks via command:

sudo apt-get install --install-recommends linux-generic-hwe-16.04 xserver-xorg-hwe-16.04

For any reason, you can uninstall HWE stacks by following this tutorial.

Enable “Open as Admin” in Nautilus File Browser

Last updated: February 15, 2018

It’s been a long time last time I wrote about how to enable “Open as root” or “Open as Administrator” in Nautilus’ context menu.

A Nautilus extension called Nautilus Admin has been created for a period of time. It’s a simply Python script that adds some administrative actions to the right-click menu:

  • Open as Administrator: opens a folder in a new Nautilus window running with administrator (root) privileges.
  • Edit as Administrator: opens a file in a Gedit window running with administrator (root) privileges.

To install the Nautilus extension:

The extension is available for all current Ubuntu releases: Ubuntu 14.04, Ubuntu 16.04, Ubuntu 17.10, and Ubuntu 18.04.

1. Simply open “Terminal” either via Ctrl+Alt+T or from app launcher. Then run command:

sudo apt-get install nautilus-admin

Input your password (no visual feedback while typing) when it prompts and hit Enter.

2. Then restart Nautilus via command:

nautilus -q

That’s it. Open nautilus file browser again and enjoy with new context menu options!

MicroSoft’s Visual Studio Code IDE now is super easy to install in Ubuntu 14.04, Ubuntu 16.04, and higher via the Snap package format.

David Callé announced the availability of Visual Studio Code as a Snap a day ago:

Launched in 2015 by Microsoft, Visual Studio Code has imposed itself as one of the preferred code editors in the developer community. Cross-platform (powered by Electron), it features a marketplace of more than 3000 extensions where any language can find its linters, debuggers and test runners.

To install Visual Studio Code in all current Ubuntu releases, simply run command (open terminal via Ctrl+Alt+T):

sudo snap install --classic vscode

That’s it! Installed snaps are automatically refreshed, so you’ll always have the latest release of VS Code installed.

In addition, if you’re first time installing a Snap package in Ubuntu, you need to first install snapd, the service which runs on your machine and keeps track of your installed snaps, via command:

sudo apt install snapd

Like traditional deb packages, the snap version of the software can be launched either from Unity Dash, Gnome application launcher, or other desktop menu, or via command vscode.

Uninstall:

To remove VS Code, run the snap command with remove flag:

sudo snap remove vscode

Ubuntu 16.04.2 LTS was released 2 days ago with security updates, corrections for high-impact bugs, and hardware enablement stacks for use on newer hardware.

The LTS enablement stacks provide Linux Kernel 4.8 and newer X support, and they are included in the Ubuntu 16.04.2 desktop ISO images.

For original Ubuntu 16.04, and Ubuntu 16.04.1 users, you have to manually install the HWE stacks. And below will tell you how:

How to Install Hardware Enablement Stacks:

Open terminal from app launcher or via Ctrl+Alt+T shortcut key. When it opens, run command:

sudo apt-get install --install-recommends xserver-xorg-hwe-16.04

Type in your password (no visual feedback) and hit Enter.

After installation, reboot your computer.

How to Uninstall:

1. I don’t like the new X stack in my laptop, so I removed it via commands:

sudo apt remove xserver-xorg-core-hwe-16.04 xserver-xorg-input-all-hwe-16.04 linux-generic-hwe-16.04 xserver-xorg-video-all-hwe-16.04

You’ll see the command also removes the ubuntu-desktop package. Don’t worry. The following commands will install it back.

2. Then install back the original xserver-xorg via commands:

sudo apt install xserver-xorg-core

sudo apt install ubuntu-desktop xserver-xorg xserver-xorg-video-all xserver-xorg-input-all libgl1-mesa-dri:i386 libgl1-mesa-glx:i386

If you want to remove the new kernel 4.8, reboot and select boot with old 4.4 kernel (grub -> Advanced Options), then see this how to tutorial.

Record Animated GIF Images in Ubuntu 16.04 via Peek

Last updated: November 16, 2016

For those who want to record a selection of your screen to an animated GIF image, Peek is open source tool for Linux that offers a simple window that can be resized to select a screen area to record over.

After resizing Peek window to select a screen area, click the Record button to start recording.

Once you stop the recording, a dialog pops-up and prompts you to give a name and select where to save the GIF image.

After you save the GIF image, a dialog pops-up allows you to open the file folder quickly with the GIF image automatic highlighted.

Install Peek Animated GIF recorder in Ubuntu 16.04:

Peek so far only support Linux with X11. Other Unix like systems using X11 should work as well. It is planned to also support Wayland and maybe other operating systems in the future.

1. Open terminal from Unity Dash, App Launcher, or via Ctrl+Alt+T keys, then run command to install the requirements:

sudo apt install libsdl1.2debian ffmpeg libavdevice-ffmpeg56

2. Then download peek, Linux.deb package from the link below:

Finally click install the .deb via Ubuntu Software or use dpkg -i command in terminal:

sudo dpkg -i ~/Downloads/peek-*.deb && sudo apt -f install

Once installed, launch peek from Unity Dash or your app launcher and enjoy!

The best-looking Linux distro, Elementary OS, has reached the 0.4 release, code name “Loki” and base on Ubuntu 16.04 package system.

The Elementary OS team announced the stable release of Loki last night:


After a little over a year of development, elementary is proud to announce the stable release of elementary OS Loki!

Loki is the newest version of elementary OS, a design-oriented and open source Linux-based operating system for desktops and laptops. It succeeds Freya which was released in April of 2015.

What’s new in Elementary OS Loki:

  • Linux Kernel 4.4 and Ubuntu 16.04 base
  • redesigned indicators change to be dark or light depending on your wallpaper.
  • redesigned audio indicator with more compact set of controls and large icons
  • new network indicator and redesigned network settings, bluetooth indicator
  • A new lid close setting and related behavior
  • Notification center now caches notifications and offers Do Not Disturb toggle
  • use Epiphany as new default web browser.
  • new app store
  • various other improvements, see the release note.

Download Elementary OS Loki at: elementary.io. (pay any dollar amount, or type 0 for free)

The first point release of Ubuntu 16.04 LTS was released today with so many fixes, improvements, and Kernel and hardware support updates.

Updated CD images for Ubuntu 16.04.1 are available for download, including fixes for many hardware-specific bugs.

According to the change summary, Ubuntu 16.04.1 brings:

  • Some apt, systemd, dpkg and xinit bugs has been fixed in this release to fix upgrade issues.
  • some LibreOffice crash fixes.
  • Lots of fixes and improvements to Gnome Software (Ubuntu Software)
  • Enable the Snappy back-end for Gnome Software (Ubuntu Software)
  • Many many fixes to Unity, Unity Settings Daemon, compiz, lightdm display manager, oxide-qt browser engine, etc.
  • See the change summary for more details.

How to Upgrade to Ubuntu 16.04.1:

For Ubuntu 16.04, running a regular system update using Software Updater will bring you to Ubuntu 16.04.1.

Or run commands in terminal via:

sudo apt update && sudo apt upgrade

For Ubuntu 15.10 and Ubuntu 14.04, you may follow this guide to upgrade to 16.04.1.

You can upgrade directly from 14.04 to 16.04.1. Just make sure you have selected to notify LTS only in Software & Updates settings:

Faenza is one of the most popular Gnome icon theme that provides light, dark, Faenza-Ambiance, and Faenza-Radiance themes to fit with light or dark panels / toolbars.

Since Ubuntu 15.04 Vivid, the icon theme was finally made into official Ubuntu repositories to make it easier to install.

For Ubuntu 16.04, while Ubuntu Software (Gnome Software) does not show applications without appdata (information about software description and screenshot etc.), use Synaptic or apt command:

Open terminal (Ctrl+Alt+T) and run command to install Faenza Icons in Ubuntu 16.04:

sudo apt install faenza-icon-theme

Type in password and once it’s properly installed, launch Unity Tweak Tool (available in Ubuntu Software) or other tweak tool for your desktop and apply new icons in Appearance -> Icons.


A repacked version is also available that includes wireless mouse icon and the tiny calendar icon in time & date menu.

Whatsie is a simple & beautiful desktop client (unofficial) for WhatsApp Web. It’s and open-source, cross-platform software works on OS X, Windows, and Linux.

Besides all the WhatsApp Web features, it also features:

  • Themes & Mini Mode
  • Native Notifications (with reply on OS X)
  • Spell Checker & Auto Correct (English)
  • Keyboard Shortcuts

How to Install Whatsie in Ubuntu:

Pre-compiled binary packages are available for download in its release page (see the link below), select download:

  • whatsie-x.x.x-linux-amd64.deb for 64-bit Ubuntu
  • whatsie-x.x.x-linux-i386.deb for 32-bit Ubuntu

from:

Download the latest Whatsie (.deb)

Then click install via Ubuntu Software, or run command in terminal (Ctrl+Alt+T):

sudo dpkg -i ~/Downloads/whatsie*.deb; sudo apt -f install

Once the software is successfully installed, launch it from Unity Dash (App Launcher), scan the QR code via WhatsApp in your mobile phone, and enjoy chatting with your friends.

If you like Whatsie and want to receive future updates along with other system updates via Software Updater, add the Linux repository by running the commands below one by one in terminal (Ctrl+Alt+T):

gpg --keyserver pool.sks-keyservers.net --recv-keys 1537994D

gpg --export --armor 1537994D | sudo apt-key add -

echo "deb https://dl.bintray.com/aluxian/deb stable main" | sudo tee -a /etc/apt/sources.list

(Optional) To remove the software, use Synaptic Package Manager (available in Ubuntu Software), or run apt command in terminal via remove flag:

sudo apt remove whatsie

And the Linux repository can be removed via System Settings -> Software & Updates -> Other Software -> highlight and remove the repository line.

Shotwell photo manager has recently reached the 0.23.1 release. While Ubuntu 16.04 contains the old 0.22 release, you can now install the latest release and receive future updates through the maintainer, Jens Georg’s PPA.

Notable changes in Shotwell 0.23.1:

  • Update Facebook application id so Facebook integration works again
  • Rename “Yorba website” to “Shotwell website” in About dialog
  • Copyright transferred from Yorba to Software Freedom Conservancy (SFC)
  • New and updated icons
  • Various bug fixes and translation updates.

How to Install / Upgrade Shotwell in Ubuntu 16.04:

1. Add the maintainer’s PPA.

Open terminal (Ctrl+Alt+T), paste the command below and hit run:

sudo add-apt-repository ppa:yg-jensge/shotwell

Type in your password (no visual feedback) when it asks and hit Enter.

2. Launch Software Updater and upgrade Shotwell.

Launch Software Updater, after checking for updates, you’ll see the new release of “Digital photo manager” available for upgrade under Other updates -> Ubuntu Base.

3. (Optional) To revert back to the stock version of Shotwell in Ubuntu 16.04, run command in terminal to install ppa-purge and purge the PPA which also downgrade the photo manager:

sudo apt install ppa-purge && sudo ppa-purge ppa:yg-jensge/shotwell

That’s it. Enjoy!