Avidemux video editor reached the new 2.7 series a few days ago. Now you can install it in Ubuntu 16.04 and/or Ubuntu 17.04 via GetDeb repository, though there’s already an appimage available.
For the release highlights and appimage, a single executable file (non-install), see this page.
To install Avidemux 2.7, open terminal via Ctrl+Alt+T or by searching for “terminal” from app launcher, and do following steps:
It’s Avidemux 2.7 though getdeb still uses the old 2.6 package naming system.
Uninstall:
You can remove the GetDeb repository via Software & Updates utility (Other Software tab), and remove Avidemux 2.7 either via Synaptic package manage or by running command:
Finally launch the app from your application launcher and enjoy! And it should automatically update itself once a new release is out and published in snappy store.
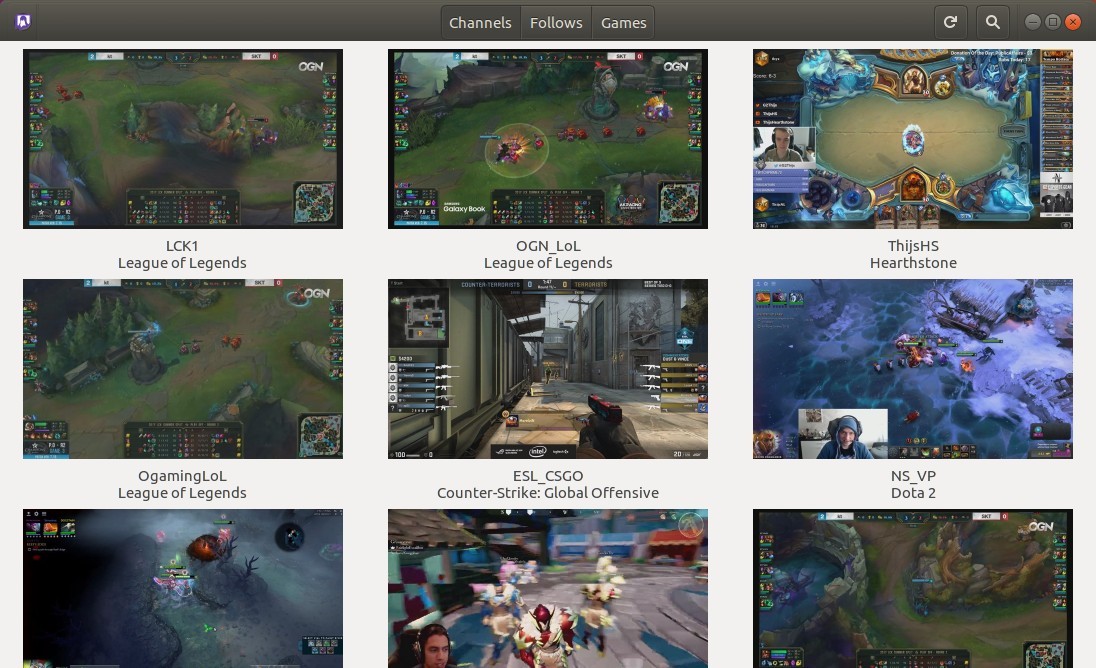
Uninstall:
To remove Gnome Twitch snap app, simply run command:
sudo snap remove gnome-twitch
You may also remove the gnome-3-24 snap if you don’t require it via sudo snap remove gnome-3-24 command.
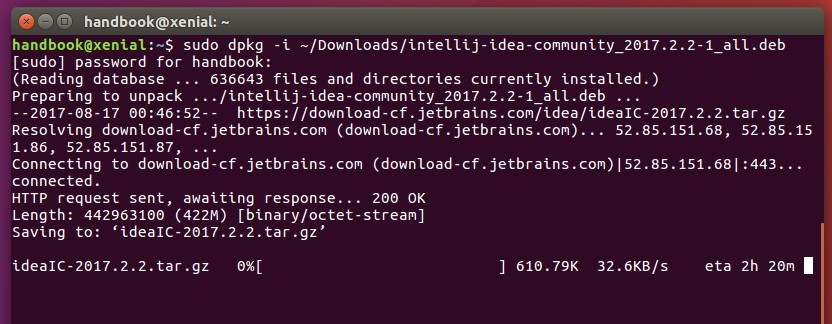
JetBrains IntelliJ IDEA java IDE has reached the new point release 2017.2.2 a few hours ago. The new release brings some new features, numerous bug-fixes and improvements.
Fix crashes that occurred with the use of using custom fonts
Fix wrong HiDPI scaling on multiple monitors for Windows 10
Kotlin pugin updated to 1.1.4
Support for CSS Modules with LESS and SASS
XQuery/XPath with Language Injection
Favorites in the Database tool window
Fix major performance regression
How to Install IntelliJ IDEA 2017.2.2 in Ubuntu:
JetBrains offers official Linux packages for download at the link below:
Just extract and run the executable file to launch the Java IDE.
For Ubuntu 14.04, Ubuntu 16.04, Ubuntu 17.04, Ubuntu 17.10, you can also use the installer script available in the link below.
Run the script will download the official package from JetBrains web server, then install it in your Ubuntu automatically with application shortcut integration.
“On windows, some antivirus do not like recent versions, it is a false positive. There is no virus/trojan…… The code is generated on linux.”
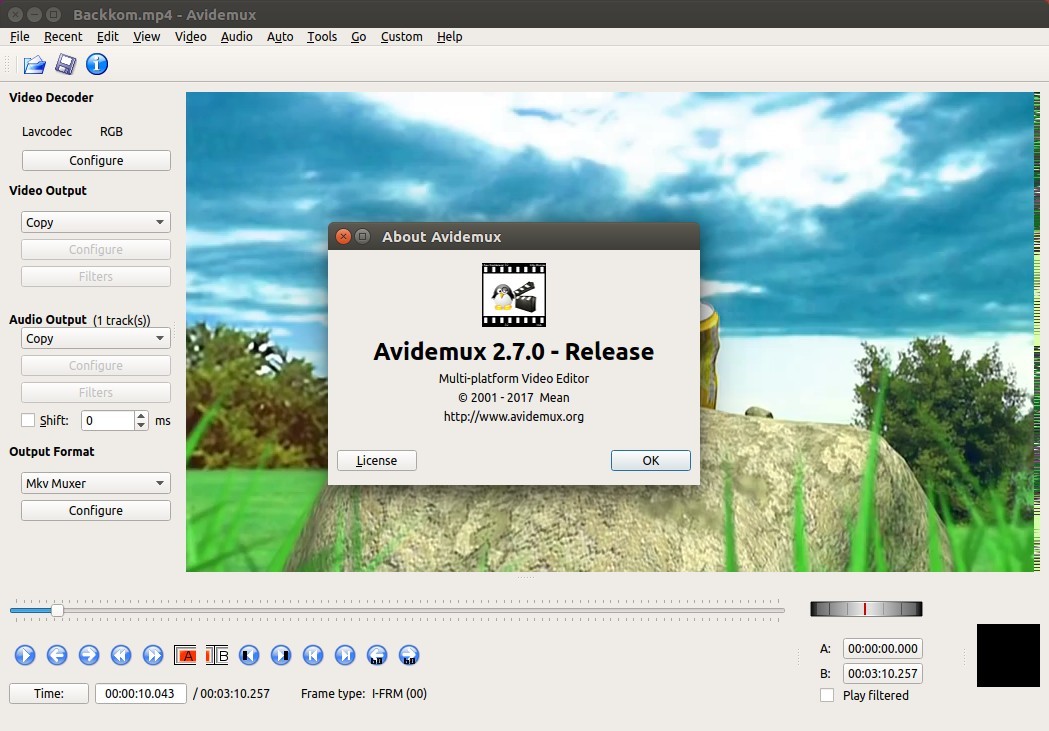
Changes in Avidemux 2.7.0 include:
FFmpeg switched to the 3.3.x branch
Fixed frame computation bug that led to bad cutting
Put log files into the local folder for Win32.
Steplessly zoom paused video when the window is resized
Added Ctrl+Shift+C shortcut to copy the current PTS to clipboard
HEVC decoding via DXVA2 blacklisted on win32, active on win64
Fix VP9 decoding
New filter:ADM ivtc
Distinguish between AC3 and EAC3 when importing
UI improvements and more.
Download / Install Avidemux 2.7.0 in Ubuntu:
The getdeb repository and Thanh Tung Nguyen’s PPA maintain the Avidemux packages for Ubuntu, though the two repositories do not update with the new 2.7.0 release at the moment of writing.
The official AppImage, a single executable file for all Linux, is available for download at the link below:
Make the AppImage executable from its ‘Properties’ dialog, and run the file will launch the video editor:
If you don’t see ‘Run’ option, go to menu Edit -> Preferences -> Behavior -> tick the box says ‘Run executable text files when they are opened’, and finally re-open Nautilus file browser.
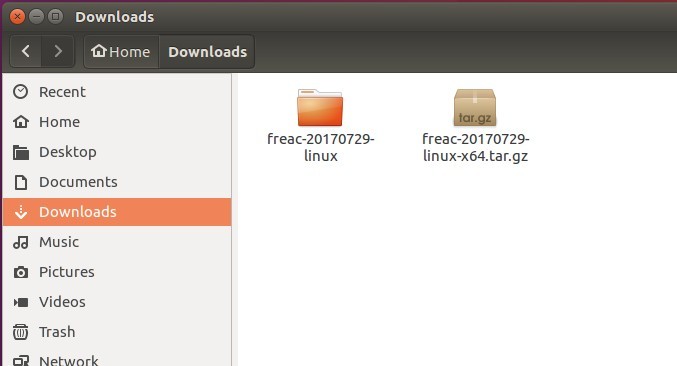
This quick tutorial is going to show you how to install the free ‘fre:ac’ audio converter in Ubuntu and manually create app shortcut to be able to launch it from Unity Dash, Gnome app launcher, or other app launcher.
fre:ac is a free audio converter and CD ripper works on Windows, Mac OS, Linux, and FreeBSD. It offers Linux packages but lacks application shortcut.
Download fre:ac:
First download the latest version of the audio converter from the link below:
Select download:
freac-yymmdd-linux.tar.gz package for 32-bit system.
freac-yymmdd-linux-x64.tar.gz package for 64-bit system.
Then extract it. In the case below, I downloaded the 64-bit tarball:
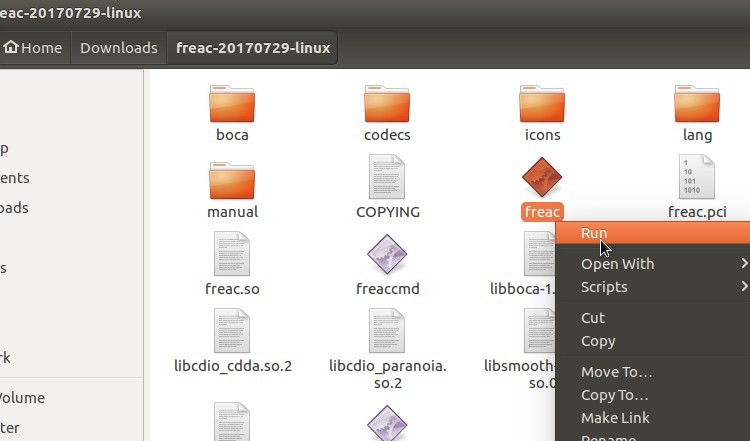
You can now launch the audio converter by run the executable file from its context menu:
Create app shortcut for fre:ac audio converter:
To be able to launch the software from Unity Dash, Gnome app launcher, or other app launcher, you have to manually create an app shortcut for fre:ac.
To do so, open terminal via Ctrl+Alt+T or from app launcher, and do following steps:
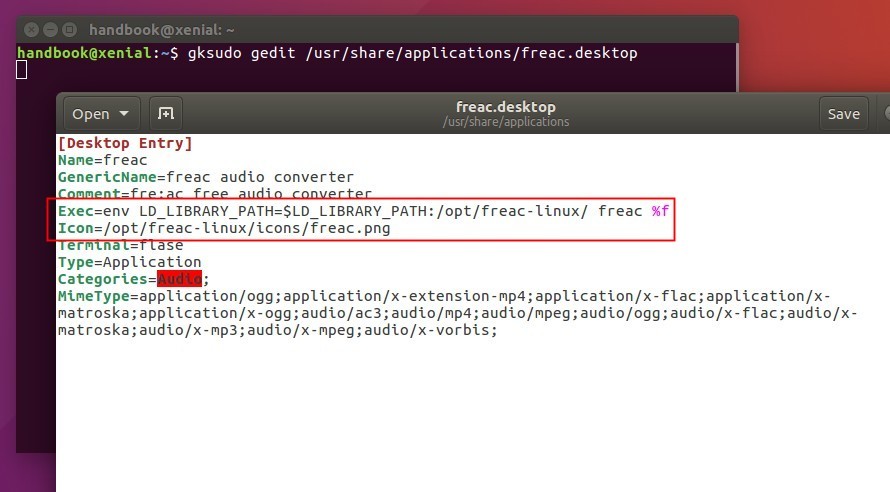
1. Move the source folder to /opt/ directory for global use by running command:
It’s important to add variable env LD_LIBRARY_PATH=$LD_LIBRARY_PATH:/opt/freac-linux/ to the value of Exec, or it won’t launch the software and output error:
freac: error while loading shared libraries: libsmooth-0.8.73.so.0: cannot open shared object file: No such file or directory
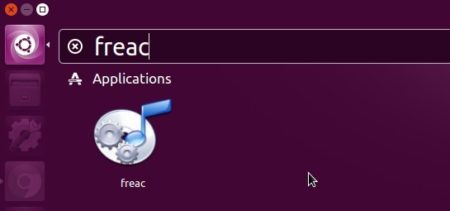
4. Finally launch fre:ac audio converter from app launcher (might need log out and back in) and enjoy!
How to Remove:
To remove fre:ac audio converter, simply remove the source folder, symbolic link, and app shortcut by running following command:
GIMP, the popular free and open-source cross-platform image editor, now is available as Snap app for Ubuntu 14.04, Ubuntu 16.04, and higher.
GIMP has been made into the beta channel of Ubuntu Snappy Store for testing for days. Now the latest GIMP 2.8.22 is available in stable channel:
1. For Ubuntu 14.04 and Ubuntu 16.04 users that have not installed any Snap app, install snapd daemon first via command (open terminal via Ctrl+Alt+T):
sudo apt-get install snapd
Input your password (no visual feedback while typing due to security reason) and hit Enter.
2. Then install GIMP snap app either via command:
sudo snap install gimp
Or by using Ubuntu Software Center (need login):
The snap app can co-exist with the traditional GIMP package. So if you have both versions installed, you have to launch GIMP Snap app via following command since the app launcher opens the traditional one:
/snap/bin/gimp
How to Remove GIMP Snap app:
To remove the app, simply run command in terminal:
Microsoft Visual Studio Code is available via Snap app in Ubuntu, though it’s not updated to version 1.15 at the moment of writing, see how to install VS Code vis Snap in Ubuntu.
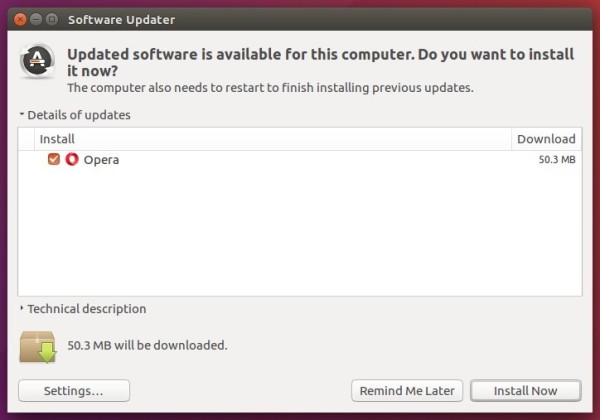
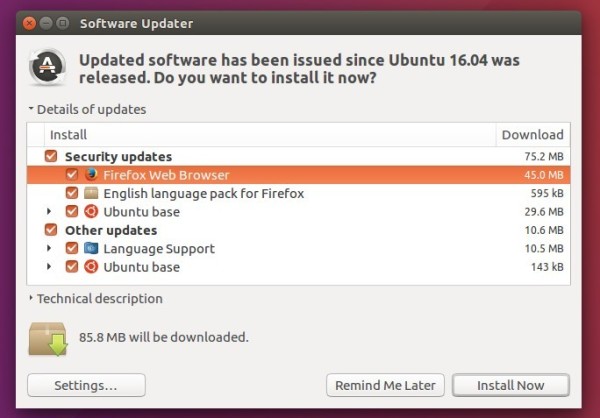
Although Mozilla website offers non-install version Linux binaries, the best way to get the latest Firefox in Ubuntu is using Software Updater to upgrade it through Ubuntu main (security & updates) repository.
NOTE that there will some delay for the new release being published in main repositories, check the build page.
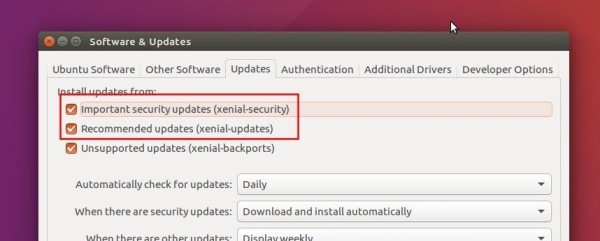
The security and updates repositories are enabled by default. If you don’t see the Firefox updates even after Ubuntu published it in these repositories, check out the Updates tab in Software & Updates utility.