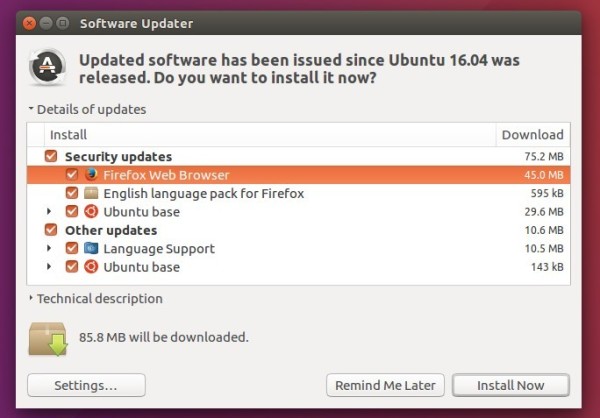
Although Mozilla website offers non-install version Linux binaries, the best way to get the latest Firefox in Ubuntu is using Software Updater to upgrade it through Ubuntu main (security & updates) repository.
NOTE that there will some delay for the new release being published in main repositories, check the build page.
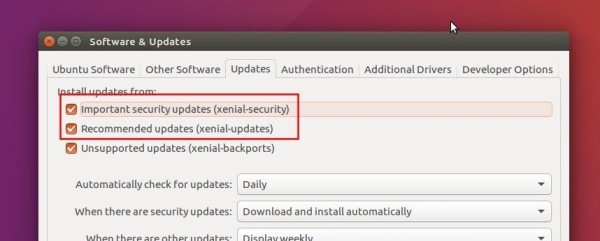
The security and updates repositories are enabled by default. If you don’t see the Firefox updates even after Ubuntu published it in these repositories, check out the Updates tab in Software & Updates utility.
The binary packages are very small in size. For those who don’t want to add the PPA, grab the .deb package from PPA page. Ubuntu 14.04 and Ubuntu 16.04 need to install python-pydbus package first from the link page.
Uninstall:
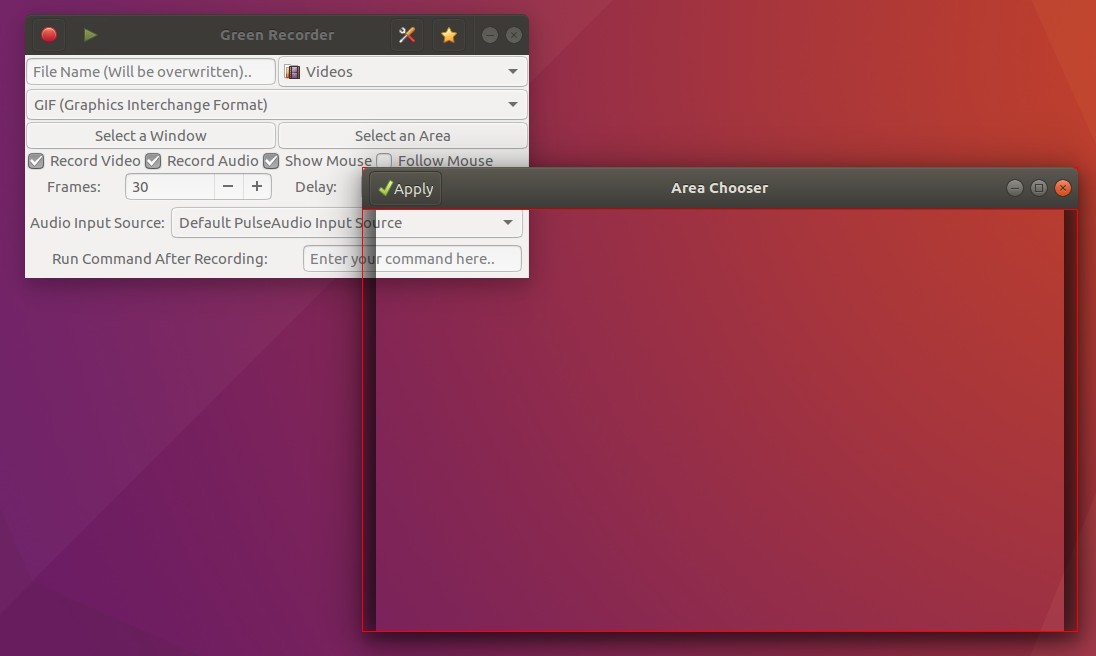
To remove the screen recording application, either use Synaptic package manager or run command:
sudo apt-get remove --autoremove green-recorder
And remove the PPA via Software & Updates utility under ‘Other Software’ tab.
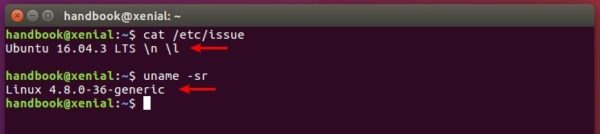
The third point release of Ubuntu 16.04 LTS Xenial Xerus, Ubuntu 16.04.3, was released 1 day ago with Linux Kernel 4.10 and new graphic stack from Ubuntu 17.04.
The Ubuntu team is pleased to announce the release of Ubuntu 16.04.3 LTS (Long-Term Support) for its Desktop, Server, and Cloud products, as well as other flavours of Ubuntu with long-term support.
Like previous LTS series’, 16.04.3 includes hardware enablement stacks for use on newer hardware. This support is offered on all architectures except for 32-bit powerpc, and is installed by default when using one of the desktop images. Ubuntu Server defaults to installing the GA kernel, however you may select the HWE kernel from the installer bootloader.
As usual, this point release includes many updates, and updated installation media has been provided so that fewer updates will need to be downloaded after installation. These include security updates and corrections for other high-impact bugs, with a focus on maintaining stability and compatibility with Ubuntu 16.04 LTS.
Install all system updates via either Software Updater or apt command will bring you to the latest Ubuntu 16.04.3 from an old point release, though it does not install the new Kernel and graphics stacks.
To install new hardware enablement stacks from Ubuntu 17.04
Open terminal via Ctrl+Alt+T or by searching for “Terminal” from app launcher. When it opens, run command:
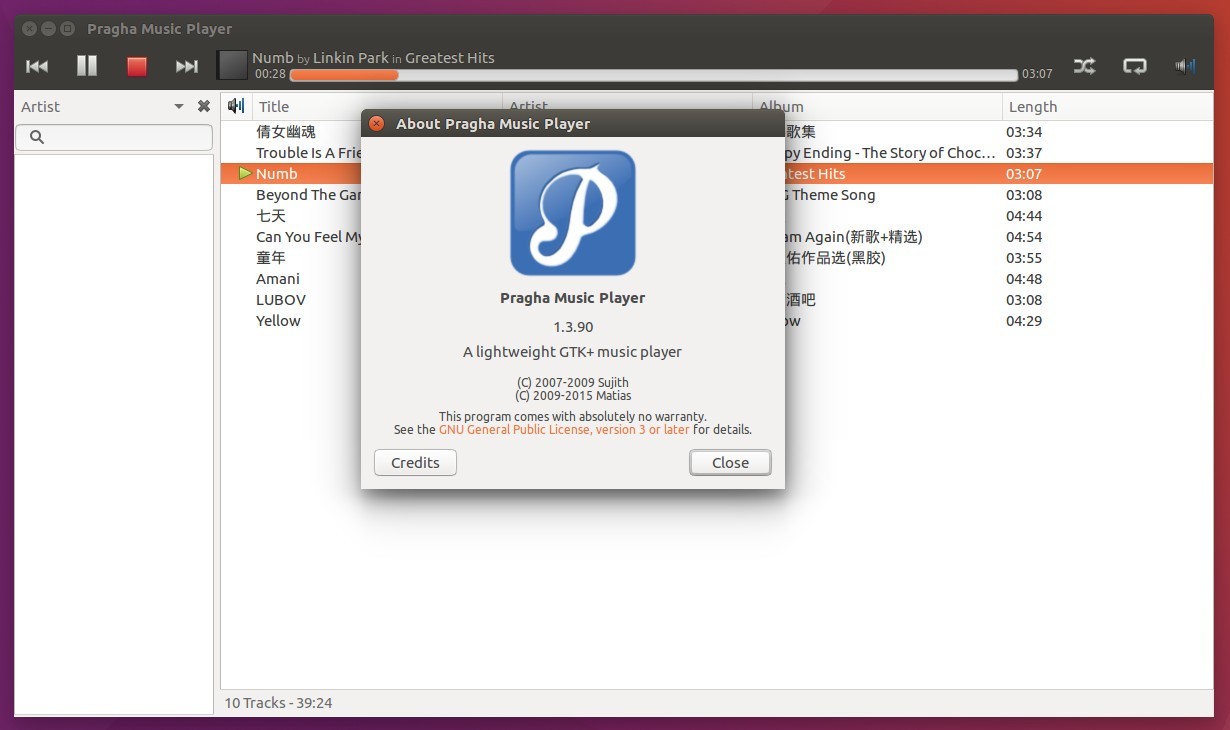
Pragha, a lightweight music player for Linux, has reached the 1.3.90 release earlier today. It’s marked as the first beta release for the next major 1.4 release.
What’s New in Pragha 1.4 beta:
New Ampache plugin.
Uses a new concept of ‘provider’ that allows show music from multiple
collections independently.
New standard widget to display progress of long tasks.
Allow apply a custom css.
Register session in GtkApplication now compatible with xfce 4.14
Misc fixes to Gtk 3.20 and GCC 6.0.
Various other changes, bug-fixes, and translation updates.
While the project page provides only source tarball, you can easily install Pragha via an unofficial PPA for Ubuntu 16.04, Ubuntu 17.04, and Ubuntu 17.10.
1. Open terminal via Ctrl+Alt+T or from app launcher. When it opens, run command to add the PPA:
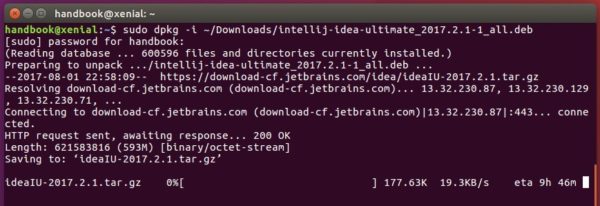
JetBrains’ IntelliJ IDEA Java ide has reached the 2017.2.1 release a few hours ago with lots of bug-fixes and some performance updates.
IntelliJ IDEA 2017.2.1 is the first bug-fix release for the 2017.2 series that fixes:
Performance issue while typing
100% of one core CPU usage issue
Version 2017.2 can’t load project with character “|” in its name
Java 9 compilation fails with error
Add feature: showing comments in Database tree
Various fixes to Docker, Java. Inspections, Spring, JavaScript, JavaScript. Frameworks, JavaScript. Inspections
Some new features and many other fixes, see release note for details.
How to Install IntelliJ IDEA 2017.2.1 in Ubuntu:
The official Linux packages are available for download at the link below:
Grab the package, extract, and run the executable to launch the IDE. You may manually create an application shortcut to be able to start it from app launcher.
For Ubuntu 14.04, Ubuntu 16.04, Ubuntu 17.04, Ubuntu 17.10, you can also use the installer script to download the IDE from JetBrains’ web server, install it to /opt/, and automatically create an app shortcut for it.
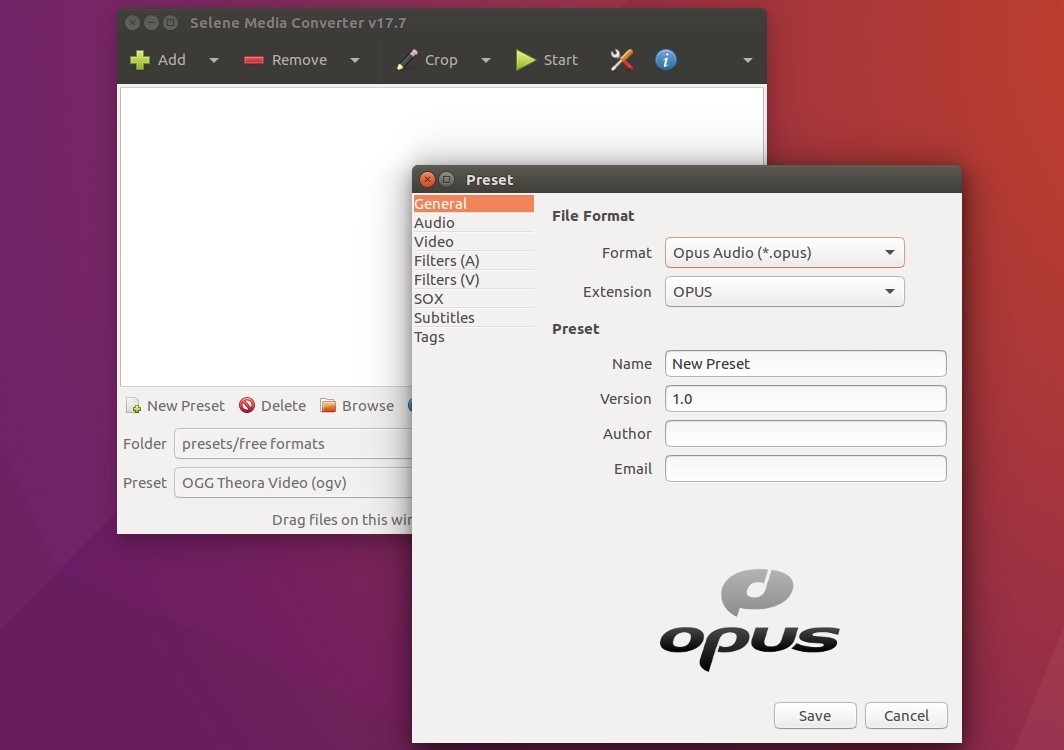
The open source Selene media converter got a new release a few days ago with enhancements, translation updates, and updated installers.
Selene is an audio/video converter for Linux that supports almost every file format that you are likely to come across and can encode them to popular output formats like MKV, MP4, etc. It aims to provide a simple GUI for converting files to popular formats along with powerful command-line options for automated/unattended encoding.
Selene 17.7 features:
Added support for OPUS in WEBM, MKV and OGG containers
Added audio tag support for Fraunhoffer AAC encoding
Use VLC for playing media instead of internal player
MediaPlayer: Center screen and show file name in header bar
Updated installers and translations.
How to Install Selene 17.7 in Ubuntu:
The project offers the .deb and .run installers in its release page.
To upgrade the software easily via system Software Updater utility, you can install Selene from the developer’s PPA repository:
1. Open terminal (Ctrl+Alt+T) and run command to add the PPA:
sudo add-apt-repository ppa:teejee2008/ppa
Type in your password (no visual feedback while typing due to security reason) when prompts and hit Enter. Supports for Ubuntu 16.04, Ubuntu 17.04, Ubuntu 17.10
2. To install the media encoder for first time, run commands to check updates and install it:
sudo apt update

sudo apt install selene
To upgrade it from an existing release, simply launch Software Updater and install the updates.
Uninstall:
To remove selene media converter, run command in terminal:
sudo apt remove --autoremove selene
And remove the PPA repository via Software & Udpates utility under Other Software tab.
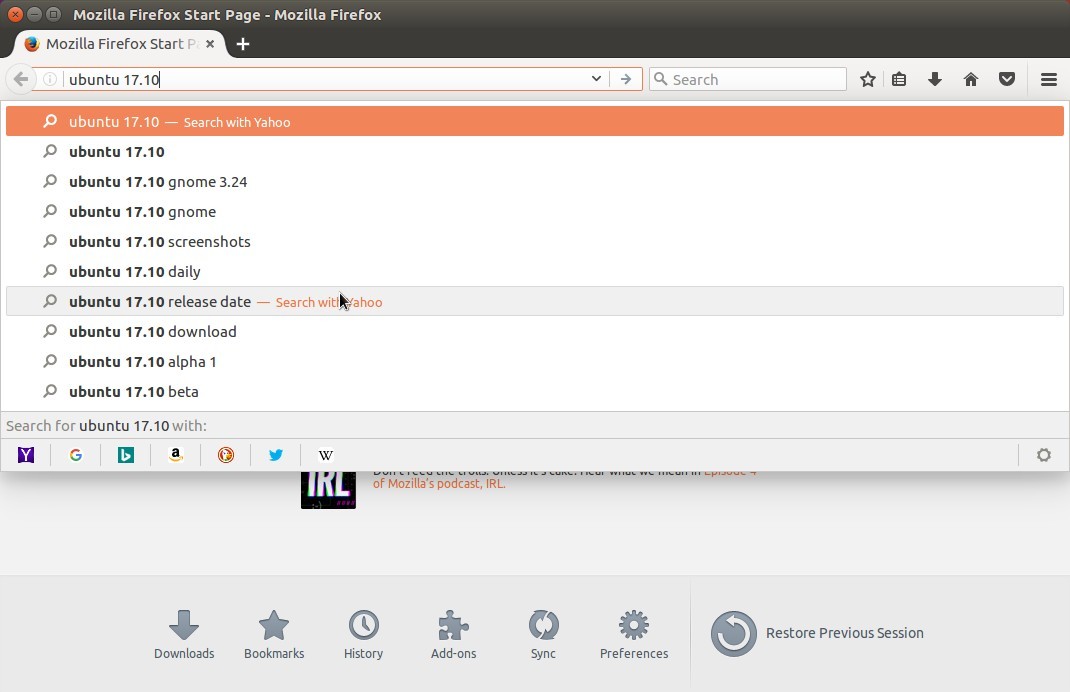
The second alpha release of Ubuntu 17.10 Artful Aardvark now is available for download. Ubuntu 17.10 Alpha 2 features images for Kubuntu, Lubuntu, Ubuntu Budgie, Ubuntu Kylin, and Ubuntu MATE.
Ubuntu 17.10 is still based on Kernel 4.11, which is used in Ubuntu 17.04, however there are a lot of internal updates, such as Python 3 support as default, GNOME’s GDM as default login manager instead of LightDM, and hardware-accelerated video playback.
Download Ubuntu 17.10:
NOTE the pre-release images are not recommended for anyone who need a stable system. However, they are recommended for developers or users who want to test by finding, reporting, and/or fixing bugs, or people want to see how the current snapshot of Ubuntu 17.10 will look and behave.
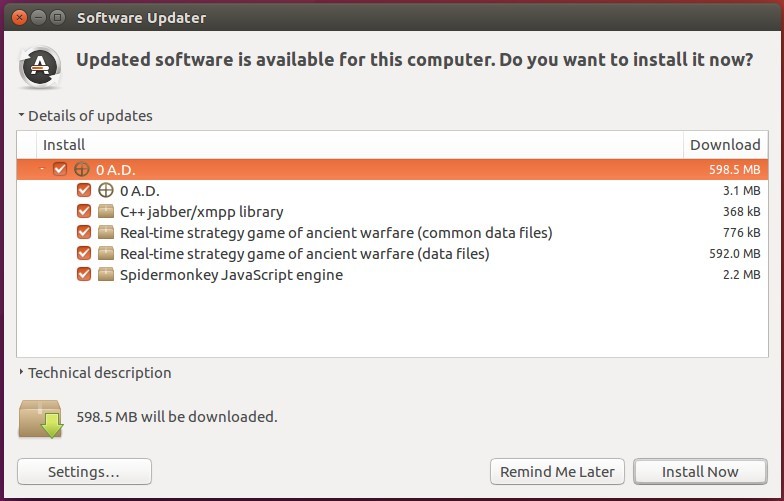
The twenty-second alpha version of the free and open-source real-time strategy game of ancient warfare, 0 A.D. Alpha 22 “Venustas”, was released a few hours ago.
New Features in 0 A.D. alpha 22:
Remake of many models, animations and textures, two new music tracks
Configuration-free Multiplayer Hosting
Capture the Relic Gamemode
Aura and Heal Range Visualization
Twelve new maps, including scripted enemies, rising water and a tutorial
The Wildfire Games team is currently building (and testing) the PPA packages. It will be soon available in the official PPA for Ubuntu 14.04, Ubuntu 16.04, Ubuntu 17.04, Ubuntu 17.10, and their derivatives.
1. Open terminal (Ctrl+Alt+T) and run command to add the PPA:
sudo add-apt-repository ppa:wfg/0ad
Type your password (no visual feedback while typing due to security reason) when prompts and hit Enter.
2. Then upgrade the game from an existing release via Software Updater:
Or simply run commands to update and install the game: