The open-source Liferea feed reader finally reached the new stable 1.12.0 release after months of development. Here’s how to install it in Ubuntu 16.04, Ubuntu 17.04, Ubuntu 17.10, Ubuntu 18.04.
Liferea 1.12.0 release highlights:
- Wide view is now default view
- HTML view now has a ‘View Image’ context menu
- Redesign of the wide view: large icons with teaser text for better using 16:9 screen ratios and making Liferea usable on touchscreen
- Optional AMP / HTML5 rich content fetching feature
- Upgrade to WebKit2: This is an important security improvement!
- Added a “Do Not Track” preference (disabled per-default)
- Reordered columns in ‘Normal’ email-like view to have the date column always at the end
- Plugins switched to Python3 libpeas loader
- Full screen support for videos
- Simplified external browser support
- Experimental support for InoReader and Reedah online services
- Added category/folder support for TheOldReader
- Added folder auto-removal for TinyTinyRSS & TheOldReader
- Removed libindicate, libnotify code, tray icon code (re-added as a plugins)
- Some important bug-fixes.

How to Install Liferea 1.12.0 in Ubuntu:
For Ubuntu 16.04 and higher, you can easily install the new release from this PPA repository.
1. Open terminal either via Ctrl+Alt+T or by searching for ‘terminal’ from app launcher. When it opens, run command:
sudo add-apt-repository ppa:ubuntuhandbook1/apps
Type your password (no visual feedback while typing) when it asks and hit Enter.

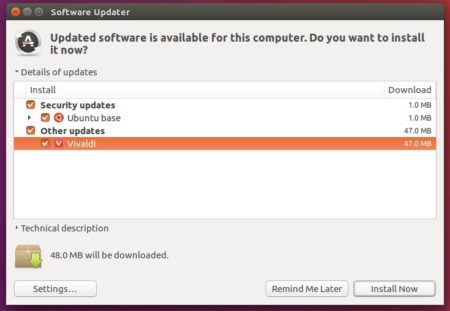
2. Then upgrade Liferea via Software Updater utility:

or run commands one by one to install the Linux feed reader:
sudo apt-get update

sudo apt-get install liferea
Uninstall Liferea:
To remove the software, either use your system package manager or run command:
sudo apt-get remove --autoremove liferea
To remove the PPA repository, open “Software & Updates” utility and navigate to Other Software tab.