The final release of Deepin 2014.2, an Ubuntu 14.04 based Linux Distro, is out today!
Deepin is a Chinese Linux Distro that officially supports over 20 languages, it uses its own Deepin Desktop Environment developed based on HTML5 technology, with Deepin Music, Deepin Movie, Deepin Store and other Deepin system software. In addition, deepin comes with media codecs, Adobe Flash Player, Google Chrome, and other software pre-installed under license by the relevant manufacturers.
A great new feature in this release is that a deepin special version of CrossOver is pre-installed, allows to run Windows applications with CrossOver for free.
For Chinese users, the 2014.2 release brings QQ6.7, 360 security guard for Linux, and the latest versions of WPS, Google Chrome, and more.
System Requirements:
minimum system requirements: Intel Pentium IV 2.0GHz CPU, 1GB RAM, 10GB Hard Drive.
Using Faenza icons on your Ubuntu desktop? If you’re a perfectionist, you may already have found that this icon theme set lacks the wireless mouse icon and the tiny calendar icon under time & date menu in Ubuntu 14.04.
Faenza icons is one of the most popular icon theme sets for Gnome. It’s created by Matthieu James and last updated two years ago in 2012. A guy from Ubuntu forum has recently added fixes to the source so that below icons work in Ubuntu 14.04 & higher:
the wireless mouse icon
the tiny calendar icon under time & date menu
Fix to Faenza icons
No screenshot for the wireless mouse icon because I don’t have one, sorry…
I’ve repack the Faenza Icon 1.3.1 with the fixes into PPA and the .deb package available for download at the link below:
Just click download the package and then double-click to open it with Ubuntu Software Center and finally click install.
Finally apply the theme in Unity Tweak Tool -> Icons and done.
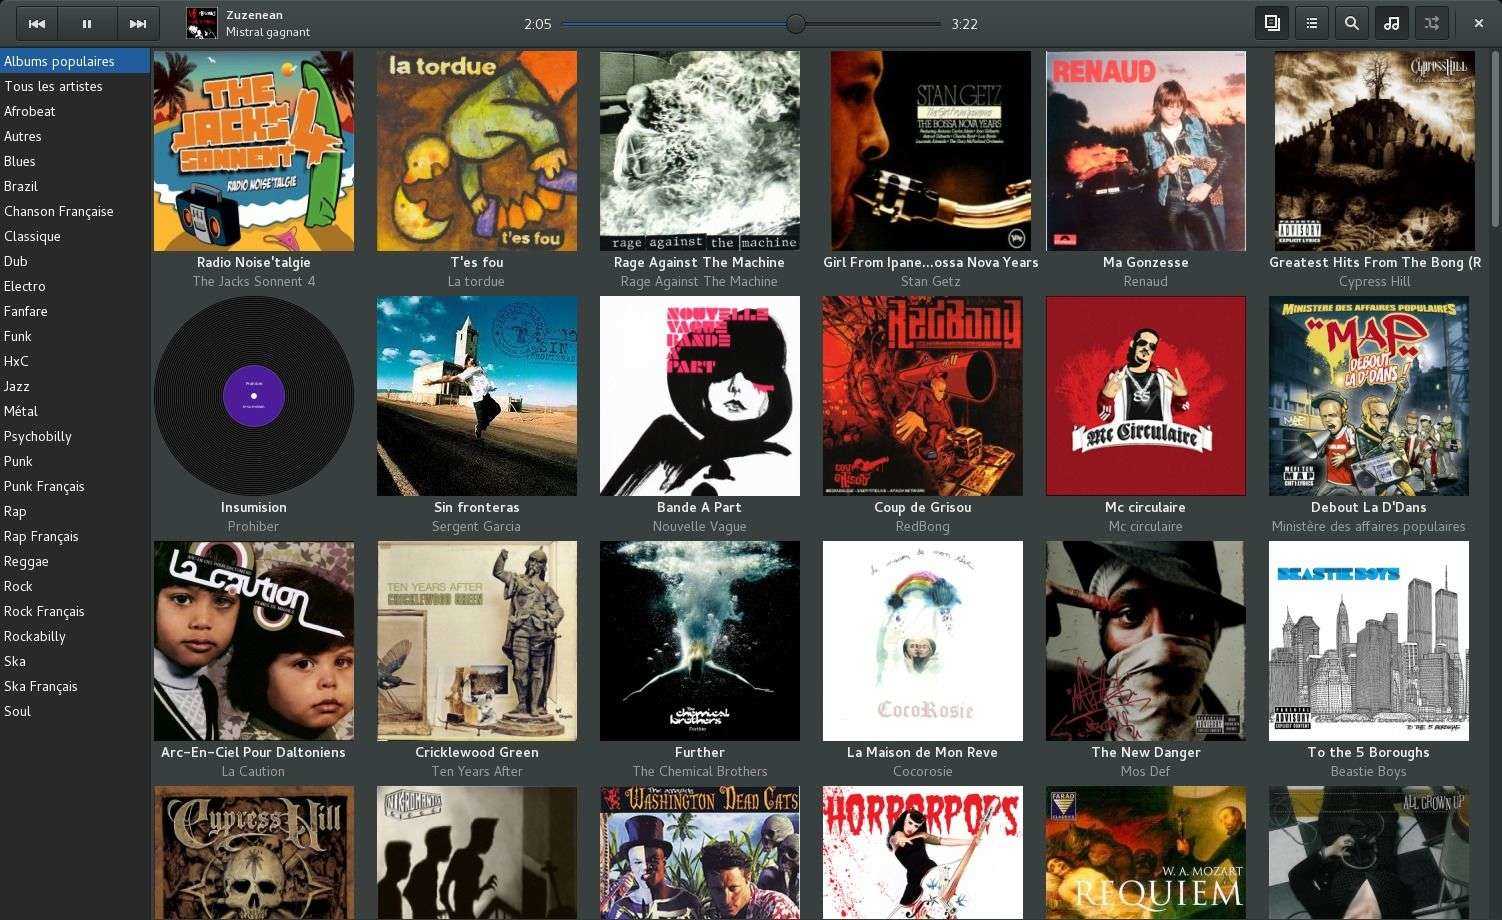
Lollypop is a new Gnome music playing application written in Python and Gtk3. It’s a free and open-source project hosted on github.
The music player features:
mp3/4, ogg and flac.
Genre/Cover browsing
Genre/Artist/Cover browsing
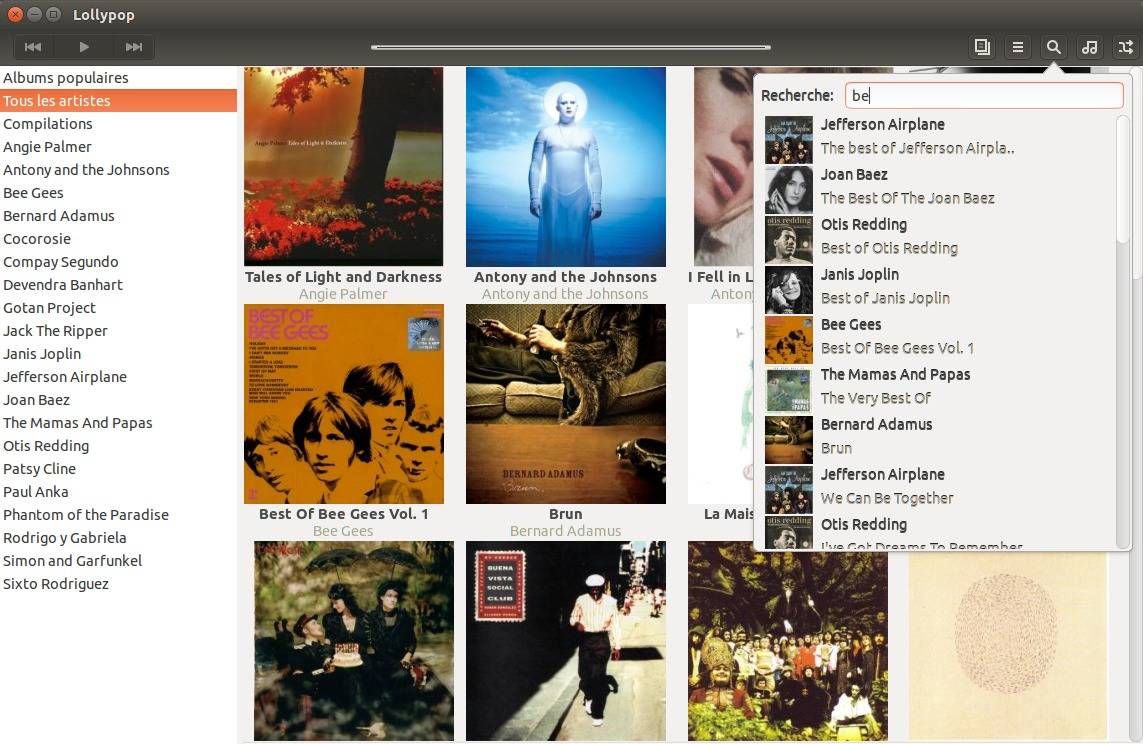
Search
Main playlist (called queue in other apps)
Party mode
Replay gain
Cover art downloader
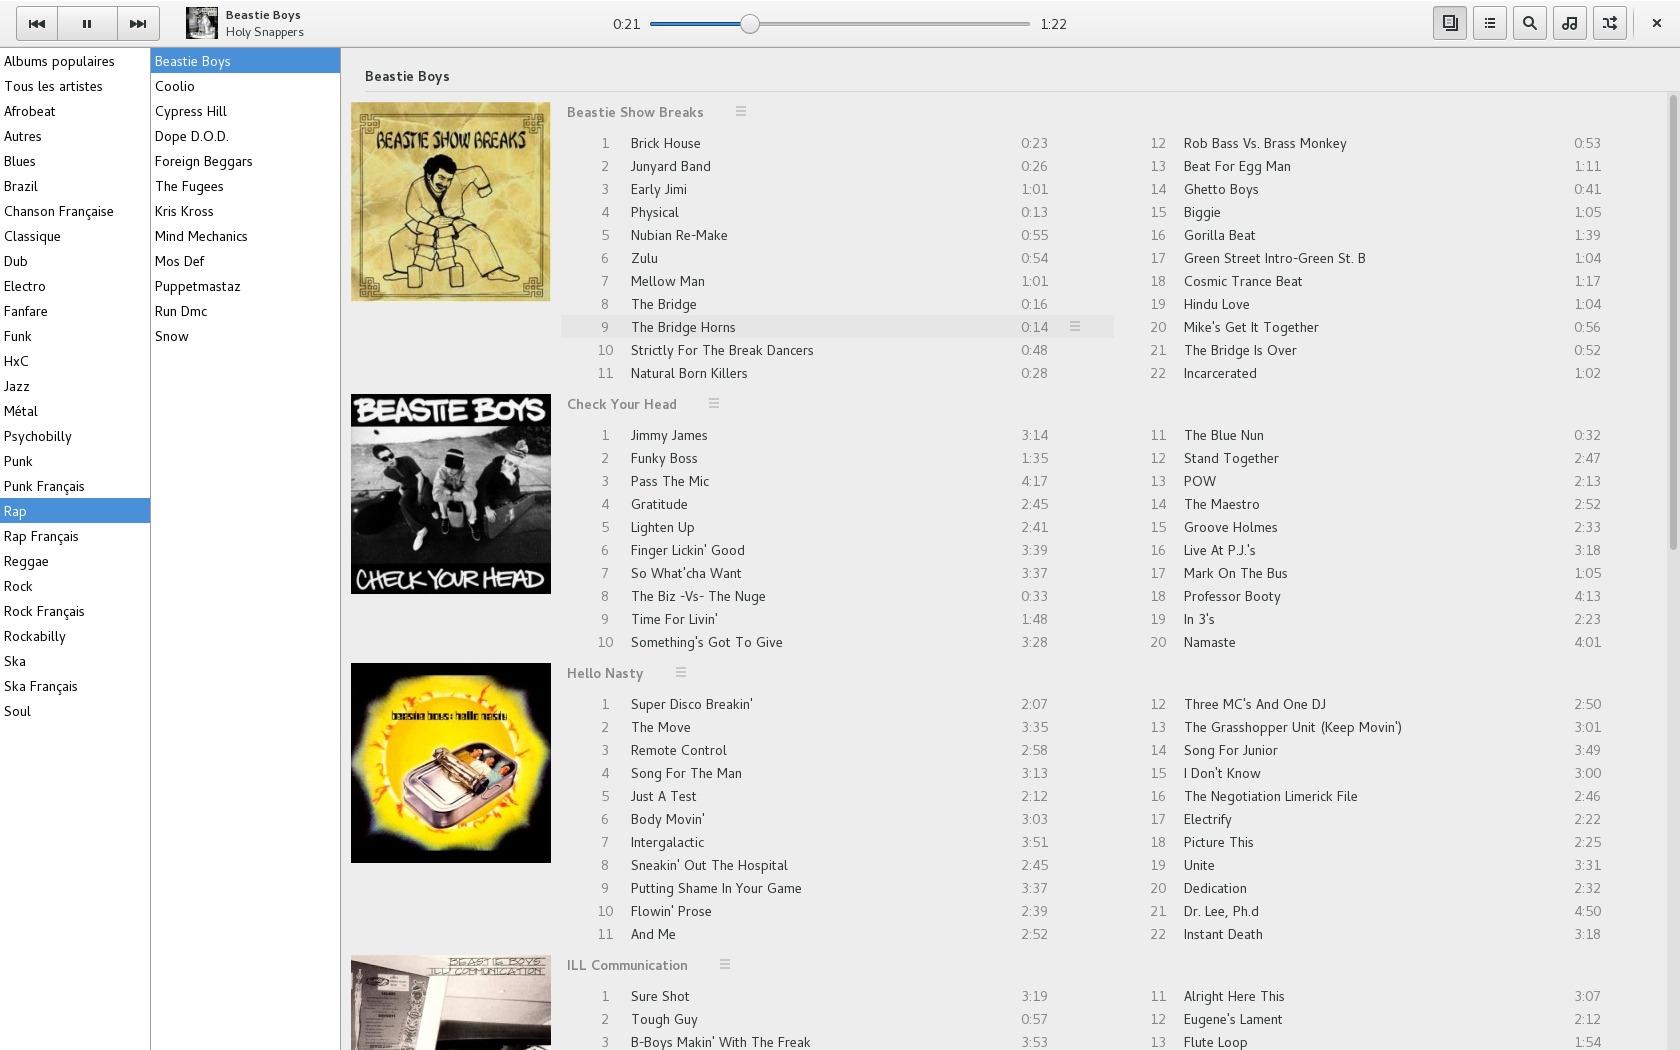
Context artist view
The screenshots:
How to Install Lollypop Music Player in Ubuntu:
The developer has built the latest packages into his PPA, available for Ubuntu 14.04 (tested in Ubuntu 14.04 but it doesn’t work), Ubuntu 14.10, Ubuntu 15.04 and derivatives.
1. To add the PPA, open terminal from the Dash or by pressing Ctrl+Alt+T on keyboard. When it opens, run the command below:
sudo add-apt-repository ppa:gnumdk/lollypop
Type in your user password when it asks and hit Enter to continue.
2. After added the PPA, run command to reload system package cache:
sudo apt-get update
3. Finally install the player from Synaptic Package Manager, or by running below command:
sudo apt-get install lollypop
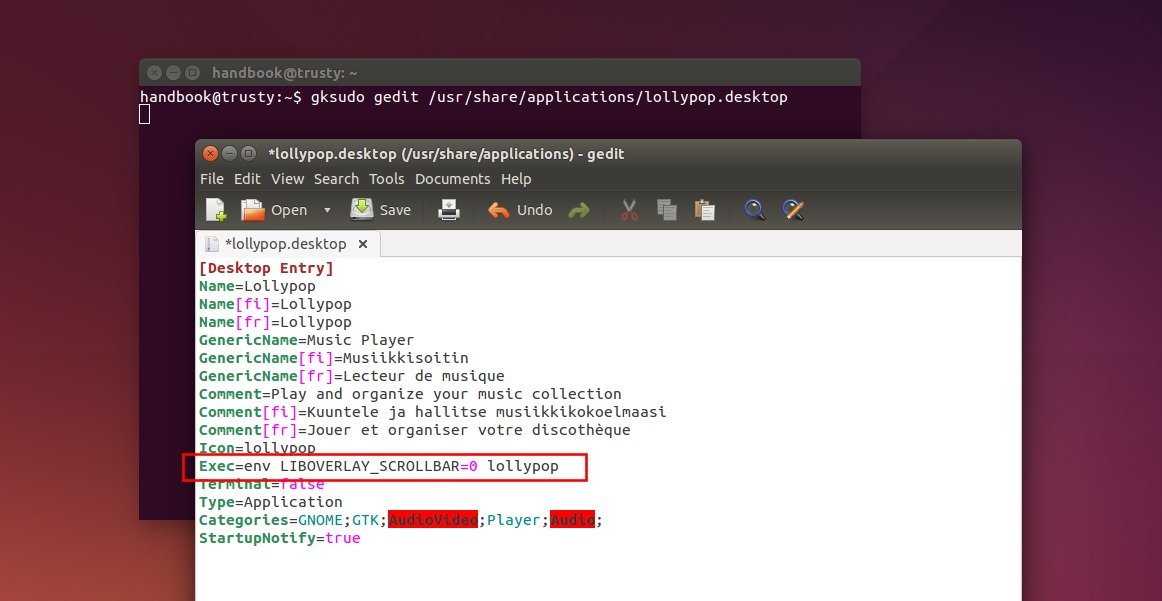
4. [Fixed in Ubuntu 15.10 and higher] Due to an Ubuntu related bug, you have to disable the overlay scrollbars for better experience.
To do this for this single application, run command to edit the .desktop file:
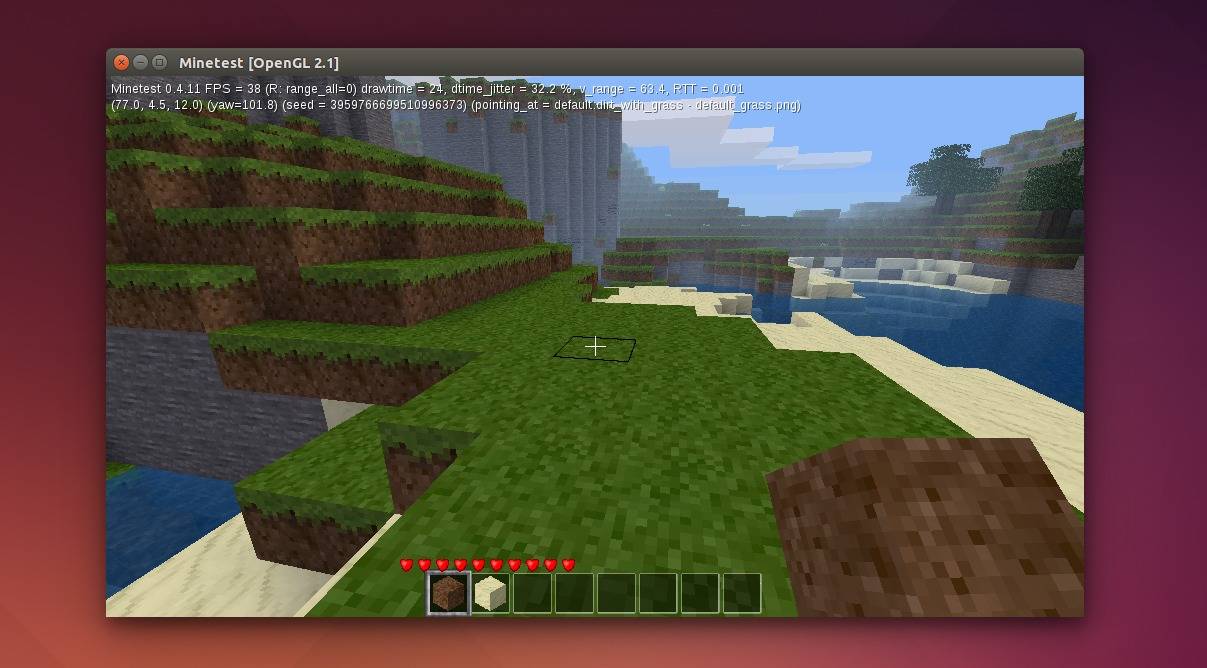
Minetest, the popular open-source game alternative to Minecraft, has reached the 0.4.11 release recently.
The 0.4.11 release adds new game-play options, provides various visual changes, boasts build system improvements, provides various performance optimizations, and offers a lots of bug-fixes. For a complete list of changes, see the minetest web page.
Install Minetest 0.4.11 in Ubuntu:
While Ubuntu repository provide an old version of the game package, the Minetest Stable PPA has made the new release available for Ubuntu 14.04 LTS (also contains the 12.04 build, but failed so far).
To add the PPA and install the game, press Ctrl+Alt+T to open terminal. When it opens, run the commands below one by one:
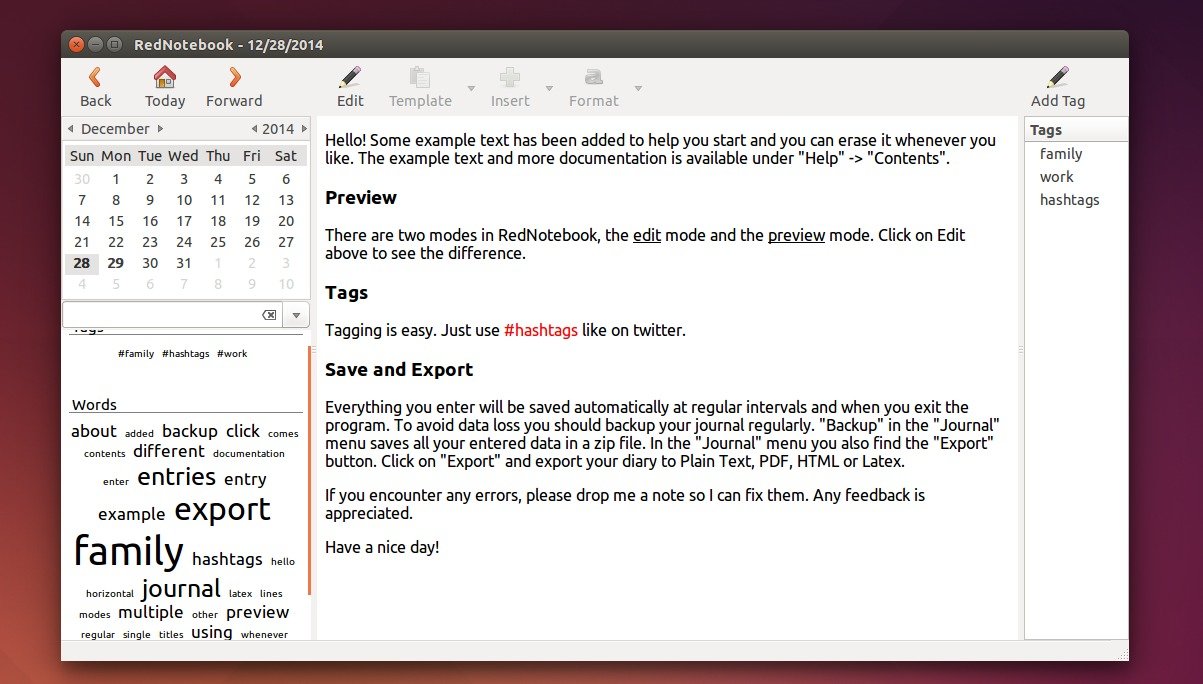
RedNotebook, a cross-platform diary and journal software, has been updated to the 1.9.0 release recently with a few improvements and bug fixes.
For those who have never heard of RedNotebook, it is a free and modern journal that includes a calendar navigation, customizable templates, export functionality and word clouds. With it, you can also format, tag and search your entries.
It features:
Tagging
Format your text bold, italic or underlined
Insert Images, files and links to websites
Links and mail addresses are recognized automatically
Spell Check on Linux
Live-Search
Automatic saving
Backup to zip archive
Word Clouds with most often used words and tags
Templates
Export the journal to PDF, HTML, Latex or plain text
The data is stored in plain text files, no database is needed
Translated into more than 30 languages
The latest 1.9.0 release was released a few hours ago with below changes:
Add #tags to cloud ignore list to remove them from the tag cloud (thanks Przemysław Buczkowski).
Remove option to start RedNotebook minimized.
Do not remove menu bar in fullscreen mode (lp:1400356).
Allow exiting fullscreen mode with ESC key.
Only allow comment signs (#) at the beginning of a line in the config file.
Fix reading configuration files.
How to Install / Upgrade to RedNotebook 1.9.0 in Ubuntu:
The official PPA repository has made this release available for Ubuntu 14.10, Ubuntu 14.04, Ubuntu 12.04, Ubuntu 10.04 and derivatives
To add the PPA and install the software, press Ctrl+Alt+T to open terminal, then run the commands below one by one:
If you don’t want to add the PPA, download the “rednotebook_VERSION_OS-EDITION_all.deb” package from the launchpad page. Finally double-click to package to open with Ubuntu Software Center and click install.
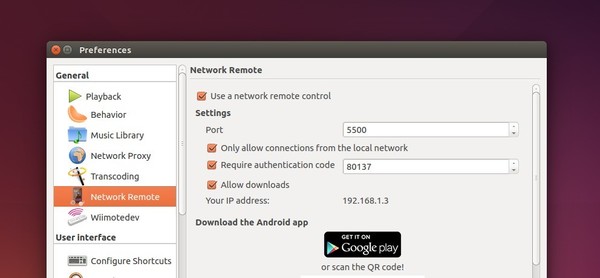
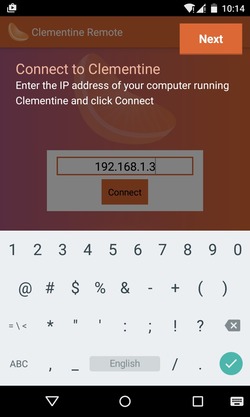
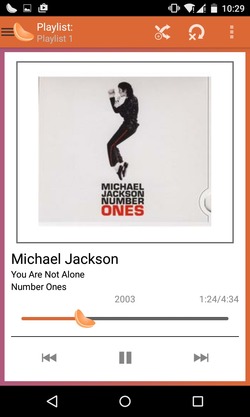
Want to remotely control the desktop PC music playback via your phone? Clementine music player has a built-in feature allows to remotely control player using Android mobile over LAN (or WAN).
All you need to do is enable this feature in the desktop player and install the official app ‘Clementine Remote’ on your phone.
1. For Ubuntu 14.04 and earlier editions, you have to upgrade to the latest Clementine release by installing the package from the official link below:
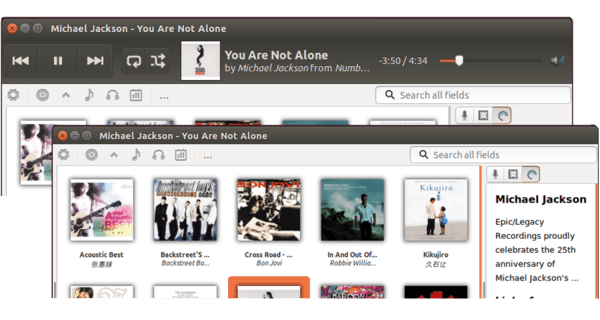
Quick tutorial shows how to show or hide the play bar (control buttons and volume control) in Ubuntu’s default Rhythmbox Music Player.
As a small Christmas present to Rhythmbox v3.x users, a rhythmbox plugin developer has created a plugin allows the control toolbar to be hidden when the application starts.
The bar can be redisplayed via the keyboard shortcut Ctrl+T or the menu “View -> Show Toolbar”.
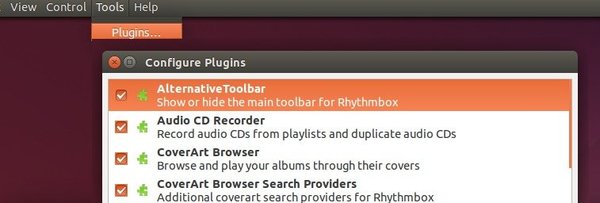
How to install this Rhythmbox Plugin:
The plugin is available in the developer’s PPA for Ubuntu 14.04 and Ubuntu 14.10.
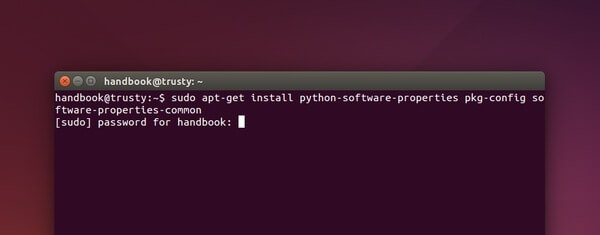
Press Ctrl+Alt+T on keyboard to open terminal. When it opens, run the commands below one by one to add the PPA and install the plugin:
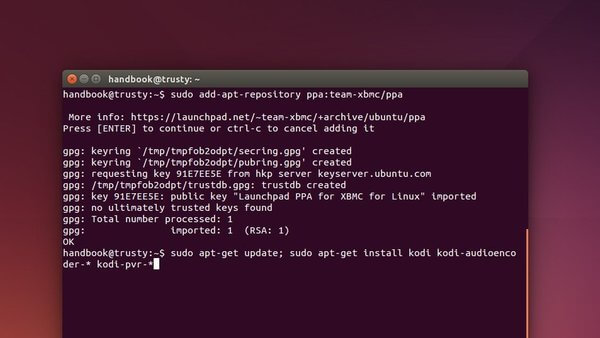
The first stable release of Kodi Media Center, formerly known as XBMC, has been released the day before Christmas Eve. The code name of Kodi 14.0 is ‘Helix Unwinds’.
Besides changing names, Kodi 14.0 uses FFmpeg 2.4.4 which means it’s now able to play back h.265 and VP9 video codecs. Also there are improvements on Kodi Library and audio playback, crashes on Linux and audio-related bug-fixes, more user controls.
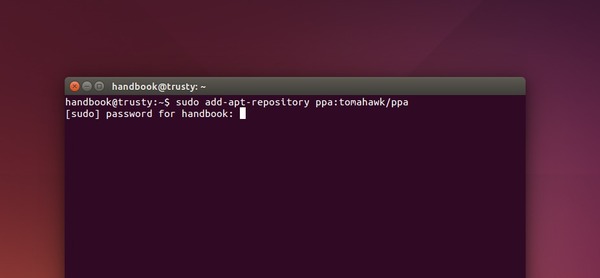
The PPA repository for Tomahawk Music Player finally made the latest 0.8.x release available for Ubuntu 12.04 Precise. Now the PPA provides the latest packages for Ubuntu 14.10, Ubuntu 14.04, Ubuntu 12.04 and derivatives.
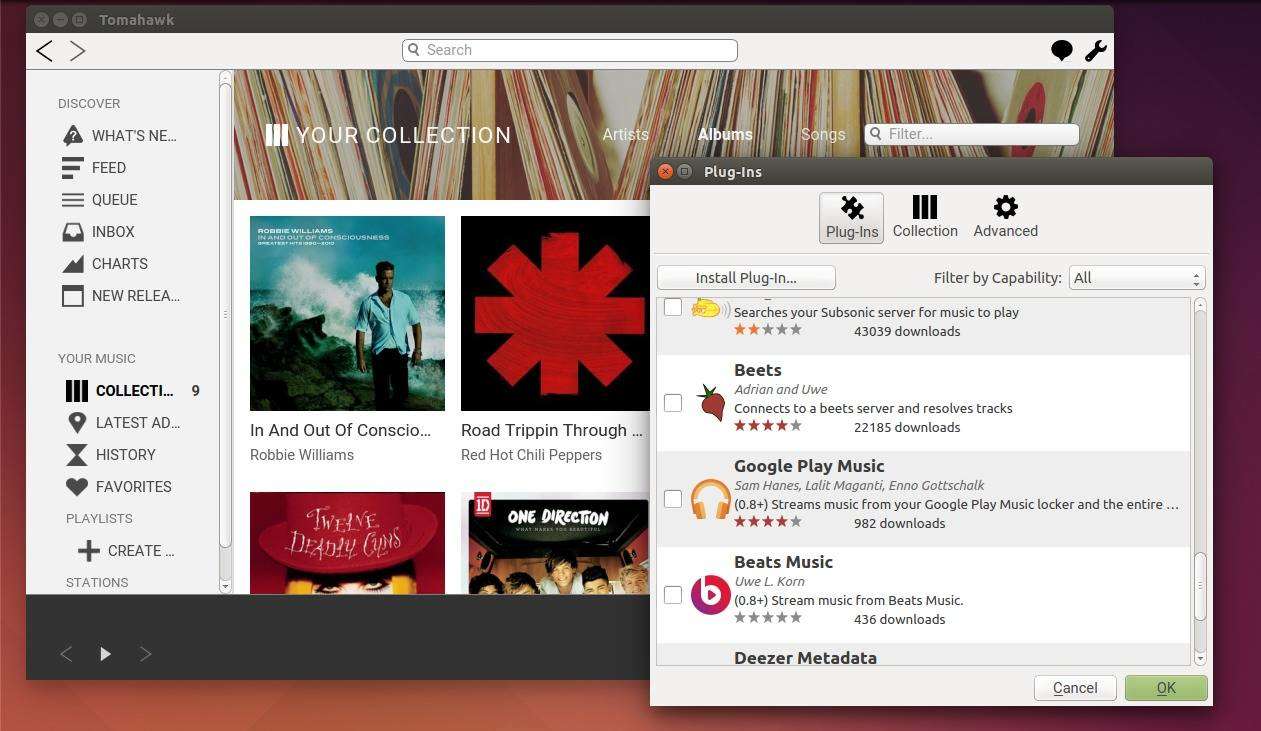
For those who have never heard of Tomahawk, it is a music player that not only plays your local collection, but also streams from SoundCloud, Beats, Spotify, Google Play Music, YouTube and many more. You can even connect Tomahawk with your friends via Jabber / GTalk and share your playlists and collections.
Tomahawk 0.8 was released a month ago with redesigned UI and new music services support and various fixes. Here’s the release highlights:
New UI and Icons
Drag and drop support for iTunes, Deezer, Beats Music, Rdio, Spotify, SoundCloud links (into Tomahawk) for playlists/tracks/artists/album links.
Added Google Play Music and Beats Music support.
Now Playing notifications
Support rtmp:// streams.
Add support for Opus codec (requires TagLib 1.9). Ubuntu 12.04 is not supported because it’s built with Taglib 1.8
The open-source video editor and VJ tool LiVEs 2.2.7 has been released recently. PPA’s ready for Ubuntu 14.04, Ubuntu 12.04, Ubuntu 14.10, Linux Mint 17, and derivatives.
What is LiVEs?
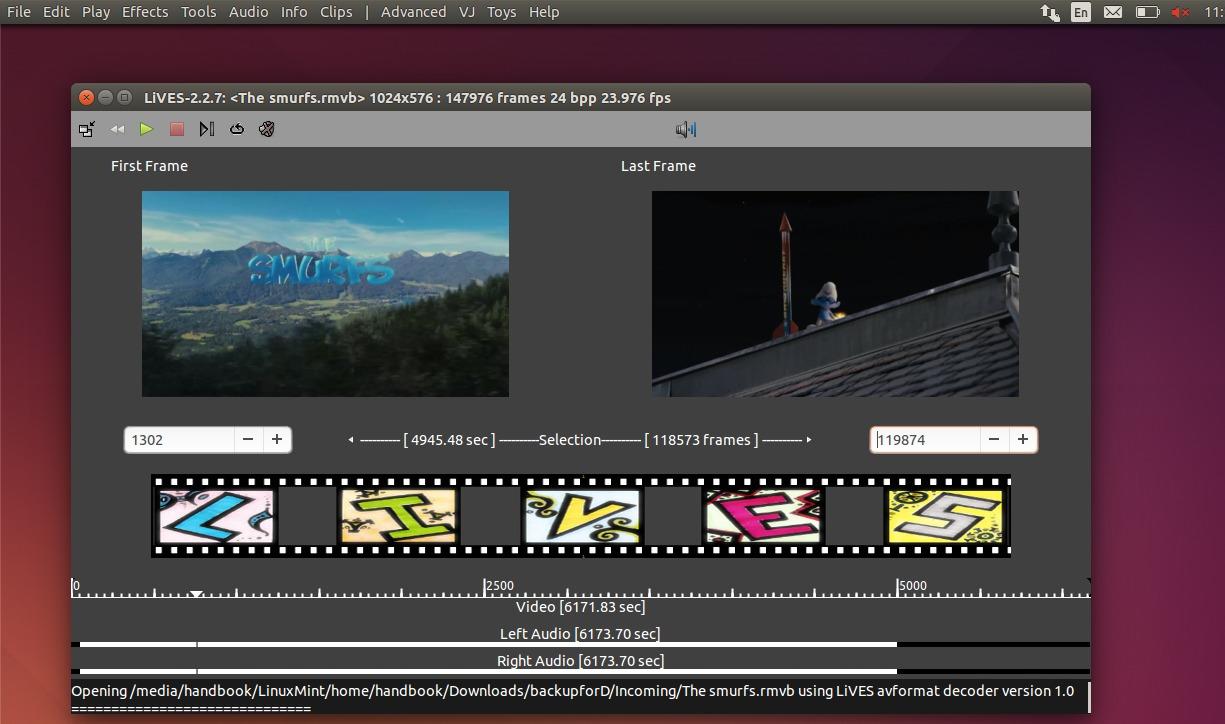
LiVES is a Video Editing System. It is designed to be simple to use, yet powerful. It is small in size, yet it has many advanced features.
LiVES mixes realtime video performance and non-linear editing in one professional quality application. It will let you start editing and making video right away, without having to worry about formats, frame sizes, or framerates. It is a very flexible tool which is used by both professional VJ’s and video editors – mix and switch clips from the keyboard, use dozens of realtime effects, trim and edit your clips in the clip editor, and bring them together using the multitrack timeline. You can even record your performance in real time, and then edit it further or render it straight away.
For the more technically minded, the application is frame and sample accurate, and it can be controlled remotely or scripted for use as a video server. And it supports all of the latest free standards.
For features, documentation and other details, see LiVEs web site.
Changes in LiVEs 2.2.7:
Add support for audio triggered generators.
Add support for projectM (milkdrop) generators.
Improvements to openGL playback plugin.
Add permanent inputs in jack and pulse audio when handling external audio.
Fix bug in chroma_blend transition.
Further code cleanup.
Fix text width for “show VJ keys” window.
Remove unnecessary deinterlacing from threaded player.
Added OSC commands /clip/selection/rte_apply, /clip/undo and /clip/redo.
Add libvisual plugins to correct submenu (regression).
Minor fixes for the rfx builder window.
Minor fixes for merge in clip editor.
Install/Upgrade to LiVEs 2.2.7 in Ubuntu:
For Ubuntu 14.10, Ubuntu 14.04 and Ubuntu 12.04 users, run below commands one by one to install or upgrade to LiVEs 2.2.7.
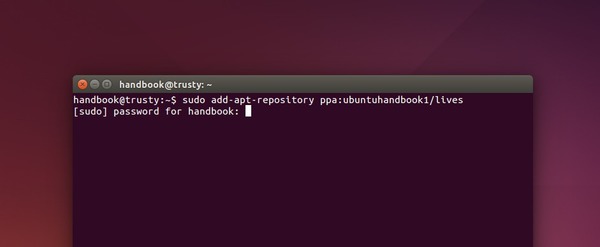
1. Open terminal from the Dash or by pressing Ctrl+Alt+T on keyboard. When it opens, run the command below to add the PPA repository:
sudo add-apt-repository ppa:ubuntuhandbook1/lives
Type in user password when it asks and hit Enter to continue.
2. If you have a previous version installed, upgrade the editor using “Software Updater” or “Synaptic Package Manager” after checking for updates.
Or you can run below commands one by one to update packages cache and install LiVEs: